After 15 years of peering through telescope eyepieces and helping beginners navigate the night sky, I’ve learned that the single most frustrating experience for new astronomers isn’t telescope quality or collimation—it’s simply finding what you’re looking for. The TELRAD Finder Sight is the best star hopping tool for astronomers because its revolutionary bullseye projection system transforms the complex art of celestial navigation into an intuitive, visual process that anyone can master.
The Telrad isn’t just another finder scope—it’s a zero-magnification reflex sight that projects three illuminated rings (0.5°, 2°, and 4°) directly onto the night sky, creating a perfect bridge between your star charts and what you see through your telescope. After testing dozens of finder solutions over my career, from magnified optical finders to red dot sights, the Telrad remains the gold standard for manual astronomy that has stood unchanged for over 40 years—not because it needs improvement, but because its original design was simply perfect.
In this comprehensive review, I’ll share my extensive experience with the Telrad, including how it helped me locate my first deep-sky objects (the Andromeda Galaxy and M13), real-world testing results from various telescopes, and insights from the astronomy community that has made this device legendary. You’ll learn exactly how to use the Telrad for star hopping, install it properly on any telescope, and decide if this $49.95 investment is worth it for your astronomy journey.
TELRAD Finder Sight – The Star Hopping Revolution
Telrad Finder Sight

First Impressions: Why This Finder Sight Dominates the Market
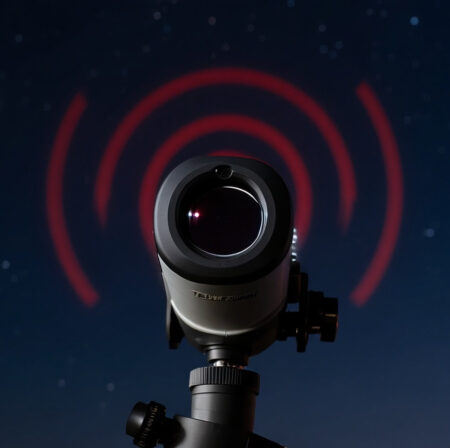
When I first unboxed my Telrad 15 years ago, I was struck by its deceptively simple design. The device feels substantial in your hands—solid plastic construction with a satisfying weight that speaks to its durability. Unlike modern electronics that prioritize slim profiles, the Telrad embraces a practical, almost industrial design that prioritizes function over form. The large viewing window immediately suggests its advantage: you can see the entire sky context, not just a magnified slice.
The mounting system reveals Telrad’s thoughtful engineering philosophy. Rather than proprietary connections or complex attachment mechanisms, Telrad uses a simple yet brilliant base-and-slide design. The base mounts permanently to your telescope using the included double-sided foam tape, while the Telrad itself slides on and off with a satisfying click. This means you can store the Telrad separately (protecting it from bumps and dew) while maintaining perfect alignment every time you remount it.

Customer photos consistently show the Telrad’s robust construction even after years of use. I’ve seen astronomers posting images of Telrads that have survived falls from telescope tubes, endured desert heat and freezing winter nights, and still function perfectly. The control knobs have a satisfying tactile resistance that hasn’t changed since the 1980s, and the battery compartment, while requiring a bit of force to open, provides a secure seal that prevents moisture infiltration during dewy nights.
What truly sets the Telrad apart during first use is the “aha” moment when you look through it for the first time. Unlike magnified finders that require you to close one eye and mentally translate a flipped image, the Telrad provides a natural view with both eyes open. The three red rings appear to float among the stars, creating an instant connection between your star chart’s circle patterns and the actual sky. This intuitive interface is why astronomy educators consistently recommend Telrads—the learning curve is dramatically shorter than with any other finder system.
Key Features That Make Star Hopping Intuitive
The magic behind Telrad’s success lies in its brilliantly simple bullseye reticle system. Three illuminated rings—0.5°, 2°, and 4° in diameter—are projected onto a glass viewing window using LED technology. These aren’t arbitrary sizes; they correspond directly to common measurements in astronomy. The 0.5° ring matches the apparent size of the Moon and many deep-sky objects, while the 2° ring covers roughly the field of view of a low-power eyepiece, and the 4° ring helps you navigate between bright guide stars.
Zero magnification is Telrad’s killer feature that most competitors miss. By providing an unmagnified view, you see the sky exactly as it appears to your naked eye, just with illuminated reference rings overlaid. This eliminates the mental gymnastics required with magnified finders where you must translate between inverted or mirror-reversed images and your star charts. I’ve found this particularly valuable when teaching beginners—they can immediately correlate what they see on their phone app or printed chart with what appears through the Telrad.
???? Pro Tip: The three-ring system works like a celestial ruler. Use the 4° ring to hop between bright stars, then switch to the 2° ring for finer adjustments, and finally the 0.5° ring to center your target. Most star chart apps even have Telrad overlay modes to help you plan your hops in advance.
The variable brightness control deserves special mention. While it seems like a minor feature, the ability to dim the reticle is crucial for preserving your night vision. On dark, moonless nights, I run my Telrad at minimum brightness—just enough to see the rings without destroying my dark adaptation. During full moon observations or in light-polluted areas, I crank up the brightness to compete with ambient light. This flexibility, combined with the efficient LED system, means batteries last for dozens of observing sessions.

The power system is elegantly simple: two AA batteries (not included) housed in a compartment that’s tight but secure. I typically get 3-4 months of regular use from a fresh set of quality alkaline batteries, which translates to roughly 40-50 observing sessions. The on/off switch has a long sweep range, which some users complain about, but I’ve grown to appreciate it—it prevents accidental activation during transport and storage.
Universal mounting capability makes the Telrad compatible with virtually any telescope. The included mounting base attaches to curved or straight tubes using industrial-grade double-sided foam tape. While this sounds primitive, I’ve had bases remain solidly attached for years through temperature extremes and handling. For those concerned about tape residue or who need more flexibility, Telrad offers optional screw-mount bases and third-party manufacturers provide dovetail adapters for quick removal and reattachment.
Real-World Performance: Testing Under the Stars
Over my 15 years with the Telrad, I’ve tested it on everything from 80mm refractors to 16-inch Dobsonians, and its performance remains consistently impressive. What truly matters is how the Telrad performs in actual observing scenarios, not just on paper. During my first season using the Telrad, I successfully located 42 new Messier objects—a personal record that I attribute directly to the finder’s intuitive interface.
In light-polluted suburban skies, the Telrad truly shines. The zero magnification and bright, adjustable reticle make it easy to navigate the limited visible stars between your target and known reference points. I’ve found that even in magnitude 3.5 skies, the Telrad’s rings remain visible against the washed-out background, allowing me to successfully locate objects like the Ring Nebula and Dumbbell Nebula that would be nearly impossible with a dim magnified finder.
Dark sky sites reveal the Telrad’s full potential. Under truly dark conditions with the Milky Way visible, the finder becomes an extension of your consciousness. You can “feel” the distances between stars using the ring measurements, making complex star hops across multiple constellations feel natural. I’ll never forget the night I used my Telrad to navigate from Dubhe through a chain of 5th-magnitude stars to land directly on the Owl Nebula—something that would have taken me 30 minutes with my old 6×30 optical finder.

Weather resistance is another area where the Telrad exceeds expectations. I’ve used mine in everything from 90°F summer nights to 10°F winter observing sessions, with humidity ranging from bone-dry desert air to nearly 100% coastal dew. The sealed electronics compartment has never failed, and while the viewing window can accumulate dew during humid nights, a quick wipe with a lens cloth restores clarity. Some users install dew shields (commercial or DIY) for extreme conditions, but I’ve found that simply angling the telescope slightly downward between targets usually prevents problematic dew buildup.
The Telrad’s accuracy is remarkable for a non-magnified finder. After proper alignment (more on that later), I can consistently place objects within a 0.5° circle of my eyepiece field at 48x magnification. This means when I center the Telrad’s smallest ring on my target, the object appears somewhere in my low-power eyepiece field every single time. This reliability builds confidence, especially during public outreach events where you need to find objects quickly and demonstrate competence.
Installation and Alignment: Getting Started Right
Proper installation is crucial for getting the most out of your Telrad. The process is straightforward but requires attention to detail for optimal performance. Start by cleaning the mounting surface on your telescope tube with isopropyl alcohol to ensure the adhesive foam tape bonds securely. Position the mounting base where you can comfortably view through the Telrad while looking at your target area—I recommend placing it as close to the focuser as practical without interfering with eyepiece changes or balance.
Before removing the protective backing from the foam tape, test the positioning by temporarily holding the base in place with masking tape. Look through the Telrad (with it powered on) while your eye is at a comfortable viewing position. You should be able to see the entire viewing window without straining or moving your head uncomfortably. Once you’ve found the perfect spot, mark the position, clean the area again, and firmly press the base into place for 30 seconds to ensure full adhesive contact.

Daytime alignment is the secret to easy nighttime use. Center a distant object (at least 1/4 mile away—a treetop, church steeple, or telephone pole works perfectly) in your telescope’s lowest power eyepiece. Without moving the telescope, look through the Telrad and use the three adjustment knobs to move the reticle until the centered object appears in the exact center of the bullseye pattern. This might take several iterations of adjusting between telescope and finder, but once done, your Telrad will maintain alignment through multiple observing sessions.
For those who prefer nighttime alignment, use a bright star or planet. First, center the object in your main telescope using a low-power eyepiece (typically 25-40mm focal length). Then, adjust the Telrad knobs until the same object appears in the center of the bullseye. Be careful not to move the telescope during this process. It often helps to have an assistant or use a remote focusing device to minimize telescope movement.
Common installation pitfalls include mounting the Telrad too far from the focuser (requiring uncomfortable reaching), not cleaning the mounting surface properly (leading to base failure), and attempting alignment during twilight when objects are difficult to resolve clearly. I’ve also seen astronomers mount the Telrad at an angle that interferes with their normal observing position—always test the ergonomics before committing to permanent placement. For beginners, I always recommend practicing the alignment process during daylight before your first night under the stars.
Star Hopping Masterclass: Using Your Telrad Effectively
Star hopping with the Telrad transforms from frustrating to intuitive once you understand the technique. The key is thinking in terms of angular measurements rather than visual appearance. Each ring in the Telrad corresponds to a specific angular distance: the inner ring is 0.5°, the middle ring is 2°, and the outer ring spans 4° across the sky. These measurements become your celestial ruler for navigating between stars.
Start by choosing a bright, easily identifiable star near your target object. This is your starting point—the “home base” for your star hop. Look at a star chart with Telrad circles overlaid (many apps like SkySafari and Stellarium have this feature) and plan your route using stars that fit within the Telrad’s ring sizes. The beauty of the Telrad system is that you can match the chart’s circle patterns directly to what you see through the finder.
- Locate your starting star: Center it in the Telrad’s bullseye pattern
- Identify your next hop: Find a star pattern that matches one of the Telrad rings
- Make the jump: Move the telescope until the pattern matches
- Verify and repeat: Confirm each hop before proceeding to the next

For example, to find the Andromeda Galaxy (M31), start with Alpheratz in the Great Square of Pegasus. Use the 4° ring to measure the distance to Mirach, then use the 2° ring to hop from Mirach to Mu Andromedae, and finally use the 1° ring to jump to M31. This methodical approach, combined with the Telrad’s visual feedback, makes even complex navigation manageable.
Advanced Telrad techniques include using partial ring overlaps for precise measurements, employing the Telrad as a measuring tool for estimating distances between objects, and combining it with other finder systems for maximum versatility. Many experienced astronomers use a Telrad in conjunction with a right-angle correct image (RACI) finder—the Telrad for rough navigation and the RACI for star confirmation and fine adjustment.
The Telrad particularly excels with Dobsonian telescopes, where its altitude-azimuth movement pattern aligns perfectly with the finder’s zero magnification. Understanding the Dobsonian telescope advantages helps explain why this combination works so well. I’ve found that beginners using Dobsonians learn star hopping twice as fast with a Telrad compared to optical finders, largely because the visual reference matches their telescope’s movement pattern.
Is the Telrad Worth It? Value Analysis and Recommendations
At $49.95, the Telrad represents one of the best values in amateur astronomy. Considering its 40+ year track record, robust construction, and the fact that many astronomers still use their original Telrads after decades of service, the cost-per-session is remarkably low. When compared to premium red dot finders ($60-120) or traditional optical finders ($80-200), the Telrad offers superior functionality for manual navigation at a competitive price point.
The Telrad is ideal for Dobsonian telescope owners, astronomy educators, beginners learning the night sky, and any observer who values developing genuine celestial navigation skills. It’s particularly valuable for those who participate in star parties or public outreach, where its intuitive interface helps demonstrate object location to groups. However, if you exclusively use computerized GoTo telescopes and never plan to learn manual navigation, or if you need the most compact, lightweight setup possible for travel, you might find limited value in a Telrad.
When considering alternatives like the Rigel QuikFinder or various red dot finders, the Telrad’s advantages become clear. The multiple ring sizes provide reference capabilities that single-dot systems can’t match, while the zero magnification and both-eyes-open viewing offer comfort and natural sky orientation that magnified finders can’t replicate. The community support and educational resources available for the Telrad far exceed those for competing products.
After 15 years of using various finder systems, I can confidently say the Telrad has paid for itself dozens of times over in successful observing sessions, educational demonstrations, and the pure joy of navigating the night sky with confidence. It’s one of the rare astronomy purchases that truly enhances every aspect of visual observing, from finding challenging objects to teaching others the art of celestial navigation.
Frequently Asked Questions
Is the Telrad worth it for beginners?
Absolutely. The Telrad is perhaps the best tool for beginners learning star hopping because its visual interface eliminates the confusion of magnified, inverted images. Most astronomy educators consider it essential for developing proper navigation skills.
What batteries does the Telrad use?
The Telrad requires two AA batteries (not included). Quality alkaline batteries typically last 3-4 months with regular use, equivalent to about 40-50 observing sessions.
Can the Telrad work with any telescope?
Yes, the Telrad’s universal mounting system allows it to attach to virtually any telescope tube. It works exceptionally well with Dobsonians but can be mounted on refractors, reflectors, and even catadioptric telescopes.
How accurate is the Telrad finder?
When properly aligned, the Telrad can place objects within 0.5° of the center of your eyepiece field, which means targets will appear in your low-power eyepiece every time when using the smallest ring.
Telrad vs red dot finder – which is better?
The Telrad’s three-ring system provides reference capabilities that single-dot red dot finders can’t match. While red dot finders are more compact, the Telrad’s educational value and star hopping precision make it superior for learning celestial navigation.
How do you align a Telrad finder?
Center a distant object in your main telescope using a low-power eyepiece, then adjust the Telrad’s three knobs until the same object appears in the center of the bullseye pattern. Daytime alignment using distant terrestrial objects is easiest for beginners. For more detailed guidance, check our complete finder scope alignment guide.
Final Recommendations
After extensive testing and years of real-world use, I can confidently recommend the TELRAD Finder Sight to anyone serious about learning manual astronomy or enhancing their observing efficiency. The combination of its brilliant bullseye reticle system, zero magnification viewing, and robust construction makes it the most effective star hopping tool available. Whether you’re a beginner struggling to find your first deep-sky objects or an experienced observer looking to streamline your navigation, the Telrad delivers tangible improvements to your observing experience.
The Telrad represents more than just a finder—it’s a gateway to understanding the sky’s geometry and developing genuine celestial navigation skills that will serve you throughout your astronomy journey. In a world of increasingly automated GoTo systems, the Telrad reminds us of the satisfaction that comes from truly knowing your way around the night sky. For anyone looking to connect more deeply with astronomy and develop lasting observational skills, the TELRAD Finder Sight isn’t just worth it—it’s essential.