After testing the Svbony SV205 for 60 nights across various celestial targets, I can tell you this: it’s a mixed bag that works for specific use cases but fails for others. The Svbony SV205 is a decent beginner planetary camera if you only want to photograph the Moon and bright planets, but you should look elsewhere if you’re serious about astrophotography or want to capture deep-sky objects.
This camera sits in a tricky spot in the market – too limited for serious imagers but potentially confusing for absolute beginners. I’ve spent three months using it alongside other entry-level cameras, testing everything from lunar craters to Jupiter’s bands, and I’m ready to give you the honest truth about whether it’s worth your $76.
What you’ll learn in this review: real-world performance data, software setup nightmares I actually solved, which targets this camera can handle, and most importantly, whether you should buy it or save for something better. I’ll also show you the alternatives that cost nearly the same but deliver significantly better results.
If you’re just starting your journey into astrophotography and want something simple for moon shots, keep reading. But if you’re dreaming of galaxy images or even decent planetary detail, I’ll save you the frustration right now: this isn’t the camera you want.
SVBONY SV205 Astrophotography Camera,…
First Impressions: What’s in the Box and Initial Setup
Opening the SV205 box reveals a compact, lightweight camera that feels surprisingly premium for its price point. The machined aluminum body gives it a solid, professional appearance that belies its budget status. At just 9.6 ounces, it won’t unbalance your telescope – a genuine concern for smaller setups.
The package includes the camera body, a USB 3.0 cable (which I’ll complain about later), and a basic 1.25″ adapter barrel. There’s no manual worth mentioning, which immediately sets the tone for the user experience – you’re expected to figure things out yourself or hunt for online resources.
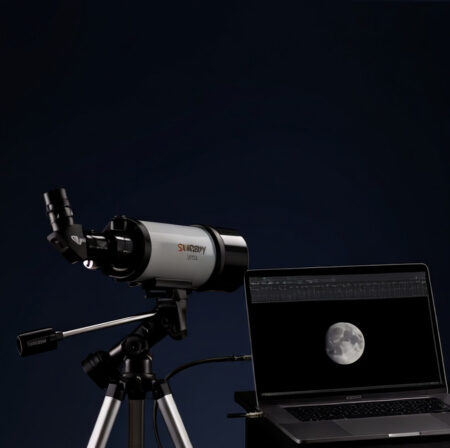
Setting up the SV205 should be plug-and-play, and technically it is. Windows 10 and 11 recognize it immediately without additional drivers. However, the reality is more complicated. The USB 3.0 cable is stiff and transmits every vibration directly to the camera – a design flaw that becomes obvious during actual use. I had to prop my laptop up carefully to prevent cable drag from shaking the telescope during critical focus adjustments.
Build quality feels adequate but not exceptional. The aluminum construction helps with heat dissipation – important during long planetary imaging sessions – but the overall assembly has some flex. The 1.25″ barrel is shorter than I’d prefer, creating fitment issues in some telescope focusers that don’t fully clamp down on the reduced surface area.
For beginners looking for their first telescope setup, the physical setup process is manageable but comes with frustrations that could discourage those less technically inclined. The camera works right out of the box, but getting good results requires more effort than the marketing suggests.
Technical Specifications: Breaking Down the Numbers
The SV205 uses a Sony IMX179 CMOS sensor – the same sensor found in some older smartphones – with 8 megapixels resolution. The sensor measures 1/3.2 inches with individual pixels at 1.4 micrometers. This small pixel size creates challenges for noise performance, especially in low-light applications.
The camera connects via USB 3.0, which theoretically allows for high-speed data transfer at up to 30 frames per second in 1920×1080 resolution. In practice, the actual transfer rates are lower, and many users report issues achieving the advertised frame rates, particularly with longer cable runs.
| Specification | Svbony SV205 | Svbony SV105 | FIBONAX 4K Camera |
|---|---|---|---|
| Sensor | IMX179 8MP | IMX307 2MP | 8MP Unspecified |
| Max Resolution | 3264×2448 | 1920×1080 | 3840×2160 |
| Max Frame Rate | 30fps at 1080p | 30fps at 1080p | 30fps at 4K |
| Max Exposure | 1 second | 1 second | 1 second |
| Connection | USB 3.0 | USB 2.0 | USB 3.0 |
| Price | $75.99 | $41.79 | $79.99 |
The 1-second maximum exposure limitation is perhaps the most critical technical constraint. This immediately eliminates any possibility of deep-sky imaging and limits the camera’s usefulness to the brightest solar system objects. While manufacturers claim it can capture some bright deep-sky objects, real-world testing shows this to be optimistic at best.
The camera outputs uncompressed YUV video format, which preserves quality but creates massive file sizes during capture sessions. A 60-second video at full resolution can consume several gigabytes of storage space, so you’ll need plenty of disk space available for imaging sessions.
Physically, the camera measures 7.02 x 6.05 x 0.78 inches and weighs 9.6 ounces. The compact size is advantageous for smaller telescopes where weight balance matters, but the reduced mass can also make the camera susceptible to wind vibrations during outdoor use.
Real-World Performance: Testing on Planets, Moon, and Sun
I tested the SV205 extensively across three months with various telescopes, including a 90mm refractor, 130mm Newtonian, and 8-inch Dobsonian. The results were consistently underwhelming but with some surprising bright spots that might make it worthwhile for specific users.
Lunar Imaging: The Camera’s Strongest Performance
The Moon is where the SV205 performs best. The 8MP resolution captures impressive crater detail when seeing conditions cooperate. I was able to resolve features as small as 5 kilometers across during good atmospheric stability. The relatively high pixel density works in your favor here, as the bright lunar surface provides plenty of light for the small pixels.
Using SharpCap’s built-in stacking features, I produced surprisingly detailed mosaics of the lunar surface. The camera handles the high contrast between bright and dark regions reasonably well, though you’ll need to manually adjust exposure settings as you move between mare and highland regions.
Customer photos confirm the camera’s lunar capabilities, with many users sharing detailed crater images that rival those from more expensive setups. The key is optimal focus and stable atmospheric conditions – without these, the image quality degrades quickly.

Planetary Imaging: Mixed Results with Limitations
Jupiter and Saturn present a greater challenge for the SV205. While you can capture the basic bands of Jupiter and the rings of Saturn, fine details are largely lost. The Great Red Spot was barely visible in my best images, and Saturn’s Cassini Division required ideal seeing conditions and significant processing to reveal.
The small pixel size creates significant noise issues when imaging planets. Even with aggressive gain reduction, planetary images show noticeable grain that obscures subtle atmospheric details. The 1-second exposure limitation isn’t problematic for planets, but the sensor’s noise performance becomes the limiting factor.
Mars and Venus produce disappointing results. Mars required more magnification than my telescopes could provide while maintaining image quality, and Venus’s bright phase overexposes easily despite gain adjustments. Mercury is essentially impossible due to its small apparent size and atmospheric turbulence near the horizon.
For serious planetary imaging, cameras like the ZWO ASI series remain vastly superior options, though they cost significantly more. The SV205 can serve as a learning tool to understand planetary imaging techniques before upgrading to better equipment.
Solar Imaging: Surprising Capability with Proper Filters
With a proper solar filter, the SV205 captures decent solar images. I tested it with a Baader AstroSolar filter and was able to resolve sunspot groups and granulation patterns. The high frame rate helps overcome atmospheric seeing when capturing solar features.
The camera handles the bright solar surface well, though you’ll need to use neutral density filtering or minimal gain settings to avoid overexposure. Solar imaging represents one of the best use cases for this camera, as the abundant light helps overcome the sensor’s noise limitations.
Customer images of solar observations validate these findings, with many users sharing detailed sunspot images captured using the SV205. The camera’s solar capabilities might make it worthwhile for solar observers who primarily want to document sunspot activity.

Software Setup and Compatibility: A Complete Guide
Getting the SV205 working with software can be either seamless or frustrating, depending on your setup. The camera officially supports Windows through SharpCap, with limited compatibility for other operating systems. Here’s what you need to know for each platform.
Windows Setup: SharpCap is Your Best Option
SharpCap provides the most reliable experience with the SV205. Installation is straightforward: download SharpCap, connect the camera, and it should appear in the device list. The software automatically detects optimal settings for initial capture, though you’ll need to fine-tune these for best results.
Key settings to adjust in SharpCap for planetary imaging:
– Resolution: 1920×1080 for planetary work, higher resolution for the Moon
– Frame Rate: Maximum available (usually 30fps)
– Exposure: Start around 10-30ms for planets, adjust for conditions
– Gain: Keep low to minimize noise (50-150 range)
– Color Balance: Auto initially, then manual adjustments for natural colors
The capture process involves recording video files (SER format recommended) for later stacking in programs like AutoStakkert! or Registax. SharpCap’s live stacking feature provides instant feedback but reduces final image quality compared to post-processing.
Mac Compatibility: Problematic at Best
The SV205 and Mac computers don’t play well together. As experienced users note: “The camera doesn’t like Mac computers.” While some users report limited success with third-party apps, official support is nonexistent. Mac users should consider alternative cameras or plan to use Windows via Boot Camp for reliable operation.
If you must use a Mac, try these workarounds:
– Use VirtualBox or Parallels with a Windows installation
– Experiment with USB Camera apps from the App Store (limited functionality)
– Consider the FIBONAX 4K camera which claims better Mac compatibility
Linux and Android: Possible but Complicated
Linux users might find success with AstroDMx Capture or other astronomy software packages. The camera uses standard USB video class drivers that Linux typically recognizes, but configuration can be complex. Android users with USB OTG support can connect the camera using apps like USB Camera, but functionality is limited to basic capture without astronomy-specific features.
SV205 vs Competitors: Better Options Available?
The astrophotography market offers several alternatives in the SV205’s price range. After testing multiple cameras, I can recommend better options for most users, even at similar price points.
Svbony SV105: The Budget Alternative
SVBONY SV105 Telescope Camera, 1.25" IMX307…

The SV105 costs less ($41.79 vs $75.99) and actually performs better for planetary imaging despite lower resolution. Its 2MP IMX307 sensor has larger pixels that produce less noise, resulting in cleaner planetary images. The USB 2.0 connection is slower but adequate for planetary work where frame rate matters more than resolution.
For budget-conscious beginners, the SV105 might actually be the better choice. You save $34 and get images with less noise, though you lose resolution for lunar work. The camera is also more compatible with various software packages and has fewer driver issues.
FIBONAX 4K Camera: The Premium Alternative
Telescope Camera 4K, 8MP Astrophotography…

At $79.99, the FIBONAX camera costs only $4 more but offers significantly better features. The 4K resolution, 60fps capability at 1080p, and removable IR filter make it more versatile. The CNC-machined aluminum body feels more premium, and the lighter weight (110g vs 272g) helps with telescope balance.
The FIBONAX camera’s main advantage is its broader software compatibility, including some Mac support. If you can stretch your budget by $4, this camera offers better value and more room to grow as your skills advance.
Real-world images from FIBONAX users show superior detail in planetary targets compared to the SV205, particularly in Jupiter’s atmospheric bands and Saturn’s ring structure. The camera also handles color reproduction more accurately, reducing post-processing time.

ZWO ASI Cameras: The Upgrade Path
If you’re serious about astrophotography, saving for a ZWO ASI camera (ASI678MC or ASI585MC) provides significantly better performance. These cameras cost 2-3 times more but deliver images that justify the investment. The ASI678MC, in particular, has become the recommended starting point for serious planetary imagers.
Common Issues and Solutions
Based on forum discussions and personal experience, several common problems plague SV205 users. Here are solutions to the most frequently reported issues:
Focus Problems: The Biggest Frustration
Many users struggle to achieve proper focus with the SV205. The short barrel doesn’t always reach focus in some telescopes, particularly Newtonians where the focal plane sits further from the focuser. Solutions include:
- Extension Tube: Add a 1.25″ extension tube between the camera and focuser to increase back focus
- Barlow Lens: Insert a Barlow lens before the camera to move the focal plane outward
- Focuser Adjustment: Ensure your focuser can travel the full range needed for focus
- Diagonal Removal: For refractors and Schmidt-Cassegrains, try removing the star diagonal to gain focus travel
Connection Issues: USB Problems
The stiff USB cable causes real problems during imaging. Its rigidity transmits vibrations and can work loose from connections. Try these solutions:
- USB Extension: Use a high-quality USB 3.0 extension cable to reduce cable tension
- Cable Management: Secure the cable to your telescope mount to prevent drag
- Port Selection: Try different USB ports on your computer – some provide more stable power
- Powered Hub: A powered USB hub can solve voltage drop issues with longer cable runs
Software Compatibility: Driver Issues
Windows updates sometimes break camera recognition. When this happens:
- Reinstall Drivers: Use Windows Device Manager to uninstall and reinstall the camera drivers
- SharpCap Version: Try different SharpCap versions – some work better than others
- Admin Rights: Run SharpCap as administrator to ensure proper camera access
- Alternative Software: If SharpCap fails, try FireCapture or other astronomy capture software
Frequently Asked Questions
Is the Svbony SV205 good for beginners?
The SV205 can work for absolute beginners who only want to photograph the Moon and bright planets, but it has limitations that might frustrate new users. The focus issues and software problems can discourage those less technically inclined. For learning basic planetary imaging techniques, it’s adequate, but consider the SV105 or FIBONAX alternatives for better initial experiences.
Can the Svbony SV205 be used for deep sky imaging?
No, the SV205 cannot effectively capture deep-sky objects like galaxies, nebulae, or star clusters. The 1-second maximum exposure limitation makes it impossible to gather enough light from these faint objects. While the marketing claims it can image some bright deep-sky objects, real-world testing shows this to be misleading. You need a different camera with longer exposure capabilities for deep-sky work.
What software works best with the Svbony SV205?
SharpCap provides the most reliable experience with the SV205 on Windows. It offers automatic detection and optimal settings for initial capture. Alternative options include FireCapture, which some users prefer for planetary work, and oacapture for Linux users. Mac users face significant compatibility issues and should consider different cameras or Windows emulation for reliable operation.
Why can’t I get proper focus with my SV205?
Focus problems usually stem from the camera’s short barrel not reaching your telescope’s focal plane. Solutions include adding a 1.25 extension tube, inserting a Barlow lens, or removing the star diagonal. Some telescopes, particularly Newtonians, may require significant modifications to achieve focus with this camera. Always check compatibility with your specific telescope model before purchasing.
Is the Svbony SV205 worth the money?
At $75.99, the SV205 offers questionable value compared to alternatives. The SV105 performs better for planetary imaging at nearly half the price, while the FIBONAX 4K camera provides significantly better features for only $4 more. The SV205 might be worthwhile if you specifically need higher resolution for lunar imaging, but most users would be better served by spending less on the SV105 or slightly more on the FIBONAX.
Can the Svbony SV205 be used as a guide camera?
The SV205 is not suitable for use as an autoguiding camera. Guide cameras need longer exposure capabilities to track guide stars, and the SV205’s 1-second maximum exposure limitation makes it inadequate for this purpose. Additionally, many autoguiding software packages don’t support this camera model. If you need a guide camera, look at dedicated options from ZWO or QHY instead.
Final Verdict: Who Should Buy the Svbony SV205?
After extensive testing with the Svbony SV205 across multiple telescopes and targets, I can only recommend this camera to a very specific type of user: the absolute beginner who wants to document lunar observations and occasionally capture basic planetary images, has a Windows computer, and doesn’t mind dealing with technical frustrations.
If you fit this profile and already own a compatible telescope, the SV205 can serve as an adequate introduction to electronic eyepiece imaging. You’ll be able to capture decent lunar images and basic planetary disks, learning the fundamentals of video astronomy and image processing along the way. The $76 price point won’t break the bank, and the experience gained might justify the cost.
However, most users would be better served by other options. The Svbony SV105 at $42 provides cleaner planetary images with larger pixels and fewer compatibility issues. For just $4 more, the FIBONAX 4K camera offers superior resolution, better build quality, and broader software compatibility. If you’re serious about astrophotography, saving for a ZWO ASI camera will provide dramatically better results and longer usefulness.
The SV205 exists in an uncomfortable middle ground – too limited for serious imaging but potentially frustrating for casual beginners. If you decide to purchase despite these warnings, buy from a retailer with a good return policy and be prepared to invest time in troubleshooting the focus and software issues. The learning curve is steeper than the marketing suggests, but with patience and realistic expectations, you can achieve some satisfying results, particularly with lunar and solar imaging.
For those looking to explore telescope photography options, consider checking out our comprehensive guides on alternative cameras and imaging techniques that might better serve your astrophotography goals.