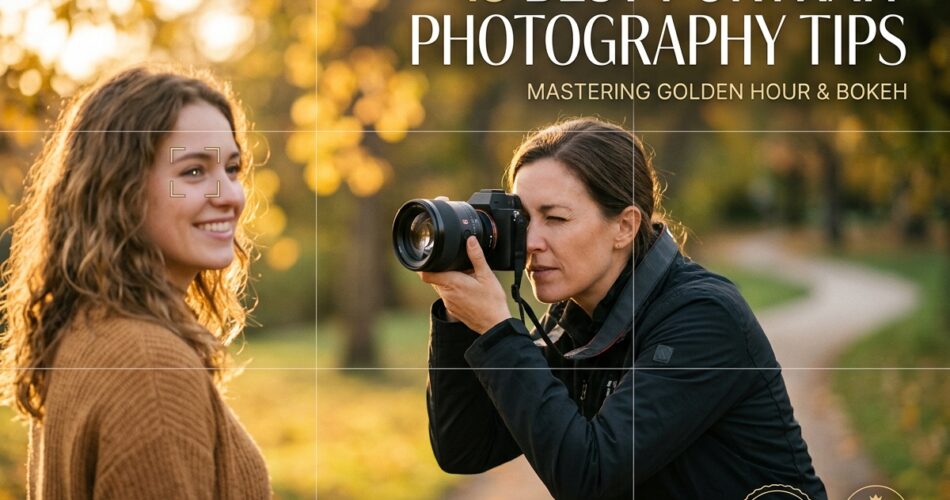
I have been shooting portraits for over seven years, and if there is one thing I have learned, it is that great portrait photography is not about having the most expensive camera. It is about understanding light, connecting with your subject, and knowing a handful of techniques that consistently produce flattering results. These portrait photography tips come from thousands of hours behind the lens, plenty of mistakes, and real feedback from photographers I trust.
Whether you picked up a DSLR last week or you have been shooting for a few years and want to level up, this guide covers the techniques that actually move the needle. I am going to walk you through camera settings, lighting setups, posing direction, composition rules, and post-processing workflows that I use every single time I shoot. My goal is to give you a clear, actionable roadmap so your next portrait session produces images you are genuinely proud of.
The best part is that most of these improvements cost nothing. You do not need new gear to see dramatic changes in your work. What you need is a better understanding of how light behaves, how to position people, and how to compose a frame that draws the viewer straight to your subject’s eyes.
Best Portrait Photography Tips for 2026
Here is a quick summary of the 15 techniques I cover in this guide. Each one addresses a specific part of the portrait process, from camera setup to final edit.
- Choose the right focal length (50mm or 85mm for most portraits)
- Shoot with a wide aperture for shallow depth of field
- Use natural light during golden hour whenever possible
- Find natural reflectors to bounce fill light onto your subject
- Position your subject’s shoulders at an angle to the camera
- Keep the nose pointed slightly toward the camera for flattering angles
- Focus on the eye closest to the camera
- Create catchlights by positioning your subject near a light source
- Apply the rule of thirds for balanced compositions
- Choose backgrounds that do not distract from your subject
- Coordinate clothing colors with your shooting location
- Always shoot in RAW format for editing flexibility
- Build rapport with your subject before picking up the camera
- Give clear, simple posing directions
- Use your smartphone’s portrait mode with the same principles
Let me break each of these down with specific settings, real examples, and the reasoning behind every technique.
Camera Settings and Lens Selection
The settings you choose before pressing the shutter matter more than most beginners realize. I used to shoot everything in auto mode, and my portraits looked flat and lifeless. Once I understood how focal length, aperture, and shutter speed work together, my portraits improved overnight. These camera settings are the foundation of every good portrait.
Best Focal Length for Portraits
Focal length changes how faces look in photographs more than almost any other setting. Wide-angle lenses (anything below 35mm) distort facial features, making noses look bigger and foreheads appear wider. I learned this the hard way when I shot an entire session at 24mm and every face looked stretched and unnatural.
For flattering portraits, stick with 50mm to 85mm on a full-frame camera. A 50mm lens gives you a natural perspective that closely matches how the human eye sees a person. An 85mm lens compresses facial features slightly, which most people find more flattering. On a crop-sensor camera, a 35mm lens gives you roughly the same field of view as a 50mm on full frame, so adjust accordingly.
Here is a quick reference I keep taped inside my camera bag:
- 35mm (full frame): Good for environmental portraits where you want to show the subject in their surroundings
- 50mm (full frame): The versatile workhorse. Works for headshots, half-body, and three-quarter shots
- 85mm (full frame): My go-to for tight headshots. Extremely flattering for faces
- 135mm (full frame): Beautiful compression and bokeh, but you need space to back up
Aperture Settings for Background Blur
Aperture controls how much of your image is in sharp focus. For portraits, I almost always shoot with a wide aperture (low f-number) to create a shallow depth of field. This blurs the background, separates your subject from distractions, and creates that creamy bokeh effect people love in portraits.
My starting aperture for most portraits is f/2.8. If I am shooting with a lens that opens to f/1.8 or f/1.4, I will sometimes stop down to f/2.2 or f/2.5 for a bit more sharpness across the face while keeping the background nicely blurred. Shooting wide open at f/1.4 can be risky because the depth of field is so thin that if you focus on the tip of the nose, the eyes might be soft.
For group portraits, you need a smaller aperture (higher f-number) to keep everyone in focus. I typically use f/5.6 to f/8 for groups of two to four people.
Essential Camera Settings for Portraits
When I shoot portraits, I set my camera to aperture priority mode or full manual. Here are the settings I start with for outdoor portraits in natural light:
- Aperture: f/2.8 (or f/2.2 if your lens allows it)
- ISO: 100 (or as low as possible to keep noise minimal)
- Shutter speed: At least 1/200s to avoid motion blur from subject movement
- White balance: Set to match your light source, or shoot in RAW and adjust later
- Focus mode: Single-point autofocus, placed on the eye closest to the camera
- File format: RAW (always, no exceptions for portraits)
These settings give you clean files with plenty of editing flexibility, shallow depth of field for background separation, and fast enough shutter speed to freeze small movements.
Lighting Techniques That Transform Your Portraits
Light is the single most important element in photography, and portrait photography is no exception. I would rather shoot with a $200 camera in beautiful light than a $3,000 camera in terrible light. Understanding how to find, shape, and use light is what separates snapshots from portraits that make people stop scrolling.
Natural Light and Golden Hour
The golden hour is that magical period shortly after sunrise and shortly before sunset when the sun sits low on the horizon. During this time, sunlight travels through more atmosphere, which softens it and gives it a warm, golden quality. I schedule nearly all my outdoor portrait sessions during golden hour because the light is simply more flattering.
Here is what I tell anyone who asks about timing: aim to start your session about 90 minutes before sunset. The last 30 minutes before the sun drops below the horizon is when the light becomes truly magical. It is soft, directional, warm, and creates beautiful rim lighting on hair and shoulders.
The biggest mistake beginners make is shooting in harsh midday sun. Direct overhead sunlight creates dark shadows under the eyes, nose, and chin. These shadows are unflattering and difficult to fix in post-processing. If you absolutely must shoot at midday, find open shade under a tree, building overhang, or awning.
Using Reflectors and Natural Reflectors
A reflector is one of the cheapest and most effective tools for portrait photography. I carry a simple 5-in-1 reflector that cost me about $20, and it has improved my portraits more than any lens I have ever bought. You position the reflector on the shadow side of your subject’s face, and it bounces light back to fill in those dark areas.
Natural reflectors work the same way but cost nothing. A white wall, a light-colored sidewalk, or even a white shirt on someone standing nearby can bounce fill light onto your subject. I once shot a portrait session where the subject was standing near a pale sandstone building, and the warm reflected light gave their skin a beautiful glow I could never have created with a flash.
When using a reflector, place it at about waist height and angle it upward toward your subject’s face. This fills shadows from below, which looks more natural than top-down fill. The silver side of a reflector gives a stronger, cooler fill. The white side gives a softer, more subtle fill. I prefer white for most portraits.
Window Light for Indoor Portraits
Window light is the original portrait lighting setup, and it remains one of the best. Large windows produce soft, directional light that wraps around your subject beautifully. I shoot many of my indoor portraits next to a large window because the light is consistent and easy to control.
Position your subject parallel to the window so the light falls across their face from one side. This creates gentle shadows that add dimension and depth. If you want more even lighting, angle the subject more toward the window. For more dramatic lighting, angle them slightly away.
Avoid placing your subject directly facing the window because the light becomes flat and featureless. Also avoid placing them with their back to the window unless you are intentionally creating a silhouette. The sweet spot is about 45 degrees to the window for the most dimensional, flattering light.
Posing and Directing Your Subject
Posing is where most photographers struggle, and it is completely understandable. Most of us are not natural directors, and telling someone how to stand or where to look can feel awkward. But posing does not have to be complicated. A few simple adjustments can make a huge difference in how your subject looks in the final image.
Making Your Subject Comfortable
The best posing tip I ever received is simple: talk to your subject before you ever raise the camera to your eye. I spend the first 10 to 15 minutes of every portrait session just chatting, walking to the location, and getting to know the person. When someone feels comfortable with you, their expressions become natural and their body language relaxes.
Practice with someone you know first. A friend, a family member, or a partner who is comfortable around you makes a great test subject. I practiced on my sister for months before I ever shot a portrait for someone I did not know well. That practice gave me confidence in my direction, and confidence is contagious. When you look like you know what you are doing, your subject relaxes.
Give simple, encouraging directions. Instead of saying “tilt your head 15 degrees to the left,” I say “look over toward that tree for me, just a little bit.” Keep your language casual and positive. Tell people when they look good. Say things like “that is great, hold that right there” or “I love that expression.” Positive feedback makes people feel at ease.
Shoulder Angle and Body Positioning
When someone faces the camera square-on with both shoulders parallel to the lens, they look wider and more rigid than they do in person. I always ask my subjects to turn their body slightly away from the camera, about 30 to 45 degrees, and then look back toward the lens. This creates a more dynamic, slimming pose.
Dropping one shoulder slightly lower than the other breaks up the symmetry and creates a more natural, relaxed look. I also have subjects shift their weight to their back foot, which naturally angles their body and prevents that stiff, “passport photo” stance.
For seated portraits, the same principle applies. Angle the chair slightly and have the subject turn their face back toward the camera. Leaning slightly forward from the waist creates engagement and prevents the subject from sinking into their shoulders.
The Nose Angle Rule
This tip comes from photographer Scott Robert Lim, and it changed my portraits overnight. The rule is simple: keep the subject’s nose pointed in the same direction as the light source, or slightly toward the camera. When the nose points away from the camera while the face is lit from the front, you get an unflattering widemouth effect.
In practice, this means that if your light source is coming from the left side, your subject’s nose should point slightly to the left or straight at the camera. Avoid having the nose point to the right (away from the light) because the far side of the face falls into deep shadow and the nose can appear larger.
This rule also helps with profile shots. A true profile (nose pointed 90 degrees away from camera) rarely looks flattering because you lose the dimension of the face. A three-quarter angle, where the nose points roughly 45 degrees from the camera, is almost always more interesting and dimensional.
Hands Positioning in Portraits
Hands are one of the most overlooked elements in portrait photography, and they can make or break an image. Awkward, dangling hands draw attention away from the face. I always give my subjects something to do with their hands because it looks more natural than leaving them empty.
Here are a few hand poses I use regularly:
- One hand resting lightly on the opposite arm
- Hands in pockets with thumbs visible outside
- One hand near the face, touching the chin or hair gently
- Holding a prop like a jacket, coffee cup, or flowers
- Arms crossed loosely, with one hand visible on the opposite arm
The key is keeping hands relaxed. Tense, rigid fingers look unnatural. I tell subjects to shake out their hands and then place them naturally. Soft, slightly curled fingers look best in photographs.
Composition Rules for Better Portraits
Composition is how you arrange elements within your frame to guide the viewer’s eye. Good composition makes portraits feel intentional and polished. Bad composition makes even well-lit, well-posed portraits look like snapshots. Here are the composition rules I rely on for every session.
Rule of Thirds in Portrait Photography
The rule of thirds is one of the most well-known composition guidelines, and for good reason. Imagine dividing your frame into a grid of nine equal sections using two horizontal and two vertical lines. The four points where these lines intersect are the strongest positions to place your subject’s eyes.
When I shoot a vertical portrait, I place the subject’s eyes on or near the upper horizontal third line. This leaves negative space below the face, which creates a sense of openness and keeps the portrait from feeling cramped. For horizontal portraits, I position the subject along one of the vertical third lines rather than dead center.
Centering your subject works sometimes, particularly for symmetrical, confrontational portraits. But most of the time, off-center placement using the rule of thirds creates a more dynamic and visually pleasing image.
Framing and Leading Lines
Framing means using elements within your scene to create a natural border around your subject. Doorways, windows, tree branches, archways, and tunnels all work as frames. A frame draws the viewer’s eye directly to your subject and adds depth to the image.
Leading lines are visual paths that guide the eye through the image toward your subject. Fences, pathways, walls, and even the lines of a staircase can serve as leading lines. I look for these elements in every location I scout because they make compositions stronger with zero extra effort.
The neckline and collar of your subject’s clothing also create leading lines. A V-neck or open collar draws the eye toward the face. Turtlenecks and high collars can block that visual flow. I always consider how clothing lines interact with the overall composition.
Background Selection
A distracting background ruins portraits faster than any other mistake. Before I press the shutter, I scan the background for bright spots, poles sticking out of heads, trash on the ground, and anything that pulls attention away from the subject.
The easiest way to handle backgrounds is to use a wide aperture and get close to your subject. This blurs the background into a smooth wash of color and shape. If you cannot blur the background enough with your lens, physically move your subject to a simpler location. A plain wall, a hedge, or an open sky all work as clean backgrounds.
Also pay attention to the distance between your subject and the background. The farther your subject is from whatever is behind them, the more blurred the background appears. Moving someone just 10 feet away from a wall instead of 2 feet away makes a noticeable difference in background separation.
Focus on the Eyes
If there is one technical rule I never break in portrait photography, it is this: the eyes must be sharp. Viewers are drawn to eyes in photographs. If the eyes are soft, the entire portrait feels off, even if everything else is perfect. I always focus on the eye closest to the camera because that is where the viewer looks first.
Why Eye Focus Matters
Eyes are the most expressive part of the face. They communicate emotion, personality, and connection. A portrait with razor-sharp eyes draws the viewer in and creates an emotional bond with the subject. A portrait with soft eyes feels distant and incomplete, no matter how beautiful the lighting or posing.
I use single-point autofocus and manually position the focus point directly over the eye closest to the camera. For cameras with eye-detection autofocus, I turn that feature on and trust it. Modern eye-detection AF is remarkably accurate and fast.
If your depth of field is very shallow (shooting at f/1.4 or f/1.8), even a small focus error can leave the eyes soft. I recommend focusing, holding the shutter halfway, and then recomposing carefully. Or better yet, move the focus point to the eye rather than recomposing, which can shift the plane of focus slightly.
Creating Catchlights
Catchlights are the reflections of light sources you see in a subject’s eyes. They might seem like a small detail, but they make a huge difference. Eyes without catchlights look flat and lifeless. Eyes with catchlights look alive, bright, and engaging.
To create catchlights, position your subject so they are facing or angled toward your light source. The light reflects off the surface of the eye, creating a small bright spot. For outdoor portraits, the sky acts as a natural light source and creates beautiful catchlights when your subject looks slightly upward.
For window light portraits, the window itself becomes the catchlight. Position your subject so the window is in front of them and slightly to one side. The catchlight appears at roughly the 10 o’clock or 2 o’clock position in the eye, which looks natural and appealing.
Color Scheme and Clothing Coordination
I used to ignore clothing choices and let subjects wear whatever they wanted. Then I compared my portraits and realized that the best ones always had coordinated colors between the subject’s outfit and the location. Color harmony makes portraits look polished and intentional.
The simplest approach is to ask your subject to wear solid colors in muted tones that complement the shooting environment. For a park with green trees and brown earth, earth tones like olive, tan, burgundy, and navy work beautifully. For an urban setting with concrete and steel, cool tones like charcoal, slate blue, and deep green create nice contrast.
Avoid bright whites, neon colors, and bold patterns. Pure white shirts tend to blow out in natural light and draw attention away from the face. Neon colors cast color reflections onto skin that look unnatural. Bold stripes and busy patterns compete with the face for attention.
Complementary color theory can take your portraits to another level. Orange and blue are complementary colors, so a subject in a warm orange or rust-colored top against a blue sky or blue wall creates a striking image. I keep a small color wheel on my phone for quick reference during location scouting.
Post-Processing Tips for Portraits
Post-processing is not about fixing bad photos. It is about enhancing the good ones. I spend about 5 to 10 minutes editing each portrait, and that small investment makes a significant difference. Here are the editing practices I follow for every portrait session.
Shooting in RAW Format
I mentioned this earlier, but it deserves its own section because it matters that much. RAW files contain dramatically more data than JPEG files, which means you can recover highlights, pull detail from shadows, adjust white balance, and fine-tune exposure with almost no quality loss. JPEG files bake in all these decisions at the time of capture, and once that data is gone, it is gone.
The only downside to RAW is larger file sizes, but storage is cheap. Shoot RAW for every portrait session without exception. You can always export a JPEG later, but you cannot create a RAW file from a JPEG.
Skin Tone Editing
Skin tones are the most sensitive part of portrait editing. Push colors too far and skin looks orange, green, or unnaturally smooth. I keep my skin tone adjustments subtle and always compare my edits to the original.
My basic skin editing workflow looks like this:
- Correct white balance first so skin tones are accurate
- Apply gentle exposure and contrast adjustments
- Use a soft brush to even out major blemishes and temporary skin issues
- Avoid over-smoothing skin texture. Pores and fine lines look natural
- Check skin tones on multiple devices before final export
I never remove permanent features like birthmarks, moles, or scars unless the subject specifically asks. These features are part of who they are, and removing them without permission crosses an ethical line.
Color Grading Basics
Color grading is the process of adjusting the overall color tone of an image to create a mood or style. I keep my color grading subtle for portraits because the goal is to enhance the subject, not draw attention to the editing.
For warm, inviting portraits, I slightly warm the shadows and add a touch of orange to midtones. For cooler, more dramatic portraits, I shift shadows toward blue and keep highlights clean. The key is restraint. If the color grading is the first thing someone notices, you have gone too far.
High-key portraits use bright, even lighting with minimal shadows for a light, airy feel. Low-key portraits use dark backgrounds and dramatic lighting for a moody, intense atmosphere. Both styles are worth experimenting with because they communicate very different moods.
Portrait Photography Tips for Smartphone Users
You do not need a dedicated camera to take great portraits. Modern smartphones have powerful portrait modes that simulate the shallow depth of field of professional lenses. The same principles I covered above apply to phone photography, and they actually make a bigger difference because the phone is doing more of the technical work for you.
Here is how I approach portrait photography with a phone:
- Tap to focus on the eyes: Most phones let you tap the screen to set focus and exposure. Tap directly on the eye closest to the camera
- Use portrait mode: This creates artificial background blur. It is not as good as optical blur from a real lens, but it works well in good lighting
- Find great light: The same golden hour rule applies. Phone sensors are smaller and noisier, so good light matters even more
- Clean your lens: This sounds silly, but a dirty phone lens produces hazy, low-contrast images. Wipe it before every session
- Avoid digital zoom: It degrades image quality. Move closer with your feet instead
For self-portraits with your phone, prop it against something stable and use the timer or a Bluetooth remote. Position yourself next to a window for soft directional light. The same posing rules apply: angle your body, create catchlights, and keep the background simple.
Phone portrait photography has one major advantage over traditional cameras: people are more relaxed around phones. Subjects who feel awkward in front of a big camera often loosen up when you use a phone. Use that comfort to your advantage and capture more natural, candid expressions.
Common Portrait Photography Mistakes to Avoid
I have made every one of these mistakes myself, and I still catch myself slipping into old habits. Being aware of the most common errors helps you avoid them or catch them quickly during a shoot.
Shooting from below eye level: Shooting up at someone from a low angle captures unflattering views up the nostrils and makes the chin appear larger. I shoot at or slightly above my subject’s eye level for the most flattering angle. For seated subjects, I kneel or sit so I am not looking down at them.
Using harsh midday sun: Direct overhead sunlight creates raccoon eyes (dark shadows under the eyes) and squinting subjects. If you must shoot at noon, find shade or use a diffuser. Open shade is your best friend when golden hour is not an option.
Distracting backgrounds: I always do a quick background scan before I start shooting. Look for bright spots, poles, signs, trash, and other elements that pull the eye away from your subject. A clean background is one of the easiest wins in portrait photography.
Cropping at joints: Avoid cutting off the frame at the neck, wrists, knees, or ankles. Cropping mid-thigh, mid-calf, or just above the elbow looks more natural. If you are unsure, include more of the body rather than less.
Over-editing: Heavy skin smoothing, oversaturated colors, and extreme contrast adjustments make portraits look artificial. Edit with a light touch and step away from the screen for a few minutes before making final adjustments. Fresh eyes catch over-processing faster than tired ones.
Not directing your subject: Silence is the enemy of good portraits. If you are not talking to your subject, they are standing there wondering what to do, and that uncertainty shows in their expression. Keep a constant stream of gentle direction and positive feedback going throughout the session.
Frequently Asked Questions
What is the rule of 3 in portrait?
The rule of thirds in portrait photography means dividing your frame into a 3×3 grid and placing your subject’s eyes along the upper horizontal line or at one of the four intersection points. This creates a more dynamic and visually balanced composition than centering the subject. Most cameras and phones have a grid overlay you can turn on to help with placement.
What are the 5 C’s of photography?
The 5 C’s of photography are Composition, Contrast, Cutting, Close-ups, and Containment. Composition refers to how you arrange elements in the frame. Contrast is the range between light and dark tones. Cutting means careful cropping of the image. Close-ups draw attention to detail. Containment is about framing the subject within the image boundaries.
How to take a really good portrait photo?
To take a great portrait photo, focus on these essentials: use a focal length between 50mm and 85mm for flattering perspective, shoot with a wide aperture like f/2.8 for background blur, focus on the eye closest to the camera, shoot during golden hour for soft warm light, position your subject at an angle rather than square to the camera, and keep the background simple and uncluttered. Building rapport with your subject before and during the shoot produces more natural expressions than any technical setting.
What is Michael Anthony’s photography style?
Michael Anthony is known for a bold, high-contrast portrait style that combines dramatic lighting with creative color grading and strong compositions. His work often features vibrant tones, intentional lens flare, and expressive posing. While his style is distinctive and recognizable, it is worth noting that developing your own personal style comes from shooting regularly and studying a variety of approaches rather than copying any single photographer.
Conclusion
Great portrait photography comes down to a few core principles: understanding light, choosing the right settings, directing your subject with confidence, and composing your frame with intention. These portrait photography tips are the same ones I use on every shoot, whether I am working with a professional model or taking photos of a friend at the park.
Start with the basics. Pick up your camera, set it to aperture priority, open up to f/2.8, and head outside during golden hour. Focus on the eyes, angle your subject’s shoulders, and keep talking to them throughout the session. You will see immediate improvement from just these few changes.
The real secret is practice. No guide, no matter how comprehensive, replaces time behind the camera. Grab a friend, try these techniques, review your results, and shoot again. In 2026, with smartphone cameras as capable as they are, there has never been a better time to start taking portraits you are proud of.
Comments