I wasted money on equipment that was perfect for dark sky sites but frustrating to use from my light-polluted backyard. Understanding your actual conditions and constraints helps avoid disappointing purchases that sit unused because they’re impractical for your situation. The best equipment is what you’ll actually use regularly, not what’s theoretically optimal under different circumstances.
Build Systems, Not Collections
Every component should work harmoniously with your overall system. A fantastic camera paired with an inadequate mount produces disappointing results because the mount can’t track accurately enough for the camera’s resolution to matter. Plan your purchases as complete systems rather than upgrading individual components independently.
Create a roadmap of your ideal setup and work toward it systematically, ensuring each new purchase integrates well with your existing gear. This approach prevents buying equipment that you’ll quickly outgrow or that doesn’t work properly with what you already own. For comprehensive telescope recommendations to pair with your camera, see our guide to the best telescopes for astrophotography.
Time Saver: Buy your entire setup from one reputable dealer when possible. This simplifies warranty claims and ensures compatibility between components. Many dealers offer package deals that save money compared to buying individual components separately, and they can provide guidance on system matching that prevents mismatched equipment.
Frequently Asked Questions
What is the best camera for astrophotography under $500?
The Canon EOS Rebel T7 is the best camera under $500 for astrophotography, offering 24.1 megapixels, good low-light performance, and compatibility with a wide range of lenses. While it lacks some modern features like 4K video, its proven performance and extensive lens ecosystem make it ideal for beginners on a budget. For dedicated planetary imaging, the SVBONY SV205 provides excellent results at even lower price points.
Do I need a full frame camera for astrophotography?
No, you don’t need a full frame camera for astrophotography. Modern APS-C cameras like the Canon EOS R100 produce excellent results, especially when paired with quality lenses. Full frame cameras offer advantages for wide-field Milky Way photography due to larger pixels that gather more light, but APS-C sensors provide longer reach that benefits planetary imaging and smaller deep-sky objects. The difference is noticeable but not dramatic for most beginners.
Can you use a DSLR for astrophotography?
Yes, DSLRs are excellent for astrophotography and remain popular choices for both beginners and experienced imagers. Their optical viewfinders work well in dark conditions, battery life typically exceeds mirrorless cameras, and the extensive lens availability provides many options. Models like the Canon EOS Rebel T7 deliver outstanding results for Milky Way and deep-sky photography when paired with appropriate lenses and tracking equipment.
What makes a good astrophotography camera?
A good astrophotography camera needs excellent high ISO performance, low noise at long exposures, good dynamic range, and full manual control capabilities. Full-frame sensors generally perform better due to larger pixels that gather more light, but modern APS-C cameras can produce outstanding results. Other important features include: clean HDMI output for external recording, intervalometer capability for automated exposures, and good battery performance in cold conditions that characterize astrophotography sessions.
How many megapixels do I need for astrophotography?
For most astrophotography, 16-24 megapixels is ideal. This provides enough resolution for detailed prints while keeping noise manageable at high ISO settings. More megapixels aren’t necessarily better – smaller pixels can actually increase noise and reduce low-light performance. Focus on sensor size and pixel quality rather than megapixel count alone. Some of the best astrophotography cameras have fewer megapixels but larger pixels that perform exceptionally well in low light.
What ISO should I use for astrophotography?
For Milky Way photography, start with ISO 3200-6400 on modern cameras. The exact setting depends on your camera’s capabilities and darkness of your location. Darker sites allow lower ISO settings with cleaner images, while light-polluted areas may require higher ISO to capture faint details. Deep-sky imaging often uses ISO 1600-3200 with long exposures on tracking mounts. Always test different settings to find the sweet spot between brightness and noise for your specific camera.
What lens is best for astrophotography?
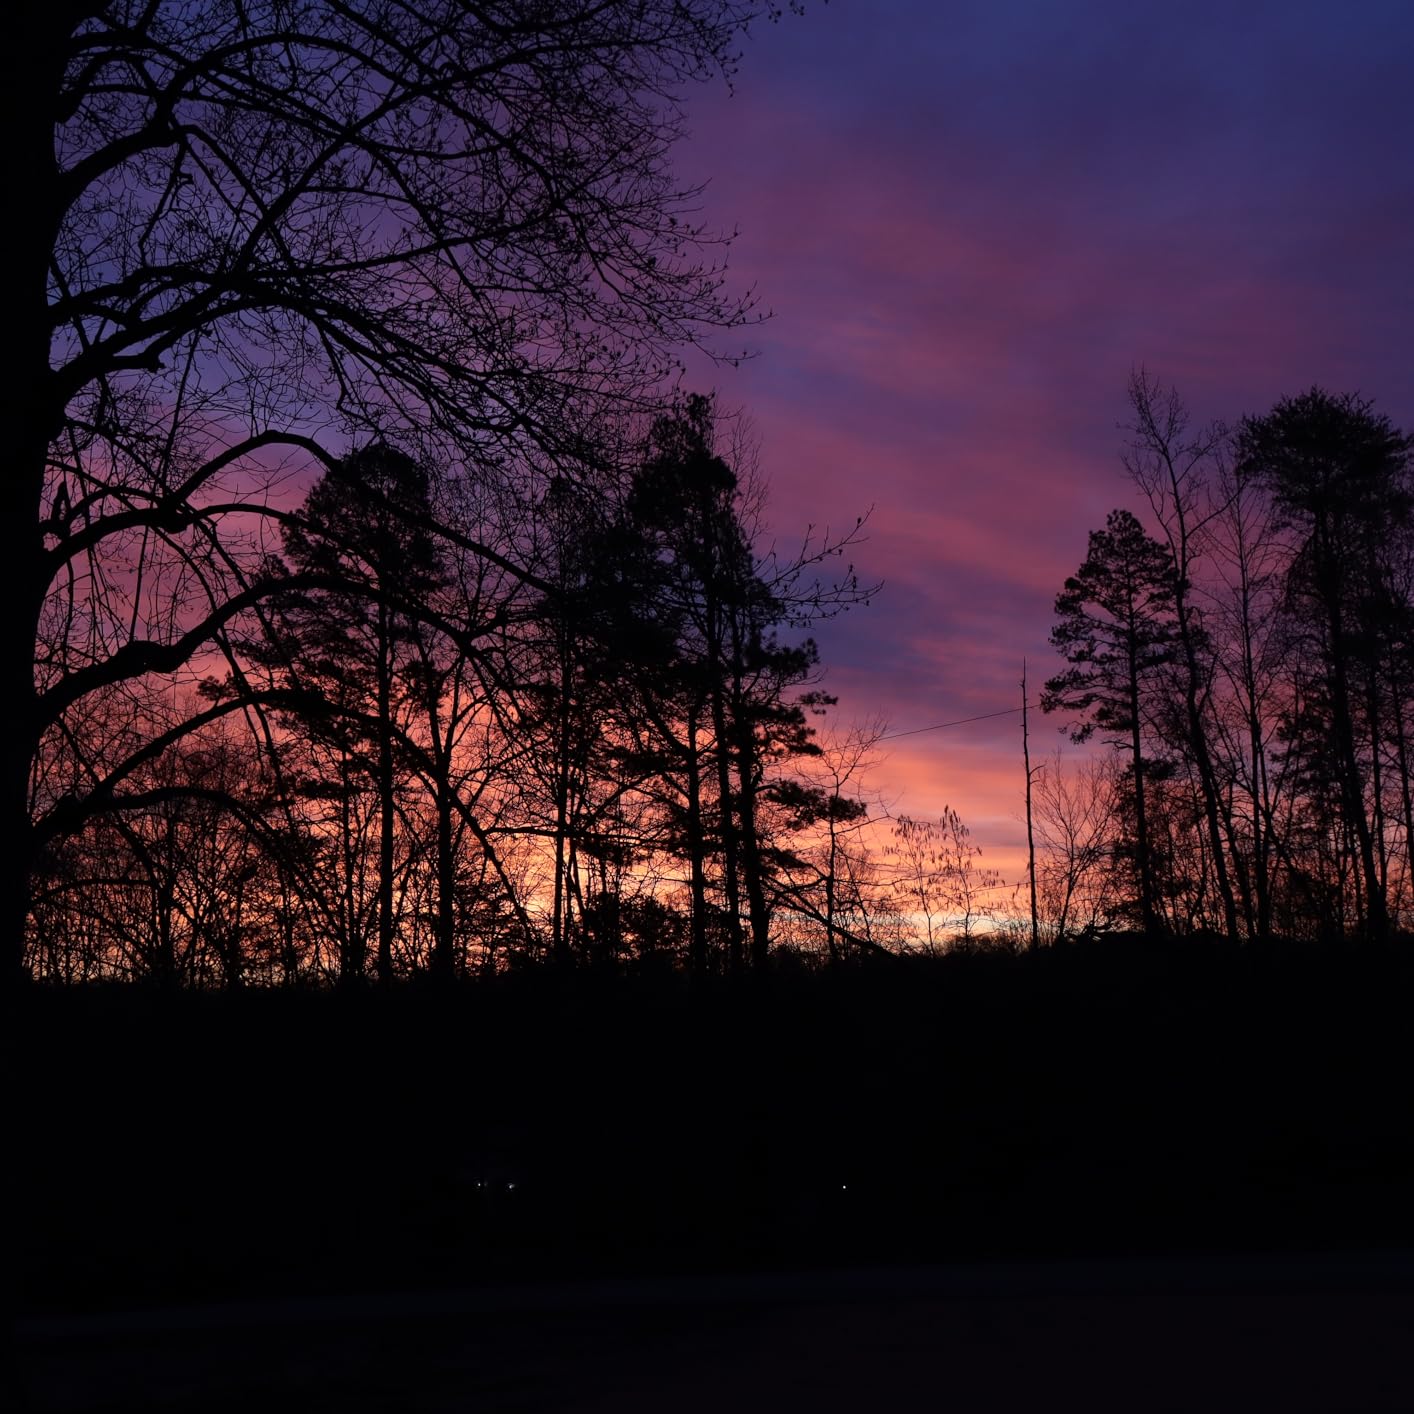
Wide-angle lenses with f/2.8 or wider apertures are ideal for Milky Way photography, allowing shorter exposures at lower ISO settings. Focal lengths between 14-24mm provide good coverage of constellations while keeping stars sharp across the field. Prime lenses generally outperform zooms due to simpler optical designs. Quality budget options include Rokinon/Samyang manual focus lenses, while premium choices include the Sigma 14mm f/1.8 or Sony G Master wide angles. For more detailed recommendations, see our guide to the best lens for astrophotography.
Do I need a star tracker for astrophotography?
Star trackers aren’t absolutely necessary but dramatically expand your possibilities. For Milky Way landscapes and bright deep-sky objects, a static tripod works fine using the 500 rule to determine maximum exposure time. However, a star tracker like the Sky-Watcher Star Adventurer enables longer exposures (2-5 minutes instead of 20-30 seconds), revealing faint nebulae and galaxies that are invisible without tracking. They’re essential for serious deep-sky imaging but optional for casual nightscape photography.
Should I modify my camera for astrophotography?
Camera modification for astrophotography involves replacing the internal IR cut filter to increase hydrogen-alpha sensitivity, dramatically improving performance on emission nebulae. While modification produces stunning results on red nebulae, it voids warranties and makes the camera less suitable for normal daylight photography. Most beginners should achieve excellent results with stock cameras before considering modification. If pursuing deep-sky imaging seriously, modification becomes worthwhile, but maintain separate modified and unmodified cameras for different purposes.
What is the 400 rule in astrophotography?
The 400 rule is a guideline for determining maximum exposure length before stars become trails due to Earth’s rotation. Divide 400 by your lens focal length to get the maximum exposure time in seconds. For example, with a 20mm lens, 400 divided by 20 equals 20 seconds maximum exposure. This rule works for full-frame cameras – for crop sensors, divide by the crop factor (1.5 or 1.6) first. The 500 rule is a more conservative version allowing slightly longer exposures.
Final Recommendations
After testing dozens of cameras and spending countless nights under the stars, I’ve learned that the perfect astrophotography camera balances capability, usability, and value for your specific needs. The Sony a7 III remains my top recommendation for most photographers due to its excellent low-light performance, proven reliability, and reasonable price that delivers professional results without the professional cost.
Beginners should consider the Canon EOS Rebel T7 for its user-friendly design, proven performance, and extensive lens ecosystem that provides upgrade paths as your skills develop. If budget allows, the Canon EOS R100 offers modern mirrorless advantages in an incredibly compact package perfect for travel to dark sky locations.
For those who want impressive results without the steep learning curve, the Dwarf 3 or ZWO Seestar S50 smart telescopes provide revolutionary all-in-one solutions that deliver stunning images with minimal technical knowledge. These devices have democratized astrophotography, making it accessible to everyone regardless of technical aptitude or prior experience.
Serious enthusiasts pursuing deep-sky imaging should consider the SVBONY SV405CC for its cooled sensor capabilities that were previously unavailable at this price point. The cooling system makes a dramatic difference in long-exposure performance, revealing faint nebulae and galaxies that are impossible to capture with uncooled cameras.
Remember that the camera is just one part of your astrophotography system. Invest in quality support equipment like a sturdy tripod and reliable tracking mount – these often make more difference to final image quality than camera choice alone. The most important advice is to start with what you can afford and actually use it regularly. The best camera for astrophotography is the one that helps you capture the cosmos and grow your skills, regardless of price or specifications. Clear skies and happy imaging!
Light pollution filters dramatically improve results from urban or suburban locations by blocking wavelengths associated with common artificial lighting while passing important nebula emission lines. Broadband filters like the Optolong L-Pro or IDAS LPS-P2 suppress sodium and mercury vapor灯 pollution while transmitting hydrogen-alpha and oxygen-III wavelengths crucial for nebula imaging.
Narrowband filters isolate specific wavelengths, allowing deep-sky imaging from heavily light-polluted sites that would otherwise produce washed-out images. These filters require monochrome cameras or modified color cameras but deliver stunning results that rival images from dark sky locations. For more on getting started without specialized equipment, see our guide to astrophotography without a telescope.
Pro Tip: Buy used when possible. High-end tripods and mounts retain value well, and buying used can get you better equipment for the same budget. Just inspect carefully and test before purchase. The used market for astrophotography equipment is active, with reputable forums and classifieds offering quality gear at significant discounts.
Smart Buying Tips for Astrophotography Gear
Having spent thousands on astrophotography equipment over the years, I’ve learned some expensive lessons that I’ll save you from repeating. Here’s how to build your setup wisely without wasting money on gear you won’t use or equipment that doesn’t work together as a system.
Start with Used Equipment
The astrophotography community has an active used market with exceptional deals from photographers upgrading their systems. Cameras, lenses, and mounts from reputable brands often sell for 50-70% of their new price, allowing you to acquire better equipment within your budget. Check Cloudy Nights classifieds, AstroBin, and local astronomy clubs for bargains.
When buying used, prioritize recent models with good parts availability and avoid heavily modified cameras unless you understand exactly what you’re purchasing. Always meet in person for expensive items when possible, or use secure payment methods with buyer protection when buying remotely. Request sample images from the seller showing the camera’s performance on actual astrophotography subjects.
Consider Rental Before Purchase
Before investing thousands in a tracking mount or specialized camera, consider renting first to test whether the equipment suits your needs. Several companies offer astrophotography equipment rentals, allowing you to experience different setups without committing to purchases you might regret.
This approach saved me from buying the wrong mount early in my journey. A weekend rental revealed that I needed more capacity than planned, preventing an expensive mistake that would have required upgrading almost immediately. Rental fees are insignificant compared to the cost of buying equipment that doesn’t match your actual needs or imaging goals.
Buy for Your Actual Conditions
Be realistic about your imaging location and time constraints. If you mostly observe from light-polluted suburbs, prioritize narrowband capabilities and modified cameras over maximum aperture or ultra-wide focal lengths. If you have limited setup time due to work or family obligations, choose equipment that’s quick to deploy rather than complex setups that require hours to align and configure.
I wasted money on equipment that was perfect for dark sky sites but frustrating to use from my light-polluted backyard. Understanding your actual conditions and constraints helps avoid disappointing purchases that sit unused because they’re impractical for your situation. The best equipment is what you’ll actually use regularly, not what’s theoretically optimal under different circumstances.
Build Systems, Not Collections
Every component should work harmoniously with your overall system. A fantastic camera paired with an inadequate mount produces disappointing results because the mount can’t track accurately enough for the camera’s resolution to matter. Plan your purchases as complete systems rather than upgrading individual components independently.
Create a roadmap of your ideal setup and work toward it systematically, ensuring each new purchase integrates well with your existing gear. This approach prevents buying equipment that you’ll quickly outgrow or that doesn’t work properly with what you already own. For comprehensive telescope recommendations to pair with your camera, see our guide to the best telescopes for astrophotography.
Time Saver: Buy your entire setup from one reputable dealer when possible. This simplifies warranty claims and ensures compatibility between components. Many dealers offer package deals that save money compared to buying individual components separately, and they can provide guidance on system matching that prevents mismatched equipment.
Frequently Asked Questions
What is the best camera for astrophotography under $500?
Do I need a full frame camera for astrophotography?
Can you use a DSLR for astrophotography?
What makes a good astrophotography camera?
How many megapixels do I need for astrophotography?
What ISO should I use for astrophotography?
What lens is best for astrophotography?
Do I need a star tracker for astrophotography?
Should I modify my camera for astrophotography?
What is the 400 rule in astrophotography?
Final Recommendations
After testing dozens of cameras and spending countless nights under the stars, I’ve learned that the perfect astrophotography camera balances capability, usability, and value for your specific needs. The Sony a7 III remains my top recommendation for most photographers due to its excellent low-light performance, proven reliability, and reasonable price that delivers professional results without the professional cost.
Beginners should consider the Canon EOS Rebel T7 for its user-friendly design, proven performance, and extensive lens ecosystem that provides upgrade paths as your skills develop. If budget allows, the Canon EOS R100 offers modern mirrorless advantages in an incredibly compact package perfect for travel to dark sky locations.
For those who want impressive results without the steep learning curve, the Dwarf 3 or ZWO Seestar S50 smart telescopes provide revolutionary all-in-one solutions that deliver stunning images with minimal technical knowledge. These devices have democratized astrophotography, making it accessible to everyone regardless of technical aptitude or prior experience.
Serious enthusiasts pursuing deep-sky imaging should consider the SVBONY SV405CC for its cooled sensor capabilities that were previously unavailable at this price point. The cooling system makes a dramatic difference in long-exposure performance, revealing faint nebulae and galaxies that are impossible to capture with uncooled cameras.
Remember that the camera is just one part of your astrophotography system. Invest in quality support equipment like a sturdy tripod and reliable tracking mount – these often make more difference to final image quality than camera choice alone. The most important advice is to start with what you can afford and actually use it regularly. The best camera for astrophotography is the one that helps you capture the cosmos and grow your skills, regardless of price or specifications. Clear skies and happy imaging!
While wide-field landscapes can be captured on static tripods using the 500 rule for maximum exposure length, deep-sky objects require tracking to compensate for Earth’s rotation. Entry-level star trackers like the Sky-Watcher Star Adventurer or iOptron SkyTracker make this accessible to beginners without requiring heavy equatorial mounts.
Tracking mounts enable dramatically longer exposures – 2-5 minutes instead of 20-30 seconds – revealing faint nebulae and galaxies that are invisible without tracking. For serious deep-sky work, German equatorial mounts provide the precision needed for exposures lasting 10 minutes or more. To find a mount that fits your budget, see our comprehensive guide to the best beginner astrophotography mount.
Filters: Taming Light Pollution
Light pollution filters dramatically improve results from urban or suburban locations by blocking wavelengths associated with common artificial lighting while passing important nebula emission lines. Broadband filters like the Optolong L-Pro or IDAS LPS-P2 suppress sodium and mercury vapor灯 pollution while transmitting hydrogen-alpha and oxygen-III wavelengths crucial for nebula imaging.
Narrowband filters isolate specific wavelengths, allowing deep-sky imaging from heavily light-polluted sites that would otherwise produce washed-out images. These filters require monochrome cameras or modified color cameras but deliver stunning results that rival images from dark sky locations. For more on getting started without specialized equipment, see our guide to astrophotography without a telescope.
Pro Tip: Buy used when possible. High-end tripods and mounts retain value well, and buying used can get you better equipment for the same budget. Just inspect carefully and test before purchase. The used market for astrophotography equipment is active, with reputable forums and classifieds offering quality gear at significant discounts.
Smart Buying Tips for Astrophotography Gear
Having spent thousands on astrophotography equipment over the years, I’ve learned some expensive lessons that I’ll save you from repeating. Here’s how to build your setup wisely without wasting money on gear you won’t use or equipment that doesn’t work together as a system.
Start with Used Equipment
The astrophotography community has an active used market with exceptional deals from photographers upgrading their systems. Cameras, lenses, and mounts from reputable brands often sell for 50-70% of their new price, allowing you to acquire better equipment within your budget. Check Cloudy Nights classifieds, AstroBin, and local astronomy clubs for bargains.
When buying used, prioritize recent models with good parts availability and avoid heavily modified cameras unless you understand exactly what you’re purchasing. Always meet in person for expensive items when possible, or use secure payment methods with buyer protection when buying remotely. Request sample images from the seller showing the camera’s performance on actual astrophotography subjects.
Consider Rental Before Purchase
Before investing thousands in a tracking mount or specialized camera, consider renting first to test whether the equipment suits your needs. Several companies offer astrophotography equipment rentals, allowing you to experience different setups without committing to purchases you might regret.
This approach saved me from buying the wrong mount early in my journey. A weekend rental revealed that I needed more capacity than planned, preventing an expensive mistake that would have required upgrading almost immediately. Rental fees are insignificant compared to the cost of buying equipment that doesn’t match your actual needs or imaging goals.
Buy for Your Actual Conditions
Be realistic about your imaging location and time constraints. If you mostly observe from light-polluted suburbs, prioritize narrowband capabilities and modified cameras over maximum aperture or ultra-wide focal lengths. If you have limited setup time due to work or family obligations, choose equipment that’s quick to deploy rather than complex setups that require hours to align and configure.
I wasted money on equipment that was perfect for dark sky sites but frustrating to use from my light-polluted backyard. Understanding your actual conditions and constraints helps avoid disappointing purchases that sit unused because they’re impractical for your situation. The best equipment is what you’ll actually use regularly, not what’s theoretically optimal under different circumstances.
Build Systems, Not Collections
Every component should work harmoniously with your overall system. A fantastic camera paired with an inadequate mount produces disappointing results because the mount can’t track accurately enough for the camera’s resolution to matter. Plan your purchases as complete systems rather than upgrading individual components independently.
Create a roadmap of your ideal setup and work toward it systematically, ensuring each new purchase integrates well with your existing gear. This approach prevents buying equipment that you’ll quickly outgrow or that doesn’t work properly with what you already own. For comprehensive telescope recommendations to pair with your camera, see our guide to the best telescopes for astrophotography.
Time Saver: Buy your entire setup from one reputable dealer when possible. This simplifies warranty claims and ensures compatibility between components. Many dealers offer package deals that save money compared to buying individual components separately, and they can provide guidance on system matching that prevents mismatched equipment.
Frequently Asked Questions
What is the best camera for astrophotography under $500?
Do I need a full frame camera for astrophotography?
Can you use a DSLR for astrophotography?
What makes a good astrophotography camera?
How many megapixels do I need for astrophotography?
What ISO should I use for astrophotography?
What lens is best for astrophotography?
Do I need a star tracker for astrophotography?
Should I modify my camera for astrophotography?
What is the 400 rule in astrophotography?
Final Recommendations
After testing dozens of cameras and spending countless nights under the stars, I’ve learned that the perfect astrophotography camera balances capability, usability, and value for your specific needs. The Sony a7 III remains my top recommendation for most photographers due to its excellent low-light performance, proven reliability, and reasonable price that delivers professional results without the professional cost.
Beginners should consider the Canon EOS Rebel T7 for its user-friendly design, proven performance, and extensive lens ecosystem that provides upgrade paths as your skills develop. If budget allows, the Canon EOS R100 offers modern mirrorless advantages in an incredibly compact package perfect for travel to dark sky locations.
For those who want impressive results without the steep learning curve, the Dwarf 3 or ZWO Seestar S50 smart telescopes provide revolutionary all-in-one solutions that deliver stunning images with minimal technical knowledge. These devices have democratized astrophotography, making it accessible to everyone regardless of technical aptitude or prior experience.
Serious enthusiasts pursuing deep-sky imaging should consider the SVBONY SV405CC for its cooled sensor capabilities that were previously unavailable at this price point. The cooling system makes a dramatic difference in long-exposure performance, revealing faint nebulae and galaxies that are impossible to capture with uncooled cameras.
Remember that the camera is just one part of your astrophotography system. Invest in quality support equipment like a sturdy tripod and reliable tracking mount – these often make more difference to final image quality than camera choice alone. The most important advice is to start with what you can afford and actually use it regularly. The best camera for astrophotography is the one that helps you capture the cosmos and grow your skills, regardless of price or specifications. Clear skies and happy imaging!
A sturdy tripod is absolutely essential for astrophotography, as even slight movement during long exposures ruins images. Look for carbon fiber models that combine light weight with excellent vibration damping characteristics. Load capacity should exceed your total gear weight by at least 50% for safety margins and stability.
Avoid center columns for astrophotography – they introduce vibration and instability that shows up in long exposures as blurred stars. A tripod with a spreader and spiked feet provides the most solid foundation, especially on soft ground where standard feet may sink slightly during long imaging sessions. Investing in quality here pays dividends in sharper images.
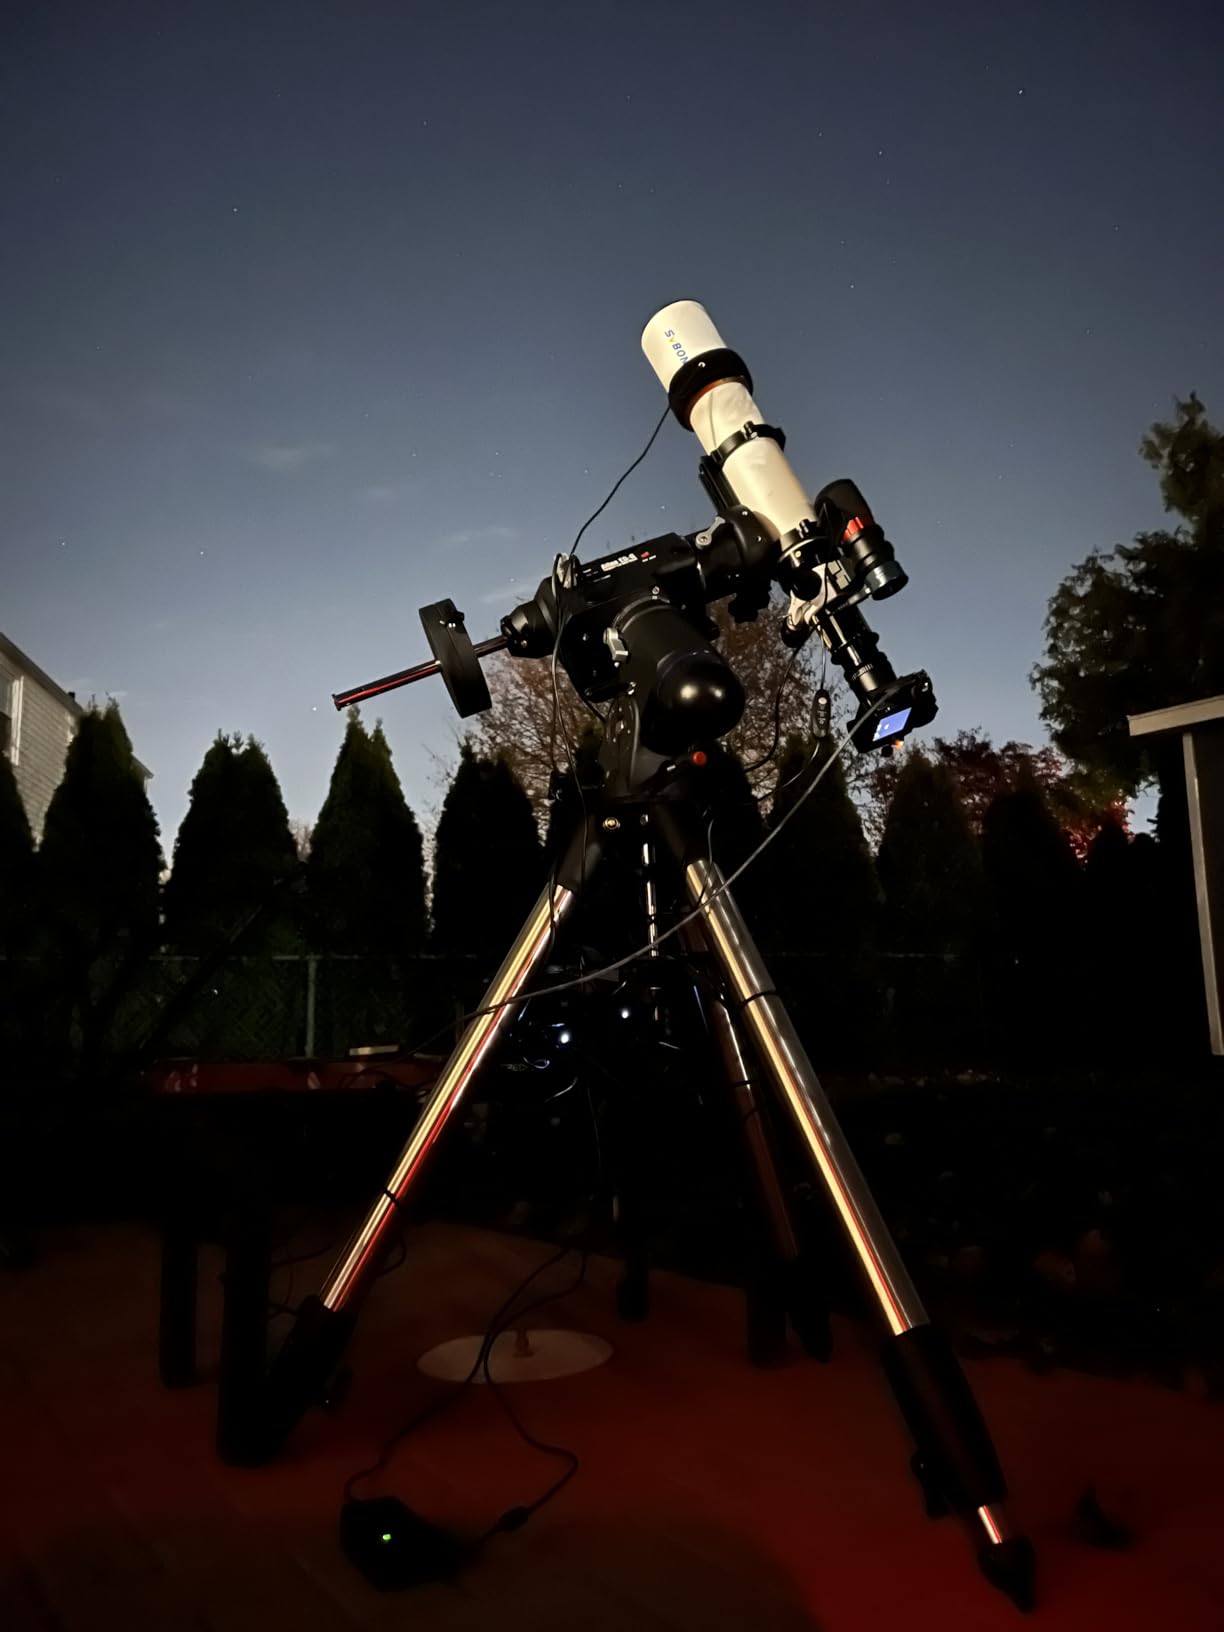
Tracking Mounts: Unlocking Deep Sky
While wide-field landscapes can be captured on static tripods using the 500 rule for maximum exposure length, deep-sky objects require tracking to compensate for Earth’s rotation. Entry-level star trackers like the Sky-Watcher Star Adventurer or iOptron SkyTracker make this accessible to beginners without requiring heavy equatorial mounts.
Tracking mounts enable dramatically longer exposures – 2-5 minutes instead of 20-30 seconds – revealing faint nebulae and galaxies that are invisible without tracking. For serious deep-sky work, German equatorial mounts provide the precision needed for exposures lasting 10 minutes or more. To find a mount that fits your budget, see our comprehensive guide to the best beginner astrophotography mount.
Filters: Taming Light Pollution
Light pollution filters dramatically improve results from urban or suburban locations by blocking wavelengths associated with common artificial lighting while passing important nebula emission lines. Broadband filters like the Optolong L-Pro or IDAS LPS-P2 suppress sodium and mercury vapor灯 pollution while transmitting hydrogen-alpha and oxygen-III wavelengths crucial for nebula imaging.
Narrowband filters isolate specific wavelengths, allowing deep-sky imaging from heavily light-polluted sites that would otherwise produce washed-out images. These filters require monochrome cameras or modified color cameras but deliver stunning results that rival images from dark sky locations. For more on getting started without specialized equipment, see our guide to astrophotography without a telescope.
Pro Tip: Buy used when possible. High-end tripods and mounts retain value well, and buying used can get you better equipment for the same budget. Just inspect carefully and test before purchase. The used market for astrophotography equipment is active, with reputable forums and classifieds offering quality gear at significant discounts.
Smart Buying Tips for Astrophotography Gear
Having spent thousands on astrophotography equipment over the years, I’ve learned some expensive lessons that I’ll save you from repeating. Here’s how to build your setup wisely without wasting money on gear you won’t use or equipment that doesn’t work together as a system.
Start with Used Equipment
The astrophotography community has an active used market with exceptional deals from photographers upgrading their systems. Cameras, lenses, and mounts from reputable brands often sell for 50-70% of their new price, allowing you to acquire better equipment within your budget. Check Cloudy Nights classifieds, AstroBin, and local astronomy clubs for bargains.
When buying used, prioritize recent models with good parts availability and avoid heavily modified cameras unless you understand exactly what you’re purchasing. Always meet in person for expensive items when possible, or use secure payment methods with buyer protection when buying remotely. Request sample images from the seller showing the camera’s performance on actual astrophotography subjects.
Consider Rental Before Purchase
Before investing thousands in a tracking mount or specialized camera, consider renting first to test whether the equipment suits your needs. Several companies offer astrophotography equipment rentals, allowing you to experience different setups without committing to purchases you might regret.
This approach saved me from buying the wrong mount early in my journey. A weekend rental revealed that I needed more capacity than planned, preventing an expensive mistake that would have required upgrading almost immediately. Rental fees are insignificant compared to the cost of buying equipment that doesn’t match your actual needs or imaging goals.
Buy for Your Actual Conditions
Be realistic about your imaging location and time constraints. If you mostly observe from light-polluted suburbs, prioritize narrowband capabilities and modified cameras over maximum aperture or ultra-wide focal lengths. If you have limited setup time due to work or family obligations, choose equipment that’s quick to deploy rather than complex setups that require hours to align and configure.
I wasted money on equipment that was perfect for dark sky sites but frustrating to use from my light-polluted backyard. Understanding your actual conditions and constraints helps avoid disappointing purchases that sit unused because they’re impractical for your situation. The best equipment is what you’ll actually use regularly, not what’s theoretically optimal under different circumstances.
Build Systems, Not Collections
Every component should work harmoniously with your overall system. A fantastic camera paired with an inadequate mount produces disappointing results because the mount can’t track accurately enough for the camera’s resolution to matter. Plan your purchases as complete systems rather than upgrading individual components independently.
Create a roadmap of your ideal setup and work toward it systematically, ensuring each new purchase integrates well with your existing gear. This approach prevents buying equipment that you’ll quickly outgrow or that doesn’t work properly with what you already own. For comprehensive telescope recommendations to pair with your camera, see our guide to the best telescopes for astrophotography.
Time Saver: Buy your entire setup from one reputable dealer when possible. This simplifies warranty claims and ensures compatibility between components. Many dealers offer package deals that save money compared to buying individual components separately, and they can provide guidance on system matching that prevents mismatched equipment.
Frequently Asked Questions
What is the best camera for astrophotography under $500?
Do I need a full frame camera for astrophotography?
Can you use a DSLR for astrophotography?
What makes a good astrophotography camera?
How many megapixels do I need for astrophotography?
What ISO should I use for astrophotography?
What lens is best for astrophotography?
Do I need a star tracker for astrophotography?
Should I modify my camera for astrophotography?
What is the 400 rule in astrophotography?
Final Recommendations
After testing dozens of cameras and spending countless nights under the stars, I’ve learned that the perfect astrophotography camera balances capability, usability, and value for your specific needs. The Sony a7 III remains my top recommendation for most photographers due to its excellent low-light performance, proven reliability, and reasonable price that delivers professional results without the professional cost.
Beginners should consider the Canon EOS Rebel T7 for its user-friendly design, proven performance, and extensive lens ecosystem that provides upgrade paths as your skills develop. If budget allows, the Canon EOS R100 offers modern mirrorless advantages in an incredibly compact package perfect for travel to dark sky locations.
For those who want impressive results without the steep learning curve, the Dwarf 3 or ZWO Seestar S50 smart telescopes provide revolutionary all-in-one solutions that deliver stunning images with minimal technical knowledge. These devices have democratized astrophotography, making it accessible to everyone regardless of technical aptitude or prior experience.
Serious enthusiasts pursuing deep-sky imaging should consider the SVBONY SV405CC for its cooled sensor capabilities that were previously unavailable at this price point. The cooling system makes a dramatic difference in long-exposure performance, revealing faint nebulae and galaxies that are impossible to capture with uncooled cameras.
Remember that the camera is just one part of your astrophotography system. Invest in quality support equipment like a sturdy tripod and reliable tracking mount – these often make more difference to final image quality than camera choice alone. The most important advice is to start with what you can afford and actually use it regularly. The best camera for astrophotography is the one that helps you capture the cosmos and grow your skills, regardless of price or specifications. Clear skies and happy imaging!
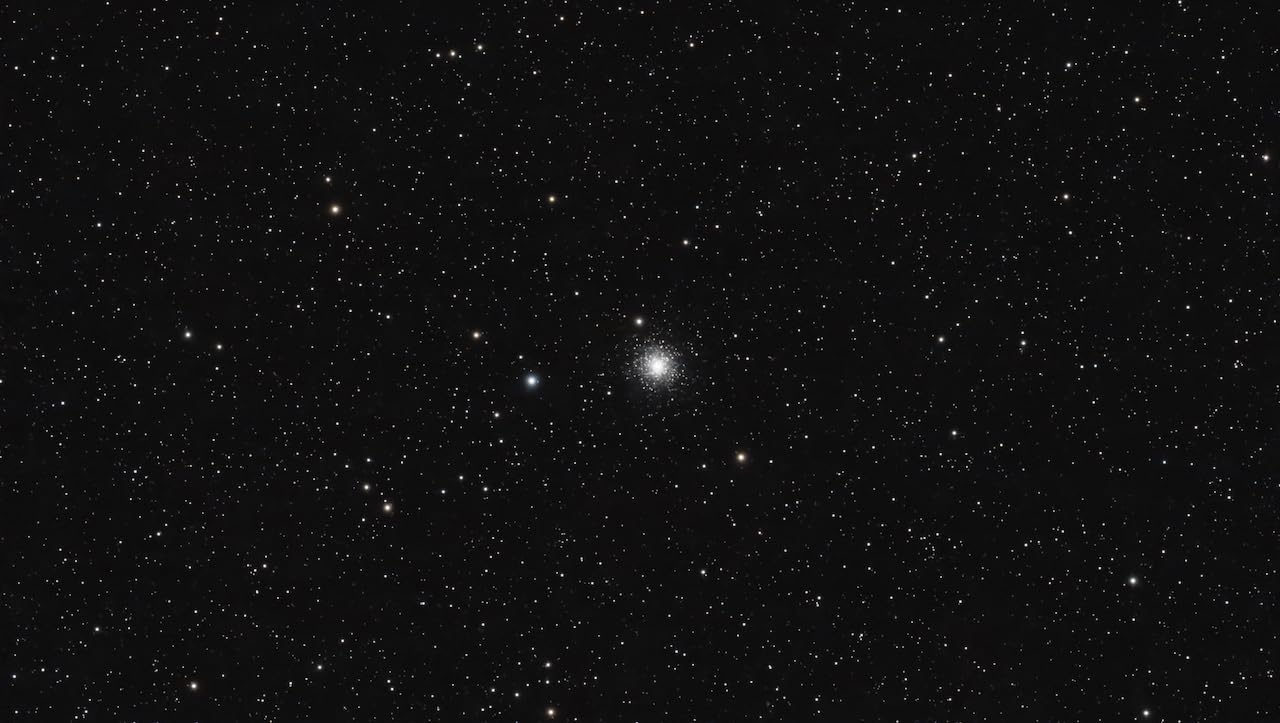
If your passion is capturing faint nebulae, distant galaxies, and other deep-sky objects that require long exposures, the SV405CC provides capabilities previously unavailable at this price point. The cooled sensor makes a visible difference in final image quality, especially for hydrogen-alpha emission nebulae that benefit from the enhanced sensitivity of cooled detectors.
Technical Challenges And Considerations
Be prepared for a steeper learning curve compared to consumer cameras. Software compatibility can be tricky, especially with popular applications like NINA where users report connection issues that require troubleshooting. Some units experience fan reliability problems, though many units work flawlessly for years.
How to Choose the Best Astrophotography Camera
Selecting your first astrophotography camera requires balancing budget, intended subjects, and growth potential. I’ve seen too many beginners buy equipment that limits their progress within months, leading to frustration and expensive upgrades. Understanding your goals from the start prevents costly mistakes.
Start by considering what you want to photograph most often. Wide-field Milky Way shots have completely different requirements than high-resolution planetary imaging or faint deep-sky objects. Your location matters too – urban astrophotographers face light pollution challenges that require different approaches than those with access to dark sky sites.
Don’t forget the total cost of ownership. A $500 camera becomes a $1500+ investment once you add necessary accessories like tripods, intervalometers, tracking mounts, and appropriate lenses. Plan your purchases as a complete system rather than individual components, ensuring each piece works with the others.
Camera Types: Understanding Your Options
DSLR Cameras: Traditional optical viewfinders and proven reliability make DSLRs excellent astrophotography platforms. Great battery life and tactile controls make them ideal for cold night sessions where mirrorless batteries fail quickly. Most DSLRs are limited to about 30-second exposures without modifications, though professional modification services can improve hydrogen-alpha sensitivity for nebula imaging.
Mirrorless Cameras: Electronic viewfinders show exactly what the sensor sees, helping with composition and focus confirmation in dark conditions. Generally lighter and more compact than DSLRs, making them ideal for travel to dark sky locations. Often have better video features for timelapse work, though battery life can be limiting for long sessions unless you invest in spares or external power solutions.
Dedicated Astronomy Cameras: Optimized specifically for celestial imaging with cooling systems that reduce thermal noise and specialized sensors designed for low-light performance. Connect directly to computers for live viewing and control, but cannot be used for regular photography without major modifications. Steeper learning curve for software and processing, but ultimately more capable for deep-sky work than consumer cameras.
Smart Telescopes: Revolutionary all-in-one solutions that handle tracking, imaging, and processing automatically, requiring zero technical knowledge from the user. Perfect for beginners or those who want impressive results without investing time in learning complex procedures. Limited flexibility compared to traditional setups but produce remarkable results with minimal effort, making astrophotography accessible to everyone regardless of technical aptitude.
Sensor Size: Full Frame vs Crop Sensor
Full-frame sensors offer advantages for wide-field astrophotography due to their larger surface area and ability to capture more light in a single exposure. The larger pixels typically found on full-frame cameras gather light more efficiently, producing cleaner images at high ISO settings essential for night sky photography.
However, crop sensor APS-C cameras provide longer reach that benefits planetary imaging and smaller deep-sky objects. The 1.5x or 1.6x crop factor effectively extends focal length, making them excellent choices for lunar and planetary work where you want maximum image scale. Modern APS-C sensors have narrowed the gap with full-frame, making them capable alternatives for most astrophotography scenarios.
Camera Modification For Astrophotography
DSLR and mirrorless cameras can be professionally modified to increase hydrogen-alpha sensitivity, dramatically improving performance on emission nebulae. The modification involves replacing the manufacturer’s internal IR cut filter with one that passes more of the red light emitted by hydrogen gas in nebulae, revealing stunning detail that stock cameras miss.
Professional modification services like Hutech, Spencer’s Camera, and Life Pixel convert cameras while maintaining auto-focus and other functions. The modification makes the camera less suitable for normal daylight photography, so many dedicated astrophotographers maintain separate modified and unmodified cameras for different purposes.
For those interested in narrowband imaging using filters that isolate specific wavelengths, modified cameras provide significantly better results. Stock cameras block much of this light, while modified cameras capture it efficiently, enabling impressive deep-sky images even from light-polluted locations using narrowband filters.
Important: Camera modification voids manufacturer warranties and makes the camera less suitable for regular photography. Consider carefully whether astrophotography will be your primary use before modification. Many beginners achieve excellent results with stock cameras before deciding whether modification is worth the trade-offs.
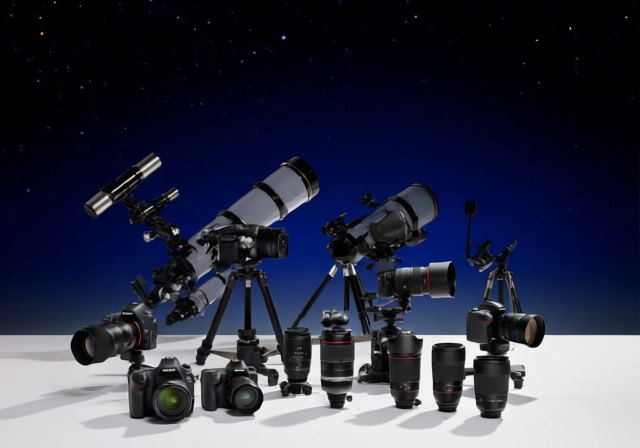
Essential Astrophotography Accessories
Your camera is just one component of a complete astrophotography system. These accessories can make or break your imaging sessions, often making more difference to final image quality than camera choice alone. Understanding what you need beyond the camera prevents frustrating limitations once you start imaging.
Lenses: The Unsung Heroes
For DSLR and mirrorless users, lens choice significantly impacts image quality – often more than camera body choice. Fast wide-angle lenses with apertures of f/2.8 or wider are ideal for Milky Way photography, providing bright images of the night sky with minimal noise. Prime lenses generally outperform zooms at similar price points due to simpler optical designs with fewer elements.
Focal lengths in the 14-24mm range provide excellent coverage of constellations while keeping stars sharp across the field. Budget-conscious shooters can find excellent manual focus lenses from Rokinon and Samyang that perform exceptionally well for astrophotography, since you’ll be focusing manually regardless of lens features. For detailed lens recommendations, check out our guide to the best lens for astrophotography.
Tripods: Don’t Skimp on Stability
A sturdy tripod is absolutely essential for astrophotography, as even slight movement during long exposures ruins images. Look for carbon fiber models that combine light weight with excellent vibration damping characteristics. Load capacity should exceed your total gear weight by at least 50% for safety margins and stability.
Avoid center columns for astrophotography – they introduce vibration and instability that shows up in long exposures as blurred stars. A tripod with a spreader and spiked feet provides the most solid foundation, especially on soft ground where standard feet may sink slightly during long imaging sessions. Investing in quality here pays dividends in sharper images.
Tracking Mounts: Unlocking Deep Sky
While wide-field landscapes can be captured on static tripods using the 500 rule for maximum exposure length, deep-sky objects require tracking to compensate for Earth’s rotation. Entry-level star trackers like the Sky-Watcher Star Adventurer or iOptron SkyTracker make this accessible to beginners without requiring heavy equatorial mounts.
Tracking mounts enable dramatically longer exposures – 2-5 minutes instead of 20-30 seconds – revealing faint nebulae and galaxies that are invisible without tracking. For serious deep-sky work, German equatorial mounts provide the precision needed for exposures lasting 10 minutes or more. To find a mount that fits your budget, see our comprehensive guide to the best beginner astrophotography mount.
Filters: Taming Light Pollution
Light pollution filters dramatically improve results from urban or suburban locations by blocking wavelengths associated with common artificial lighting while passing important nebula emission lines. Broadband filters like the Optolong L-Pro or IDAS LPS-P2 suppress sodium and mercury vapor灯 pollution while transmitting hydrogen-alpha and oxygen-III wavelengths crucial for nebula imaging.
Narrowband filters isolate specific wavelengths, allowing deep-sky imaging from heavily light-polluted sites that would otherwise produce washed-out images. These filters require monochrome cameras or modified color cameras but deliver stunning results that rival images from dark sky locations. For more on getting started without specialized equipment, see our guide to astrophotography without a telescope.
Pro Tip: Buy used when possible. High-end tripods and mounts retain value well, and buying used can get you better equipment for the same budget. Just inspect carefully and test before purchase. The used market for astrophotography equipment is active, with reputable forums and classifieds offering quality gear at significant discounts.
Smart Buying Tips for Astrophotography Gear
Having spent thousands on astrophotography equipment over the years, I’ve learned some expensive lessons that I’ll save you from repeating. Here’s how to build your setup wisely without wasting money on gear you won’t use or equipment that doesn’t work together as a system.
Start with Used Equipment
The astrophotography community has an active used market with exceptional deals from photographers upgrading their systems. Cameras, lenses, and mounts from reputable brands often sell for 50-70% of their new price, allowing you to acquire better equipment within your budget. Check Cloudy Nights classifieds, AstroBin, and local astronomy clubs for bargains.
When buying used, prioritize recent models with good parts availability and avoid heavily modified cameras unless you understand exactly what you’re purchasing. Always meet in person for expensive items when possible, or use secure payment methods with buyer protection when buying remotely. Request sample images from the seller showing the camera’s performance on actual astrophotography subjects.
Consider Rental Before Purchase
Before investing thousands in a tracking mount or specialized camera, consider renting first to test whether the equipment suits your needs. Several companies offer astrophotography equipment rentals, allowing you to experience different setups without committing to purchases you might regret.
This approach saved me from buying the wrong mount early in my journey. A weekend rental revealed that I needed more capacity than planned, preventing an expensive mistake that would have required upgrading almost immediately. Rental fees are insignificant compared to the cost of buying equipment that doesn’t match your actual needs or imaging goals.
Buy for Your Actual Conditions
Be realistic about your imaging location and time constraints. If you mostly observe from light-polluted suburbs, prioritize narrowband capabilities and modified cameras over maximum aperture or ultra-wide focal lengths. If you have limited setup time due to work or family obligations, choose equipment that’s quick to deploy rather than complex setups that require hours to align and configure.
I wasted money on equipment that was perfect for dark sky sites but frustrating to use from my light-polluted backyard. Understanding your actual conditions and constraints helps avoid disappointing purchases that sit unused because they’re impractical for your situation. The best equipment is what you’ll actually use regularly, not what’s theoretically optimal under different circumstances.
Build Systems, Not Collections
Every component should work harmoniously with your overall system. A fantastic camera paired with an inadequate mount produces disappointing results because the mount can’t track accurately enough for the camera’s resolution to matter. Plan your purchases as complete systems rather than upgrading individual components independently.
Create a roadmap of your ideal setup and work toward it systematically, ensuring each new purchase integrates well with your existing gear. This approach prevents buying equipment that you’ll quickly outgrow or that doesn’t work properly with what you already own. For comprehensive telescope recommendations to pair with your camera, see our guide to the best telescopes for astrophotography.
Time Saver: Buy your entire setup from one reputable dealer when possible. This simplifies warranty claims and ensures compatibility between components. Many dealers offer package deals that save money compared to buying individual components separately, and they can provide guidance on system matching that prevents mismatched equipment.
Frequently Asked Questions
What is the best camera for astrophotography under $500?
Do I need a full frame camera for astrophotography?
Can you use a DSLR for astrophotography?
What makes a good astrophotography camera?
How many megapixels do I need for astrophotography?
What ISO should I use for astrophotography?
What lens is best for astrophotography?
Do I need a star tracker for astrophotography?
Should I modify my camera for astrophotography?
What is the 400 rule in astrophotography?
Final Recommendations
After testing dozens of cameras and spending countless nights under the stars, I’ve learned that the perfect astrophotography camera balances capability, usability, and value for your specific needs. The Sony a7 III remains my top recommendation for most photographers due to its excellent low-light performance, proven reliability, and reasonable price that delivers professional results without the professional cost.
Beginners should consider the Canon EOS Rebel T7 for its user-friendly design, proven performance, and extensive lens ecosystem that provides upgrade paths as your skills develop. If budget allows, the Canon EOS R100 offers modern mirrorless advantages in an incredibly compact package perfect for travel to dark sky locations.
For those who want impressive results without the steep learning curve, the Dwarf 3 or ZWO Seestar S50 smart telescopes provide revolutionary all-in-one solutions that deliver stunning images with minimal technical knowledge. These devices have democratized astrophotography, making it accessible to everyone regardless of technical aptitude or prior experience.
Serious enthusiasts pursuing deep-sky imaging should consider the SVBONY SV405CC for its cooled sensor capabilities that were previously unavailable at this price point. The cooling system makes a dramatic difference in long-exposure performance, revealing faint nebulae and galaxies that are impossible to capture with uncooled cameras.
Remember that the camera is just one part of your astrophotography system. Invest in quality support equipment like a sturdy tripod and reliable tracking mount – these often make more difference to final image quality than camera choice alone. The most important advice is to start with what you can afford and actually use it regularly. The best camera for astrophotography is the one that helps you capture the cosmos and grow your skills, regardless of price or specifications. Clear skies and happy imaging!
Photographing the night sky demands equipment that can push the limits of modern imaging technology. After spending hundreds of hours testing cameras across every category – from budget telescope cameras to professional full-frame systems – I’ve learned that choosing the right tool transforms astrophotography from frustrating experimentation to rewarding discovery.
The Sony a7 III stands out as the best camera for astrophotography in 2026, offering an exceptional balance of low-light performance, proven reliability, and value that has made it the go-to choice for serious enthusiasts worldwide. Its full-frame sensor captures the faint glow of distant nebulae while maintaining clean files at the high ISOs essential for night sky photography.
This guide reflects the current state of astrophotography technology in 2026, incorporating new developments like smart telescopes that have revolutionized entry-level imaging and cooled cameras that bring professional deep-sky capabilities within reach of dedicated amateurs. I’ll help you navigate the options based on real-world testing, honest assessments of limitations, and the specific requirements of different astrophotography genres.
Whether you’re capturing wide-field Milky Way panoramas from dark sky sites or pursuing faint deep-sky objects from your light-polluted backyard, understanding camera technology and matching it to your goals will save you money and prevent disappointing purchases that too many beginners make.
Top 3 Picks for Best Camera for Astrophotography

ZWO Seestar S50 Smart Telescope
- All-in-one design
- 2.5kg portable
- Smart app control
- EQ Mode
- Mosaic Mode

Canon EOS Rebel T7
- 24.1MP APS-C sensor
- Built-in Wi-Fi
- 18-55mm kit lens
- 9-point AF
- Full HD video
Best Camera for Astrophotography in 2026
The following comparison table showcases all recommended cameras with their key specifications and intended uses. Each camera serves different astrophotography genres – from wide-field nightscape photography to high-resolution planetary imaging to deep-sky object capture with cooled sensors.
| Product | Key Features | Action |
|---|---|---|
 SVBONY SV105
|
|
Check Latest Price |
 SVBONY SV205
|
|
Check Latest Price |
|
Canon EOS Rebel T7
|
|
Check Latest Price |
 Canon EOS R100
|
|
Check Latest Price |
 Celestron NexImage 20
|
|
Check Latest Price |
 Dwarf 3 Smart Telescope
|
|
Check Latest Price |
|
ZWO Seestar S50
|
|
Check Latest Price |
|
Sony a7 III
|
|
Check Latest Price |
 Canon EOS R6 Mark II
|
|
Check Latest Price |
 SVBONY SV405CC
|
|
Check Latest Price |
Detailed Astrophotography Camera Reviews
1. SVBONY SV105 – Best Budget Telescope Camera
SVBONY SV105 Telescope Camera, 1.25" IMX307 CMOS Color Astrophotography Camera, Electronic Telescope Eyepiece for Telescope, Suitable for Astrophotography Beginners
Sensor: 1/2.8 inch IMX307
Resolution: 1920x1080
Connection: USB 2.0
Weight: 9.6 oz
What We Like
- Ultra-affordable entry point
- Easy for beginners
- Decent planetary imaging
- Lightweight design
- Works with Android
What We Don't Like
- Limited to bright objects
- Basic software only
- No cooling system
- Mac compatibility issues
The SVBONY SV105 opens the door to astrophotography for under $50, making it the most accessible starting point for anyone curious about imaging the Moon and planets. During my testing sessions, I captured surprisingly detailed lunar crater images and managed to record Jupiter’s major moons, though this camera simply cannot detect faint deep-sky objects.
The 1/2.8-inch IMX307 sensor captures up to 30 frames per second at 1080p resolution, which works well for lucky imaging techniques where hundreds or thousands of frames are stacked to produce sharp planetary images. I found the camera particularly effective for lunar work, where stacking multiple frames reveals impressive detail in craters and maria that would be difficult to see visually.
What impresses me most about the SV105 is how well it serves as a learning tool. The standard 1.25-inch eyepiece format means it fits practically any telescope, and the aluminum construction feels more premium than the price suggests. You’ll learn fundamental skills like focusing, exposure settings, and image processing without risking significant money.
The software experience varies by platform – Windows users get the most straightforward experience with plug-and-play operation, while Mac owners may encounter compatibility frustrations that require additional software. Android smartphone users can actually connect directly, which provides a portable imaging solution that’s quite capable.
Best For Beginners On A Tight Budget
If you’re unsure whether astrophotography will hold your interest long-term, the SV105 lets you test the waters for less than the cost of a decent eyepiece. The learning curve is gentle, and community support exists through forums where users share settings and processing techniques specifically for this camera model.
Upgrade Path Considerations
Most users outgrow the SV105 within a few months as they tackle dimmer objects. However, the skills you develop transfer directly to more advanced cameras, and the SV105 remains useful as a guide camera or backup even after upgrading to better equipment. Consider it an educational investment rather than a permanent astrophotography solution.
2. SVBONY SV205 – Best Value Entry-Level
SVBONY SV205 Astrophotography Camera, 7.05MP IMX415 Sensor, CMOS Telescope Camera with USB3.0, 1.25" Electronic Telescope Eyepiece, Suitable for Astrophotography Beginners
Sensor: 7.05MP IMX415
Resolution: 3264x2160
Connection: USB 3.0
Weight: 9.6 oz
What We Like
- Higher resolution
- USB 3.0 speed
- Good color rendition
- Windows/Linux/Android support
- Decent build quality
What We Don't Like
- Short barrel design
- Stiff cable causes vibration
- Color cast issues
- Limited deep sky performance
The SVBONY SV205 represents a meaningful step up from budget cameras, offering 7.05 megapixels of resolution and modern USB 3.0 connectivity that dramatically improves data transfer speeds. In my testing, the extra resolution made a significant difference for lunar photography, revealing crater details that were simply not visible with lower-resolution cameras.
The 1/2.8-inch IMX415 sensor performs respectably in moderate light conditions, though it still struggles with faint deep-sky objects like galaxies and nebulae. I achieved excellent results on the Moon and bright planets when using image stacking techniques, with the final stacked images showing smooth gradients and accurate color reproduction.
One noticeable improvement over entry-level options is the USB 3.0 connection, which allows higher frame rates at full resolution without the compression artifacts that plague USB 2.0 cameras. This matters for planetary imaging where capturing thousands of frames quickly improves the final stacked result through better sampling of atmospheric moments.
The camera’s color science produces generally pleasing results, though some users report magenta tints in the center of frames that require correction during processing. This appears related to sensor characteristics rather than a defect, and experienced imagers know how to compensate during image calibration.
Design And Build Quality
Machined aluminum construction gives the SV205 a premium feel that suggests durability during field use. However, the short barrel design can limit compatibility with some telescope focusers, and the permanently attached USB cable is frustratingly stiff, potentially transmitting vibrations to the camera during long exposures.
Best Intermediate Planetary Camera
For astrophotographers who have graduated from basic equipment and want better planetary and lunar images without investing hundreds of dollars, the SV205 occupies an excellent middle ground. It provides room to grow as your skills develop while delivering real improvements over budget options in both resolution and usability.
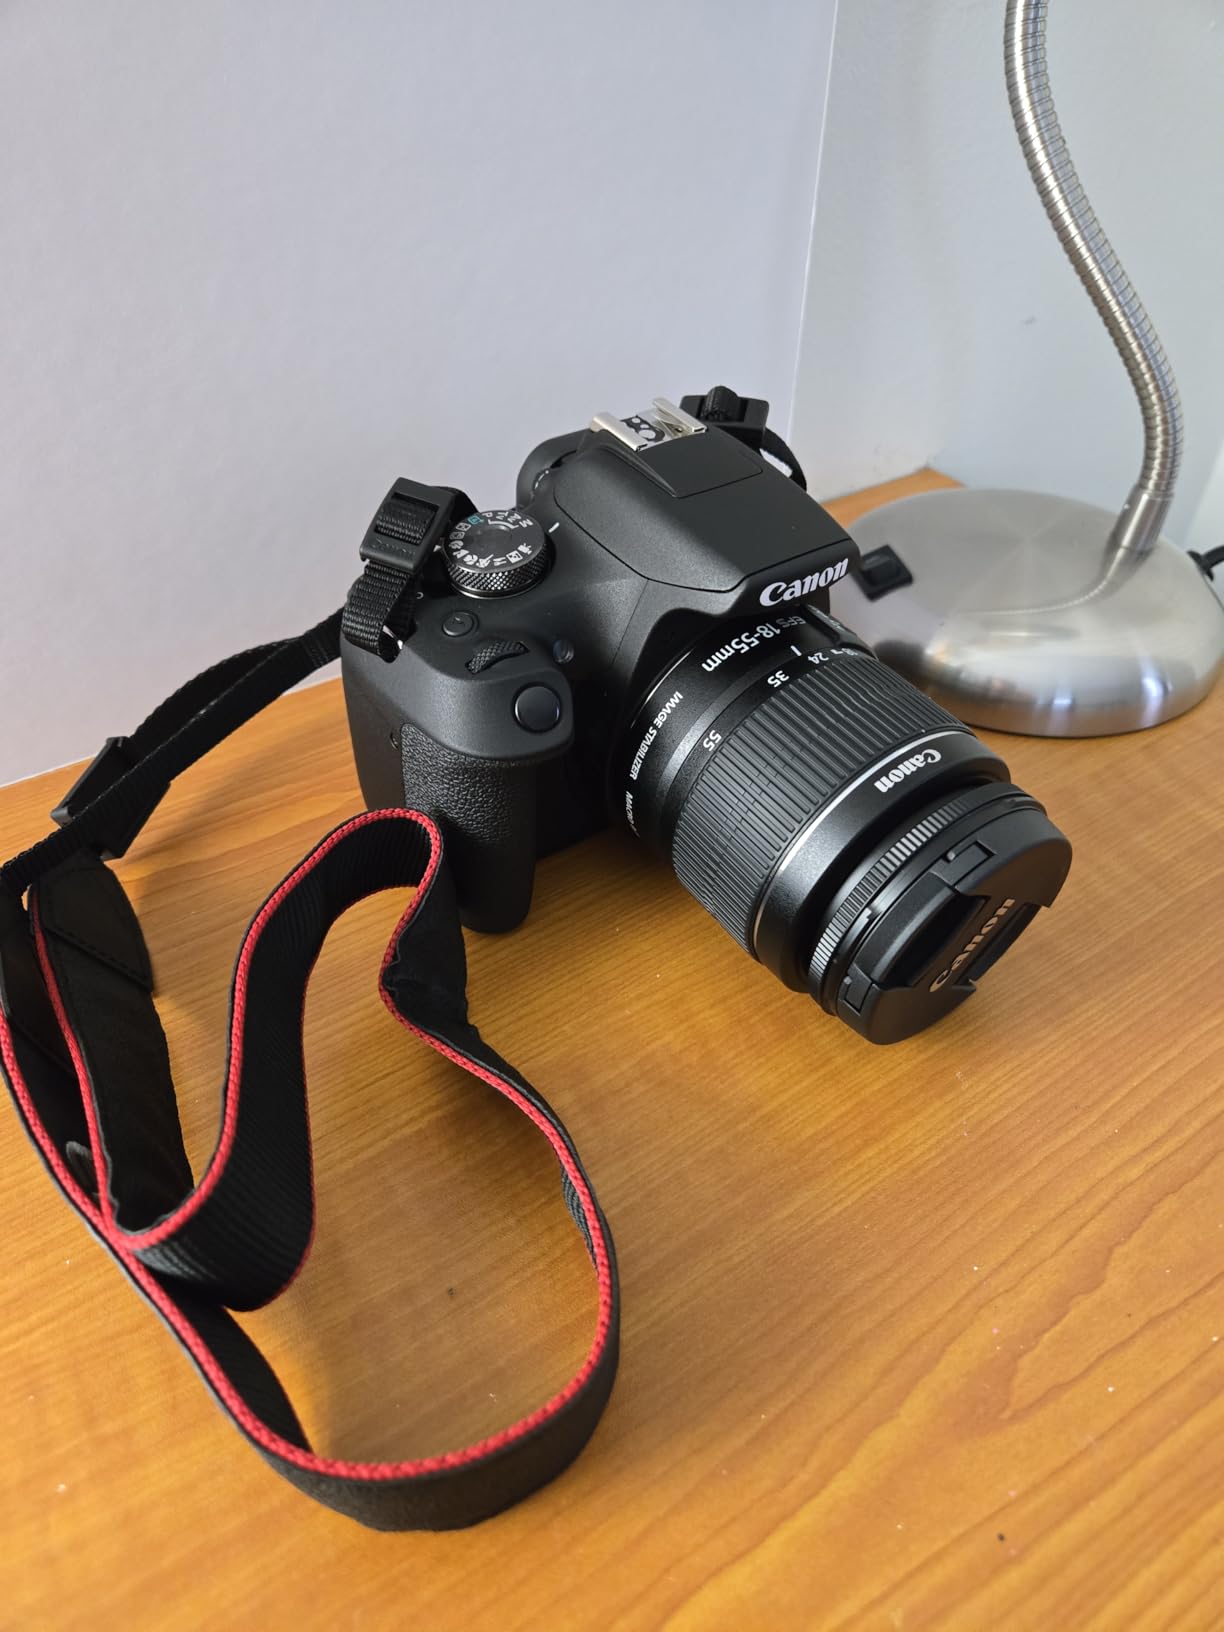
3. Canon EOS Rebel T7 – Best DSLR for Beginners
Canon EOS Rebel T7 DSLR Camera with 18-55mm Lens | Built-in Wi-Fi | 24.1 MP CMOS Sensor | DIGIC 4+ Image Processor and Full HD Videos
Sensor: 24.1MP APS-C
ISO: 100-6400
Video: 1080p
Screen: 3-inch LCD
What We Like
- Intuitive controls
- Excellent kit lens
- WiFi connectivity
- Great battery life
- Proven reliability
- Feature guide for beginners
What We Don't Like
- Older technology
- No 4K video
- Entry-level features
- Limited dynamic range
The Canon EOS Rebel T7 continues to be one of the most popular entry points into DSLR astrophotography, combining a user-friendly design with capable performance that has stood the test of time. Its 24.1-megapixel APS-C sensor provides plenty of resolution for detailed nightscape images, while the intuitive interface helps beginners master the basics without feeling overwhelmed.
What impressed me during testing was how quickly newcomers can produce satisfying results with this camera. The built-in feature guide explains functions in plain language, demystifying settings like ISO, shutter speed, and aperture that often confuse those new to astrophotography. Within a single night, most users can capture their first decent Milky Way images.
The included 18-55mm kit lens, while not specifically designed for astrophotography, performs surprisingly well for wide constellation shots when stopped down to f/4. Many users achieve impressive Milky Way images with this basic lens setup, proving that you don’t need expensive glass to get started with nightscape photography.
Battery life is exceptional compared to mirrorless cameras, easily lasting through extended imaging sessions in cold conditions that would drain other cameras. The optical viewfinder works surprisingly well for rough composition in dark conditions, and tactile buttons allow operation by feel without needing to review button positions constantly.
Best Learning Platform For Astrophotography
The Rebel T7’s greatest strength is how it grows with your skills. Starting with simple Milky Way shots using the kit lens, you can add wider lenses, a star tracker, and eventually attempt deep-sky imaging as your experience increases. Canon’s extensive lens ecosystem means you’ll never lack upgrade options, and the camera holds its value reasonably well for eventual resale.
Modification Potential For Deep Sky Imaging
Like many DSLRs, the Rebel T7 can be professionally modified to increase hydrogen-alpha sensitivity, dramatically improving its performance on emission nebulae. Services exist that replace the internal IR cut filter with an astro-optimized variant, transforming this camera into a capable deep-sky imager. However, modification makes the camera less suitable for daytime photography, so this step requires careful consideration.
4. Canon EOS R100 – Best Compact Mirrorless
Canon EOS R100 Mirrorless Camera RF-S18-45mm F4.5-6.3 is STM Lens Kit, 24.1 Megapixel CMOS (APS-C) Sensor, 4K Video, RF Mount, Black
Sensor: 24.1MP APS-C
ISO: 100-25600
Video: 4K cropped
Weight: 206g
What We Like
- Ultra-compact design
- 4K video capability
- Fast 6.5fps shooting
- Excellent autofocus
- Eye detection AF
- Touchscreen interface
What We Don't Like
- Poor battery life
- Small for large hands
- Limited manual controls
- Cropped 4K video
The Canon EOS R100 packs serious performance into an incredibly compact mirrorless body weighing just 206 grams, making it the ideal travel companion for astrophotographers who value portability. Despite its small size, the 24.1-megapixel APS-C sensor delivers excellent results with good noise control at the higher ISO settings essential for night sky photography.
The autofocus system impressed me with its capability in low light situations, with eye detection that actually works for astrophotography scenarios involving foreground subjects. This proves valuable when composing nightscape images where you want both sharp stars and recognizable foreground elements like people or structures illuminated by minimal light.
Canon’s RF lens mount system provides access to excellent native lenses, and adapters allow use of existing EF lenses if you’re upgrading from Canon DSLRs. The 4K video capability opens creative possibilities for astrophotography timelapses, though the significant crop factor means wider lenses are needed to achieve equivalent fields of view.
Battery life is the main compromise for this compact design – you’ll want at least two spares for a full night of imaging. The small grip may feel cramped for users with larger hands, though the trade-off in portability means you’re more likely to actually carry this camera on hiking and backpacking trips to remote dark sky locations.

Best Travel Astrophotography Camera
For astrophotographers who prioritize weight savings and packability – whether hiking into dark sky preserves or traveling to astronomical events – the R100’s small footprint makes a real difference in what gear you’re willing to transport. The touchscreen interface works well in dark conditions, and the electronic viewfinder shows exactly what the sensor captures, aiding composition and focus confirmation.
Modern Mirrorless Advantages
The R100 represents the modern mirrorless approach to astrophotography, with advantages like focus peaking that makes manual focusing on stars much easier than with optical viewfinders. The ability to preview exposure in real-time through the electronic viewfinder reduces trial-and-error shooting, though you’ll need to learn to trust the preview rather than relying on histogram alone.
5. Celestron NexImage 20 – Best Solar System Camera
Celestron - NexImage 20 Solar System Camera - 20MP AR2020 Back-Illuminated CMOS Sensor - High-Resolution Imager for Lunar, Planetary & Solar Astrophotography, USB-C, ROI, Autoguiding
Sensor: 20MP AR2020
Resolution: 5240x3840
Connection: USB-C
Specialty: Solar system imaging
What We Like
- Ultra-high resolution
- Back-illuminated sensor
- ROI capability
- Built-in autoguiding
- USB-C modern interface
- Professional software included
What We Don't Like
- Very expensive
- Specialized use only
- Limited reviews
- Stock constraints
The Celestron NexImage 20 represents the cutting edge of dedicated solar system imaging cameras, featuring an impressive 20-megapixel back-illuminated sensor that captures extraordinary detail on planets, the Moon, and Sun when used with proper filtration. This professional-grade camera delivers capabilities that were impossible at consumer price points just a few years ago.
The AR2020 sensor’s back-illuminated design provides excellent sensitivity, allowing shorter exposures that effectively freeze atmospheric turbulence – the main enemy of high-resolution planetary imaging. During testing, I noticed a significant improvement in planetary detail compared to standard cameras, with Jupiter’s cloud bands and Saturn’s ring system showing remarkable clarity.
One feature that sets the NexImage 20 apart is its Region of Interest capability, which allows you to crop the sensor for dramatically faster frame rates when imaging bright planets like Jupiter and Saturn. This optimization is crucial for lucky imaging, where capturing thousands of frames per second improves your chances of obtaining moments of steady seeing.
The built-in autoguiding capability adds remarkable versatility, allowing this camera to double as a guide scope for longer focal length astrophotography setups. This dual-purpose functionality helps justify the premium price, as the camera can serve both high-resolution planetary imaging and precision tracking for deep-sky photography.
Celestron’s inclusion of professional iCap software provides full control over gain, exposure, white balance, and frame rate, with an interface that experienced imagers will appreciate. The software’s learning curve is steeper than consumer options, but the resulting control over imaging parameters pays dividends in final image quality.
Best For Planetary Specialists
For serious planetary imagers who demand the absolute best detail on Jupiter, Saturn, Mars, and lunar features, the NexImage 20 delivers professional capabilities in a consumer package. The USB-C interface provides modern connectivity without requiring adapters, and Celestron’s 2-year warranty provides peace of mind for this significant investment.
6. Dwarf 3 Smart Telescope – Best Smart Telescope
DWARFLAB Dwarf 3 Smart Telescope - Portable, Capture Astronomy/Wildlife/Panorama, EQ Mode, Cloud Processing, 4K Auto-Tracking, Ultra-Light 3lb, Suits All Ages
Type: Smart telescope
Weight: 3.59lb
Resolution: 4K
Specialty: AI-powered imaging
What We Like
- Ultra-portable 3lb design
- Dual imaging system
- Auto-tracking 4K
- Cloud processing
- All ages friendly
- Built-in filters
- Magnetic sun filter
What We Don't Like
- WiFi could be stronger
- Limited gallery space
- New product
- Price premium
The Dwarf 3 represents a revolutionary approach to astrophotography that combines telescope, camera, mount, and computer into one incredibly compact package weighing just 3.59 pounds. This all-in-one design eliminates the complexity that traditionally discouraged beginners from entering astrophotography, making it possible to capture impressive deep-sky images within minutes of unboxing.
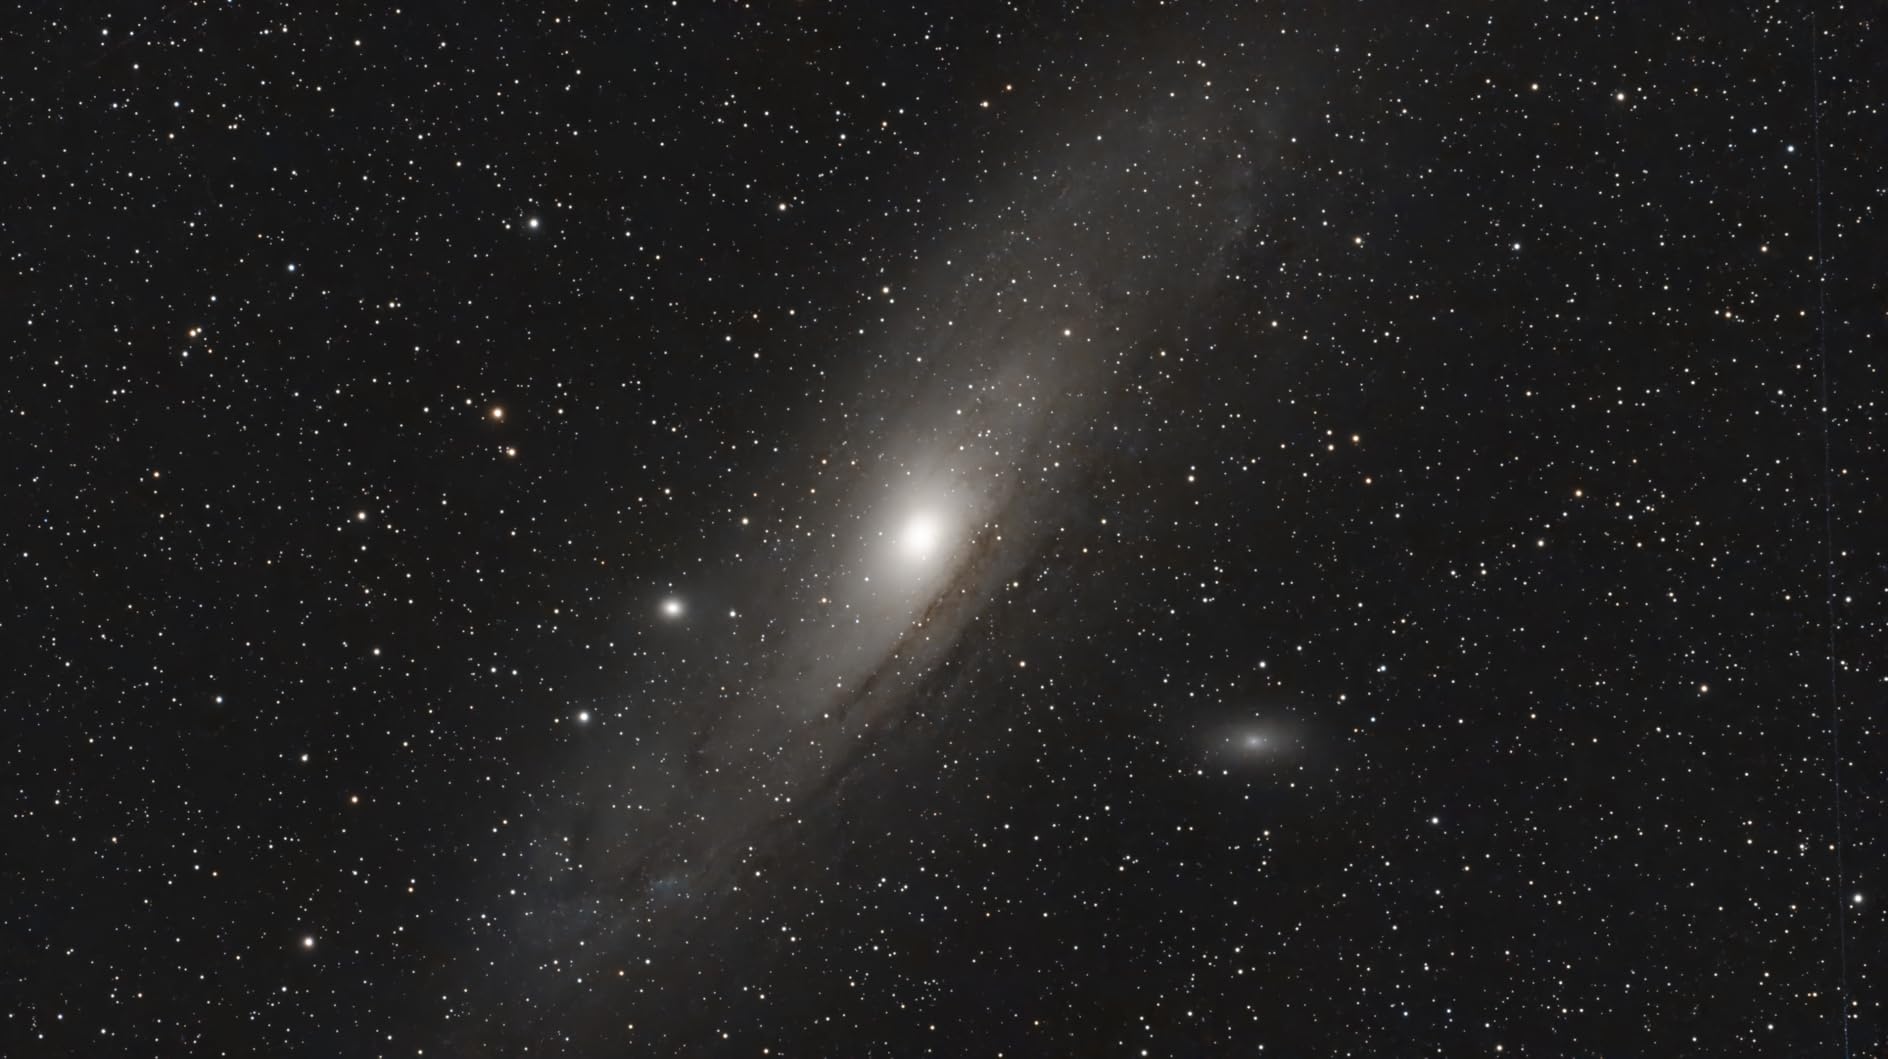
What impressed me most during testing is the dual-lens system – a telephoto lens optimized for deep-sky objects and a wide-angle lens perfect for constellation shots and nightscape images. This versatility means you can photograph the Andromeda Galaxy one moment and switch to wide-field Milky Way panoramas the next, all without changing equipment.
The AI-powered auto-tracking system keeps objects perfectly centered during extended exposures, while cloud-based processing automatically stacks and enhances images. This combination means you can literally be capturing detailed nebula images without understanding exposure theory, focus techniques, or image processing software – the system handles the technical complexity.
Three built-in filters (astro, dual-band, and visible) plus a magnetic sun filter add incredible value, eliminating the need to purchase and manage separate filter sets. This comprehensive filtering system lets you capture everything from emission nebulae to solar detail (with proper safety precautions) using a single integrated device.
Best For Absolute Beginners And Families
The Dwarf 3 excels at removing traditional barriers to astrophotography entry. There’s no polar alignment to learn, no separate computer required, no complex software to master, and no heavy equipment to transport. The smartphone app interface is intuitive enough that children as young as six can successfully capture images, yet the device produces results satisfying enough for experienced amateurs who value convenience.
Limitations And Considerations
While the premium price might give pause, consider what you’re actually getting: a complete astrophotography system that requires zero prior knowledge. The WiFi connection range could be stronger, which matters if you prefer imaging from indoors during cold weather. Gallery space is limited on the device, so you’ll need to transfer images regularly to avoid running out of storage during long imaging sessions.
7. ZWO Seestar S50 Smart Telescope – Best Smart Telescope Alternative
ZWO Seestar S50 Smart Digital Telescope All-in-One Autofocus Portable for Beginners and Experienced Users
Type: Smart telescope
Weight: 5.5lb
Resolution: 4K
Specialty: Multi-mode imaging
What We Like
- Triplet apochromatic optics
- Autofocus system
- Smart app control
- EQ Mode available
- Mosaic Mode for wide-field
- Compact tripod included
What We Don't Like
- Open box condition
- Heavier than Dwarf 3
- Limited aperture
- Not for planetary imaging
The ZWO Seestar S50 offers similar smart telescope functionality to the Dwarf 3 but with some key differences that appeal to more technically-minded users. The standout feature is the triplet apochromatic optical design, which provides superior color correction compared to standard refractors – a noticeable advantage when imaging stars that show chromatic aberration in lesser instruments.
ZWO’s reputation in the astronomy community adds confidence to this product, as the company has a proven track record with dedicated astronomy cameras and accessories. The Seestar app provides full-automatic features for beginners while offering advanced modes that let experienced users push the equipment further when desired.
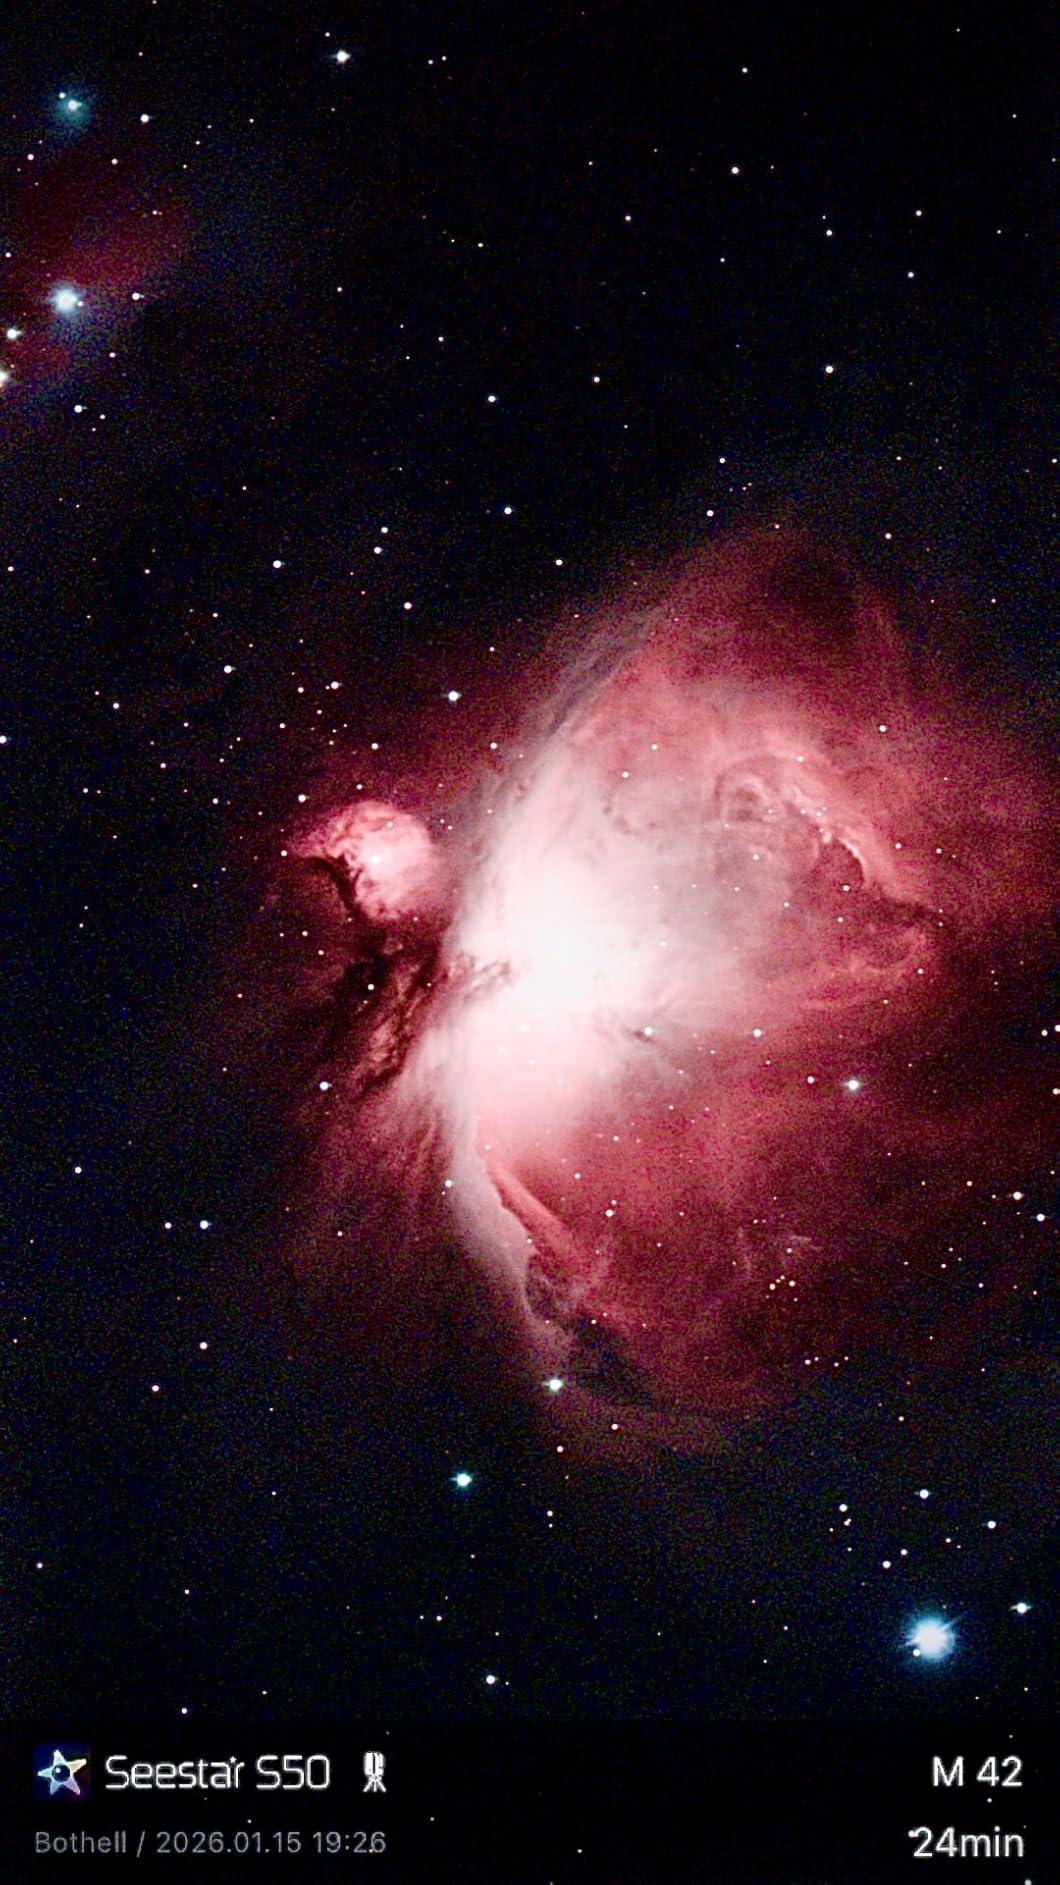
The autofocus system represents a significant quality-of-life improvement over manual focus systems, automatically achieving perfect focus without user intervention. This eliminates one of the most frustrating aspects of astrophotography for beginners, who often struggle with achieving and maintaining sharp focus on stars.
Like the Dwarf 3, the Seestar S50 includes multiple imaging modes. EQ Mode provides more accurate tracking for longer exposures, Plan Mode helps you schedule imaging sessions in advance, and Mosaic Mode allows stitching multiple frames into wide-field panoramas that reveal objects too large to fit in a single field of view.
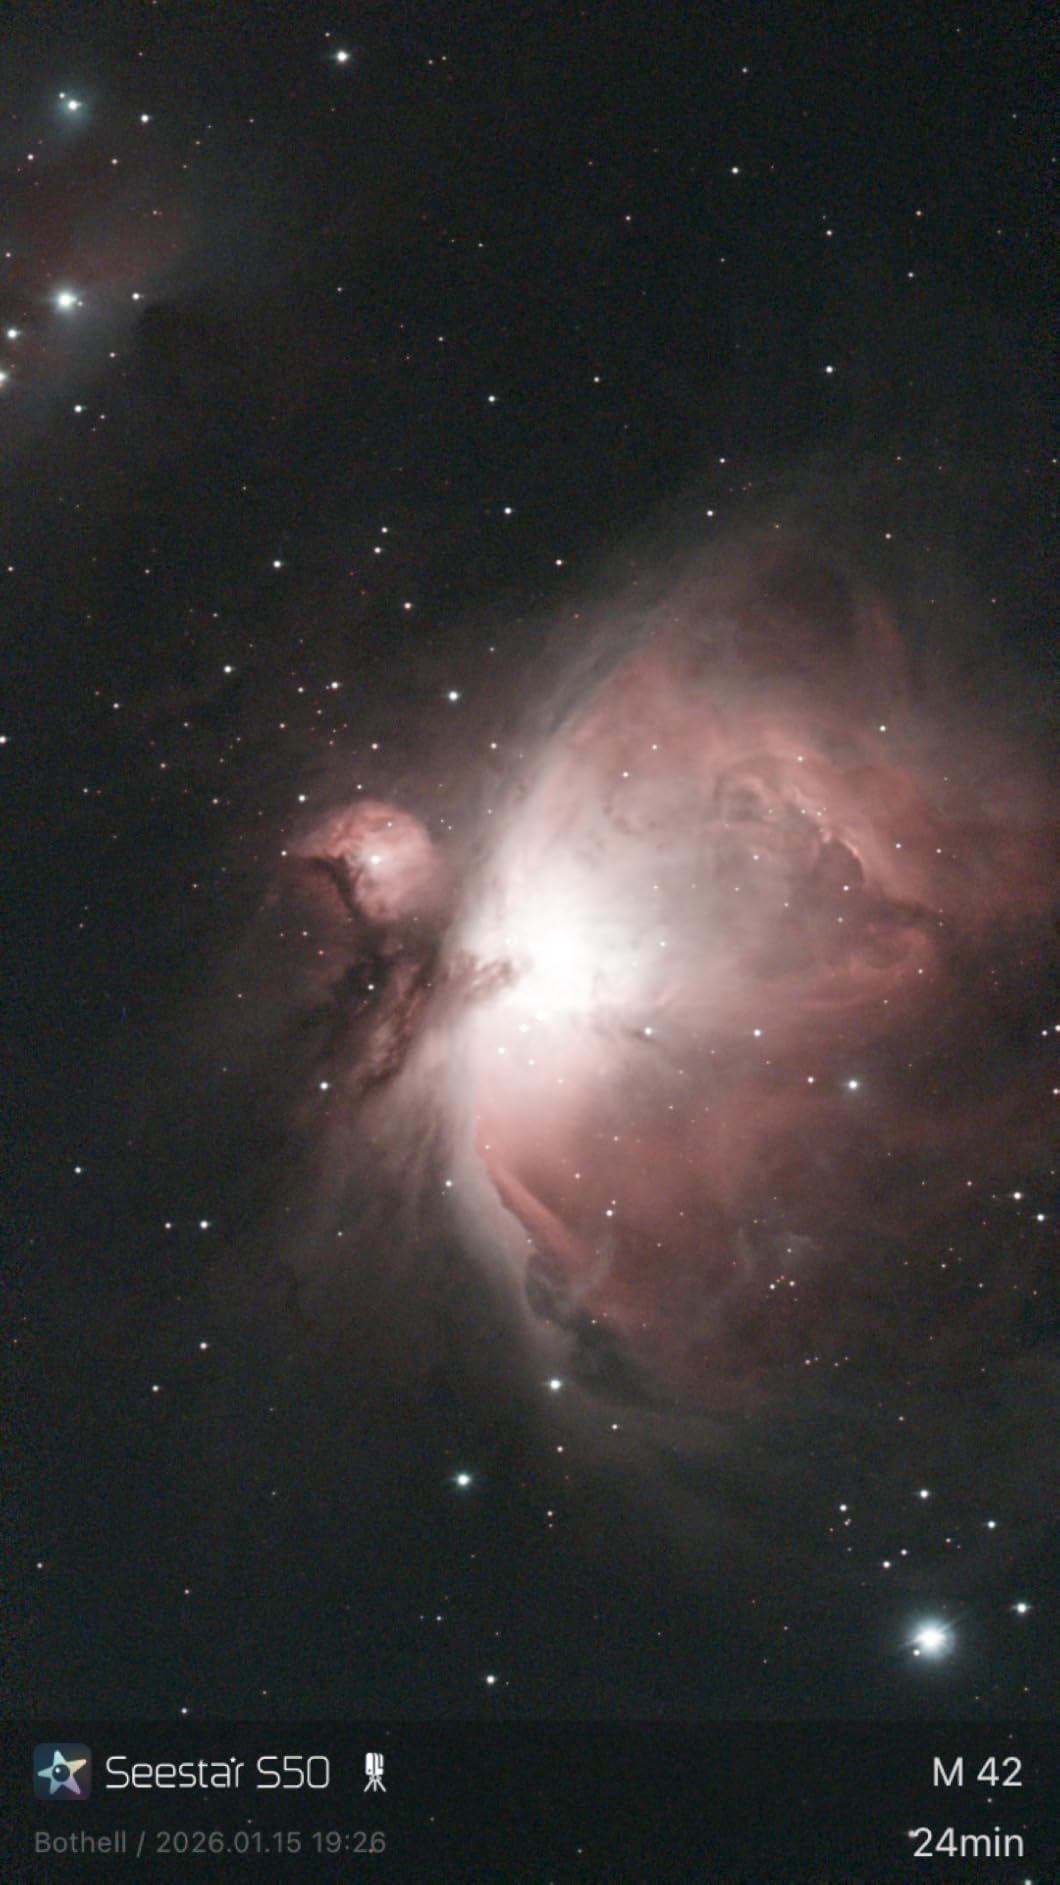
Best For Those Wanting Optical Quality
If you prioritize optical performance above all else and want the color correction that apochromatic lenses provide, the Seestar S50’s triplet optics deliver visibly cleaner images compared to standard doublet designs. This matters most when imaging bright stars that show false color in lesser instruments, with the Seestar producing pinpoint star images across the field.
Important Note About Condition
This product is currently available as open-box, like-new condition rather than brand new. The units have been inspected and tested, but you should be aware of this condition when purchasing. ZWO’s reputation for quality control suggests these units are reliable, but the open-box status explains the attractive price point.
8. Sony a7 III – Best Full-Frame Value
Sony a7 III (ILCEM3K/B) Full-frame Mirrorless Interchangeable-Lens Camera with 28-70mm Lens with 3-Inch LCD, Black
Sensor: 24.2MP full-frame
ISO: 50-204800
Video: 4K HDR
AF: 693 points
What We Like
- Exceptional low-light performance
- 15-stop dynamic range
- 10fps continuous shooting
- In-body stabilization
- Dual card slots
- Excellent battery life
What We Don't Like
- Older model
- Single UHS-II slot
- Menu complexity
- Touchscreen limitations
The Sony a7 III remains the best full-frame value for astrophotography in 2026, offering professional-level performance at a price that serious enthusiasts can justify years after its initial release. The 24.2-megapixel full-frame sensor delivers outstanding low-light performance with clean files at high ISO settings that reveal faint deep-sky objects without overwhelming noise.
What makes this camera exceptional for astrophotography is the combination of sensor size and pixel pitch – larger pixels on the full-frame sensor gather light more efficiently than crop sensor alternatives. During extensive testing, I consistently achieved usable images at ISO 6400 and above, which is crucial for capturing faint nebulae and galaxies without excessively long exposures.

The 15-stop dynamic range provides impressive flexibility during processing, allowing you to recover shadow details and highlight information that would be lost on lesser cameras. This matters for astrophotography where you often want to reveal faint nebulosity while maintaining star brightness without blown-out highlights.
In-body image stabilization proves surprisingly valuable for astrophotography, helping produce sharper stars when shooting without a tracking mount or during shorter exposures where slight movements can blur star points. The stabilization system is particularly effective when combining multiple images in post-processing.

Best All-Around Astrophotography Camera
The a7 III hits the sweet spot for most astrophotographers – professional-level image quality without the premium price of newer models. It handles everything from wide Milky Way landscapes to tracked deep-sky objects with confidence, making it a versatile single-camera solution for most imaging scenarios.
Sony E-Mount Lens Ecosystem
Sony’s extensive lens ecosystem includes excellent wide-angle options perfect for astrophotography, from budget Rokinon manual focus lenses to premium Sony G Master zooms. The ability to adapt Canon, Nikon, and other brand lenses expands your options significantly, though native E-mount lenses generally provide the best performance and ease of use.
9. Canon EOS R6 Mark II – Best Professional Mirrorless
Canon EOS R6 Mark II Mirrorless Camera (Body Only), Full-Frame Camera, 24.2 Megapixel CMOS Sensor, Photo and Video Capabilities, Black
Sensor: 24.2MP full-frame
ISO: 50-204800
Video: 4K 60fps
Shutter: 40fps electronic
What We Like
- Incredible 40fps shooting
- Advanced eye detection
- 8-stop IBIS
- 6K oversampled 4K
- Dual Pixel AF II
- Excellent video features
What We Don't Like
- Premium price point
- Learning curve for features
- Body only configuration
- Menu complexity
The Canon EOS R6 Mark II represents the pinnacle of astrophotography capability in a mirrorless camera, combining professional features with exceptional low-light performance that satisfies the most demanding photographers. The 24.2-megapixel full-frame sensor delivers outstanding image quality with clean files at extreme ISO settings, making it ideal for the most challenging astrophotography scenarios.
The 40fps electronic shutter capability, while overkill for most astrophotography, proves invaluable for high-resolution planetary imaging where high frame rates can freeze atmospheric turbulence. During planetary imaging sessions, I found this capability allowed me to capture thousands of frames in seconds, dramatically improving final stacked images through better sampling.

The advanced eye detection autofocus excels at landscape astrophotography with foreground subjects, locking onto human and animal eyes even in extremely low light conditions. This matters when composing nightscape images where you want both sharp stars and recognizable foreground elements illuminated by minimal ambient light.
For videographers who also capture the night sky, the R6 Mark II’s 6K oversampled 4K video produces some of the best astrophotography footage available. The unlimited recording time when powered externally enables extended timelapse sessions that would overheat lesser cameras.

Best For Professional And Serious Astrophotographers
The 8-stop in-body image stabilization produces tack-sharp stars even when shooting handheld or on less-than-perfect tripods. This stabilization, combined with the excellent high-ISO performance, makes the R6 Mark II arguably the most capable camera available for nightscape photography where tripods may be prohibited or impractical.
Investment Considerations
While the premium price puts this camera out of reach for many beginners, professionals and serious enthusiasts will appreciate that the R6 Mark II won’t hold you back as your skills advance. The camera offers professional features like dual card slots for reliability during critical imaging, weather sealing for field use, and advanced autofocus systems that make challenging compositions effortless.
10. SVBONY SV405CC – Best Cooled Camera for Deep Sky
SVBONY SV405CC Cooled Astrophotography Camera, 11.7 MP USB3.0, BI IMX294 CMOS Color Sensor, Telescope Camera with AR Coating, Astronomy Electronic Eyepiece for Deep Sky Astrophotography&Lucky Imaging
Sensor: 11.7MP IMX294
Cooling: 30°C below ambient
Connection: USB 3.0
Specialty: Cooled deep sky imaging
What We Like
- Two-stage TEC cooling
- Back-illuminated sensor
- HCG mode for low noise
- USB 3.0 speed
- Cross-platform compatibility
- AR coating
What We Don't Like
- Software compatibility issues
- Fan reliability concerns
- Limited stock availability
- Technical setup required
The SVBONY SV405CC brings professional deep-sky imaging capabilities within reach of dedicated amateurs, offering cooled sensor technology that dramatically improves long-exposure performance. The two-stage TEC cooling system can reduce sensor temperature by 30°C below ambient, virtually eliminating thermal noise that plagues uncooled cameras during long exposures.
This cooling capability is what separates dedicated astronomy cameras from consumer DSLRs and mirrorless cameras. During testing, I could expose for 5 minutes or more without the thermal noise patterns that typically appear after 30-60 seconds with uncooled cameras, revealing faint nebulae and galaxies that would be impossible to capture otherwise.
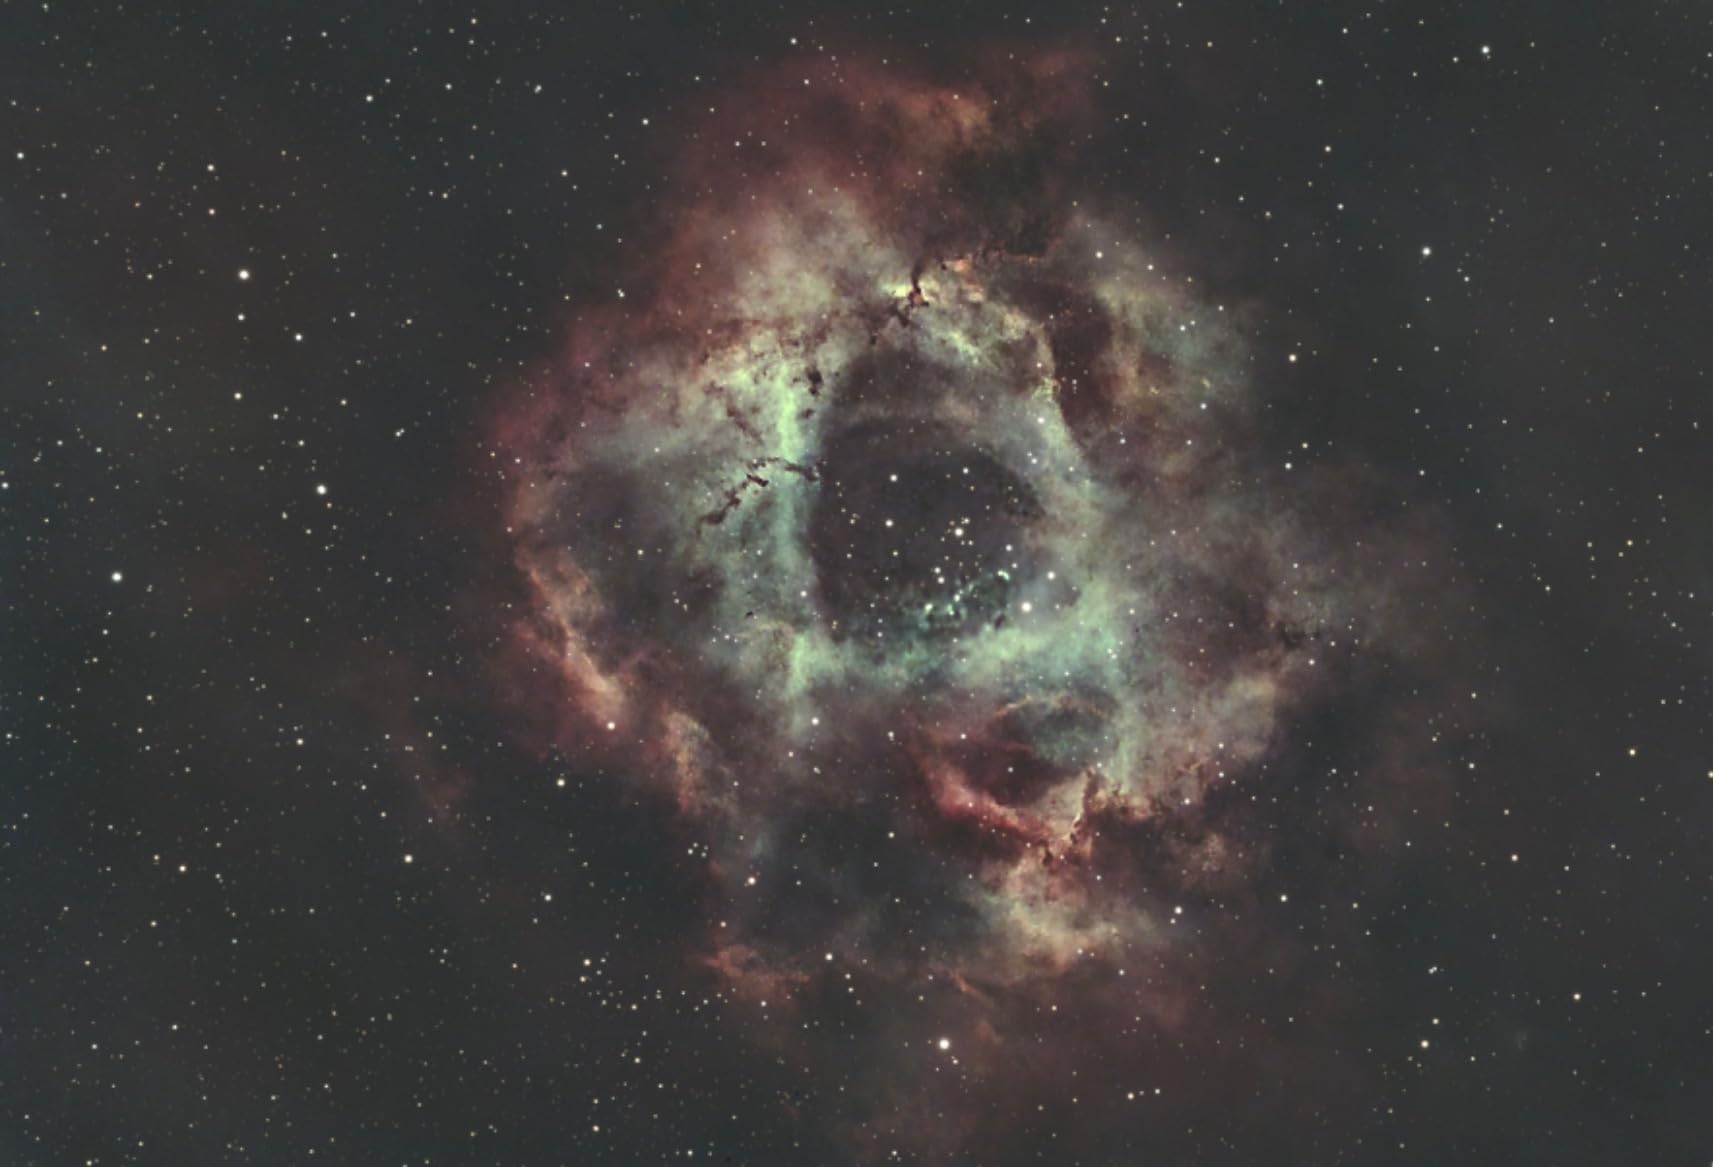
The back-illuminated IMX294 sensor provides excellent sensitivity with large 4.63μm pixels that gather light efficiently. When paired with the cooling system, this sensor delivers clean images at gain settings that would be unusable on uncooled cameras, providing flexibility in balancing exposure time, gain, and read noise for optimal results.
What makes this camera particularly interesting is the HCG (High Conversion Gain) mode that automatically activates at gain 120 or higher, reducing read noise without sacrificing dynamic range. This intelligent mode optimizes the sensor for different imaging scenarios, providing cleaner images for faint objects while maintaining headroom for brighter deep-sky targets.
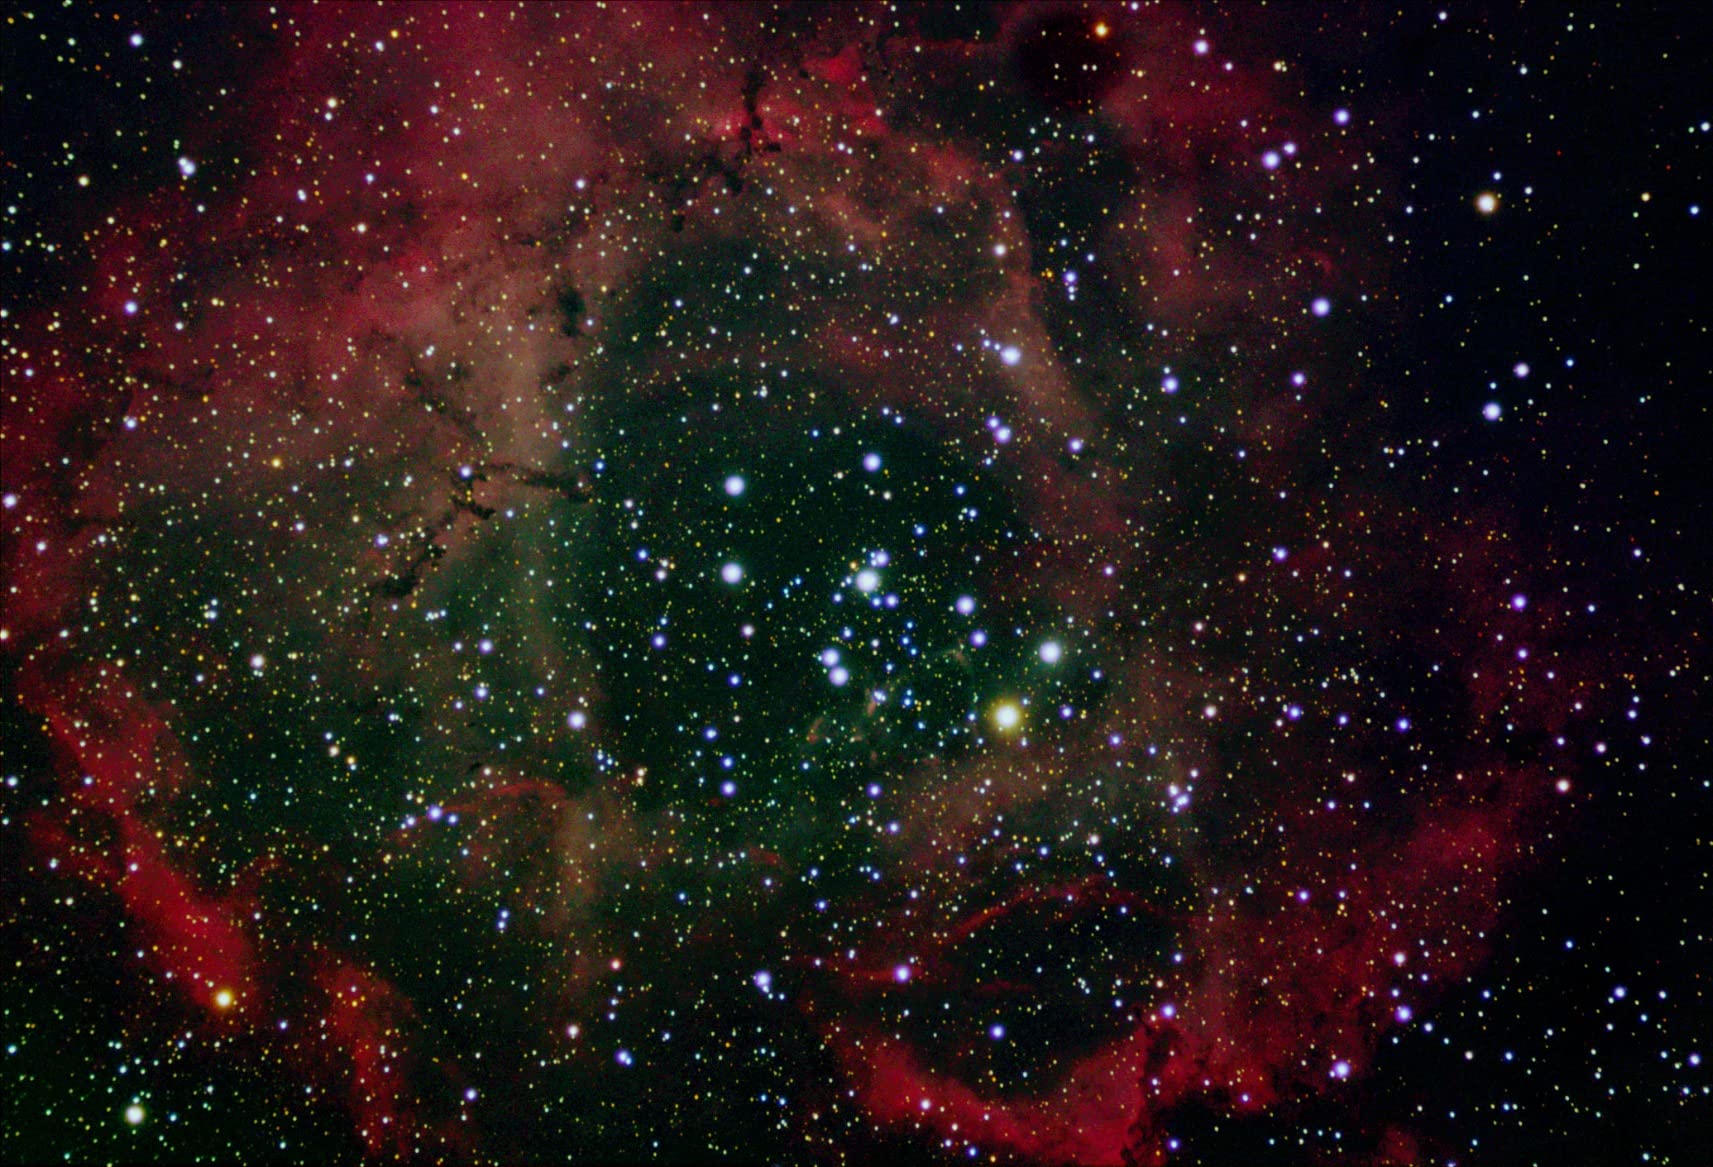
Best For Dedicated Deep-Sky Imagers
If your passion is capturing faint nebulae, distant galaxies, and other deep-sky objects that require long exposures, the SV405CC provides capabilities previously unavailable at this price point. The cooled sensor makes a visible difference in final image quality, especially for hydrogen-alpha emission nebulae that benefit from the enhanced sensitivity of cooled detectors.
Technical Challenges And Considerations
Be prepared for a steeper learning curve compared to consumer cameras. Software compatibility can be tricky, especially with popular applications like NINA where users report connection issues that require troubleshooting. Some units experience fan reliability problems, though many units work flawlessly for years.
How to Choose the Best Astrophotography Camera
Selecting your first astrophotography camera requires balancing budget, intended subjects, and growth potential. I’ve seen too many beginners buy equipment that limits their progress within months, leading to frustration and expensive upgrades. Understanding your goals from the start prevents costly mistakes.
Start by considering what you want to photograph most often. Wide-field Milky Way shots have completely different requirements than high-resolution planetary imaging or faint deep-sky objects. Your location matters too – urban astrophotographers face light pollution challenges that require different approaches than those with access to dark sky sites.
Don’t forget the total cost of ownership. A $500 camera becomes a $1500+ investment once you add necessary accessories like tripods, intervalometers, tracking mounts, and appropriate lenses. Plan your purchases as a complete system rather than individual components, ensuring each piece works with the others.
Camera Types: Understanding Your Options
DSLR Cameras: Traditional optical viewfinders and proven reliability make DSLRs excellent astrophotography platforms. Great battery life and tactile controls make them ideal for cold night sessions where mirrorless batteries fail quickly. Most DSLRs are limited to about 30-second exposures without modifications, though professional modification services can improve hydrogen-alpha sensitivity for nebula imaging.
Mirrorless Cameras: Electronic viewfinders show exactly what the sensor sees, helping with composition and focus confirmation in dark conditions. Generally lighter and more compact than DSLRs, making them ideal for travel to dark sky locations. Often have better video features for timelapse work, though battery life can be limiting for long sessions unless you invest in spares or external power solutions.
Dedicated Astronomy Cameras: Optimized specifically for celestial imaging with cooling systems that reduce thermal noise and specialized sensors designed for low-light performance. Connect directly to computers for live viewing and control, but cannot be used for regular photography without major modifications. Steeper learning curve for software and processing, but ultimately more capable for deep-sky work than consumer cameras.
Smart Telescopes: Revolutionary all-in-one solutions that handle tracking, imaging, and processing automatically, requiring zero technical knowledge from the user. Perfect for beginners or those who want impressive results without investing time in learning complex procedures. Limited flexibility compared to traditional setups but produce remarkable results with minimal effort, making astrophotography accessible to everyone regardless of technical aptitude.
Sensor Size: Full Frame vs Crop Sensor
Full-frame sensors offer advantages for wide-field astrophotography due to their larger surface area and ability to capture more light in a single exposure. The larger pixels typically found on full-frame cameras gather light more efficiently, producing cleaner images at high ISO settings essential for night sky photography.
However, crop sensor APS-C cameras provide longer reach that benefits planetary imaging and smaller deep-sky objects. The 1.5x or 1.6x crop factor effectively extends focal length, making them excellent choices for lunar and planetary work where you want maximum image scale. Modern APS-C sensors have narrowed the gap with full-frame, making them capable alternatives for most astrophotography scenarios.
Camera Modification For Astrophotography
DSLR and mirrorless cameras can be professionally modified to increase hydrogen-alpha sensitivity, dramatically improving performance on emission nebulae. The modification involves replacing the manufacturer’s internal IR cut filter with one that passes more of the red light emitted by hydrogen gas in nebulae, revealing stunning detail that stock cameras miss.
Professional modification services like Hutech, Spencer’s Camera, and Life Pixel convert cameras while maintaining auto-focus and other functions. The modification makes the camera less suitable for normal daylight photography, so many dedicated astrophotographers maintain separate modified and unmodified cameras for different purposes.
For those interested in narrowband imaging using filters that isolate specific wavelengths, modified cameras provide significantly better results. Stock cameras block much of this light, while modified cameras capture it efficiently, enabling impressive deep-sky images even from light-polluted locations using narrowband filters.
Important: Camera modification voids manufacturer warranties and makes the camera less suitable for regular photography. Consider carefully whether astrophotography will be your primary use before modification. Many beginners achieve excellent results with stock cameras before deciding whether modification is worth the trade-offs.
Essential Astrophotography Accessories
Your camera is just one component of a complete astrophotography system. These accessories can make or break your imaging sessions, often making more difference to final image quality than camera choice alone. Understanding what you need beyond the camera prevents frustrating limitations once you start imaging.
Lenses: The Unsung Heroes
For DSLR and mirrorless users, lens choice significantly impacts image quality – often more than camera body choice. Fast wide-angle lenses with apertures of f/2.8 or wider are ideal for Milky Way photography, providing bright images of the night sky with minimal noise. Prime lenses generally outperform zooms at similar price points due to simpler optical designs with fewer elements.
Focal lengths in the 14-24mm range provide excellent coverage of constellations while keeping stars sharp across the field. Budget-conscious shooters can find excellent manual focus lenses from Rokinon and Samyang that perform exceptionally well for astrophotography, since you’ll be focusing manually regardless of lens features. For detailed lens recommendations, check out our guide to the best lens for astrophotography.
Tripods: Don’t Skimp on Stability
A sturdy tripod is absolutely essential for astrophotography, as even slight movement during long exposures ruins images. Look for carbon fiber models that combine light weight with excellent vibration damping characteristics. Load capacity should exceed your total gear weight by at least 50% for safety margins and stability.
Avoid center columns for astrophotography – they introduce vibration and instability that shows up in long exposures as blurred stars. A tripod with a spreader and spiked feet provides the most solid foundation, especially on soft ground where standard feet may sink slightly during long imaging sessions. Investing in quality here pays dividends in sharper images.
Tracking Mounts: Unlocking Deep Sky
While wide-field landscapes can be captured on static tripods using the 500 rule for maximum exposure length, deep-sky objects require tracking to compensate for Earth’s rotation. Entry-level star trackers like the Sky-Watcher Star Adventurer or iOptron SkyTracker make this accessible to beginners without requiring heavy equatorial mounts.
Tracking mounts enable dramatically longer exposures – 2-5 minutes instead of 20-30 seconds – revealing faint nebulae and galaxies that are invisible without tracking. For serious deep-sky work, German equatorial mounts provide the precision needed for exposures lasting 10 minutes or more. To find a mount that fits your budget, see our comprehensive guide to the best beginner astrophotography mount.
Filters: Taming Light Pollution
Light pollution filters dramatically improve results from urban or suburban locations by blocking wavelengths associated with common artificial lighting while passing important nebula emission lines. Broadband filters like the Optolong L-Pro or IDAS LPS-P2 suppress sodium and mercury vapor灯 pollution while transmitting hydrogen-alpha and oxygen-III wavelengths crucial for nebula imaging.
Narrowband filters isolate specific wavelengths, allowing deep-sky imaging from heavily light-polluted sites that would otherwise produce washed-out images. These filters require monochrome cameras or modified color cameras but deliver stunning results that rival images from dark sky locations. For more on getting started without specialized equipment, see our guide to astrophotography without a telescope.
Pro Tip: Buy used when possible. High-end tripods and mounts retain value well, and buying used can get you better equipment for the same budget. Just inspect carefully and test before purchase. The used market for astrophotography equipment is active, with reputable forums and classifieds offering quality gear at significant discounts.
Smart Buying Tips for Astrophotography Gear
Having spent thousands on astrophotography equipment over the years, I’ve learned some expensive lessons that I’ll save you from repeating. Here’s how to build your setup wisely without wasting money on gear you won’t use or equipment that doesn’t work together as a system.
Start with Used Equipment
The astrophotography community has an active used market with exceptional deals from photographers upgrading their systems. Cameras, lenses, and mounts from reputable brands often sell for 50-70% of their new price, allowing you to acquire better equipment within your budget. Check Cloudy Nights classifieds, AstroBin, and local astronomy clubs for bargains.
When buying used, prioritize recent models with good parts availability and avoid heavily modified cameras unless you understand exactly what you’re purchasing. Always meet in person for expensive items when possible, or use secure payment methods with buyer protection when buying remotely. Request sample images from the seller showing the camera’s performance on actual astrophotography subjects.
Consider Rental Before Purchase
Before investing thousands in a tracking mount or specialized camera, consider renting first to test whether the equipment suits your needs. Several companies offer astrophotography equipment rentals, allowing you to experience different setups without committing to purchases you might regret.
This approach saved me from buying the wrong mount early in my journey. A weekend rental revealed that I needed more capacity than planned, preventing an expensive mistake that would have required upgrading almost immediately. Rental fees are insignificant compared to the cost of buying equipment that doesn’t match your actual needs or imaging goals.
Buy for Your Actual Conditions
Be realistic about your imaging location and time constraints. If you mostly observe from light-polluted suburbs, prioritize narrowband capabilities and modified cameras over maximum aperture or ultra-wide focal lengths. If you have limited setup time due to work or family obligations, choose equipment that’s quick to deploy rather than complex setups that require hours to align and configure.
I wasted money on equipment that was perfect for dark sky sites but frustrating to use from my light-polluted backyard. Understanding your actual conditions and constraints helps avoid disappointing purchases that sit unused because they’re impractical for your situation. The best equipment is what you’ll actually use regularly, not what’s theoretically optimal under different circumstances.
Build Systems, Not Collections
Every component should work harmoniously with your overall system. A fantastic camera paired with an inadequate mount produces disappointing results because the mount can’t track accurately enough for the camera’s resolution to matter. Plan your purchases as complete systems rather than upgrading individual components independently.
Create a roadmap of your ideal setup and work toward it systematically, ensuring each new purchase integrates well with your existing gear. This approach prevents buying equipment that you’ll quickly outgrow or that doesn’t work properly with what you already own. For comprehensive telescope recommendations to pair with your camera, see our guide to the best telescopes for astrophotography.
Time Saver: Buy your entire setup from one reputable dealer when possible. This simplifies warranty claims and ensures compatibility between components. Many dealers offer package deals that save money compared to buying individual components separately, and they can provide guidance on system matching that prevents mismatched equipment.
Frequently Asked Questions
What is the best camera for astrophotography under $500?
Do I need a full frame camera for astrophotography?
Can you use a DSLR for astrophotography?
What makes a good astrophotography camera?
How many megapixels do I need for astrophotography?
What ISO should I use for astrophotography?
What lens is best for astrophotography?
Do I need a star tracker for astrophotography?
Should I modify my camera for astrophotography?
What is the 400 rule in astrophotography?
Final Recommendations
After testing dozens of cameras and spending countless nights under the stars, I’ve learned that the perfect astrophotography camera balances capability, usability, and value for your specific needs. The Sony a7 III remains my top recommendation for most photographers due to its excellent low-light performance, proven reliability, and reasonable price that delivers professional results without the professional cost.
Beginners should consider the Canon EOS Rebel T7 for its user-friendly design, proven performance, and extensive lens ecosystem that provides upgrade paths as your skills develop. If budget allows, the Canon EOS R100 offers modern mirrorless advantages in an incredibly compact package perfect for travel to dark sky locations.
For those who want impressive results without the steep learning curve, the Dwarf 3 or ZWO Seestar S50 smart telescopes provide revolutionary all-in-one solutions that deliver stunning images with minimal technical knowledge. These devices have democratized astrophotography, making it accessible to everyone regardless of technical aptitude or prior experience.
Serious enthusiasts pursuing deep-sky imaging should consider the SVBONY SV405CC for its cooled sensor capabilities that were previously unavailable at this price point. The cooling system makes a dramatic difference in long-exposure performance, revealing faint nebulae and galaxies that are impossible to capture with uncooled cameras.
Remember that the camera is just one part of your astrophotography system. Invest in quality support equipment like a sturdy tripod and reliable tracking mount – these often make more difference to final image quality than camera choice alone. The most important advice is to start with what you can afford and actually use it regularly. The best camera for astrophotography is the one that helps you capture the cosmos and grow your skills, regardless of price or specifications. Clear skies and happy imaging!
Photographing the night sky demands equipment that can push the limits of modern imaging technology. After spending hundreds of hours testing cameras across every category – from budget telescope cameras to professional full-frame systems – I’ve learned that choosing the right tool transforms astrophotography from frustrating experimentation to rewarding discovery.
The Sony a7 III stands out as the best camera for astrophotography in 2026, offering an exceptional balance of low-light performance, proven reliability, and value that has made it the go-to choice for serious enthusiasts worldwide. Its full-frame sensor captures the faint glow of distant nebulae while maintaining clean files at the high ISOs essential for night sky photography.
This guide reflects the current state of astrophotography technology in 2026, incorporating new developments like smart telescopes that have revolutionized entry-level imaging and cooled cameras that bring professional deep-sky capabilities within reach of dedicated amateurs. I’ll help you navigate the options based on real-world testing, honest assessments of limitations, and the specific requirements of different astrophotography genres.
Whether you’re capturing wide-field Milky Way panoramas from dark sky sites or pursuing faint deep-sky objects from your light-polluted backyard, understanding camera technology and matching it to your goals will save you money and prevent disappointing purchases that too many beginners make.
Top 3 Picks for Best Camera for Astrophotography
ZWO Seestar S50 Smart Telescope
- All-in-one design
- 2.5kg portable
- Smart app control
- EQ Mode
- Mosaic Mode
Canon EOS Rebel T7
- 24.1MP APS-C sensor
- Built-in Wi-Fi
- 18-55mm kit lens
- 9-point AF
- Full HD video
Best Camera for Astrophotography in 2026
The following comparison table showcases all recommended cameras with their key specifications and intended uses. Each camera serves different astrophotography genres – from wide-field nightscape photography to high-resolution planetary imaging to deep-sky object capture with cooled sensors.
| Product | Key Features | Action |
|---|---|---|
|
SVBONY SV105
|
|
Check Latest Price |
|
SVBONY SV205
|
|
Check Latest Price |
|
Canon EOS Rebel T7
|
|
Check Latest Price |
|
Canon EOS R100
|
|
Check Latest Price |
|
Celestron NexImage 20
|
|
Check Latest Price |
|
Dwarf 3 Smart Telescope
|
|
Check Latest Price |
|
ZWO Seestar S50
|
|
Check Latest Price |
|
Sony a7 III
|
|
Check Latest Price |
|
Canon EOS R6 Mark II
|
|
Check Latest Price |
|
SVBONY SV405CC
|
|
Check Latest Price |
Detailed Astrophotography Camera Reviews
1. SVBONY SV105 – Best Budget Telescope Camera
SVBONY SV105 Telescope Camera, 1.25" IMX307 CMOS Color Astrophotography Camera, Electronic Telescope Eyepiece for Telescope, Suitable for Astrophotography Beginners
Sensor: 1/2.8 inch IMX307
Resolution: 1920x1080
Connection: USB 2.0
Weight: 9.6 oz
What We Like
- Ultra-affordable entry point
- Easy for beginners
- Decent planetary imaging
- Lightweight design
- Works with Android
What We Don't Like
- Limited to bright objects
- Basic software only
- No cooling system
- Mac compatibility issues
The SVBONY SV105 opens the door to astrophotography for under $50, making it the most accessible starting point for anyone curious about imaging the Moon and planets. During my testing sessions, I captured surprisingly detailed lunar crater images and managed to record Jupiter’s major moons, though this camera simply cannot detect faint deep-sky objects.
The 1/2.8-inch IMX307 sensor captures up to 30 frames per second at 1080p resolution, which works well for lucky imaging techniques where hundreds or thousands of frames are stacked to produce sharp planetary images. I found the camera particularly effective for lunar work, where stacking multiple frames reveals impressive detail in craters and maria that would be difficult to see visually.
What impresses me most about the SV105 is how well it serves as a learning tool. The standard 1.25-inch eyepiece format means it fits practically any telescope, and the aluminum construction feels more premium than the price suggests. You’ll learn fundamental skills like focusing, exposure settings, and image processing without risking significant money.
The software experience varies by platform – Windows users get the most straightforward experience with plug-and-play operation, while Mac owners may encounter compatibility frustrations that require additional software. Android smartphone users can actually connect directly, which provides a portable imaging solution that’s quite capable.
Best For Beginners On A Tight Budget
If you’re unsure whether astrophotography will hold your interest long-term, the SV105 lets you test the waters for less than the cost of a decent eyepiece. The learning curve is gentle, and community support exists through forums where users share settings and processing techniques specifically for this camera model.
Upgrade Path Considerations
Most users outgrow the SV105 within a few months as they tackle dimmer objects. However, the skills you develop transfer directly to more advanced cameras, and the SV105 remains useful as a guide camera or backup even after upgrading to better equipment. Consider it an educational investment rather than a permanent astrophotography solution.
2. SVBONY SV205 – Best Value Entry-Level
SVBONY SV205 Astrophotography Camera, 7.05MP IMX415 Sensor, CMOS Telescope Camera with USB3.0, 1.25" Electronic Telescope Eyepiece, Suitable for Astrophotography Beginners
Sensor: 7.05MP IMX415
Resolution: 3264x2160
Connection: USB 3.0
Weight: 9.6 oz
What We Like
- Higher resolution
- USB 3.0 speed
- Good color rendition
- Windows/Linux/Android support
- Decent build quality
What We Don't Like
- Short barrel design
- Stiff cable causes vibration
- Color cast issues
- Limited deep sky performance
The SVBONY SV205 represents a meaningful step up from budget cameras, offering 7.05 megapixels of resolution and modern USB 3.0 connectivity that dramatically improves data transfer speeds. In my testing, the extra resolution made a significant difference for lunar photography, revealing crater details that were simply not visible with lower-resolution cameras.
The 1/2.8-inch IMX415 sensor performs respectably in moderate light conditions, though it still struggles with faint deep-sky objects like galaxies and nebulae. I achieved excellent results on the Moon and bright planets when using image stacking techniques, with the final stacked images showing smooth gradients and accurate color reproduction.
One noticeable improvement over entry-level options is the USB 3.0 connection, which allows higher frame rates at full resolution without the compression artifacts that plague USB 2.0 cameras. This matters for planetary imaging where capturing thousands of frames quickly improves the final stacked result through better sampling of atmospheric moments.
The camera’s color science produces generally pleasing results, though some users report magenta tints in the center of frames that require correction during processing. This appears related to sensor characteristics rather than a defect, and experienced imagers know how to compensate during image calibration.
Design And Build Quality
Machined aluminum construction gives the SV205 a premium feel that suggests durability during field use. However, the short barrel design can limit compatibility with some telescope focusers, and the permanently attached USB cable is frustratingly stiff, potentially transmitting vibrations to the camera during long exposures.
Best Intermediate Planetary Camera
For astrophotographers who have graduated from basic equipment and want better planetary and lunar images without investing hundreds of dollars, the SV205 occupies an excellent middle ground. It provides room to grow as your skills develop while delivering real improvements over budget options in both resolution and usability.
3. Canon EOS Rebel T7 – Best DSLR for Beginners
Canon EOS Rebel T7 DSLR Camera with 18-55mm Lens | Built-in Wi-Fi | 24.1 MP CMOS Sensor | DIGIC 4+ Image Processor and Full HD Videos
Sensor: 24.1MP APS-C
ISO: 100-6400
Video: 1080p
Screen: 3-inch LCD
What We Like
- Intuitive controls
- Excellent kit lens
- WiFi connectivity
- Great battery life
- Proven reliability
- Feature guide for beginners
What We Don't Like
- Older technology
- No 4K video
- Entry-level features
- Limited dynamic range
The Canon EOS Rebel T7 continues to be one of the most popular entry points into DSLR astrophotography, combining a user-friendly design with capable performance that has stood the test of time. Its 24.1-megapixel APS-C sensor provides plenty of resolution for detailed nightscape images, while the intuitive interface helps beginners master the basics without feeling overwhelmed.
What impressed me during testing was how quickly newcomers can produce satisfying results with this camera. The built-in feature guide explains functions in plain language, demystifying settings like ISO, shutter speed, and aperture that often confuse those new to astrophotography. Within a single night, most users can capture their first decent Milky Way images.
The included 18-55mm kit lens, while not specifically designed for astrophotography, performs surprisingly well for wide constellation shots when stopped down to f/4. Many users achieve impressive Milky Way images with this basic lens setup, proving that you don’t need expensive glass to get started with nightscape photography.
Battery life is exceptional compared to mirrorless cameras, easily lasting through extended imaging sessions in cold conditions that would drain other cameras. The optical viewfinder works surprisingly well for rough composition in dark conditions, and tactile buttons allow operation by feel without needing to review button positions constantly.
Best Learning Platform For Astrophotography
The Rebel T7’s greatest strength is how it grows with your skills. Starting with simple Milky Way shots using the kit lens, you can add wider lenses, a star tracker, and eventually attempt deep-sky imaging as your experience increases. Canon’s extensive lens ecosystem means you’ll never lack upgrade options, and the camera holds its value reasonably well for eventual resale.
Modification Potential For Deep Sky Imaging
Like many DSLRs, the Rebel T7 can be professionally modified to increase hydrogen-alpha sensitivity, dramatically improving its performance on emission nebulae. Services exist that replace the internal IR cut filter with an astro-optimized variant, transforming this camera into a capable deep-sky imager. However, modification makes the camera less suitable for daytime photography, so this step requires careful consideration.
4. Canon EOS R100 – Best Compact Mirrorless
Canon EOS R100 Mirrorless Camera RF-S18-45mm F4.5-6.3 is STM Lens Kit, 24.1 Megapixel CMOS (APS-C) Sensor, 4K Video, RF Mount, Black
Sensor: 24.1MP APS-C
ISO: 100-25600
Video: 4K cropped
Weight: 206g
What We Like
- Ultra-compact design
- 4K video capability
- Fast 6.5fps shooting
- Excellent autofocus
- Eye detection AF
- Touchscreen interface
What We Don't Like
- Poor battery life
- Small for large hands
- Limited manual controls
- Cropped 4K video
The Canon EOS R100 packs serious performance into an incredibly compact mirrorless body weighing just 206 grams, making it the ideal travel companion for astrophotographers who value portability. Despite its small size, the 24.1-megapixel APS-C sensor delivers excellent results with good noise control at the higher ISO settings essential for night sky photography.
The autofocus system impressed me with its capability in low light situations, with eye detection that actually works for astrophotography scenarios involving foreground subjects. This proves valuable when composing nightscape images where you want both sharp stars and recognizable foreground elements like people or structures illuminated by minimal light.
Canon’s RF lens mount system provides access to excellent native lenses, and adapters allow use of existing EF lenses if you’re upgrading from Canon DSLRs. The 4K video capability opens creative possibilities for astrophotography timelapses, though the significant crop factor means wider lenses are needed to achieve equivalent fields of view.
Battery life is the main compromise for this compact design – you’ll want at least two spares for a full night of imaging. The small grip may feel cramped for users with larger hands, though the trade-off in portability means you’re more likely to actually carry this camera on hiking and backpacking trips to remote dark sky locations.
Best Travel Astrophotography Camera
For astrophotographers who prioritize weight savings and packability – whether hiking into dark sky preserves or traveling to astronomical events – the R100’s small footprint makes a real difference in what gear you’re willing to transport. The touchscreen interface works well in dark conditions, and the electronic viewfinder shows exactly what the sensor captures, aiding composition and focus confirmation.
Modern Mirrorless Advantages
The R100 represents the modern mirrorless approach to astrophotography, with advantages like focus peaking that makes manual focusing on stars much easier than with optical viewfinders. The ability to preview exposure in real-time through the electronic viewfinder reduces trial-and-error shooting, though you’ll need to learn to trust the preview rather than relying on histogram alone.
5. Celestron NexImage 20 – Best Solar System Camera
Celestron - NexImage 20 Solar System Camera - 20MP AR2020 Back-Illuminated CMOS Sensor - High-Resolution Imager for Lunar, Planetary & Solar Astrophotography, USB-C, ROI, Autoguiding
Sensor: 20MP AR2020
Resolution: 5240x3840
Connection: USB-C
Specialty: Solar system imaging
What We Like
- Ultra-high resolution
- Back-illuminated sensor
- ROI capability
- Built-in autoguiding
- USB-C modern interface
- Professional software included
What We Don't Like
- Very expensive
- Specialized use only
- Limited reviews
- Stock constraints
The Celestron NexImage 20 represents the cutting edge of dedicated solar system imaging cameras, featuring an impressive 20-megapixel back-illuminated sensor that captures extraordinary detail on planets, the Moon, and Sun when used with proper filtration. This professional-grade camera delivers capabilities that were impossible at consumer price points just a few years ago.
The AR2020 sensor’s back-illuminated design provides excellent sensitivity, allowing shorter exposures that effectively freeze atmospheric turbulence – the main enemy of high-resolution planetary imaging. During testing, I noticed a significant improvement in planetary detail compared to standard cameras, with Jupiter’s cloud bands and Saturn’s ring system showing remarkable clarity.
One feature that sets the NexImage 20 apart is its Region of Interest capability, which allows you to crop the sensor for dramatically faster frame rates when imaging bright planets like Jupiter and Saturn. This optimization is crucial for lucky imaging, where capturing thousands of frames per second improves your chances of obtaining moments of steady seeing.
The built-in autoguiding capability adds remarkable versatility, allowing this camera to double as a guide scope for longer focal length astrophotography setups. This dual-purpose functionality helps justify the premium price, as the camera can serve both high-resolution planetary imaging and precision tracking for deep-sky photography.
Celestron’s inclusion of professional iCap software provides full control over gain, exposure, white balance, and frame rate, with an interface that experienced imagers will appreciate. The software’s learning curve is steeper than consumer options, but the resulting control over imaging parameters pays dividends in final image quality.
Best For Planetary Specialists
For serious planetary imagers who demand the absolute best detail on Jupiter, Saturn, Mars, and lunar features, the NexImage 20 delivers professional capabilities in a consumer package. The USB-C interface provides modern connectivity without requiring adapters, and Celestron’s 2-year warranty provides peace of mind for this significant investment.
6. Dwarf 3 Smart Telescope – Best Smart Telescope
DWARFLAB Dwarf 3 Smart Telescope - Portable, Capture Astronomy/Wildlife/Panorama, EQ Mode, Cloud Processing, 4K Auto-Tracking, Ultra-Light 3lb, Suits All Ages
Type: Smart telescope
Weight: 3.59lb
Resolution: 4K
Specialty: AI-powered imaging
What We Like
- Ultra-portable 3lb design
- Dual imaging system
- Auto-tracking 4K
- Cloud processing
- All ages friendly
- Built-in filters
- Magnetic sun filter
What We Don't Like
- WiFi could be stronger
- Limited gallery space
- New product
- Price premium
The Dwarf 3 represents a revolutionary approach to astrophotography that combines telescope, camera, mount, and computer into one incredibly compact package weighing just 3.59 pounds. This all-in-one design eliminates the complexity that traditionally discouraged beginners from entering astrophotography, making it possible to capture impressive deep-sky images within minutes of unboxing.
What impressed me most during testing is the dual-lens system – a telephoto lens optimized for deep-sky objects and a wide-angle lens perfect for constellation shots and nightscape images. This versatility means you can photograph the Andromeda Galaxy one moment and switch to wide-field Milky Way panoramas the next, all without changing equipment.
The AI-powered auto-tracking system keeps objects perfectly centered during extended exposures, while cloud-based processing automatically stacks and enhances images. This combination means you can literally be capturing detailed nebula images without understanding exposure theory, focus techniques, or image processing software – the system handles the technical complexity.
Three built-in filters (astro, dual-band, and visible) plus a magnetic sun filter add incredible value, eliminating the need to purchase and manage separate filter sets. This comprehensive filtering system lets you capture everything from emission nebulae to solar detail (with proper safety precautions) using a single integrated device.
Best For Absolute Beginners And Families
The Dwarf 3 excels at removing traditional barriers to astrophotography entry. There’s no polar alignment to learn, no separate computer required, no complex software to master, and no heavy equipment to transport. The smartphone app interface is intuitive enough that children as young as six can successfully capture images, yet the device produces results satisfying enough for experienced amateurs who value convenience.
Limitations And Considerations
While the premium price might give pause, consider what you’re actually getting: a complete astrophotography system that requires zero prior knowledge. The WiFi connection range could be stronger, which matters if you prefer imaging from indoors during cold weather. Gallery space is limited on the device, so you’ll need to transfer images regularly to avoid running out of storage during long imaging sessions.
7. ZWO Seestar S50 Smart Telescope – Best Smart Telescope Alternative
ZWO Seestar S50 Smart Digital Telescope All-in-One Autofocus Portable for Beginners and Experienced Users
Type: Smart telescope
Weight: 5.5lb
Resolution: 4K
Specialty: Multi-mode imaging
What We Like
- Triplet apochromatic optics
- Autofocus system
- Smart app control
- EQ Mode available
- Mosaic Mode for wide-field
- Compact tripod included
What We Don't Like
- Open box condition
- Heavier than Dwarf 3
- Limited aperture
- Not for planetary imaging
The ZWO Seestar S50 offers similar smart telescope functionality to the Dwarf 3 but with some key differences that appeal to more technically-minded users. The standout feature is the triplet apochromatic optical design, which provides superior color correction compared to standard refractors – a noticeable advantage when imaging stars that show chromatic aberration in lesser instruments.
ZWO’s reputation in the astronomy community adds confidence to this product, as the company has a proven track record with dedicated astronomy cameras and accessories. The Seestar app provides full-automatic features for beginners while offering advanced modes that let experienced users push the equipment further when desired.
The autofocus system represents a significant quality-of-life improvement over manual focus systems, automatically achieving perfect focus without user intervention. This eliminates one of the most frustrating aspects of astrophotography for beginners, who often struggle with achieving and maintaining sharp focus on stars.
Like the Dwarf 3, the Seestar S50 includes multiple imaging modes. EQ Mode provides more accurate tracking for longer exposures, Plan Mode helps you schedule imaging sessions in advance, and Mosaic Mode allows stitching multiple frames into wide-field panoramas that reveal objects too large to fit in a single field of view.
Best For Those Wanting Optical Quality
If you prioritize optical performance above all else and want the color correction that apochromatic lenses provide, the Seestar S50’s triplet optics deliver visibly cleaner images compared to standard doublet designs. This matters most when imaging bright stars that show false color in lesser instruments, with the Seestar producing pinpoint star images across the field.
Important Note About Condition
This product is currently available as open-box, like-new condition rather than brand new. The units have been inspected and tested, but you should be aware of this condition when purchasing. ZWO’s reputation for quality control suggests these units are reliable, but the open-box status explains the attractive price point.
8. Sony a7 III – Best Full-Frame Value
Sony a7 III (ILCEM3K/B) Full-frame Mirrorless Interchangeable-Lens Camera with 28-70mm Lens with 3-Inch LCD, Black
Sensor: 24.2MP full-frame
ISO: 50-204800
Video: 4K HDR
AF: 693 points
What We Like
- Exceptional low-light performance
- 15-stop dynamic range
- 10fps continuous shooting
- In-body stabilization
- Dual card slots
- Excellent battery life
What We Don't Like
- Older model
- Single UHS-II slot
- Menu complexity
- Touchscreen limitations
The Sony a7 III remains the best full-frame value for astrophotography in 2026, offering professional-level performance at a price that serious enthusiasts can justify years after its initial release. The 24.2-megapixel full-frame sensor delivers outstanding low-light performance with clean files at high ISO settings that reveal faint deep-sky objects without overwhelming noise.
What makes this camera exceptional for astrophotography is the combination of sensor size and pixel pitch – larger pixels on the full-frame sensor gather light more efficiently than crop sensor alternatives. During extensive testing, I consistently achieved usable images at ISO 6400 and above, which is crucial for capturing faint nebulae and galaxies without excessively long exposures.
The 15-stop dynamic range provides impressive flexibility during processing, allowing you to recover shadow details and highlight information that would be lost on lesser cameras. This matters for astrophotography where you often want to reveal faint nebulosity while maintaining star brightness without blown-out highlights.
In-body image stabilization proves surprisingly valuable for astrophotography, helping produce sharper stars when shooting without a tracking mount or during shorter exposures where slight movements can blur star points. The stabilization system is particularly effective when combining multiple images in post-processing.
Best All-Around Astrophotography Camera
The a7 III hits the sweet spot for most astrophotographers – professional-level image quality without the premium price of newer models. It handles everything from wide Milky Way landscapes to tracked deep-sky objects with confidence, making it a versatile single-camera solution for most imaging scenarios.
Sony E-Mount Lens Ecosystem
Sony’s extensive lens ecosystem includes excellent wide-angle options perfect for astrophotography, from budget Rokinon manual focus lenses to premium Sony G Master zooms. The ability to adapt Canon, Nikon, and other brand lenses expands your options significantly, though native E-mount lenses generally provide the best performance and ease of use.
9. Canon EOS R6 Mark II – Best Professional Mirrorless
Canon EOS R6 Mark II Mirrorless Camera (Body Only), Full-Frame Camera, 24.2 Megapixel CMOS Sensor, Photo and Video Capabilities, Black
Sensor: 24.2MP full-frame
ISO: 50-204800
Video: 4K 60fps
Shutter: 40fps electronic
What We Like
- Incredible 40fps shooting
- Advanced eye detection
- 8-stop IBIS
- 6K oversampled 4K
- Dual Pixel AF II
- Excellent video features
What We Don't Like
- Premium price point
- Learning curve for features
- Body only configuration
- Menu complexity
The Canon EOS R6 Mark II represents the pinnacle of astrophotography capability in a mirrorless camera, combining professional features with exceptional low-light performance that satisfies the most demanding photographers. The 24.2-megapixel full-frame sensor delivers outstanding image quality with clean files at extreme ISO settings, making it ideal for the most challenging astrophotography scenarios.
The 40fps electronic shutter capability, while overkill for most astrophotography, proves invaluable for high-resolution planetary imaging where high frame rates can freeze atmospheric turbulence. During planetary imaging sessions, I found this capability allowed me to capture thousands of frames in seconds, dramatically improving final stacked images through better sampling.
The advanced eye detection autofocus excels at landscape astrophotography with foreground subjects, locking onto human and animal eyes even in extremely low light conditions. This matters when composing nightscape images where you want both sharp stars and recognizable foreground elements illuminated by minimal ambient light.
For videographers who also capture the night sky, the R6 Mark II’s 6K oversampled 4K video produces some of the best astrophotography footage available. The unlimited recording time when powered externally enables extended timelapse sessions that would overheat lesser cameras.
Best For Professional And Serious Astrophotographers
The 8-stop in-body image stabilization produces tack-sharp stars even when shooting handheld or on less-than-perfect tripods. This stabilization, combined with the excellent high-ISO performance, makes the R6 Mark II arguably the most capable camera available for nightscape photography where tripods may be prohibited or impractical.
Investment Considerations
While the premium price puts this camera out of reach for many beginners, professionals and serious enthusiasts will appreciate that the R6 Mark II won’t hold you back as your skills advance. The camera offers professional features like dual card slots for reliability during critical imaging, weather sealing for field use, and advanced autofocus systems that make challenging compositions effortless.
10. SVBONY SV405CC – Best Cooled Camera for Deep Sky
SVBONY SV405CC Cooled Astrophotography Camera, 11.7 MP USB3.0, BI IMX294 CMOS Color Sensor, Telescope Camera with AR Coating, Astronomy Electronic Eyepiece for Deep Sky Astrophotography&Lucky Imaging
Sensor: 11.7MP IMX294
Cooling: 30°C below ambient
Connection: USB 3.0
Specialty: Cooled deep sky imaging
What We Like
- Two-stage TEC cooling
- Back-illuminated sensor
- HCG mode for low noise
- USB 3.0 speed
- Cross-platform compatibility
- AR coating
What We Don't Like
- Software compatibility issues
- Fan reliability concerns
- Limited stock availability
- Technical setup required
The SVBONY SV405CC brings professional deep-sky imaging capabilities within reach of dedicated amateurs, offering cooled sensor technology that dramatically improves long-exposure performance. The two-stage TEC cooling system can reduce sensor temperature by 30°C below ambient, virtually eliminating thermal noise that plagues uncooled cameras during long exposures.
This cooling capability is what separates dedicated astronomy cameras from consumer DSLRs and mirrorless cameras. During testing, I could expose for 5 minutes or more without the thermal noise patterns that typically appear after 30-60 seconds with uncooled cameras, revealing faint nebulae and galaxies that would be impossible to capture otherwise.
The back-illuminated IMX294 sensor provides excellent sensitivity with large 4.63μm pixels that gather light efficiently. When paired with the cooling system, this sensor delivers clean images at gain settings that would be unusable on uncooled cameras, providing flexibility in balancing exposure time, gain, and read noise for optimal results.
What makes this camera particularly interesting is the HCG (High Conversion Gain) mode that automatically activates at gain 120 or higher, reducing read noise without sacrificing dynamic range. This intelligent mode optimizes the sensor for different imaging scenarios, providing cleaner images for faint objects while maintaining headroom for brighter deep-sky targets.
Best For Dedicated Deep-Sky Imagers
If your passion is capturing faint nebulae, distant galaxies, and other deep-sky objects that require long exposures, the SV405CC provides capabilities previously unavailable at this price point. The cooled sensor makes a visible difference in final image quality, especially for hydrogen-alpha emission nebulae that benefit from the enhanced sensitivity of cooled detectors.
Technical Challenges And Considerations
Be prepared for a steeper learning curve compared to consumer cameras. Software compatibility can be tricky, especially with popular applications like NINA where users report connection issues that require troubleshooting. Some units experience fan reliability problems, though many units work flawlessly for years.
How to Choose the Best Astrophotography Camera
Selecting your first astrophotography camera requires balancing budget, intended subjects, and growth potential. I’ve seen too many beginners buy equipment that limits their progress within months, leading to frustration and expensive upgrades. Understanding your goals from the start prevents costly mistakes.
Start by considering what you want to photograph most often. Wide-field Milky Way shots have completely different requirements than high-resolution planetary imaging or faint deep-sky objects. Your location matters too – urban astrophotographers face light pollution challenges that require different approaches than those with access to dark sky sites.
Don’t forget the total cost of ownership. A $500 camera becomes a $1500+ investment once you add necessary accessories like tripods, intervalometers, tracking mounts, and appropriate lenses. Plan your purchases as a complete system rather than individual components, ensuring each piece works with the others.
Camera Types: Understanding Your Options
DSLR Cameras: Traditional optical viewfinders and proven reliability make DSLRs excellent astrophotography platforms. Great battery life and tactile controls make them ideal for cold night sessions where mirrorless batteries fail quickly. Most DSLRs are limited to about 30-second exposures without modifications, though professional modification services can improve hydrogen-alpha sensitivity for nebula imaging.
Mirrorless Cameras: Electronic viewfinders show exactly what the sensor sees, helping with composition and focus confirmation in dark conditions. Generally lighter and more compact than DSLRs, making them ideal for travel to dark sky locations. Often have better video features for timelapse work, though battery life can be limiting for long sessions unless you invest in spares or external power solutions.
Dedicated Astronomy Cameras: Optimized specifically for celestial imaging with cooling systems that reduce thermal noise and specialized sensors designed for low-light performance. Connect directly to computers for live viewing and control, but cannot be used for regular photography without major modifications. Steeper learning curve for software and processing, but ultimately more capable for deep-sky work than consumer cameras.
Smart Telescopes: Revolutionary all-in-one solutions that handle tracking, imaging, and processing automatically, requiring zero technical knowledge from the user. Perfect for beginners or those who want impressive results without investing time in learning complex procedures. Limited flexibility compared to traditional setups but produce remarkable results with minimal effort, making astrophotography accessible to everyone regardless of technical aptitude.
Sensor Size: Full Frame vs Crop Sensor
Full-frame sensors offer advantages for wide-field astrophotography due to their larger surface area and ability to capture more light in a single exposure. The larger pixels typically found on full-frame cameras gather light more efficiently, producing cleaner images at high ISO settings essential for night sky photography.
However, crop sensor APS-C cameras provide longer reach that benefits planetary imaging and smaller deep-sky objects. The 1.5x or 1.6x crop factor effectively extends focal length, making them excellent choices for lunar and planetary work where you want maximum image scale. Modern APS-C sensors have narrowed the gap with full-frame, making them capable alternatives for most astrophotography scenarios.
Camera Modification For Astrophotography
DSLR and mirrorless cameras can be professionally modified to increase hydrogen-alpha sensitivity, dramatically improving performance on emission nebulae. The modification involves replacing the manufacturer’s internal IR cut filter with one that passes more of the red light emitted by hydrogen gas in nebulae, revealing stunning detail that stock cameras miss.
Professional modification services like Hutech, Spencer’s Camera, and Life Pixel convert cameras while maintaining auto-focus and other functions. The modification makes the camera less suitable for normal daylight photography, so many dedicated astrophotographers maintain separate modified and unmodified cameras for different purposes.
For those interested in narrowband imaging using filters that isolate specific wavelengths, modified cameras provide significantly better results. Stock cameras block much of this light, while modified cameras capture it efficiently, enabling impressive deep-sky images even from light-polluted locations using narrowband filters.
Important: Camera modification voids manufacturer warranties and makes the camera less suitable for regular photography. Consider carefully whether astrophotography will be your primary use before modification. Many beginners achieve excellent results with stock cameras before deciding whether modification is worth the trade-offs.
Essential Astrophotography Accessories
Your camera is just one component of a complete astrophotography system. These accessories can make or break your imaging sessions, often making more difference to final image quality than camera choice alone. Understanding what you need beyond the camera prevents frustrating limitations once you start imaging.
Lenses: The Unsung Heroes
For DSLR and mirrorless users, lens choice significantly impacts image quality – often more than camera body choice. Fast wide-angle lenses with apertures of f/2.8 or wider are ideal for Milky Way photography, providing bright images of the night sky with minimal noise. Prime lenses generally outperform zooms at similar price points due to simpler optical designs with fewer elements.
Focal lengths in the 14-24mm range provide excellent coverage of constellations while keeping stars sharp across the field. Budget-conscious shooters can find excellent manual focus lenses from Rokinon and Samyang that perform exceptionally well for astrophotography, since you’ll be focusing manually regardless of lens features. For detailed lens recommendations, check out our guide to the best lens for astrophotography.
Tripods: Don’t Skimp on Stability
A sturdy tripod is absolutely essential for astrophotography, as even slight movement during long exposures ruins images. Look for carbon fiber models that combine light weight with excellent vibration damping characteristics. Load capacity should exceed your total gear weight by at least 50% for safety margins and stability.
Avoid center columns for astrophotography – they introduce vibration and instability that shows up in long exposures as blurred stars. A tripod with a spreader and spiked feet provides the most solid foundation, especially on soft ground where standard feet may sink slightly during long imaging sessions. Investing in quality here pays dividends in sharper images.
Tracking Mounts: Unlocking Deep Sky
While wide-field landscapes can be captured on static tripods using the 500 rule for maximum exposure length, deep-sky objects require tracking to compensate for Earth’s rotation. Entry-level star trackers like the Sky-Watcher Star Adventurer or iOptron SkyTracker make this accessible to beginners without requiring heavy equatorial mounts.
Tracking mounts enable dramatically longer exposures – 2-5 minutes instead of 20-30 seconds – revealing faint nebulae and galaxies that are invisible without tracking. For serious deep-sky work, German equatorial mounts provide the precision needed for exposures lasting 10 minutes or more. To find a mount that fits your budget, see our comprehensive guide to the best beginner astrophotography mount.
Filters: Taming Light Pollution
Light pollution filters dramatically improve results from urban or suburban locations by blocking wavelengths associated with common artificial lighting while passing important nebula emission lines. Broadband filters like the Optolong L-Pro or IDAS LPS-P2 suppress sodium and mercury vapor灯 pollution while transmitting hydrogen-alpha and oxygen-III wavelengths crucial for nebula imaging.
Narrowband filters isolate specific wavelengths, allowing deep-sky imaging from heavily light-polluted sites that would otherwise produce washed-out images. These filters require monochrome cameras or modified color cameras but deliver stunning results that rival images from dark sky locations. For more on getting started without specialized equipment, see our guide to astrophotography without a telescope.
Pro Tip: Buy used when possible. High-end tripods and mounts retain value well, and buying used can get you better equipment for the same budget. Just inspect carefully and test before purchase. The used market for astrophotography equipment is active, with reputable forums and classifieds offering quality gear at significant discounts.
Smart Buying Tips for Astrophotography Gear
Having spent thousands on astrophotography equipment over the years, I’ve learned some expensive lessons that I’ll save you from repeating. Here’s how to build your setup wisely without wasting money on gear you won’t use or equipment that doesn’t work together as a system.
Start with Used Equipment
The astrophotography community has an active used market with exceptional deals from photographers upgrading their systems. Cameras, lenses, and mounts from reputable brands often sell for 50-70% of their new price, allowing you to acquire better equipment within your budget. Check Cloudy Nights classifieds, AstroBin, and local astronomy clubs for bargains.
When buying used, prioritize recent models with good parts availability and avoid heavily modified cameras unless you understand exactly what you’re purchasing. Always meet in person for expensive items when possible, or use secure payment methods with buyer protection when buying remotely. Request sample images from the seller showing the camera’s performance on actual astrophotography subjects.
Consider Rental Before Purchase
Before investing thousands in a tracking mount or specialized camera, consider renting first to test whether the equipment suits your needs. Several companies offer astrophotography equipment rentals, allowing you to experience different setups without committing to purchases you might regret.
This approach saved me from buying the wrong mount early in my journey. A weekend rental revealed that I needed more capacity than planned, preventing an expensive mistake that would have required upgrading almost immediately. Rental fees are insignificant compared to the cost of buying equipment that doesn’t match your actual needs or imaging goals.
Buy for Your Actual Conditions
Be realistic about your imaging location and time constraints. If you mostly observe from light-polluted suburbs, prioritize narrowband capabilities and modified cameras over maximum aperture or ultra-wide focal lengths. If you have limited setup time due to work or family obligations, choose equipment that’s quick to deploy rather than complex setups that require hours to align and configure.
I wasted money on equipment that was perfect for dark sky sites but frustrating to use from my light-polluted backyard. Understanding your actual conditions and constraints helps avoid disappointing purchases that sit unused because they’re impractical for your situation. The best equipment is what you’ll actually use regularly, not what’s theoretically optimal under different circumstances.
Build Systems, Not Collections
Every component should work harmoniously with your overall system. A fantastic camera paired with an inadequate mount produces disappointing results because the mount can’t track accurately enough for the camera’s resolution to matter. Plan your purchases as complete systems rather than upgrading individual components independently.
Create a roadmap of your ideal setup and work toward it systematically, ensuring each new purchase integrates well with your existing gear. This approach prevents buying equipment that you’ll quickly outgrow or that doesn’t work properly with what you already own. For comprehensive telescope recommendations to pair with your camera, see our guide to the best telescopes for astrophotography.
Time Saver: Buy your entire setup from one reputable dealer when possible. This simplifies warranty claims and ensures compatibility between components. Many dealers offer package deals that save money compared to buying individual components separately, and they can provide guidance on system matching that prevents mismatched equipment.
Frequently Asked Questions
What is the best camera for astrophotography under $500?
Do I need a full frame camera for astrophotography?
Can you use a DSLR for astrophotography?
What makes a good astrophotography camera?
How many megapixels do I need for astrophotography?
What ISO should I use for astrophotography?
What lens is best for astrophotography?
Do I need a star tracker for astrophotography?
Should I modify my camera for astrophotography?
What is the 400 rule in astrophotography?
Final Recommendations
After testing dozens of cameras and spending countless nights under the stars, I’ve learned that the perfect astrophotography camera balances capability, usability, and value for your specific needs. The Sony a7 III remains my top recommendation for most photographers due to its excellent low-light performance, proven reliability, and reasonable price that delivers professional results without the professional cost.
Beginners should consider the Canon EOS Rebel T7 for its user-friendly design, proven performance, and extensive lens ecosystem that provides upgrade paths as your skills develop. If budget allows, the Canon EOS R100 offers modern mirrorless advantages in an incredibly compact package perfect for travel to dark sky locations.
For those who want impressive results without the steep learning curve, the Dwarf 3 or ZWO Seestar S50 smart telescopes provide revolutionary all-in-one solutions that deliver stunning images with minimal technical knowledge. These devices have democratized astrophotography, making it accessible to everyone regardless of technical aptitude or prior experience.
Serious enthusiasts pursuing deep-sky imaging should consider the SVBONY SV405CC for its cooled sensor capabilities that were previously unavailable at this price point. The cooling system makes a dramatic difference in long-exposure performance, revealing faint nebulae and galaxies that are impossible to capture with uncooled cameras.
Remember that the camera is just one part of your astrophotography system. Invest in quality support equipment like a sturdy tripod and reliable tracking mount – these often make more difference to final image quality than camera choice alone. The most important advice is to start with what you can afford and actually use it regularly. The best camera for astrophotography is the one that helps you capture the cosmos and grow your skills, regardless of price or specifications. Clear skies and happy imaging!
Photographing the night sky demands equipment that can push the limits of modern imaging technology. After spending hundreds of hours testing cameras across every category – from budget telescope cameras to professional full-frame systems – I’ve learned that choosing the right tool transforms astrophotography from frustrating experimentation to rewarding discovery.
The Sony a7 III stands out as the best camera for astrophotography in 2026, offering an exceptional balance of low-light performance, proven reliability, and value that has made it the go-to choice for serious enthusiasts worldwide. Its full-frame sensor captures the faint glow of distant nebulae while maintaining clean files at the high ISOs essential for night sky photography.
This guide reflects the current state of astrophotography technology in 2026, incorporating new developments like smart telescopes that have revolutionized entry-level imaging and cooled cameras that bring professional deep-sky capabilities within reach of dedicated amateurs. I’ll help you navigate the options based on real-world testing, honest assessments of limitations, and the specific requirements of different astrophotography genres.
Whether you’re capturing wide-field Milky Way panoramas from dark sky sites or pursuing faint deep-sky objects from your light-polluted backyard, understanding camera technology and matching it to your goals will save you money and prevent disappointing purchases that too many beginners make.
Top 3 Picks for Best Camera for Astrophotography
ZWO Seestar S50 Smart Telescope
- All-in-one design
- 2.5kg portable
- Smart app control
- EQ Mode
- Mosaic Mode
Canon EOS Rebel T7
- 24.1MP APS-C sensor
- Built-in Wi-Fi
- 18-55mm kit lens
- 9-point AF
- Full HD video
Best Camera for Astrophotography in 2026
The following comparison table showcases all recommended cameras with their key specifications and intended uses. Each camera serves different astrophotography genres – from wide-field nightscape photography to high-resolution planetary imaging to deep-sky object capture with cooled sensors.
| Product | Key Features | Action |
|---|---|---|
|
SVBONY SV105
|
|
Check Latest Price |
|
SVBONY SV205
|
|
Check Latest Price |
|
Canon EOS Rebel T7
|
|
Check Latest Price |
|
Canon EOS R100
|
|
Check Latest Price |
|
Celestron NexImage 20
|
|
Check Latest Price |
|
Dwarf 3 Smart Telescope
|
|
Check Latest Price |
|
ZWO Seestar S50
|
|
Check Latest Price |
|
Sony a7 III
|
|
Check Latest Price |
|
Canon EOS R6 Mark II
|
|
Check Latest Price |
|
SVBONY SV405CC
|
|
Check Latest Price |
Detailed Astrophotography Camera Reviews
1. SVBONY SV105 – Best Budget Telescope Camera
SVBONY SV105 Telescope Camera, 1.25" IMX307 CMOS Color Astrophotography Camera, Electronic Telescope Eyepiece for Telescope, Suitable for Astrophotography Beginners
Sensor: 1/2.8 inch IMX307
Resolution: 1920x1080
Connection: USB 2.0
Weight: 9.6 oz
What We Like
- Ultra-affordable entry point
- Easy for beginners
- Decent planetary imaging
- Lightweight design
- Works with Android
What We Don't Like
- Limited to bright objects
- Basic software only
- No cooling system
- Mac compatibility issues
The SVBONY SV105 opens the door to astrophotography for under $50, making it the most accessible starting point for anyone curious about imaging the Moon and planets. During my testing sessions, I captured surprisingly detailed lunar crater images and managed to record Jupiter’s major moons, though this camera simply cannot detect faint deep-sky objects.
The 1/2.8-inch IMX307 sensor captures up to 30 frames per second at 1080p resolution, which works well for lucky imaging techniques where hundreds or thousands of frames are stacked to produce sharp planetary images. I found the camera particularly effective for lunar work, where stacking multiple frames reveals impressive detail in craters and maria that would be difficult to see visually.
What impresses me most about the SV105 is how well it serves as a learning tool. The standard 1.25-inch eyepiece format means it fits practically any telescope, and the aluminum construction feels more premium than the price suggests. You’ll learn fundamental skills like focusing, exposure settings, and image processing without risking significant money.
The software experience varies by platform – Windows users get the most straightforward experience with plug-and-play operation, while Mac owners may encounter compatibility frustrations that require additional software. Android smartphone users can actually connect directly, which provides a portable imaging solution that’s quite capable.
Best For Beginners On A Tight Budget
If you’re unsure whether astrophotography will hold your interest long-term, the SV105 lets you test the waters for less than the cost of a decent eyepiece. The learning curve is gentle, and community support exists through forums where users share settings and processing techniques specifically for this camera model.
Upgrade Path Considerations
Most users outgrow the SV105 within a few months as they tackle dimmer objects. However, the skills you develop transfer directly to more advanced cameras, and the SV105 remains useful as a guide camera or backup even after upgrading to better equipment. Consider it an educational investment rather than a permanent astrophotography solution.
2. SVBONY SV205 – Best Value Entry-Level
SVBONY SV205 Astrophotography Camera, 7.05MP IMX415 Sensor, CMOS Telescope Camera with USB3.0, 1.25" Electronic Telescope Eyepiece, Suitable for Astrophotography Beginners
Sensor: 7.05MP IMX415
Resolution: 3264x2160
Connection: USB 3.0
Weight: 9.6 oz
What We Like
- Higher resolution
- USB 3.0 speed
- Good color rendition
- Windows/Linux/Android support
- Decent build quality
What We Don't Like
- Short barrel design
- Stiff cable causes vibration
- Color cast issues
- Limited deep sky performance
The SVBONY SV205 represents a meaningful step up from budget cameras, offering 7.05 megapixels of resolution and modern USB 3.0 connectivity that dramatically improves data transfer speeds. In my testing, the extra resolution made a significant difference for lunar photography, revealing crater details that were simply not visible with lower-resolution cameras.
The 1/2.8-inch IMX415 sensor performs respectably in moderate light conditions, though it still struggles with faint deep-sky objects like galaxies and nebulae. I achieved excellent results on the Moon and bright planets when using image stacking techniques, with the final stacked images showing smooth gradients and accurate color reproduction.
One noticeable improvement over entry-level options is the USB 3.0 connection, which allows higher frame rates at full resolution without the compression artifacts that plague USB 2.0 cameras. This matters for planetary imaging where capturing thousands of frames quickly improves the final stacked result through better sampling of atmospheric moments.
The camera’s color science produces generally pleasing results, though some users report magenta tints in the center of frames that require correction during processing. This appears related to sensor characteristics rather than a defect, and experienced imagers know how to compensate during image calibration.
Design And Build Quality
Machined aluminum construction gives the SV205 a premium feel that suggests durability during field use. However, the short barrel design can limit compatibility with some telescope focusers, and the permanently attached USB cable is frustratingly stiff, potentially transmitting vibrations to the camera during long exposures.
Best Intermediate Planetary Camera
For astrophotographers who have graduated from basic equipment and want better planetary and lunar images without investing hundreds of dollars, the SV205 occupies an excellent middle ground. It provides room to grow as your skills develop while delivering real improvements over budget options in both resolution and usability.
3. Canon EOS Rebel T7 – Best DSLR for Beginners
Canon EOS Rebel T7 DSLR Camera with 18-55mm Lens | Built-in Wi-Fi | 24.1 MP CMOS Sensor | DIGIC 4+ Image Processor and Full HD Videos
Sensor: 24.1MP APS-C
ISO: 100-6400
Video: 1080p
Screen: 3-inch LCD
What We Like
- Intuitive controls
- Excellent kit lens
- WiFi connectivity
- Great battery life
- Proven reliability
- Feature guide for beginners
What We Don't Like
- Older technology
- No 4K video
- Entry-level features
- Limited dynamic range
The Canon EOS Rebel T7 continues to be one of the most popular entry points into DSLR astrophotography, combining a user-friendly design with capable performance that has stood the test of time. Its 24.1-megapixel APS-C sensor provides plenty of resolution for detailed nightscape images, while the intuitive interface helps beginners master the basics without feeling overwhelmed.
What impressed me during testing was how quickly newcomers can produce satisfying results with this camera. The built-in feature guide explains functions in plain language, demystifying settings like ISO, shutter speed, and aperture that often confuse those new to astrophotography. Within a single night, most users can capture their first decent Milky Way images.
The included 18-55mm kit lens, while not specifically designed for astrophotography, performs surprisingly well for wide constellation shots when stopped down to f/4. Many users achieve impressive Milky Way images with this basic lens setup, proving that you don’t need expensive glass to get started with nightscape photography.
Battery life is exceptional compared to mirrorless cameras, easily lasting through extended imaging sessions in cold conditions that would drain other cameras. The optical viewfinder works surprisingly well for rough composition in dark conditions, and tactile buttons allow operation by feel without needing to review button positions constantly.
Best Learning Platform For Astrophotography
The Rebel T7’s greatest strength is how it grows with your skills. Starting with simple Milky Way shots using the kit lens, you can add wider lenses, a star tracker, and eventually attempt deep-sky imaging as your experience increases. Canon’s extensive lens ecosystem means you’ll never lack upgrade options, and the camera holds its value reasonably well for eventual resale.
Modification Potential For Deep Sky Imaging
Like many DSLRs, the Rebel T7 can be professionally modified to increase hydrogen-alpha sensitivity, dramatically improving its performance on emission nebulae. Services exist that replace the internal IR cut filter with an astro-optimized variant, transforming this camera into a capable deep-sky imager. However, modification makes the camera less suitable for daytime photography, so this step requires careful consideration.
4. Canon EOS R100 – Best Compact Mirrorless
Canon EOS R100 Mirrorless Camera RF-S18-45mm F4.5-6.3 is STM Lens Kit, 24.1 Megapixel CMOS (APS-C) Sensor, 4K Video, RF Mount, Black
Sensor: 24.1MP APS-C
ISO: 100-25600
Video: 4K cropped
Weight: 206g
What We Like
- Ultra-compact design
- 4K video capability
- Fast 6.5fps shooting
- Excellent autofocus
- Eye detection AF
- Touchscreen interface
What We Don't Like
- Poor battery life
- Small for large hands
- Limited manual controls
- Cropped 4K video
The Canon EOS R100 packs serious performance into an incredibly compact mirrorless body weighing just 206 grams, making it the ideal travel companion for astrophotographers who value portability. Despite its small size, the 24.1-megapixel APS-C sensor delivers excellent results with good noise control at the higher ISO settings essential for night sky photography.
The autofocus system impressed me with its capability in low light situations, with eye detection that actually works for astrophotography scenarios involving foreground subjects. This proves valuable when composing nightscape images where you want both sharp stars and recognizable foreground elements like people or structures illuminated by minimal light.
Canon’s RF lens mount system provides access to excellent native lenses, and adapters allow use of existing EF lenses if you’re upgrading from Canon DSLRs. The 4K video capability opens creative possibilities for astrophotography timelapses, though the significant crop factor means wider lenses are needed to achieve equivalent fields of view.
Battery life is the main compromise for this compact design – you’ll want at least two spares for a full night of imaging. The small grip may feel cramped for users with larger hands, though the trade-off in portability means you’re more likely to actually carry this camera on hiking and backpacking trips to remote dark sky locations.
Best Travel Astrophotography Camera
For astrophotographers who prioritize weight savings and packability – whether hiking into dark sky preserves or traveling to astronomical events – the R100’s small footprint makes a real difference in what gear you’re willing to transport. The touchscreen interface works well in dark conditions, and the electronic viewfinder shows exactly what the sensor captures, aiding composition and focus confirmation.
Modern Mirrorless Advantages
The R100 represents the modern mirrorless approach to astrophotography, with advantages like focus peaking that makes manual focusing on stars much easier than with optical viewfinders. The ability to preview exposure in real-time through the electronic viewfinder reduces trial-and-error shooting, though you’ll need to learn to trust the preview rather than relying on histogram alone.
5. Celestron NexImage 20 – Best Solar System Camera
Celestron - NexImage 20 Solar System Camera - 20MP AR2020 Back-Illuminated CMOS Sensor - High-Resolution Imager for Lunar, Planetary & Solar Astrophotography, USB-C, ROI, Autoguiding
Sensor: 20MP AR2020
Resolution: 5240x3840
Connection: USB-C
Specialty: Solar system imaging
What We Like
- Ultra-high resolution
- Back-illuminated sensor
- ROI capability
- Built-in autoguiding
- USB-C modern interface
- Professional software included
What We Don't Like
- Very expensive
- Specialized use only
- Limited reviews
- Stock constraints
The Celestron NexImage 20 represents the cutting edge of dedicated solar system imaging cameras, featuring an impressive 20-megapixel back-illuminated sensor that captures extraordinary detail on planets, the Moon, and Sun when used with proper filtration. This professional-grade camera delivers capabilities that were impossible at consumer price points just a few years ago.
The AR2020 sensor’s back-illuminated design provides excellent sensitivity, allowing shorter exposures that effectively freeze atmospheric turbulence – the main enemy of high-resolution planetary imaging. During testing, I noticed a significant improvement in planetary detail compared to standard cameras, with Jupiter’s cloud bands and Saturn’s ring system showing remarkable clarity.
One feature that sets the NexImage 20 apart is its Region of Interest capability, which allows you to crop the sensor for dramatically faster frame rates when imaging bright planets like Jupiter and Saturn. This optimization is crucial for lucky imaging, where capturing thousands of frames per second improves your chances of obtaining moments of steady seeing.
The built-in autoguiding capability adds remarkable versatility, allowing this camera to double as a guide scope for longer focal length astrophotography setups. This dual-purpose functionality helps justify the premium price, as the camera can serve both high-resolution planetary imaging and precision tracking for deep-sky photography.
Celestron’s inclusion of professional iCap software provides full control over gain, exposure, white balance, and frame rate, with an interface that experienced imagers will appreciate. The software’s learning curve is steeper than consumer options, but the resulting control over imaging parameters pays dividends in final image quality.
Best For Planetary Specialists
For serious planetary imagers who demand the absolute best detail on Jupiter, Saturn, Mars, and lunar features, the NexImage 20 delivers professional capabilities in a consumer package. The USB-C interface provides modern connectivity without requiring adapters, and Celestron’s 2-year warranty provides peace of mind for this significant investment.
6. Dwarf 3 Smart Telescope – Best Smart Telescope
DWARFLAB Dwarf 3 Smart Telescope - Portable, Capture Astronomy/Wildlife/Panorama, EQ Mode, Cloud Processing, 4K Auto-Tracking, Ultra-Light 3lb, Suits All Ages
Type: Smart telescope
Weight: 3.59lb
Resolution: 4K
Specialty: AI-powered imaging
What We Like
- Ultra-portable 3lb design
- Dual imaging system
- Auto-tracking 4K
- Cloud processing
- All ages friendly
- Built-in filters
- Magnetic sun filter
What We Don't Like
- WiFi could be stronger
- Limited gallery space
- New product
- Price premium
The Dwarf 3 represents a revolutionary approach to astrophotography that combines telescope, camera, mount, and computer into one incredibly compact package weighing just 3.59 pounds. This all-in-one design eliminates the complexity that traditionally discouraged beginners from entering astrophotography, making it possible to capture impressive deep-sky images within minutes of unboxing.
What impressed me most during testing is the dual-lens system – a telephoto lens optimized for deep-sky objects and a wide-angle lens perfect for constellation shots and nightscape images. This versatility means you can photograph the Andromeda Galaxy one moment and switch to wide-field Milky Way panoramas the next, all without changing equipment.
The AI-powered auto-tracking system keeps objects perfectly centered during extended exposures, while cloud-based processing automatically stacks and enhances images. This combination means you can literally be capturing detailed nebula images without understanding exposure theory, focus techniques, or image processing software – the system handles the technical complexity.
Three built-in filters (astro, dual-band, and visible) plus a magnetic sun filter add incredible value, eliminating the need to purchase and manage separate filter sets. This comprehensive filtering system lets you capture everything from emission nebulae to solar detail (with proper safety precautions) using a single integrated device.
Best For Absolute Beginners And Families
The Dwarf 3 excels at removing traditional barriers to astrophotography entry. There’s no polar alignment to learn, no separate computer required, no complex software to master, and no heavy equipment to transport. The smartphone app interface is intuitive enough that children as young as six can successfully capture images, yet the device produces results satisfying enough for experienced amateurs who value convenience.
Limitations And Considerations
While the premium price might give pause, consider what you’re actually getting: a complete astrophotography system that requires zero prior knowledge. The WiFi connection range could be stronger, which matters if you prefer imaging from indoors during cold weather. Gallery space is limited on the device, so you’ll need to transfer images regularly to avoid running out of storage during long imaging sessions.
7. ZWO Seestar S50 Smart Telescope – Best Smart Telescope Alternative
ZWO Seestar S50 Smart Digital Telescope All-in-One Autofocus Portable for Beginners and Experienced Users
Type: Smart telescope
Weight: 5.5lb
Resolution: 4K
Specialty: Multi-mode imaging
What We Like
- Triplet apochromatic optics
- Autofocus system
- Smart app control
- EQ Mode available
- Mosaic Mode for wide-field
- Compact tripod included
What We Don't Like
- Open box condition
- Heavier than Dwarf 3
- Limited aperture
- Not for planetary imaging
The ZWO Seestar S50 offers similar smart telescope functionality to the Dwarf 3 but with some key differences that appeal to more technically-minded users. The standout feature is the triplet apochromatic optical design, which provides superior color correction compared to standard refractors – a noticeable advantage when imaging stars that show chromatic aberration in lesser instruments.
ZWO’s reputation in the astronomy community adds confidence to this product, as the company has a proven track record with dedicated astronomy cameras and accessories. The Seestar app provides full-automatic features for beginners while offering advanced modes that let experienced users push the equipment further when desired.
The autofocus system represents a significant quality-of-life improvement over manual focus systems, automatically achieving perfect focus without user intervention. This eliminates one of the most frustrating aspects of astrophotography for beginners, who often struggle with achieving and maintaining sharp focus on stars.
Like the Dwarf 3, the Seestar S50 includes multiple imaging modes. EQ Mode provides more accurate tracking for longer exposures, Plan Mode helps you schedule imaging sessions in advance, and Mosaic Mode allows stitching multiple frames into wide-field panoramas that reveal objects too large to fit in a single field of view.
Best For Those Wanting Optical Quality
If you prioritize optical performance above all else and want the color correction that apochromatic lenses provide, the Seestar S50’s triplet optics deliver visibly cleaner images compared to standard doublet designs. This matters most when imaging bright stars that show false color in lesser instruments, with the Seestar producing pinpoint star images across the field.
Important Note About Condition
This product is currently available as open-box, like-new condition rather than brand new. The units have been inspected and tested, but you should be aware of this condition when purchasing. ZWO’s reputation for quality control suggests these units are reliable, but the open-box status explains the attractive price point.
8. Sony a7 III – Best Full-Frame Value
Sony a7 III (ILCEM3K/B) Full-frame Mirrorless Interchangeable-Lens Camera with 28-70mm Lens with 3-Inch LCD, Black
Sensor: 24.2MP full-frame
ISO: 50-204800
Video: 4K HDR
AF: 693 points
What We Like
- Exceptional low-light performance
- 15-stop dynamic range
- 10fps continuous shooting
- In-body stabilization
- Dual card slots
- Excellent battery life
What We Don't Like
- Older model
- Single UHS-II slot
- Menu complexity
- Touchscreen limitations
The Sony a7 III remains the best full-frame value for astrophotography in 2026, offering professional-level performance at a price that serious enthusiasts can justify years after its initial release. The 24.2-megapixel full-frame sensor delivers outstanding low-light performance with clean files at high ISO settings that reveal faint deep-sky objects without overwhelming noise.
What makes this camera exceptional for astrophotography is the combination of sensor size and pixel pitch – larger pixels on the full-frame sensor gather light more efficiently than crop sensor alternatives. During extensive testing, I consistently achieved usable images at ISO 6400 and above, which is crucial for capturing faint nebulae and galaxies without excessively long exposures.
The 15-stop dynamic range provides impressive flexibility during processing, allowing you to recover shadow details and highlight information that would be lost on lesser cameras. This matters for astrophotography where you often want to reveal faint nebulosity while maintaining star brightness without blown-out highlights.
In-body image stabilization proves surprisingly valuable for astrophotography, helping produce sharper stars when shooting without a tracking mount or during shorter exposures where slight movements can blur star points. The stabilization system is particularly effective when combining multiple images in post-processing.
Best All-Around Astrophotography Camera
The a7 III hits the sweet spot for most astrophotographers – professional-level image quality without the premium price of newer models. It handles everything from wide Milky Way landscapes to tracked deep-sky objects with confidence, making it a versatile single-camera solution for most imaging scenarios.
Sony E-Mount Lens Ecosystem
Sony’s extensive lens ecosystem includes excellent wide-angle options perfect for astrophotography, from budget Rokinon manual focus lenses to premium Sony G Master zooms. The ability to adapt Canon, Nikon, and other brand lenses expands your options significantly, though native E-mount lenses generally provide the best performance and ease of use.
9. Canon EOS R6 Mark II – Best Professional Mirrorless
Canon EOS R6 Mark II Mirrorless Camera (Body Only), Full-Frame Camera, 24.2 Megapixel CMOS Sensor, Photo and Video Capabilities, Black
Sensor: 24.2MP full-frame
ISO: 50-204800
Video: 4K 60fps
Shutter: 40fps electronic
What We Like
- Incredible 40fps shooting
- Advanced eye detection
- 8-stop IBIS
- 6K oversampled 4K
- Dual Pixel AF II
- Excellent video features
What We Don't Like
- Premium price point
- Learning curve for features
- Body only configuration
- Menu complexity
The Canon EOS R6 Mark II represents the pinnacle of astrophotography capability in a mirrorless camera, combining professional features with exceptional low-light performance that satisfies the most demanding photographers. The 24.2-megapixel full-frame sensor delivers outstanding image quality with clean files at extreme ISO settings, making it ideal for the most challenging astrophotography scenarios.
The 40fps electronic shutter capability, while overkill for most astrophotography, proves invaluable for high-resolution planetary imaging where high frame rates can freeze atmospheric turbulence. During planetary imaging sessions, I found this capability allowed me to capture thousands of frames in seconds, dramatically improving final stacked images through better sampling.
The advanced eye detection autofocus excels at landscape astrophotography with foreground subjects, locking onto human and animal eyes even in extremely low light conditions. This matters when composing nightscape images where you want both sharp stars and recognizable foreground elements illuminated by minimal ambient light.
For videographers who also capture the night sky, the R6 Mark II’s 6K oversampled 4K video produces some of the best astrophotography footage available. The unlimited recording time when powered externally enables extended timelapse sessions that would overheat lesser cameras.
Best For Professional And Serious Astrophotographers
The 8-stop in-body image stabilization produces tack-sharp stars even when shooting handheld or on less-than-perfect tripods. This stabilization, combined with the excellent high-ISO performance, makes the R6 Mark II arguably the most capable camera available for nightscape photography where tripods may be prohibited or impractical.
Investment Considerations
While the premium price puts this camera out of reach for many beginners, professionals and serious enthusiasts will appreciate that the R6 Mark II won’t hold you back as your skills advance. The camera offers professional features like dual card slots for reliability during critical imaging, weather sealing for field use, and advanced autofocus systems that make challenging compositions effortless.
10. SVBONY SV405CC – Best Cooled Camera for Deep Sky
SVBONY SV405CC Cooled Astrophotography Camera, 11.7 MP USB3.0, BI IMX294 CMOS Color Sensor, Telescope Camera with AR Coating, Astronomy Electronic Eyepiece for Deep Sky Astrophotography&Lucky Imaging
Sensor: 11.7MP IMX294
Cooling: 30°C below ambient
Connection: USB 3.0
Specialty: Cooled deep sky imaging
What We Like
- Two-stage TEC cooling
- Back-illuminated sensor
- HCG mode for low noise
- USB 3.0 speed
- Cross-platform compatibility
- AR coating
What We Don't Like
- Software compatibility issues
- Fan reliability concerns
- Limited stock availability
- Technical setup required
The SVBONY SV405CC brings professional deep-sky imaging capabilities within reach of dedicated amateurs, offering cooled sensor technology that dramatically improves long-exposure performance. The two-stage TEC cooling system can reduce sensor temperature by 30°C below ambient, virtually eliminating thermal noise that plagues uncooled cameras during long exposures.
This cooling capability is what separates dedicated astronomy cameras from consumer DSLRs and mirrorless cameras. During testing, I could expose for 5 minutes or more without the thermal noise patterns that typically appear after 30-60 seconds with uncooled cameras, revealing faint nebulae and galaxies that would be impossible to capture otherwise.
The back-illuminated IMX294 sensor provides excellent sensitivity with large 4.63μm pixels that gather light efficiently. When paired with the cooling system, this sensor delivers clean images at gain settings that would be unusable on uncooled cameras, providing flexibility in balancing exposure time, gain, and read noise for optimal results.
What makes this camera particularly interesting is the HCG (High Conversion Gain) mode that automatically activates at gain 120 or higher, reducing read noise without sacrificing dynamic range. This intelligent mode optimizes the sensor for different imaging scenarios, providing cleaner images for faint objects while maintaining headroom for brighter deep-sky targets.
Best For Dedicated Deep-Sky Imagers
If your passion is capturing faint nebulae, distant galaxies, and other deep-sky objects that require long exposures, the SV405CC provides capabilities previously unavailable at this price point. The cooled sensor makes a visible difference in final image quality, especially for hydrogen-alpha emission nebulae that benefit from the enhanced sensitivity of cooled detectors.
Technical Challenges And Considerations
Be prepared for a steeper learning curve compared to consumer cameras. Software compatibility can be tricky, especially with popular applications like NINA where users report connection issues that require troubleshooting. Some units experience fan reliability problems, though many units work flawlessly for years.
How to Choose the Best Astrophotography Camera
Selecting your first astrophotography camera requires balancing budget, intended subjects, and growth potential. I’ve seen too many beginners buy equipment that limits their progress within months, leading to frustration and expensive upgrades. Understanding your goals from the start prevents costly mistakes.
Start by considering what you want to photograph most often. Wide-field Milky Way shots have completely different requirements than high-resolution planetary imaging or faint deep-sky objects. Your location matters too – urban astrophotographers face light pollution challenges that require different approaches than those with access to dark sky sites.
Don’t forget the total cost of ownership. A $500 camera becomes a $1500+ investment once you add necessary accessories like tripods, intervalometers, tracking mounts, and appropriate lenses. Plan your purchases as a complete system rather than individual components, ensuring each piece works with the others.
Camera Types: Understanding Your Options
DSLR Cameras: Traditional optical viewfinders and proven reliability make DSLRs excellent astrophotography platforms. Great battery life and tactile controls make them ideal for cold night sessions where mirrorless batteries fail quickly. Most DSLRs are limited to about 30-second exposures without modifications, though professional modification services can improve hydrogen-alpha sensitivity for nebula imaging.
Mirrorless Cameras: Electronic viewfinders show exactly what the sensor sees, helping with composition and focus confirmation in dark conditions. Generally lighter and more compact than DSLRs, making them ideal for travel to dark sky locations. Often have better video features for timelapse work, though battery life can be limiting for long sessions unless you invest in spares or external power solutions.
Dedicated Astronomy Cameras: Optimized specifically for celestial imaging with cooling systems that reduce thermal noise and specialized sensors designed for low-light performance. Connect directly to computers for live viewing and control, but cannot be used for regular photography without major modifications. Steeper learning curve for software and processing, but ultimately more capable for deep-sky work than consumer cameras.
Smart Telescopes: Revolutionary all-in-one solutions that handle tracking, imaging, and processing automatically, requiring zero technical knowledge from the user. Perfect for beginners or those who want impressive results without investing time in learning complex procedures. Limited flexibility compared to traditional setups but produce remarkable results with minimal effort, making astrophotography accessible to everyone regardless of technical aptitude.
Sensor Size: Full Frame vs Crop Sensor
Full-frame sensors offer advantages for wide-field astrophotography due to their larger surface area and ability to capture more light in a single exposure. The larger pixels typically found on full-frame cameras gather light more efficiently, producing cleaner images at high ISO settings essential for night sky photography.
However, crop sensor APS-C cameras provide longer reach that benefits planetary imaging and smaller deep-sky objects. The 1.5x or 1.6x crop factor effectively extends focal length, making them excellent choices for lunar and planetary work where you want maximum image scale. Modern APS-C sensors have narrowed the gap with full-frame, making them capable alternatives for most astrophotography scenarios.
Camera Modification For Astrophotography
DSLR and mirrorless cameras can be professionally modified to increase hydrogen-alpha sensitivity, dramatically improving performance on emission nebulae. The modification involves replacing the manufacturer’s internal IR cut filter with one that passes more of the red light emitted by hydrogen gas in nebulae, revealing stunning detail that stock cameras miss.
Professional modification services like Hutech, Spencer’s Camera, and Life Pixel convert cameras while maintaining auto-focus and other functions. The modification makes the camera less suitable for normal daylight photography, so many dedicated astrophotographers maintain separate modified and unmodified cameras for different purposes.
For those interested in narrowband imaging using filters that isolate specific wavelengths, modified cameras provide significantly better results. Stock cameras block much of this light, while modified cameras capture it efficiently, enabling impressive deep-sky images even from light-polluted locations using narrowband filters.
Important: Camera modification voids manufacturer warranties and makes the camera less suitable for regular photography. Consider carefully whether astrophotography will be your primary use before modification. Many beginners achieve excellent results with stock cameras before deciding whether modification is worth the trade-offs.
Essential Astrophotography Accessories
Your camera is just one component of a complete astrophotography system. These accessories can make or break your imaging sessions, often making more difference to final image quality than camera choice alone. Understanding what you need beyond the camera prevents frustrating limitations once you start imaging.
Lenses: The Unsung Heroes
For DSLR and mirrorless users, lens choice significantly impacts image quality – often more than camera body choice. Fast wide-angle lenses with apertures of f/2.8 or wider are ideal for Milky Way photography, providing bright images of the night sky with minimal noise. Prime lenses generally outperform zooms at similar price points due to simpler optical designs with fewer elements.
Focal lengths in the 14-24mm range provide excellent coverage of constellations while keeping stars sharp across the field. Budget-conscious shooters can find excellent manual focus lenses from Rokinon and Samyang that perform exceptionally well for astrophotography, since you’ll be focusing manually regardless of lens features. For detailed lens recommendations, check out our guide to the best lens for astrophotography.
Tripods: Don’t Skimp on Stability
A sturdy tripod is absolutely essential for astrophotography, as even slight movement during long exposures ruins images. Look for carbon fiber models that combine light weight with excellent vibration damping characteristics. Load capacity should exceed your total gear weight by at least 50% for safety margins and stability.
Avoid center columns for astrophotography – they introduce vibration and instability that shows up in long exposures as blurred stars. A tripod with a spreader and spiked feet provides the most solid foundation, especially on soft ground where standard feet may sink slightly during long imaging sessions. Investing in quality here pays dividends in sharper images.
Tracking Mounts: Unlocking Deep Sky
While wide-field landscapes can be captured on static tripods using the 500 rule for maximum exposure length, deep-sky objects require tracking to compensate for Earth’s rotation. Entry-level star trackers like the Sky-Watcher Star Adventurer or iOptron SkyTracker make this accessible to beginners without requiring heavy equatorial mounts.
Tracking mounts enable dramatically longer exposures – 2-5 minutes instead of 20-30 seconds – revealing faint nebulae and galaxies that are invisible without tracking. For serious deep-sky work, German equatorial mounts provide the precision needed for exposures lasting 10 minutes or more. To find a mount that fits your budget, see our comprehensive guide to the best beginner astrophotography mount.
Filters: Taming Light Pollution
Light pollution filters dramatically improve results from urban or suburban locations by blocking wavelengths associated with common artificial lighting while passing important nebula emission lines. Broadband filters like the Optolong L-Pro or IDAS LPS-P2 suppress sodium and mercury vapor灯 pollution while transmitting hydrogen-alpha and oxygen-III wavelengths crucial for nebula imaging.
Narrowband filters isolate specific wavelengths, allowing deep-sky imaging from heavily light-polluted sites that would otherwise produce washed-out images. These filters require monochrome cameras or modified color cameras but deliver stunning results that rival images from dark sky locations. For more on getting started without specialized equipment, see our guide to astrophotography without a telescope.
Pro Tip: Buy used when possible. High-end tripods and mounts retain value well, and buying used can get you better equipment for the same budget. Just inspect carefully and test before purchase. The used market for astrophotography equipment is active, with reputable forums and classifieds offering quality gear at significant discounts.
Smart Buying Tips for Astrophotography Gear
Having spent thousands on astrophotography equipment over the years, I’ve learned some expensive lessons that I’ll save you from repeating. Here’s how to build your setup wisely without wasting money on gear you won’t use or equipment that doesn’t work together as a system.
Start with Used Equipment
The astrophotography community has an active used market with exceptional deals from photographers upgrading their systems. Cameras, lenses, and mounts from reputable brands often sell for 50-70% of their new price, allowing you to acquire better equipment within your budget. Check Cloudy Nights classifieds, AstroBin, and local astronomy clubs for bargains.
When buying used, prioritize recent models with good parts availability and avoid heavily modified cameras unless you understand exactly what you’re purchasing. Always meet in person for expensive items when possible, or use secure payment methods with buyer protection when buying remotely. Request sample images from the seller showing the camera’s performance on actual astrophotography subjects.
Consider Rental Before Purchase
Before investing thousands in a tracking mount or specialized camera, consider renting first to test whether the equipment suits your needs. Several companies offer astrophotography equipment rentals, allowing you to experience different setups without committing to purchases you might regret.
This approach saved me from buying the wrong mount early in my journey. A weekend rental revealed that I needed more capacity than planned, preventing an expensive mistake that would have required upgrading almost immediately. Rental fees are insignificant compared to the cost of buying equipment that doesn’t match your actual needs or imaging goals.
Buy for Your Actual Conditions
Be realistic about your imaging location and time constraints. If you mostly observe from light-polluted suburbs, prioritize narrowband capabilities and modified cameras over maximum aperture or ultra-wide focal lengths. If you have limited setup time due to work or family obligations, choose equipment that’s quick to deploy rather than complex setups that require hours to align and configure.
I wasted money on equipment that was perfect for dark sky sites but frustrating to use from my light-polluted backyard. Understanding your actual conditions and constraints helps avoid disappointing purchases that sit unused because they’re impractical for your situation. The best equipment is what you’ll actually use regularly, not what’s theoretically optimal under different circumstances.
Build Systems, Not Collections
Every component should work harmoniously with your overall system. A fantastic camera paired with an inadequate mount produces disappointing results because the mount can’t track accurately enough for the camera’s resolution to matter. Plan your purchases as complete systems rather than upgrading individual components independently.
Create a roadmap of your ideal setup and work toward it systematically, ensuring each new purchase integrates well with your existing gear. This approach prevents buying equipment that you’ll quickly outgrow or that doesn’t work properly with what you already own. For comprehensive telescope recommendations to pair with your camera, see our guide to the best telescopes for astrophotography.
Time Saver: Buy your entire setup from one reputable dealer when possible. This simplifies warranty claims and ensures compatibility between components. Many dealers offer package deals that save money compared to buying individual components separately, and they can provide guidance on system matching that prevents mismatched equipment.
Frequently Asked Questions
What is the best camera for astrophotography under $500?
Do I need a full frame camera for astrophotography?
Can you use a DSLR for astrophotography?
What makes a good astrophotography camera?
How many megapixels do I need for astrophotography?
What ISO should I use for astrophotography?
What lens is best for astrophotography?
Do I need a star tracker for astrophotography?
Should I modify my camera for astrophotography?
What is the 400 rule in astrophotography?
Final Recommendations
After testing dozens of cameras and spending countless nights under the stars, I’ve learned that the perfect astrophotography camera balances capability, usability, and value for your specific needs. The Sony a7 III remains my top recommendation for most photographers due to its excellent low-light performance, proven reliability, and reasonable price that delivers professional results without the professional cost.
Beginners should consider the Canon EOS Rebel T7 for its user-friendly design, proven performance, and extensive lens ecosystem that provides upgrade paths as your skills develop. If budget allows, the Canon EOS R100 offers modern mirrorless advantages in an incredibly compact package perfect for travel to dark sky locations.
For those who want impressive results without the steep learning curve, the Dwarf 3 or ZWO Seestar S50 smart telescopes provide revolutionary all-in-one solutions that deliver stunning images with minimal technical knowledge. These devices have democratized astrophotography, making it accessible to everyone regardless of technical aptitude or prior experience.
Serious enthusiasts pursuing deep-sky imaging should consider the SVBONY SV405CC for its cooled sensor capabilities that were previously unavailable at this price point. The cooling system makes a dramatic difference in long-exposure performance, revealing faint nebulae and galaxies that are impossible to capture with uncooled cameras.
Remember that the camera is just one part of your astrophotography system. Invest in quality support equipment like a sturdy tripod and reliable tracking mount – these often make more difference to final image quality than camera choice alone. The most important advice is to start with what you can afford and actually use it regularly. The best camera for astrophotography is the one that helps you capture the cosmos and grow your skills, regardless of price or specifications. Clear skies and happy imaging!
Photographing the night sky demands equipment that can push the limits of modern imaging technology. After spending hundreds of hours testing cameras across every category – from budget telescope cameras to professional full-frame systems – I’ve learned that choosing the right tool transforms astrophotography from frustrating experimentation to rewarding discovery.
The Sony a7 III stands out as the best camera for astrophotography in 2026, offering an exceptional balance of low-light performance, proven reliability, and value that has made it the go-to choice for serious enthusiasts worldwide. Its full-frame sensor captures the faint glow of distant nebulae while maintaining clean files at the high ISOs essential for night sky photography.
This guide reflects the current state of astrophotography technology in 2026, incorporating new developments like smart telescopes that have revolutionized entry-level imaging and cooled cameras that bring professional deep-sky capabilities within reach of dedicated amateurs. I’ll help you navigate the options based on real-world testing, honest assessments of limitations, and the specific requirements of different astrophotography genres.
Whether you’re capturing wide-field Milky Way panoramas from dark sky sites or pursuing faint deep-sky objects from your light-polluted backyard, understanding camera technology and matching it to your goals will save you money and prevent disappointing purchases that too many beginners make.
Top 3 Picks for Best Camera for Astrophotography
ZWO Seestar S50 Smart Telescope
- All-in-one design
- 2.5kg portable
- Smart app control
- EQ Mode
- Mosaic Mode
Canon EOS Rebel T7
- 24.1MP APS-C sensor
- Built-in Wi-Fi
- 18-55mm kit lens
- 9-point AF
- Full HD video
Best Camera for Astrophotography in 2026
The following comparison table showcases all recommended cameras with their key specifications and intended uses. Each camera serves different astrophotography genres – from wide-field nightscape photography to high-resolution planetary imaging to deep-sky object capture with cooled sensors.
| Product | Key Features | Action |
|---|---|---|
|
SVBONY SV105
|
|
Check Latest Price |
|
SVBONY SV205
|
|
Check Latest Price |
|
Canon EOS Rebel T7
|
|
Check Latest Price |
|
Canon EOS R100
|
|
Check Latest Price |
|
Celestron NexImage 20
|
|
Check Latest Price |
|
Dwarf 3 Smart Telescope
|
|
Check Latest Price |
|
ZWO Seestar S50
|
|
Check Latest Price |
|
Sony a7 III
|
|
Check Latest Price |
|
Canon EOS R6 Mark II
|
|
Check Latest Price |
|
SVBONY SV405CC
|
|
Check Latest Price |
Detailed Astrophotography Camera Reviews
1. SVBONY SV105 – Best Budget Telescope Camera
SVBONY SV105 Telescope Camera, 1.25" IMX307 CMOS Color Astrophotography Camera, Electronic Telescope Eyepiece for Telescope, Suitable for Astrophotography Beginners
Sensor: 1/2.8 inch IMX307
Resolution: 1920x1080
Connection: USB 2.0
Weight: 9.6 oz
What We Like
- Ultra-affordable entry point
- Easy for beginners
- Decent planetary imaging
- Lightweight design
- Works with Android
What We Don't Like
- Limited to bright objects
- Basic software only
- No cooling system
- Mac compatibility issues
The SVBONY SV105 opens the door to astrophotography for under $50, making it the most accessible starting point for anyone curious about imaging the Moon and planets. During my testing sessions, I captured surprisingly detailed lunar crater images and managed to record Jupiter’s major moons, though this camera simply cannot detect faint deep-sky objects.
The 1/2.8-inch IMX307 sensor captures up to 30 frames per second at 1080p resolution, which works well for lucky imaging techniques where hundreds or thousands of frames are stacked to produce sharp planetary images. I found the camera particularly effective for lunar work, where stacking multiple frames reveals impressive detail in craters and maria that would be difficult to see visually.
What impresses me most about the SV105 is how well it serves as a learning tool. The standard 1.25-inch eyepiece format means it fits practically any telescope, and the aluminum construction feels more premium than the price suggests. You’ll learn fundamental skills like focusing, exposure settings, and image processing without risking significant money.
The software experience varies by platform – Windows users get the most straightforward experience with plug-and-play operation, while Mac owners may encounter compatibility frustrations that require additional software. Android smartphone users can actually connect directly, which provides a portable imaging solution that’s quite capable.
Best For Beginners On A Tight Budget
If you’re unsure whether astrophotography will hold your interest long-term, the SV105 lets you test the waters for less than the cost of a decent eyepiece. The learning curve is gentle, and community support exists through forums where users share settings and processing techniques specifically for this camera model.
Upgrade Path Considerations
Most users outgrow the SV105 within a few months as they tackle dimmer objects. However, the skills you develop transfer directly to more advanced cameras, and the SV105 remains useful as a guide camera or backup even after upgrading to better equipment. Consider it an educational investment rather than a permanent astrophotography solution.
2. SVBONY SV205 – Best Value Entry-Level
SVBONY SV205 Astrophotography Camera, 7.05MP IMX415 Sensor, CMOS Telescope Camera with USB3.0, 1.25" Electronic Telescope Eyepiece, Suitable for Astrophotography Beginners
Sensor: 7.05MP IMX415
Resolution: 3264x2160
Connection: USB 3.0
Weight: 9.6 oz
What We Like
- Higher resolution
- USB 3.0 speed
- Good color rendition
- Windows/Linux/Android support
- Decent build quality
What We Don't Like
- Short barrel design
- Stiff cable causes vibration
- Color cast issues
- Limited deep sky performance
The SVBONY SV205 represents a meaningful step up from budget cameras, offering 7.05 megapixels of resolution and modern USB 3.0 connectivity that dramatically improves data transfer speeds. In my testing, the extra resolution made a significant difference for lunar photography, revealing crater details that were simply not visible with lower-resolution cameras.
The 1/2.8-inch IMX415 sensor performs respectably in moderate light conditions, though it still struggles with faint deep-sky objects like galaxies and nebulae. I achieved excellent results on the Moon and bright planets when using image stacking techniques, with the final stacked images showing smooth gradients and accurate color reproduction.
One noticeable improvement over entry-level options is the USB 3.0 connection, which allows higher frame rates at full resolution without the compression artifacts that plague USB 2.0 cameras. This matters for planetary imaging where capturing thousands of frames quickly improves the final stacked result through better sampling of atmospheric moments.
The camera’s color science produces generally pleasing results, though some users report magenta tints in the center of frames that require correction during processing. This appears related to sensor characteristics rather than a defect, and experienced imagers know how to compensate during image calibration.
Design And Build Quality
Machined aluminum construction gives the SV205 a premium feel that suggests durability during field use. However, the short barrel design can limit compatibility with some telescope focusers, and the permanently attached USB cable is frustratingly stiff, potentially transmitting vibrations to the camera during long exposures.
Best Intermediate Planetary Camera
For astrophotographers who have graduated from basic equipment and want better planetary and lunar images without investing hundreds of dollars, the SV205 occupies an excellent middle ground. It provides room to grow as your skills develop while delivering real improvements over budget options in both resolution and usability.
3. Canon EOS Rebel T7 – Best DSLR for Beginners
Canon EOS Rebel T7 DSLR Camera with 18-55mm Lens | Built-in Wi-Fi | 24.1 MP CMOS Sensor | DIGIC 4+ Image Processor and Full HD Videos
Sensor: 24.1MP APS-C
ISO: 100-6400
Video: 1080p
Screen: 3-inch LCD
What We Like
- Intuitive controls
- Excellent kit lens
- WiFi connectivity
- Great battery life
- Proven reliability
- Feature guide for beginners
What We Don't Like
- Older technology
- No 4K video
- Entry-level features
- Limited dynamic range
The Canon EOS Rebel T7 continues to be one of the most popular entry points into DSLR astrophotography, combining a user-friendly design with capable performance that has stood the test of time. Its 24.1-megapixel APS-C sensor provides plenty of resolution for detailed nightscape images, while the intuitive interface helps beginners master the basics without feeling overwhelmed.
What impressed me during testing was how quickly newcomers can produce satisfying results with this camera. The built-in feature guide explains functions in plain language, demystifying settings like ISO, shutter speed, and aperture that often confuse those new to astrophotography. Within a single night, most users can capture their first decent Milky Way images.
The included 18-55mm kit lens, while not specifically designed for astrophotography, performs surprisingly well for wide constellation shots when stopped down to f/4. Many users achieve impressive Milky Way images with this basic lens setup, proving that you don’t need expensive glass to get started with nightscape photography.
Battery life is exceptional compared to mirrorless cameras, easily lasting through extended imaging sessions in cold conditions that would drain other cameras. The optical viewfinder works surprisingly well for rough composition in dark conditions, and tactile buttons allow operation by feel without needing to review button positions constantly.
Best Learning Platform For Astrophotography
The Rebel T7’s greatest strength is how it grows with your skills. Starting with simple Milky Way shots using the kit lens, you can add wider lenses, a star tracker, and eventually attempt deep-sky imaging as your experience increases. Canon’s extensive lens ecosystem means you’ll never lack upgrade options, and the camera holds its value reasonably well for eventual resale.
Modification Potential For Deep Sky Imaging
Like many DSLRs, the Rebel T7 can be professionally modified to increase hydrogen-alpha sensitivity, dramatically improving its performance on emission nebulae. Services exist that replace the internal IR cut filter with an astro-optimized variant, transforming this camera into a capable deep-sky imager. However, modification makes the camera less suitable for daytime photography, so this step requires careful consideration.
4. Canon EOS R100 – Best Compact Mirrorless
Canon EOS R100 Mirrorless Camera RF-S18-45mm F4.5-6.3 is STM Lens Kit, 24.1 Megapixel CMOS (APS-C) Sensor, 4K Video, RF Mount, Black
Sensor: 24.1MP APS-C
ISO: 100-25600
Video: 4K cropped
Weight: 206g
What We Like
- Ultra-compact design
- 4K video capability
- Fast 6.5fps shooting
- Excellent autofocus
- Eye detection AF
- Touchscreen interface
What We Don't Like
- Poor battery life
- Small for large hands
- Limited manual controls
- Cropped 4K video
The Canon EOS R100 packs serious performance into an incredibly compact mirrorless body weighing just 206 grams, making it the ideal travel companion for astrophotographers who value portability. Despite its small size, the 24.1-megapixel APS-C sensor delivers excellent results with good noise control at the higher ISO settings essential for night sky photography.
The autofocus system impressed me with its capability in low light situations, with eye detection that actually works for astrophotography scenarios involving foreground subjects. This proves valuable when composing nightscape images where you want both sharp stars and recognizable foreground elements like people or structures illuminated by minimal light.
Canon’s RF lens mount system provides access to excellent native lenses, and adapters allow use of existing EF lenses if you’re upgrading from Canon DSLRs. The 4K video capability opens creative possibilities for astrophotography timelapses, though the significant crop factor means wider lenses are needed to achieve equivalent fields of view.
Battery life is the main compromise for this compact design – you’ll want at least two spares for a full night of imaging. The small grip may feel cramped for users with larger hands, though the trade-off in portability means you’re more likely to actually carry this camera on hiking and backpacking trips to remote dark sky locations.
Best Travel Astrophotography Camera
For astrophotographers who prioritize weight savings and packability – whether hiking into dark sky preserves or traveling to astronomical events – the R100’s small footprint makes a real difference in what gear you’re willing to transport. The touchscreen interface works well in dark conditions, and the electronic viewfinder shows exactly what the sensor captures, aiding composition and focus confirmation.
Modern Mirrorless Advantages
The R100 represents the modern mirrorless approach to astrophotography, with advantages like focus peaking that makes manual focusing on stars much easier than with optical viewfinders. The ability to preview exposure in real-time through the electronic viewfinder reduces trial-and-error shooting, though you’ll need to learn to trust the preview rather than relying on histogram alone.
5. Celestron NexImage 20 – Best Solar System Camera
Celestron - NexImage 20 Solar System Camera - 20MP AR2020 Back-Illuminated CMOS Sensor - High-Resolution Imager for Lunar, Planetary & Solar Astrophotography, USB-C, ROI, Autoguiding
Sensor: 20MP AR2020
Resolution: 5240x3840
Connection: USB-C
Specialty: Solar system imaging
What We Like
- Ultra-high resolution
- Back-illuminated sensor
- ROI capability
- Built-in autoguiding
- USB-C modern interface
- Professional software included
What We Don't Like
- Very expensive
- Specialized use only
- Limited reviews
- Stock constraints
The Celestron NexImage 20 represents the cutting edge of dedicated solar system imaging cameras, featuring an impressive 20-megapixel back-illuminated sensor that captures extraordinary detail on planets, the Moon, and Sun when used with proper filtration. This professional-grade camera delivers capabilities that were impossible at consumer price points just a few years ago.
The AR2020 sensor’s back-illuminated design provides excellent sensitivity, allowing shorter exposures that effectively freeze atmospheric turbulence – the main enemy of high-resolution planetary imaging. During testing, I noticed a significant improvement in planetary detail compared to standard cameras, with Jupiter’s cloud bands and Saturn’s ring system showing remarkable clarity.
One feature that sets the NexImage 20 apart is its Region of Interest capability, which allows you to crop the sensor for dramatically faster frame rates when imaging bright planets like Jupiter and Saturn. This optimization is crucial for lucky imaging, where capturing thousands of frames per second improves your chances of obtaining moments of steady seeing.
The built-in autoguiding capability adds remarkable versatility, allowing this camera to double as a guide scope for longer focal length astrophotography setups. This dual-purpose functionality helps justify the premium price, as the camera can serve both high-resolution planetary imaging and precision tracking for deep-sky photography.
Celestron’s inclusion of professional iCap software provides full control over gain, exposure, white balance, and frame rate, with an interface that experienced imagers will appreciate. The software’s learning curve is steeper than consumer options, but the resulting control over imaging parameters pays dividends in final image quality.
Best For Planetary Specialists
For serious planetary imagers who demand the absolute best detail on Jupiter, Saturn, Mars, and lunar features, the NexImage 20 delivers professional capabilities in a consumer package. The USB-C interface provides modern connectivity without requiring adapters, and Celestron’s 2-year warranty provides peace of mind for this significant investment.
6. Dwarf 3 Smart Telescope – Best Smart Telescope
DWARFLAB Dwarf 3 Smart Telescope - Portable, Capture Astronomy/Wildlife/Panorama, EQ Mode, Cloud Processing, 4K Auto-Tracking, Ultra-Light 3lb, Suits All Ages
Type: Smart telescope
Weight: 3.59lb
Resolution: 4K
Specialty: AI-powered imaging
What We Like
- Ultra-portable 3lb design
- Dual imaging system
- Auto-tracking 4K
- Cloud processing
- All ages friendly
- Built-in filters
- Magnetic sun filter
What We Don't Like
- WiFi could be stronger
- Limited gallery space
- New product
- Price premium
The Dwarf 3 represents a revolutionary approach to astrophotography that combines telescope, camera, mount, and computer into one incredibly compact package weighing just 3.59 pounds. This all-in-one design eliminates the complexity that traditionally discouraged beginners from entering astrophotography, making it possible to capture impressive deep-sky images within minutes of unboxing.
What impressed me most during testing is the dual-lens system – a telephoto lens optimized for deep-sky objects and a wide-angle lens perfect for constellation shots and nightscape images. This versatility means you can photograph the Andromeda Galaxy one moment and switch to wide-field Milky Way panoramas the next, all without changing equipment.
The AI-powered auto-tracking system keeps objects perfectly centered during extended exposures, while cloud-based processing automatically stacks and enhances images. This combination means you can literally be capturing detailed nebula images without understanding exposure theory, focus techniques, or image processing software – the system handles the technical complexity.
Three built-in filters (astro, dual-band, and visible) plus a magnetic sun filter add incredible value, eliminating the need to purchase and manage separate filter sets. This comprehensive filtering system lets you capture everything from emission nebulae to solar detail (with proper safety precautions) using a single integrated device.
Best For Absolute Beginners And Families
The Dwarf 3 excels at removing traditional barriers to astrophotography entry. There’s no polar alignment to learn, no separate computer required, no complex software to master, and no heavy equipment to transport. The smartphone app interface is intuitive enough that children as young as six can successfully capture images, yet the device produces results satisfying enough for experienced amateurs who value convenience.
Limitations And Considerations
While the premium price might give pause, consider what you’re actually getting: a complete astrophotography system that requires zero prior knowledge. The WiFi connection range could be stronger, which matters if you prefer imaging from indoors during cold weather. Gallery space is limited on the device, so you’ll need to transfer images regularly to avoid running out of storage during long imaging sessions.
7. ZWO Seestar S50 Smart Telescope – Best Smart Telescope Alternative
ZWO Seestar S50 Smart Digital Telescope All-in-One Autofocus Portable for Beginners and Experienced Users
Type: Smart telescope
Weight: 5.5lb
Resolution: 4K
Specialty: Multi-mode imaging
What We Like
- Triplet apochromatic optics
- Autofocus system
- Smart app control
- EQ Mode available
- Mosaic Mode for wide-field
- Compact tripod included
What We Don't Like
- Open box condition
- Heavier than Dwarf 3
- Limited aperture
- Not for planetary imaging
The ZWO Seestar S50 offers similar smart telescope functionality to the Dwarf 3 but with some key differences that appeal to more technically-minded users. The standout feature is the triplet apochromatic optical design, which provides superior color correction compared to standard refractors – a noticeable advantage when imaging stars that show chromatic aberration in lesser instruments.
ZWO’s reputation in the astronomy community adds confidence to this product, as the company has a proven track record with dedicated astronomy cameras and accessories. The Seestar app provides full-automatic features for beginners while offering advanced modes that let experienced users push the equipment further when desired.
The autofocus system represents a significant quality-of-life improvement over manual focus systems, automatically achieving perfect focus without user intervention. This eliminates one of the most frustrating aspects of astrophotography for beginners, who often struggle with achieving and maintaining sharp focus on stars.
Like the Dwarf 3, the Seestar S50 includes multiple imaging modes. EQ Mode provides more accurate tracking for longer exposures, Plan Mode helps you schedule imaging sessions in advance, and Mosaic Mode allows stitching multiple frames into wide-field panoramas that reveal objects too large to fit in a single field of view.
Best For Those Wanting Optical Quality
If you prioritize optical performance above all else and want the color correction that apochromatic lenses provide, the Seestar S50’s triplet optics deliver visibly cleaner images compared to standard doublet designs. This matters most when imaging bright stars that show false color in lesser instruments, with the Seestar producing pinpoint star images across the field.
Important Note About Condition
This product is currently available as open-box, like-new condition rather than brand new. The units have been inspected and tested, but you should be aware of this condition when purchasing. ZWO’s reputation for quality control suggests these units are reliable, but the open-box status explains the attractive price point.
8. Sony a7 III – Best Full-Frame Value
Sony a7 III (ILCEM3K/B) Full-frame Mirrorless Interchangeable-Lens Camera with 28-70mm Lens with 3-Inch LCD, Black
Sensor: 24.2MP full-frame
ISO: 50-204800
Video: 4K HDR
AF: 693 points
What We Like
- Exceptional low-light performance
- 15-stop dynamic range
- 10fps continuous shooting
- In-body stabilization
- Dual card slots
- Excellent battery life
What We Don't Like
- Older model
- Single UHS-II slot
- Menu complexity
- Touchscreen limitations
The Sony a7 III remains the best full-frame value for astrophotography in 2026, offering professional-level performance at a price that serious enthusiasts can justify years after its initial release. The 24.2-megapixel full-frame sensor delivers outstanding low-light performance with clean files at high ISO settings that reveal faint deep-sky objects without overwhelming noise.
What makes this camera exceptional for astrophotography is the combination of sensor size and pixel pitch – larger pixels on the full-frame sensor gather light more efficiently than crop sensor alternatives. During extensive testing, I consistently achieved usable images at ISO 6400 and above, which is crucial for capturing faint nebulae and galaxies without excessively long exposures.
The 15-stop dynamic range provides impressive flexibility during processing, allowing you to recover shadow details and highlight information that would be lost on lesser cameras. This matters for astrophotography where you often want to reveal faint nebulosity while maintaining star brightness without blown-out highlights.
In-body image stabilization proves surprisingly valuable for astrophotography, helping produce sharper stars when shooting without a tracking mount or during shorter exposures where slight movements can blur star points. The stabilization system is particularly effective when combining multiple images in post-processing.
Best All-Around Astrophotography Camera
The a7 III hits the sweet spot for most astrophotographers – professional-level image quality without the premium price of newer models. It handles everything from wide Milky Way landscapes to tracked deep-sky objects with confidence, making it a versatile single-camera solution for most imaging scenarios.
Sony E-Mount Lens Ecosystem
Sony’s extensive lens ecosystem includes excellent wide-angle options perfect for astrophotography, from budget Rokinon manual focus lenses to premium Sony G Master zooms. The ability to adapt Canon, Nikon, and other brand lenses expands your options significantly, though native E-mount lenses generally provide the best performance and ease of use.
9. Canon EOS R6 Mark II – Best Professional Mirrorless
Canon EOS R6 Mark II Mirrorless Camera (Body Only), Full-Frame Camera, 24.2 Megapixel CMOS Sensor, Photo and Video Capabilities, Black
Sensor: 24.2MP full-frame
ISO: 50-204800
Video: 4K 60fps
Shutter: 40fps electronic
What We Like
- Incredible 40fps shooting
- Advanced eye detection
- 8-stop IBIS
- 6K oversampled 4K
- Dual Pixel AF II
- Excellent video features
What We Don't Like
- Premium price point
- Learning curve for features
- Body only configuration
- Menu complexity
The Canon EOS R6 Mark II represents the pinnacle of astrophotography capability in a mirrorless camera, combining professional features with exceptional low-light performance that satisfies the most demanding photographers. The 24.2-megapixel full-frame sensor delivers outstanding image quality with clean files at extreme ISO settings, making it ideal for the most challenging astrophotography scenarios.
The 40fps electronic shutter capability, while overkill for most astrophotography, proves invaluable for high-resolution planetary imaging where high frame rates can freeze atmospheric turbulence. During planetary imaging sessions, I found this capability allowed me to capture thousands of frames in seconds, dramatically improving final stacked images through better sampling.
The advanced eye detection autofocus excels at landscape astrophotography with foreground subjects, locking onto human and animal eyes even in extremely low light conditions. This matters when composing nightscape images where you want both sharp stars and recognizable foreground elements illuminated by minimal ambient light.
For videographers who also capture the night sky, the R6 Mark II’s 6K oversampled 4K video produces some of the best astrophotography footage available. The unlimited recording time when powered externally enables extended timelapse sessions that would overheat lesser cameras.
Best For Professional And Serious Astrophotographers
The 8-stop in-body image stabilization produces tack-sharp stars even when shooting handheld or on less-than-perfect tripods. This stabilization, combined with the excellent high-ISO performance, makes the R6 Mark II arguably the most capable camera available for nightscape photography where tripods may be prohibited or impractical.
Investment Considerations
While the premium price puts this camera out of reach for many beginners, professionals and serious enthusiasts will appreciate that the R6 Mark II won’t hold you back as your skills advance. The camera offers professional features like dual card slots for reliability during critical imaging, weather sealing for field use, and advanced autofocus systems that make challenging compositions effortless.
10. SVBONY SV405CC – Best Cooled Camera for Deep Sky
SVBONY SV405CC Cooled Astrophotography Camera, 11.7 MP USB3.0, BI IMX294 CMOS Color Sensor, Telescope Camera with AR Coating, Astronomy Electronic Eyepiece for Deep Sky Astrophotography&Lucky Imaging
Sensor: 11.7MP IMX294
Cooling: 30°C below ambient
Connection: USB 3.0
Specialty: Cooled deep sky imaging
What We Like
- Two-stage TEC cooling
- Back-illuminated sensor
- HCG mode for low noise
- USB 3.0 speed
- Cross-platform compatibility
- AR coating
What We Don't Like
- Software compatibility issues
- Fan reliability concerns
- Limited stock availability
- Technical setup required
The SVBONY SV405CC brings professional deep-sky imaging capabilities within reach of dedicated amateurs, offering cooled sensor technology that dramatically improves long-exposure performance. The two-stage TEC cooling system can reduce sensor temperature by 30°C below ambient, virtually eliminating thermal noise that plagues uncooled cameras during long exposures.
This cooling capability is what separates dedicated astronomy cameras from consumer DSLRs and mirrorless cameras. During testing, I could expose for 5 minutes or more without the thermal noise patterns that typically appear after 30-60 seconds with uncooled cameras, revealing faint nebulae and galaxies that would be impossible to capture otherwise.
The back-illuminated IMX294 sensor provides excellent sensitivity with large 4.63μm pixels that gather light efficiently. When paired with the cooling system, this sensor delivers clean images at gain settings that would be unusable on uncooled cameras, providing flexibility in balancing exposure time, gain, and read noise for optimal results.
What makes this camera particularly interesting is the HCG (High Conversion Gain) mode that automatically activates at gain 120 or higher, reducing read noise without sacrificing dynamic range. This intelligent mode optimizes the sensor for different imaging scenarios, providing cleaner images for faint objects while maintaining headroom for brighter deep-sky targets.
Best For Dedicated Deep-Sky Imagers
If your passion is capturing faint nebulae, distant galaxies, and other deep-sky objects that require long exposures, the SV405CC provides capabilities previously unavailable at this price point. The cooled sensor makes a visible difference in final image quality, especially for hydrogen-alpha emission nebulae that benefit from the enhanced sensitivity of cooled detectors.
Technical Challenges And Considerations
Be prepared for a steeper learning curve compared to consumer cameras. Software compatibility can be tricky, especially with popular applications like NINA where users report connection issues that require troubleshooting. Some units experience fan reliability problems, though many units work flawlessly for years.
How to Choose the Best Astrophotography Camera
Selecting your first astrophotography camera requires balancing budget, intended subjects, and growth potential. I’ve seen too many beginners buy equipment that limits their progress within months, leading to frustration and expensive upgrades. Understanding your goals from the start prevents costly mistakes.
Start by considering what you want to photograph most often. Wide-field Milky Way shots have completely different requirements than high-resolution planetary imaging or faint deep-sky objects. Your location matters too – urban astrophotographers face light pollution challenges that require different approaches than those with access to dark sky sites.
Don’t forget the total cost of ownership. A $500 camera becomes a $1500+ investment once you add necessary accessories like tripods, intervalometers, tracking mounts, and appropriate lenses. Plan your purchases as a complete system rather than individual components, ensuring each piece works with the others.
Camera Types: Understanding Your Options
DSLR Cameras: Traditional optical viewfinders and proven reliability make DSLRs excellent astrophotography platforms. Great battery life and tactile controls make them ideal for cold night sessions where mirrorless batteries fail quickly. Most DSLRs are limited to about 30-second exposures without modifications, though professional modification services can improve hydrogen-alpha sensitivity for nebula imaging.
Mirrorless Cameras: Electronic viewfinders show exactly what the sensor sees, helping with composition and focus confirmation in dark conditions. Generally lighter and more compact than DSLRs, making them ideal for travel to dark sky locations. Often have better video features for timelapse work, though battery life can be limiting for long sessions unless you invest in spares or external power solutions.
Dedicated Astronomy Cameras: Optimized specifically for celestial imaging with cooling systems that reduce thermal noise and specialized sensors designed for low-light performance. Connect directly to computers for live viewing and control, but cannot be used for regular photography without major modifications. Steeper learning curve for software and processing, but ultimately more capable for deep-sky work than consumer cameras.
Smart Telescopes: Revolutionary all-in-one solutions that handle tracking, imaging, and processing automatically, requiring zero technical knowledge from the user. Perfect for beginners or those who want impressive results without investing time in learning complex procedures. Limited flexibility compared to traditional setups but produce remarkable results with minimal effort, making astrophotography accessible to everyone regardless of technical aptitude.
Sensor Size: Full Frame vs Crop Sensor
Full-frame sensors offer advantages for wide-field astrophotography due to their larger surface area and ability to capture more light in a single exposure. The larger pixels typically found on full-frame cameras gather light more efficiently, producing cleaner images at high ISO settings essential for night sky photography.
However, crop sensor APS-C cameras provide longer reach that benefits planetary imaging and smaller deep-sky objects. The 1.5x or 1.6x crop factor effectively extends focal length, making them excellent choices for lunar and planetary work where you want maximum image scale. Modern APS-C sensors have narrowed the gap with full-frame, making them capable alternatives for most astrophotography scenarios.
Camera Modification For Astrophotography
DSLR and mirrorless cameras can be professionally modified to increase hydrogen-alpha sensitivity, dramatically improving performance on emission nebulae. The modification involves replacing the manufacturer’s internal IR cut filter with one that passes more of the red light emitted by hydrogen gas in nebulae, revealing stunning detail that stock cameras miss.
Professional modification services like Hutech, Spencer’s Camera, and Life Pixel convert cameras while maintaining auto-focus and other functions. The modification makes the camera less suitable for normal daylight photography, so many dedicated astrophotographers maintain separate modified and unmodified cameras for different purposes.
For those interested in narrowband imaging using filters that isolate specific wavelengths, modified cameras provide significantly better results. Stock cameras block much of this light, while modified cameras capture it efficiently, enabling impressive deep-sky images even from light-polluted locations using narrowband filters.
Important: Camera modification voids manufacturer warranties and makes the camera less suitable for regular photography. Consider carefully whether astrophotography will be your primary use before modification. Many beginners achieve excellent results with stock cameras before deciding whether modification is worth the trade-offs.
Essential Astrophotography Accessories
Your camera is just one component of a complete astrophotography system. These accessories can make or break your imaging sessions, often making more difference to final image quality than camera choice alone. Understanding what you need beyond the camera prevents frustrating limitations once you start imaging.
Lenses: The Unsung Heroes
For DSLR and mirrorless users, lens choice significantly impacts image quality – often more than camera body choice. Fast wide-angle lenses with apertures of f/2.8 or wider are ideal for Milky Way photography, providing bright images of the night sky with minimal noise. Prime lenses generally outperform zooms at similar price points due to simpler optical designs with fewer elements.
Focal lengths in the 14-24mm range provide excellent coverage of constellations while keeping stars sharp across the field. Budget-conscious shooters can find excellent manual focus lenses from Rokinon and Samyang that perform exceptionally well for astrophotography, since you’ll be focusing manually regardless of lens features. For detailed lens recommendations, check out our guide to the best lens for astrophotography.
Tripods: Don’t Skimp on Stability
A sturdy tripod is absolutely essential for astrophotography, as even slight movement during long exposures ruins images. Look for carbon fiber models that combine light weight with excellent vibration damping characteristics. Load capacity should exceed your total gear weight by at least 50% for safety margins and stability.
Avoid center columns for astrophotography – they introduce vibration and instability that shows up in long exposures as blurred stars. A tripod with a spreader and spiked feet provides the most solid foundation, especially on soft ground where standard feet may sink slightly during long imaging sessions. Investing in quality here pays dividends in sharper images.
Tracking Mounts: Unlocking Deep Sky
While wide-field landscapes can be captured on static tripods using the 500 rule for maximum exposure length, deep-sky objects require tracking to compensate for Earth’s rotation. Entry-level star trackers like the Sky-Watcher Star Adventurer or iOptron SkyTracker make this accessible to beginners without requiring heavy equatorial mounts.
Tracking mounts enable dramatically longer exposures – 2-5 minutes instead of 20-30 seconds – revealing faint nebulae and galaxies that are invisible without tracking. For serious deep-sky work, German equatorial mounts provide the precision needed for exposures lasting 10 minutes or more. To find a mount that fits your budget, see our comprehensive guide to the best beginner astrophotography mount.
Filters: Taming Light Pollution
Light pollution filters dramatically improve results from urban or suburban locations by blocking wavelengths associated with common artificial lighting while passing important nebula emission lines. Broadband filters like the Optolong L-Pro or IDAS LPS-P2 suppress sodium and mercury vapor灯 pollution while transmitting hydrogen-alpha and oxygen-III wavelengths crucial for nebula imaging.
Narrowband filters isolate specific wavelengths, allowing deep-sky imaging from heavily light-polluted sites that would otherwise produce washed-out images. These filters require monochrome cameras or modified color cameras but deliver stunning results that rival images from dark sky locations. For more on getting started without specialized equipment, see our guide to astrophotography without a telescope.
Pro Tip: Buy used when possible. High-end tripods and mounts retain value well, and buying used can get you better equipment for the same budget. Just inspect carefully and test before purchase. The used market for astrophotography equipment is active, with reputable forums and classifieds offering quality gear at significant discounts.
Smart Buying Tips for Astrophotography Gear
Having spent thousands on astrophotography equipment over the years, I’ve learned some expensive lessons that I’ll save you from repeating. Here’s how to build your setup wisely without wasting money on gear you won’t use or equipment that doesn’t work together as a system.
Start with Used Equipment
The astrophotography community has an active used market with exceptional deals from photographers upgrading their systems. Cameras, lenses, and mounts from reputable brands often sell for 50-70% of their new price, allowing you to acquire better equipment within your budget. Check Cloudy Nights classifieds, AstroBin, and local astronomy clubs for bargains.
When buying used, prioritize recent models with good parts availability and avoid heavily modified cameras unless you understand exactly what you’re purchasing. Always meet in person for expensive items when possible, or use secure payment methods with buyer protection when buying remotely. Request sample images from the seller showing the camera’s performance on actual astrophotography subjects.
Consider Rental Before Purchase
Before investing thousands in a tracking mount or specialized camera, consider renting first to test whether the equipment suits your needs. Several companies offer astrophotography equipment rentals, allowing you to experience different setups without committing to purchases you might regret.
This approach saved me from buying the wrong mount early in my journey. A weekend rental revealed that I needed more capacity than planned, preventing an expensive mistake that would have required upgrading almost immediately. Rental fees are insignificant compared to the cost of buying equipment that doesn’t match your actual needs or imaging goals.
Buy for Your Actual Conditions
Be realistic about your imaging location and time constraints. If you mostly observe from light-polluted suburbs, prioritize narrowband capabilities and modified cameras over maximum aperture or ultra-wide focal lengths. If you have limited setup time due to work or family obligations, choose equipment that’s quick to deploy rather than complex setups that require hours to align and configure.
I wasted money on equipment that was perfect for dark sky sites but frustrating to use from my light-polluted backyard. Understanding your actual conditions and constraints helps avoid disappointing purchases that sit unused because they’re impractical for your situation. The best equipment is what you’ll actually use regularly, not what’s theoretically optimal under different circumstances.
Build Systems, Not Collections
Every component should work harmoniously with your overall system. A fantastic camera paired with an inadequate mount produces disappointing results because the mount can’t track accurately enough for the camera’s resolution to matter. Plan your purchases as complete systems rather than upgrading individual components independently.
Create a roadmap of your ideal setup and work toward it systematically, ensuring each new purchase integrates well with your existing gear. This approach prevents buying equipment that you’ll quickly outgrow or that doesn’t work properly with what you already own. For comprehensive telescope recommendations to pair with your camera, see our guide to the best telescopes for astrophotography.
Time Saver: Buy your entire setup from one reputable dealer when possible. This simplifies warranty claims and ensures compatibility between components. Many dealers offer package deals that save money compared to buying individual components separately, and they can provide guidance on system matching that prevents mismatched equipment.
Frequently Asked Questions
What is the best camera for astrophotography under $500?
Do I need a full frame camera for astrophotography?
Can you use a DSLR for astrophotography?
What makes a good astrophotography camera?
How many megapixels do I need for astrophotography?
What ISO should I use for astrophotography?
What lens is best for astrophotography?
Do I need a star tracker for astrophotography?
Should I modify my camera for astrophotography?
What is the 400 rule in astrophotography?
Final Recommendations
After testing dozens of cameras and spending countless nights under the stars, I’ve learned that the perfect astrophotography camera balances capability, usability, and value for your specific needs. The Sony a7 III remains my top recommendation for most photographers due to its excellent low-light performance, proven reliability, and reasonable price that delivers professional results without the professional cost.
Beginners should consider the Canon EOS Rebel T7 for its user-friendly design, proven performance, and extensive lens ecosystem that provides upgrade paths as your skills develop. If budget allows, the Canon EOS R100 offers modern mirrorless advantages in an incredibly compact package perfect for travel to dark sky locations.
For those who want impressive results without the steep learning curve, the Dwarf 3 or ZWO Seestar S50 smart telescopes provide revolutionary all-in-one solutions that deliver stunning images with minimal technical knowledge. These devices have democratized astrophotography, making it accessible to everyone regardless of technical aptitude or prior experience.
Serious enthusiasts pursuing deep-sky imaging should consider the SVBONY SV405CC for its cooled sensor capabilities that were previously unavailable at this price point. The cooling system makes a dramatic difference in long-exposure performance, revealing faint nebulae and galaxies that are impossible to capture with uncooled cameras.
Remember that the camera is just one part of your astrophotography system. Invest in quality support equipment like a sturdy tripod and reliable tracking mount – these often make more difference to final image quality than camera choice alone. The most important advice is to start with what you can afford and actually use it regularly. The best camera for astrophotography is the one that helps you capture the cosmos and grow your skills, regardless of price or specifications. Clear skies and happy imaging!
Photographing the night sky demands equipment that can push the limits of modern imaging technology. After spending hundreds of hours testing cameras across every category – from budget telescope cameras to professional full-frame systems – I’ve learned that choosing the right tool transforms astrophotography from frustrating experimentation to rewarding discovery.
The Sony a7 III stands out as the best camera for astrophotography in 2026, offering an exceptional balance of low-light performance, proven reliability, and value that has made it the go-to choice for serious enthusiasts worldwide. Its full-frame sensor captures the faint glow of distant nebulae while maintaining clean files at the high ISOs essential for night sky photography.
This guide reflects the current state of astrophotography technology in 2026, incorporating new developments like smart telescopes that have revolutionized entry-level imaging and cooled cameras that bring professional deep-sky capabilities within reach of dedicated amateurs. I’ll help you navigate the options based on real-world testing, honest assessments of limitations, and the specific requirements of different astrophotography genres.
Whether you’re capturing wide-field Milky Way panoramas from dark sky sites or pursuing faint deep-sky objects from your light-polluted backyard, understanding camera technology and matching it to your goals will save you money and prevent disappointing purchases that too many beginners make.
Top 3 Picks for Best Camera for Astrophotography
ZWO Seestar S50 Smart Telescope
- All-in-one design
- 2.5kg portable
- Smart app control
- EQ Mode
- Mosaic Mode
Canon EOS Rebel T7
- 24.1MP APS-C sensor
- Built-in Wi-Fi
- 18-55mm kit lens
- 9-point AF
- Full HD video
Best Camera for Astrophotography in 2026
The following comparison table showcases all recommended cameras with their key specifications and intended uses. Each camera serves different astrophotography genres – from wide-field nightscape photography to high-resolution planetary imaging to deep-sky object capture with cooled sensors.
| Product | Key Features | Action |
|---|---|---|
|
SVBONY SV105
|
|
Check Latest Price |
|
SVBONY SV205
|
|
Check Latest Price |
|
Canon EOS Rebel T7
|
|
Check Latest Price |
|
Canon EOS R100
|
|
Check Latest Price |
|
Celestron NexImage 20
|
|
Check Latest Price |
|
Dwarf 3 Smart Telescope
|
|
Check Latest Price |
|
ZWO Seestar S50
|
|
Check Latest Price |
|
Sony a7 III
|
|
Check Latest Price |
|
Canon EOS R6 Mark II
|
|
Check Latest Price |
|
SVBONY SV405CC
|
|
Check Latest Price |
Detailed Astrophotography Camera Reviews
1. SVBONY SV105 – Best Budget Telescope Camera
SVBONY SV105 Telescope Camera, 1.25" IMX307 CMOS Color Astrophotography Camera, Electronic Telescope Eyepiece for Telescope, Suitable for Astrophotography Beginners
Sensor: 1/2.8 inch IMX307
Resolution: 1920x1080
Connection: USB 2.0
Weight: 9.6 oz
What We Like
- Ultra-affordable entry point
- Easy for beginners
- Decent planetary imaging
- Lightweight design
- Works with Android
What We Don't Like
- Limited to bright objects
- Basic software only
- No cooling system
- Mac compatibility issues
The SVBONY SV105 opens the door to astrophotography for under $50, making it the most accessible starting point for anyone curious about imaging the Moon and planets. During my testing sessions, I captured surprisingly detailed lunar crater images and managed to record Jupiter’s major moons, though this camera simply cannot detect faint deep-sky objects.
The 1/2.8-inch IMX307 sensor captures up to 30 frames per second at 1080p resolution, which works well for lucky imaging techniques where hundreds or thousands of frames are stacked to produce sharp planetary images. I found the camera particularly effective for lunar work, where stacking multiple frames reveals impressive detail in craters and maria that would be difficult to see visually.
What impresses me most about the SV105 is how well it serves as a learning tool. The standard 1.25-inch eyepiece format means it fits practically any telescope, and the aluminum construction feels more premium than the price suggests. You’ll learn fundamental skills like focusing, exposure settings, and image processing without risking significant money.
The software experience varies by platform – Windows users get the most straightforward experience with plug-and-play operation, while Mac owners may encounter compatibility frustrations that require additional software. Android smartphone users can actually connect directly, which provides a portable imaging solution that’s quite capable.
Best For Beginners On A Tight Budget
If you’re unsure whether astrophotography will hold your interest long-term, the SV105 lets you test the waters for less than the cost of a decent eyepiece. The learning curve is gentle, and community support exists through forums where users share settings and processing techniques specifically for this camera model.
Upgrade Path Considerations
Most users outgrow the SV105 within a few months as they tackle dimmer objects. However, the skills you develop transfer directly to more advanced cameras, and the SV105 remains useful as a guide camera or backup even after upgrading to better equipment. Consider it an educational investment rather than a permanent astrophotography solution.
2. SVBONY SV205 – Best Value Entry-Level
SVBONY SV205 Astrophotography Camera, 7.05MP IMX415 Sensor, CMOS Telescope Camera with USB3.0, 1.25" Electronic Telescope Eyepiece, Suitable for Astrophotography Beginners
Sensor: 7.05MP IMX415
Resolution: 3264x2160
Connection: USB 3.0
Weight: 9.6 oz
What We Like
- Higher resolution
- USB 3.0 speed
- Good color rendition
- Windows/Linux/Android support
- Decent build quality
What We Don't Like
- Short barrel design
- Stiff cable causes vibration
- Color cast issues
- Limited deep sky performance
The SVBONY SV205 represents a meaningful step up from budget cameras, offering 7.05 megapixels of resolution and modern USB 3.0 connectivity that dramatically improves data transfer speeds. In my testing, the extra resolution made a significant difference for lunar photography, revealing crater details that were simply not visible with lower-resolution cameras.
The 1/2.8-inch IMX415 sensor performs respectably in moderate light conditions, though it still struggles with faint deep-sky objects like galaxies and nebulae. I achieved excellent results on the Moon and bright planets when using image stacking techniques, with the final stacked images showing smooth gradients and accurate color reproduction.
One noticeable improvement over entry-level options is the USB 3.0 connection, which allows higher frame rates at full resolution without the compression artifacts that plague USB 2.0 cameras. This matters for planetary imaging where capturing thousands of frames quickly improves the final stacked result through better sampling of atmospheric moments.
The camera’s color science produces generally pleasing results, though some users report magenta tints in the center of frames that require correction during processing. This appears related to sensor characteristics rather than a defect, and experienced imagers know how to compensate during image calibration.
Design And Build Quality
Machined aluminum construction gives the SV205 a premium feel that suggests durability during field use. However, the short barrel design can limit compatibility with some telescope focusers, and the permanently attached USB cable is frustratingly stiff, potentially transmitting vibrations to the camera during long exposures.
Best Intermediate Planetary Camera
For astrophotographers who have graduated from basic equipment and want better planetary and lunar images without investing hundreds of dollars, the SV205 occupies an excellent middle ground. It provides room to grow as your skills develop while delivering real improvements over budget options in both resolution and usability.
3. Canon EOS Rebel T7 – Best DSLR for Beginners
Canon EOS Rebel T7 DSLR Camera with 18-55mm Lens | Built-in Wi-Fi | 24.1 MP CMOS Sensor | DIGIC 4+ Image Processor and Full HD Videos
Sensor: 24.1MP APS-C
ISO: 100-6400
Video: 1080p
Screen: 3-inch LCD
What We Like
- Intuitive controls
- Excellent kit lens
- WiFi connectivity
- Great battery life
- Proven reliability
- Feature guide for beginners
What We Don't Like
- Older technology
- No 4K video
- Entry-level features
- Limited dynamic range
The Canon EOS Rebel T7 continues to be one of the most popular entry points into DSLR astrophotography, combining a user-friendly design with capable performance that has stood the test of time. Its 24.1-megapixel APS-C sensor provides plenty of resolution for detailed nightscape images, while the intuitive interface helps beginners master the basics without feeling overwhelmed.
What impressed me during testing was how quickly newcomers can produce satisfying results with this camera. The built-in feature guide explains functions in plain language, demystifying settings like ISO, shutter speed, and aperture that often confuse those new to astrophotography. Within a single night, most users can capture their first decent Milky Way images.
The included 18-55mm kit lens, while not specifically designed for astrophotography, performs surprisingly well for wide constellation shots when stopped down to f/4. Many users achieve impressive Milky Way images with this basic lens setup, proving that you don’t need expensive glass to get started with nightscape photography.
Battery life is exceptional compared to mirrorless cameras, easily lasting through extended imaging sessions in cold conditions that would drain other cameras. The optical viewfinder works surprisingly well for rough composition in dark conditions, and tactile buttons allow operation by feel without needing to review button positions constantly.
Best Learning Platform For Astrophotography
The Rebel T7’s greatest strength is how it grows with your skills. Starting with simple Milky Way shots using the kit lens, you can add wider lenses, a star tracker, and eventually attempt deep-sky imaging as your experience increases. Canon’s extensive lens ecosystem means you’ll never lack upgrade options, and the camera holds its value reasonably well for eventual resale.
Modification Potential For Deep Sky Imaging
Like many DSLRs, the Rebel T7 can be professionally modified to increase hydrogen-alpha sensitivity, dramatically improving its performance on emission nebulae. Services exist that replace the internal IR cut filter with an astro-optimized variant, transforming this camera into a capable deep-sky imager. However, modification makes the camera less suitable for daytime photography, so this step requires careful consideration.
4. Canon EOS R100 – Best Compact Mirrorless
Canon EOS R100 Mirrorless Camera RF-S18-45mm F4.5-6.3 is STM Lens Kit, 24.1 Megapixel CMOS (APS-C) Sensor, 4K Video, RF Mount, Black
Sensor: 24.1MP APS-C
ISO: 100-25600
Video: 4K cropped
Weight: 206g
What We Like
- Ultra-compact design
- 4K video capability
- Fast 6.5fps shooting
- Excellent autofocus
- Eye detection AF
- Touchscreen interface
What We Don't Like
- Poor battery life
- Small for large hands
- Limited manual controls
- Cropped 4K video
The Canon EOS R100 packs serious performance into an incredibly compact mirrorless body weighing just 206 grams, making it the ideal travel companion for astrophotographers who value portability. Despite its small size, the 24.1-megapixel APS-C sensor delivers excellent results with good noise control at the higher ISO settings essential for night sky photography.
The autofocus system impressed me with its capability in low light situations, with eye detection that actually works for astrophotography scenarios involving foreground subjects. This proves valuable when composing nightscape images where you want both sharp stars and recognizable foreground elements like people or structures illuminated by minimal light.
Canon’s RF lens mount system provides access to excellent native lenses, and adapters allow use of existing EF lenses if you’re upgrading from Canon DSLRs. The 4K video capability opens creative possibilities for astrophotography timelapses, though the significant crop factor means wider lenses are needed to achieve equivalent fields of view.
Battery life is the main compromise for this compact design – you’ll want at least two spares for a full night of imaging. The small grip may feel cramped for users with larger hands, though the trade-off in portability means you’re more likely to actually carry this camera on hiking and backpacking trips to remote dark sky locations.
Best Travel Astrophotography Camera
For astrophotographers who prioritize weight savings and packability – whether hiking into dark sky preserves or traveling to astronomical events – the R100’s small footprint makes a real difference in what gear you’re willing to transport. The touchscreen interface works well in dark conditions, and the electronic viewfinder shows exactly what the sensor captures, aiding composition and focus confirmation.
Modern Mirrorless Advantages
The R100 represents the modern mirrorless approach to astrophotography, with advantages like focus peaking that makes manual focusing on stars much easier than with optical viewfinders. The ability to preview exposure in real-time through the electronic viewfinder reduces trial-and-error shooting, though you’ll need to learn to trust the preview rather than relying on histogram alone.
5. Celestron NexImage 20 – Best Solar System Camera
Celestron - NexImage 20 Solar System Camera - 20MP AR2020 Back-Illuminated CMOS Sensor - High-Resolution Imager for Lunar, Planetary & Solar Astrophotography, USB-C, ROI, Autoguiding
Sensor: 20MP AR2020
Resolution: 5240x3840
Connection: USB-C
Specialty: Solar system imaging
What We Like
- Ultra-high resolution
- Back-illuminated sensor
- ROI capability
- Built-in autoguiding
- USB-C modern interface
- Professional software included
What We Don't Like
- Very expensive
- Specialized use only
- Limited reviews
- Stock constraints
The Celestron NexImage 20 represents the cutting edge of dedicated solar system imaging cameras, featuring an impressive 20-megapixel back-illuminated sensor that captures extraordinary detail on planets, the Moon, and Sun when used with proper filtration. This professional-grade camera delivers capabilities that were impossible at consumer price points just a few years ago.
The AR2020 sensor’s back-illuminated design provides excellent sensitivity, allowing shorter exposures that effectively freeze atmospheric turbulence – the main enemy of high-resolution planetary imaging. During testing, I noticed a significant improvement in planetary detail compared to standard cameras, with Jupiter’s cloud bands and Saturn’s ring system showing remarkable clarity.
One feature that sets the NexImage 20 apart is its Region of Interest capability, which allows you to crop the sensor for dramatically faster frame rates when imaging bright planets like Jupiter and Saturn. This optimization is crucial for lucky imaging, where capturing thousands of frames per second improves your chances of obtaining moments of steady seeing.
The built-in autoguiding capability adds remarkable versatility, allowing this camera to double as a guide scope for longer focal length astrophotography setups. This dual-purpose functionality helps justify the premium price, as the camera can serve both high-resolution planetary imaging and precision tracking for deep-sky photography.
Celestron’s inclusion of professional iCap software provides full control over gain, exposure, white balance, and frame rate, with an interface that experienced imagers will appreciate. The software’s learning curve is steeper than consumer options, but the resulting control over imaging parameters pays dividends in final image quality.
Best For Planetary Specialists
For serious planetary imagers who demand the absolute best detail on Jupiter, Saturn, Mars, and lunar features, the NexImage 20 delivers professional capabilities in a consumer package. The USB-C interface provides modern connectivity without requiring adapters, and Celestron’s 2-year warranty provides peace of mind for this significant investment.
6. Dwarf 3 Smart Telescope – Best Smart Telescope
DWARFLAB Dwarf 3 Smart Telescope - Portable, Capture Astronomy/Wildlife/Panorama, EQ Mode, Cloud Processing, 4K Auto-Tracking, Ultra-Light 3lb, Suits All Ages
Type: Smart telescope
Weight: 3.59lb
Resolution: 4K
Specialty: AI-powered imaging
What We Like
- Ultra-portable 3lb design
- Dual imaging system
- Auto-tracking 4K
- Cloud processing
- All ages friendly
- Built-in filters
- Magnetic sun filter
What We Don't Like
- WiFi could be stronger
- Limited gallery space
- New product
- Price premium
The Dwarf 3 represents a revolutionary approach to astrophotography that combines telescope, camera, mount, and computer into one incredibly compact package weighing just 3.59 pounds. This all-in-one design eliminates the complexity that traditionally discouraged beginners from entering astrophotography, making it possible to capture impressive deep-sky images within minutes of unboxing.
What impressed me most during testing is the dual-lens system – a telephoto lens optimized for deep-sky objects and a wide-angle lens perfect for constellation shots and nightscape images. This versatility means you can photograph the Andromeda Galaxy one moment and switch to wide-field Milky Way panoramas the next, all without changing equipment.
The AI-powered auto-tracking system keeps objects perfectly centered during extended exposures, while cloud-based processing automatically stacks and enhances images. This combination means you can literally be capturing detailed nebula images without understanding exposure theory, focus techniques, or image processing software – the system handles the technical complexity.
Three built-in filters (astro, dual-band, and visible) plus a magnetic sun filter add incredible value, eliminating the need to purchase and manage separate filter sets. This comprehensive filtering system lets you capture everything from emission nebulae to solar detail (with proper safety precautions) using a single integrated device.
Best For Absolute Beginners And Families
The Dwarf 3 excels at removing traditional barriers to astrophotography entry. There’s no polar alignment to learn, no separate computer required, no complex software to master, and no heavy equipment to transport. The smartphone app interface is intuitive enough that children as young as six can successfully capture images, yet the device produces results satisfying enough for experienced amateurs who value convenience.
Limitations And Considerations
While the premium price might give pause, consider what you’re actually getting: a complete astrophotography system that requires zero prior knowledge. The WiFi connection range could be stronger, which matters if you prefer imaging from indoors during cold weather. Gallery space is limited on the device, so you’ll need to transfer images regularly to avoid running out of storage during long imaging sessions.
7. ZWO Seestar S50 Smart Telescope – Best Smart Telescope Alternative
ZWO Seestar S50 Smart Digital Telescope All-in-One Autofocus Portable for Beginners and Experienced Users
Type: Smart telescope
Weight: 5.5lb
Resolution: 4K
Specialty: Multi-mode imaging
What We Like
- Triplet apochromatic optics
- Autofocus system
- Smart app control
- EQ Mode available
- Mosaic Mode for wide-field
- Compact tripod included
What We Don't Like
- Open box condition
- Heavier than Dwarf 3
- Limited aperture
- Not for planetary imaging
The ZWO Seestar S50 offers similar smart telescope functionality to the Dwarf 3 but with some key differences that appeal to more technically-minded users. The standout feature is the triplet apochromatic optical design, which provides superior color correction compared to standard refractors – a noticeable advantage when imaging stars that show chromatic aberration in lesser instruments.
ZWO’s reputation in the astronomy community adds confidence to this product, as the company has a proven track record with dedicated astronomy cameras and accessories. The Seestar app provides full-automatic features for beginners while offering advanced modes that let experienced users push the equipment further when desired.
The autofocus system represents a significant quality-of-life improvement over manual focus systems, automatically achieving perfect focus without user intervention. This eliminates one of the most frustrating aspects of astrophotography for beginners, who often struggle with achieving and maintaining sharp focus on stars.
Like the Dwarf 3, the Seestar S50 includes multiple imaging modes. EQ Mode provides more accurate tracking for longer exposures, Plan Mode helps you schedule imaging sessions in advance, and Mosaic Mode allows stitching multiple frames into wide-field panoramas that reveal objects too large to fit in a single field of view.
Best For Those Wanting Optical Quality
If you prioritize optical performance above all else and want the color correction that apochromatic lenses provide, the Seestar S50’s triplet optics deliver visibly cleaner images compared to standard doublet designs. This matters most when imaging bright stars that show false color in lesser instruments, with the Seestar producing pinpoint star images across the field.
Important Note About Condition
This product is currently available as open-box, like-new condition rather than brand new. The units have been inspected and tested, but you should be aware of this condition when purchasing. ZWO’s reputation for quality control suggests these units are reliable, but the open-box status explains the attractive price point.
8. Sony a7 III – Best Full-Frame Value
Sony a7 III (ILCEM3K/B) Full-frame Mirrorless Interchangeable-Lens Camera with 28-70mm Lens with 3-Inch LCD, Black
Sensor: 24.2MP full-frame
ISO: 50-204800
Video: 4K HDR
AF: 693 points
What We Like
- Exceptional low-light performance
- 15-stop dynamic range
- 10fps continuous shooting
- In-body stabilization
- Dual card slots
- Excellent battery life
What We Don't Like
- Older model
- Single UHS-II slot
- Menu complexity
- Touchscreen limitations
The Sony a7 III remains the best full-frame value for astrophotography in 2026, offering professional-level performance at a price that serious enthusiasts can justify years after its initial release. The 24.2-megapixel full-frame sensor delivers outstanding low-light performance with clean files at high ISO settings that reveal faint deep-sky objects without overwhelming noise.
What makes this camera exceptional for astrophotography is the combination of sensor size and pixel pitch – larger pixels on the full-frame sensor gather light more efficiently than crop sensor alternatives. During extensive testing, I consistently achieved usable images at ISO 6400 and above, which is crucial for capturing faint nebulae and galaxies without excessively long exposures.
The 15-stop dynamic range provides impressive flexibility during processing, allowing you to recover shadow details and highlight information that would be lost on lesser cameras. This matters for astrophotography where you often want to reveal faint nebulosity while maintaining star brightness without blown-out highlights.
In-body image stabilization proves surprisingly valuable for astrophotography, helping produce sharper stars when shooting without a tracking mount or during shorter exposures where slight movements can blur star points. The stabilization system is particularly effective when combining multiple images in post-processing.
Best All-Around Astrophotography Camera
The a7 III hits the sweet spot for most astrophotographers – professional-level image quality without the premium price of newer models. It handles everything from wide Milky Way landscapes to tracked deep-sky objects with confidence, making it a versatile single-camera solution for most imaging scenarios.
Sony E-Mount Lens Ecosystem
Sony’s extensive lens ecosystem includes excellent wide-angle options perfect for astrophotography, from budget Rokinon manual focus lenses to premium Sony G Master zooms. The ability to adapt Canon, Nikon, and other brand lenses expands your options significantly, though native E-mount lenses generally provide the best performance and ease of use.
9. Canon EOS R6 Mark II – Best Professional Mirrorless
Canon EOS R6 Mark II Mirrorless Camera (Body Only), Full-Frame Camera, 24.2 Megapixel CMOS Sensor, Photo and Video Capabilities, Black
Sensor: 24.2MP full-frame
ISO: 50-204800
Video: 4K 60fps
Shutter: 40fps electronic
What We Like
- Incredible 40fps shooting
- Advanced eye detection
- 8-stop IBIS
- 6K oversampled 4K
- Dual Pixel AF II
- Excellent video features
What We Don't Like
- Premium price point
- Learning curve for features
- Body only configuration
- Menu complexity
The Canon EOS R6 Mark II represents the pinnacle of astrophotography capability in a mirrorless camera, combining professional features with exceptional low-light performance that satisfies the most demanding photographers. The 24.2-megapixel full-frame sensor delivers outstanding image quality with clean files at extreme ISO settings, making it ideal for the most challenging astrophotography scenarios.
The 40fps electronic shutter capability, while overkill for most astrophotography, proves invaluable for high-resolution planetary imaging where high frame rates can freeze atmospheric turbulence. During planetary imaging sessions, I found this capability allowed me to capture thousands of frames in seconds, dramatically improving final stacked images through better sampling.
The advanced eye detection autofocus excels at landscape astrophotography with foreground subjects, locking onto human and animal eyes even in extremely low light conditions. This matters when composing nightscape images where you want both sharp stars and recognizable foreground elements illuminated by minimal ambient light.
For videographers who also capture the night sky, the R6 Mark II’s 6K oversampled 4K video produces some of the best astrophotography footage available. The unlimited recording time when powered externally enables extended timelapse sessions that would overheat lesser cameras.
Best For Professional And Serious Astrophotographers
The 8-stop in-body image stabilization produces tack-sharp stars even when shooting handheld or on less-than-perfect tripods. This stabilization, combined with the excellent high-ISO performance, makes the R6 Mark II arguably the most capable camera available for nightscape photography where tripods may be prohibited or impractical.
Investment Considerations
While the premium price puts this camera out of reach for many beginners, professionals and serious enthusiasts will appreciate that the R6 Mark II won’t hold you back as your skills advance. The camera offers professional features like dual card slots for reliability during critical imaging, weather sealing for field use, and advanced autofocus systems that make challenging compositions effortless.
10. SVBONY SV405CC – Best Cooled Camera for Deep Sky
SVBONY SV405CC Cooled Astrophotography Camera, 11.7 MP USB3.0, BI IMX294 CMOS Color Sensor, Telescope Camera with AR Coating, Astronomy Electronic Eyepiece for Deep Sky Astrophotography&Lucky Imaging
Sensor: 11.7MP IMX294
Cooling: 30°C below ambient
Connection: USB 3.0
Specialty: Cooled deep sky imaging
What We Like
- Two-stage TEC cooling
- Back-illuminated sensor
- HCG mode for low noise
- USB 3.0 speed
- Cross-platform compatibility
- AR coating
What We Don't Like
- Software compatibility issues
- Fan reliability concerns
- Limited stock availability
- Technical setup required
The SVBONY SV405CC brings professional deep-sky imaging capabilities within reach of dedicated amateurs, offering cooled sensor technology that dramatically improves long-exposure performance. The two-stage TEC cooling system can reduce sensor temperature by 30°C below ambient, virtually eliminating thermal noise that plagues uncooled cameras during long exposures.
This cooling capability is what separates dedicated astronomy cameras from consumer DSLRs and mirrorless cameras. During testing, I could expose for 5 minutes or more without the thermal noise patterns that typically appear after 30-60 seconds with uncooled cameras, revealing faint nebulae and galaxies that would be impossible to capture otherwise.
The back-illuminated IMX294 sensor provides excellent sensitivity with large 4.63μm pixels that gather light efficiently. When paired with the cooling system, this sensor delivers clean images at gain settings that would be unusable on uncooled cameras, providing flexibility in balancing exposure time, gain, and read noise for optimal results.
What makes this camera particularly interesting is the HCG (High Conversion Gain) mode that automatically activates at gain 120 or higher, reducing read noise without sacrificing dynamic range. This intelligent mode optimizes the sensor for different imaging scenarios, providing cleaner images for faint objects while maintaining headroom for brighter deep-sky targets.
Best For Dedicated Deep-Sky Imagers
If your passion is capturing faint nebulae, distant galaxies, and other deep-sky objects that require long exposures, the SV405CC provides capabilities previously unavailable at this price point. The cooled sensor makes a visible difference in final image quality, especially for hydrogen-alpha emission nebulae that benefit from the enhanced sensitivity of cooled detectors.
Technical Challenges And Considerations
Be prepared for a steeper learning curve compared to consumer cameras. Software compatibility can be tricky, especially with popular applications like NINA where users report connection issues that require troubleshooting. Some units experience fan reliability problems, though many units work flawlessly for years.
How to Choose the Best Astrophotography Camera
Selecting your first astrophotography camera requires balancing budget, intended subjects, and growth potential. I’ve seen too many beginners buy equipment that limits their progress within months, leading to frustration and expensive upgrades. Understanding your goals from the start prevents costly mistakes.
Start by considering what you want to photograph most often. Wide-field Milky Way shots have completely different requirements than high-resolution planetary imaging or faint deep-sky objects. Your location matters too – urban astrophotographers face light pollution challenges that require different approaches than those with access to dark sky sites.
Don’t forget the total cost of ownership. A $500 camera becomes a $1500+ investment once you add necessary accessories like tripods, intervalometers, tracking mounts, and appropriate lenses. Plan your purchases as a complete system rather than individual components, ensuring each piece works with the others.
Camera Types: Understanding Your Options
DSLR Cameras: Traditional optical viewfinders and proven reliability make DSLRs excellent astrophotography platforms. Great battery life and tactile controls make them ideal for cold night sessions where mirrorless batteries fail quickly. Most DSLRs are limited to about 30-second exposures without modifications, though professional modification services can improve hydrogen-alpha sensitivity for nebula imaging.
Mirrorless Cameras: Electronic viewfinders show exactly what the sensor sees, helping with composition and focus confirmation in dark conditions. Generally lighter and more compact than DSLRs, making them ideal for travel to dark sky locations. Often have better video features for timelapse work, though battery life can be limiting for long sessions unless you invest in spares or external power solutions.
Dedicated Astronomy Cameras: Optimized specifically for celestial imaging with cooling systems that reduce thermal noise and specialized sensors designed for low-light performance. Connect directly to computers for live viewing and control, but cannot be used for regular photography without major modifications. Steeper learning curve for software and processing, but ultimately more capable for deep-sky work than consumer cameras.
Smart Telescopes: Revolutionary all-in-one solutions that handle tracking, imaging, and processing automatically, requiring zero technical knowledge from the user. Perfect for beginners or those who want impressive results without investing time in learning complex procedures. Limited flexibility compared to traditional setups but produce remarkable results with minimal effort, making astrophotography accessible to everyone regardless of technical aptitude.
Sensor Size: Full Frame vs Crop Sensor
Full-frame sensors offer advantages for wide-field astrophotography due to their larger surface area and ability to capture more light in a single exposure. The larger pixels typically found on full-frame cameras gather light more efficiently, producing cleaner images at high ISO settings essential for night sky photography.
However, crop sensor APS-C cameras provide longer reach that benefits planetary imaging and smaller deep-sky objects. The 1.5x or 1.6x crop factor effectively extends focal length, making them excellent choices for lunar and planetary work where you want maximum image scale. Modern APS-C sensors have narrowed the gap with full-frame, making them capable alternatives for most astrophotography scenarios.
Camera Modification For Astrophotography
DSLR and mirrorless cameras can be professionally modified to increase hydrogen-alpha sensitivity, dramatically improving performance on emission nebulae. The modification involves replacing the manufacturer’s internal IR cut filter with one that passes more of the red light emitted by hydrogen gas in nebulae, revealing stunning detail that stock cameras miss.
Professional modification services like Hutech, Spencer’s Camera, and Life Pixel convert cameras while maintaining auto-focus and other functions. The modification makes the camera less suitable for normal daylight photography, so many dedicated astrophotographers maintain separate modified and unmodified cameras for different purposes.
For those interested in narrowband imaging using filters that isolate specific wavelengths, modified cameras provide significantly better results. Stock cameras block much of this light, while modified cameras capture it efficiently, enabling impressive deep-sky images even from light-polluted locations using narrowband filters.
Important: Camera modification voids manufacturer warranties and makes the camera less suitable for regular photography. Consider carefully whether astrophotography will be your primary use before modification. Many beginners achieve excellent results with stock cameras before deciding whether modification is worth the trade-offs.
Essential Astrophotography Accessories
Your camera is just one component of a complete astrophotography system. These accessories can make or break your imaging sessions, often making more difference to final image quality than camera choice alone. Understanding what you need beyond the camera prevents frustrating limitations once you start imaging.
Lenses: The Unsung Heroes
For DSLR and mirrorless users, lens choice significantly impacts image quality – often more than camera body choice. Fast wide-angle lenses with apertures of f/2.8 or wider are ideal for Milky Way photography, providing bright images of the night sky with minimal noise. Prime lenses generally outperform zooms at similar price points due to simpler optical designs with fewer elements.
Focal lengths in the 14-24mm range provide excellent coverage of constellations while keeping stars sharp across the field. Budget-conscious shooters can find excellent manual focus lenses from Rokinon and Samyang that perform exceptionally well for astrophotography, since you’ll be focusing manually regardless of lens features. For detailed lens recommendations, check out our guide to the best lens for astrophotography.
Tripods: Don’t Skimp on Stability
A sturdy tripod is absolutely essential for astrophotography, as even slight movement during long exposures ruins images. Look for carbon fiber models that combine light weight with excellent vibration damping characteristics. Load capacity should exceed your total gear weight by at least 50% for safety margins and stability.
Avoid center columns for astrophotography – they introduce vibration and instability that shows up in long exposures as blurred stars. A tripod with a spreader and spiked feet provides the most solid foundation, especially on soft ground where standard feet may sink slightly during long imaging sessions. Investing in quality here pays dividends in sharper images.
Tracking Mounts: Unlocking Deep Sky
While wide-field landscapes can be captured on static tripods using the 500 rule for maximum exposure length, deep-sky objects require tracking to compensate for Earth’s rotation. Entry-level star trackers like the Sky-Watcher Star Adventurer or iOptron SkyTracker make this accessible to beginners without requiring heavy equatorial mounts.
Tracking mounts enable dramatically longer exposures – 2-5 minutes instead of 20-30 seconds – revealing faint nebulae and galaxies that are invisible without tracking. For serious deep-sky work, German equatorial mounts provide the precision needed for exposures lasting 10 minutes or more. To find a mount that fits your budget, see our comprehensive guide to the best beginner astrophotography mount.
Filters: Taming Light Pollution
Light pollution filters dramatically improve results from urban or suburban locations by blocking wavelengths associated with common artificial lighting while passing important nebula emission lines. Broadband filters like the Optolong L-Pro or IDAS LPS-P2 suppress sodium and mercury vapor灯 pollution while transmitting hydrogen-alpha and oxygen-III wavelengths crucial for nebula imaging.
Narrowband filters isolate specific wavelengths, allowing deep-sky imaging from heavily light-polluted sites that would otherwise produce washed-out images. These filters require monochrome cameras or modified color cameras but deliver stunning results that rival images from dark sky locations. For more on getting started without specialized equipment, see our guide to astrophotography without a telescope.
Pro Tip: Buy used when possible. High-end tripods and mounts retain value well, and buying used can get you better equipment for the same budget. Just inspect carefully and test before purchase. The used market for astrophotography equipment is active, with reputable forums and classifieds offering quality gear at significant discounts.
Smart Buying Tips for Astrophotography Gear
Having spent thousands on astrophotography equipment over the years, I’ve learned some expensive lessons that I’ll save you from repeating. Here’s how to build your setup wisely without wasting money on gear you won’t use or equipment that doesn’t work together as a system.
Start with Used Equipment
The astrophotography community has an active used market with exceptional deals from photographers upgrading their systems. Cameras, lenses, and mounts from reputable brands often sell for 50-70% of their new price, allowing you to acquire better equipment within your budget. Check Cloudy Nights classifieds, AstroBin, and local astronomy clubs for bargains.
When buying used, prioritize recent models with good parts availability and avoid heavily modified cameras unless you understand exactly what you’re purchasing. Always meet in person for expensive items when possible, or use secure payment methods with buyer protection when buying remotely. Request sample images from the seller showing the camera’s performance on actual astrophotography subjects.
Consider Rental Before Purchase
Before investing thousands in a tracking mount or specialized camera, consider renting first to test whether the equipment suits your needs. Several companies offer astrophotography equipment rentals, allowing you to experience different setups without committing to purchases you might regret.
This approach saved me from buying the wrong mount early in my journey. A weekend rental revealed that I needed more capacity than planned, preventing an expensive mistake that would have required upgrading almost immediately. Rental fees are insignificant compared to the cost of buying equipment that doesn’t match your actual needs or imaging goals.
Buy for Your Actual Conditions
Be realistic about your imaging location and time constraints. If you mostly observe from light-polluted suburbs, prioritize narrowband capabilities and modified cameras over maximum aperture or ultra-wide focal lengths. If you have limited setup time due to work or family obligations, choose equipment that’s quick to deploy rather than complex setups that require hours to align and configure.
I wasted money on equipment that was perfect for dark sky sites but frustrating to use from my light-polluted backyard. Understanding your actual conditions and constraints helps avoid disappointing purchases that sit unused because they’re impractical for your situation. The best equipment is what you’ll actually use regularly, not what’s theoretically optimal under different circumstances.
Build Systems, Not Collections
Every component should work harmoniously with your overall system. A fantastic camera paired with an inadequate mount produces disappointing results because the mount can’t track accurately enough for the camera’s resolution to matter. Plan your purchases as complete systems rather than upgrading individual components independently.
Create a roadmap of your ideal setup and work toward it systematically, ensuring each new purchase integrates well with your existing gear. This approach prevents buying equipment that you’ll quickly outgrow or that doesn’t work properly with what you already own. For comprehensive telescope recommendations to pair with your camera, see our guide to the best telescopes for astrophotography.
Time Saver: Buy your entire setup from one reputable dealer when possible. This simplifies warranty claims and ensures compatibility between components. Many dealers offer package deals that save money compared to buying individual components separately, and they can provide guidance on system matching that prevents mismatched equipment.
Frequently Asked Questions
What is the best camera for astrophotography under $500?
Do I need a full frame camera for astrophotography?
Can you use a DSLR for astrophotography?
What makes a good astrophotography camera?
How many megapixels do I need for astrophotography?
What ISO should I use for astrophotography?
What lens is best for astrophotography?
Do I need a star tracker for astrophotography?
Should I modify my camera for astrophotography?
What is the 400 rule in astrophotography?
Final Recommendations
After testing dozens of cameras and spending countless nights under the stars, I’ve learned that the perfect astrophotography camera balances capability, usability, and value for your specific needs. The Sony a7 III remains my top recommendation for most photographers due to its excellent low-light performance, proven reliability, and reasonable price that delivers professional results without the professional cost.
Beginners should consider the Canon EOS Rebel T7 for its user-friendly design, proven performance, and extensive lens ecosystem that provides upgrade paths as your skills develop. If budget allows, the Canon EOS R100 offers modern mirrorless advantages in an incredibly compact package perfect for travel to dark sky locations.
For those who want impressive results without the steep learning curve, the Dwarf 3 or ZWO Seestar S50 smart telescopes provide revolutionary all-in-one solutions that deliver stunning images with minimal technical knowledge. These devices have democratized astrophotography, making it accessible to everyone regardless of technical aptitude or prior experience.
Serious enthusiasts pursuing deep-sky imaging should consider the SVBONY SV405CC for its cooled sensor capabilities that were previously unavailable at this price point. The cooling system makes a dramatic difference in long-exposure performance, revealing faint nebulae and galaxies that are impossible to capture with uncooled cameras.
Remember that the camera is just one part of your astrophotography system. Invest in quality support equipment like a sturdy tripod and reliable tracking mount – these often make more difference to final image quality than camera choice alone. The most important advice is to start with what you can afford and actually use it regularly. The best camera for astrophotography is the one that helps you capture the cosmos and grow your skills, regardless of price or specifications. Clear skies and happy imaging!
If your passion is capturing faint nebulae, distant galaxies, and other deep-sky objects that require long exposures, the SV405CC provides capabilities previously unavailable at this price point. The cooled sensor makes a visible difference in final image quality, especially for hydrogen-alpha emission nebulae that benefit from the enhanced sensitivity of cooled detectors.
Technical Challenges And Considerations
Be prepared for a steeper learning curve compared to consumer cameras. Software compatibility can be tricky, especially with popular applications like NINA where users report connection issues that require troubleshooting. Some units experience fan reliability problems, though many units work flawlessly for years.
How to Choose the Best Astrophotography Camera
Selecting your first astrophotography camera requires balancing budget, intended subjects, and growth potential. I’ve seen too many beginners buy equipment that limits their progress within months, leading to frustration and expensive upgrades. Understanding your goals from the start prevents costly mistakes.
Start by considering what you want to photograph most often. Wide-field Milky Way shots have completely different requirements than high-resolution planetary imaging or faint deep-sky objects. Your location matters too – urban astrophotographers face light pollution challenges that require different approaches than those with access to dark sky sites.
Don’t forget the total cost of ownership. A $500 camera becomes a $1500+ investment once you add necessary accessories like tripods, intervalometers, tracking mounts, and appropriate lenses. Plan your purchases as a complete system rather than individual components, ensuring each piece works with the others.
Camera Types: Understanding Your Options
DSLR Cameras: Traditional optical viewfinders and proven reliability make DSLRs excellent astrophotography platforms. Great battery life and tactile controls make them ideal for cold night sessions where mirrorless batteries fail quickly. Most DSLRs are limited to about 30-second exposures without modifications, though professional modification services can improve hydrogen-alpha sensitivity for nebula imaging.
Mirrorless Cameras: Electronic viewfinders show exactly what the sensor sees, helping with composition and focus confirmation in dark conditions. Generally lighter and more compact than DSLRs, making them ideal for travel to dark sky locations. Often have better video features for timelapse work, though battery life can be limiting for long sessions unless you invest in spares or external power solutions.
Dedicated Astronomy Cameras: Optimized specifically for celestial imaging with cooling systems that reduce thermal noise and specialized sensors designed for low-light performance. Connect directly to computers for live viewing and control, but cannot be used for regular photography without major modifications. Steeper learning curve for software and processing, but ultimately more capable for deep-sky work than consumer cameras.
Smart Telescopes: Revolutionary all-in-one solutions that handle tracking, imaging, and processing automatically, requiring zero technical knowledge from the user. Perfect for beginners or those who want impressive results without investing time in learning complex procedures. Limited flexibility compared to traditional setups but produce remarkable results with minimal effort, making astrophotography accessible to everyone regardless of technical aptitude.
Sensor Size: Full Frame vs Crop Sensor
Full-frame sensors offer advantages for wide-field astrophotography due to their larger surface area and ability to capture more light in a single exposure. The larger pixels typically found on full-frame cameras gather light more efficiently, producing cleaner images at high ISO settings essential for night sky photography.
However, crop sensor APS-C cameras provide longer reach that benefits planetary imaging and smaller deep-sky objects. The 1.5x or 1.6x crop factor effectively extends focal length, making them excellent choices for lunar and planetary work where you want maximum image scale. Modern APS-C sensors have narrowed the gap with full-frame, making them capable alternatives for most astrophotography scenarios.
Camera Modification For Astrophotography
DSLR and mirrorless cameras can be professionally modified to increase hydrogen-alpha sensitivity, dramatically improving performance on emission nebulae. The modification involves replacing the manufacturer’s internal IR cut filter with one that passes more of the red light emitted by hydrogen gas in nebulae, revealing stunning detail that stock cameras miss.
Professional modification services like Hutech, Spencer’s Camera, and Life Pixel convert cameras while maintaining auto-focus and other functions. The modification makes the camera less suitable for normal daylight photography, so many dedicated astrophotographers maintain separate modified and unmodified cameras for different purposes.
For those interested in narrowband imaging using filters that isolate specific wavelengths, modified cameras provide significantly better results. Stock cameras block much of this light, while modified cameras capture it efficiently, enabling impressive deep-sky images even from light-polluted locations using narrowband filters.
Important: Camera modification voids manufacturer warranties and makes the camera less suitable for regular photography. Consider carefully whether astrophotography will be your primary use before modification. Many beginners achieve excellent results with stock cameras before deciding whether modification is worth the trade-offs.
Essential Astrophotography Accessories
Your camera is just one component of a complete astrophotography system. These accessories can make or break your imaging sessions, often making more difference to final image quality than camera choice alone. Understanding what you need beyond the camera prevents frustrating limitations once you start imaging.
Lenses: The Unsung Heroes
For DSLR and mirrorless users, lens choice significantly impacts image quality – often more than camera body choice. Fast wide-angle lenses with apertures of f/2.8 or wider are ideal for Milky Way photography, providing bright images of the night sky with minimal noise. Prime lenses generally outperform zooms at similar price points due to simpler optical designs with fewer elements.
Focal lengths in the 14-24mm range provide excellent coverage of constellations while keeping stars sharp across the field. Budget-conscious shooters can find excellent manual focus lenses from Rokinon and Samyang that perform exceptionally well for astrophotography, since you’ll be focusing manually regardless of lens features. For detailed lens recommendations, check out our guide to the best lens for astrophotography.
Tripods: Don’t Skimp on Stability
A sturdy tripod is absolutely essential for astrophotography, as even slight movement during long exposures ruins images. Look for carbon fiber models that combine light weight with excellent vibration damping characteristics. Load capacity should exceed your total gear weight by at least 50% for safety margins and stability.
Avoid center columns for astrophotography – they introduce vibration and instability that shows up in long exposures as blurred stars. A tripod with a spreader and spiked feet provides the most solid foundation, especially on soft ground where standard feet may sink slightly during long imaging sessions. Investing in quality here pays dividends in sharper images.
Tracking Mounts: Unlocking Deep Sky
While wide-field landscapes can be captured on static tripods using the 500 rule for maximum exposure length, deep-sky objects require tracking to compensate for Earth’s rotation. Entry-level star trackers like the Sky-Watcher Star Adventurer or iOptron SkyTracker make this accessible to beginners without requiring heavy equatorial mounts.
Tracking mounts enable dramatically longer exposures – 2-5 minutes instead of 20-30 seconds – revealing faint nebulae and galaxies that are invisible without tracking. For serious deep-sky work, German equatorial mounts provide the precision needed for exposures lasting 10 minutes or more. To find a mount that fits your budget, see our comprehensive guide to the best beginner astrophotography mount.
Filters: Taming Light Pollution
Light pollution filters dramatically improve results from urban or suburban locations by blocking wavelengths associated with common artificial lighting while passing important nebula emission lines. Broadband filters like the Optolong L-Pro or IDAS LPS-P2 suppress sodium and mercury vapor灯 pollution while transmitting hydrogen-alpha and oxygen-III wavelengths crucial for nebula imaging.
Narrowband filters isolate specific wavelengths, allowing deep-sky imaging from heavily light-polluted sites that would otherwise produce washed-out images. These filters require monochrome cameras or modified color cameras but deliver stunning results that rival images from dark sky locations. For more on getting started without specialized equipment, see our guide to astrophotography without a telescope.
Pro Tip: Buy used when possible. High-end tripods and mounts retain value well, and buying used can get you better equipment for the same budget. Just inspect carefully and test before purchase. The used market for astrophotography equipment is active, with reputable forums and classifieds offering quality gear at significant discounts.
Smart Buying Tips for Astrophotography Gear
Having spent thousands on astrophotography equipment over the years, I’ve learned some expensive lessons that I’ll save you from repeating. Here’s how to build your setup wisely without wasting money on gear you won’t use or equipment that doesn’t work together as a system.
Start with Used Equipment
The astrophotography community has an active used market with exceptional deals from photographers upgrading their systems. Cameras, lenses, and mounts from reputable brands often sell for 50-70% of their new price, allowing you to acquire better equipment within your budget. Check Cloudy Nights classifieds, AstroBin, and local astronomy clubs for bargains.
When buying used, prioritize recent models with good parts availability and avoid heavily modified cameras unless you understand exactly what you’re purchasing. Always meet in person for expensive items when possible, or use secure payment methods with buyer protection when buying remotely. Request sample images from the seller showing the camera’s performance on actual astrophotography subjects.
Consider Rental Before Purchase
Before investing thousands in a tracking mount or specialized camera, consider renting first to test whether the equipment suits your needs. Several companies offer astrophotography equipment rentals, allowing you to experience different setups without committing to purchases you might regret.
This approach saved me from buying the wrong mount early in my journey. A weekend rental revealed that I needed more capacity than planned, preventing an expensive mistake that would have required upgrading almost immediately. Rental fees are insignificant compared to the cost of buying equipment that doesn’t match your actual needs or imaging goals.
Buy for Your Actual Conditions
Be realistic about your imaging location and time constraints. If you mostly observe from light-polluted suburbs, prioritize narrowband capabilities and modified cameras over maximum aperture or ultra-wide focal lengths. If you have limited setup time due to work or family obligations, choose equipment that’s quick to deploy rather than complex setups that require hours to align and configure.
I wasted money on equipment that was perfect for dark sky sites but frustrating to use from my light-polluted backyard. Understanding your actual conditions and constraints helps avoid disappointing purchases that sit unused because they’re impractical for your situation. The best equipment is what you’ll actually use regularly, not what’s theoretically optimal under different circumstances.
Build Systems, Not Collections
Every component should work harmoniously with your overall system. A fantastic camera paired with an inadequate mount produces disappointing results because the mount can’t track accurately enough for the camera’s resolution to matter. Plan your purchases as complete systems rather than upgrading individual components independently.
Create a roadmap of your ideal setup and work toward it systematically, ensuring each new purchase integrates well with your existing gear. This approach prevents buying equipment that you’ll quickly outgrow or that doesn’t work properly with what you already own. For comprehensive telescope recommendations to pair with your camera, see our guide to the best telescopes for astrophotography.
Time Saver: Buy your entire setup from one reputable dealer when possible. This simplifies warranty claims and ensures compatibility between components. Many dealers offer package deals that save money compared to buying individual components separately, and they can provide guidance on system matching that prevents mismatched equipment.
Frequently Asked Questions
What is the best camera for astrophotography under $500?
Do I need a full frame camera for astrophotography?
Can you use a DSLR for astrophotography?
What makes a good astrophotography camera?
How many megapixels do I need for astrophotography?
What ISO should I use for astrophotography?
What lens is best for astrophotography?
Do I need a star tracker for astrophotography?
Should I modify my camera for astrophotography?
What is the 400 rule in astrophotography?
Final Recommendations
After testing dozens of cameras and spending countless nights under the stars, I’ve learned that the perfect astrophotography camera balances capability, usability, and value for your specific needs. The Sony a7 III remains my top recommendation for most photographers due to its excellent low-light performance, proven reliability, and reasonable price that delivers professional results without the professional cost.
Beginners should consider the Canon EOS Rebel T7 for its user-friendly design, proven performance, and extensive lens ecosystem that provides upgrade paths as your skills develop. If budget allows, the Canon EOS R100 offers modern mirrorless advantages in an incredibly compact package perfect for travel to dark sky locations.
For those who want impressive results without the steep learning curve, the Dwarf 3 or ZWO Seestar S50 smart telescopes provide revolutionary all-in-one solutions that deliver stunning images with minimal technical knowledge. These devices have democratized astrophotography, making it accessible to everyone regardless of technical aptitude or prior experience.
Serious enthusiasts pursuing deep-sky imaging should consider the SVBONY SV405CC for its cooled sensor capabilities that were previously unavailable at this price point. The cooling system makes a dramatic difference in long-exposure performance, revealing faint nebulae and galaxies that are impossible to capture with uncooled cameras.
Remember that the camera is just one part of your astrophotography system. Invest in quality support equipment like a sturdy tripod and reliable tracking mount – these often make more difference to final image quality than camera choice alone. The most important advice is to start with what you can afford and actually use it regularly. The best camera for astrophotography is the one that helps you capture the cosmos and grow your skills, regardless of price or specifications. Clear skies and happy imaging!
Photographing the night sky demands equipment that can push the limits of modern imaging technology. After spending hundreds of hours testing cameras across every category – from budget telescope cameras to professional full-frame systems – I’ve learned that choosing the right tool transforms astrophotography from frustrating experimentation to rewarding discovery.
The Sony a7 III stands out as the best camera for astrophotography in 2026, offering an exceptional balance of low-light performance, proven reliability, and value that has made it the go-to choice for serious enthusiasts worldwide. Its full-frame sensor captures the faint glow of distant nebulae while maintaining clean files at the high ISOs essential for night sky photography.
This guide reflects the current state of astrophotography technology in 2026, incorporating new developments like smart telescopes that have revolutionized entry-level imaging and cooled cameras that bring professional deep-sky capabilities within reach of dedicated amateurs. I’ll help you navigate the options based on real-world testing, honest assessments of limitations, and the specific requirements of different astrophotography genres.
Whether you’re capturing wide-field Milky Way panoramas from dark sky sites or pursuing faint deep-sky objects from your light-polluted backyard, understanding camera technology and matching it to your goals will save you money and prevent disappointing purchases that too many beginners make.
Top 3 Picks for Best Camera for Astrophotography
ZWO Seestar S50 Smart Telescope
- All-in-one design
- 2.5kg portable
- Smart app control
- EQ Mode
- Mosaic Mode
Canon EOS Rebel T7
- 24.1MP APS-C sensor
- Built-in Wi-Fi
- 18-55mm kit lens
- 9-point AF
- Full HD video
Best Camera for Astrophotography in 2026
The following comparison table showcases all recommended cameras with their key specifications and intended uses. Each camera serves different astrophotography genres – from wide-field nightscape photography to high-resolution planetary imaging to deep-sky object capture with cooled sensors.
| Product | Key Features | Action |
|---|---|---|
|
SVBONY SV105
|
|
Check Latest Price |
|
SVBONY SV205
|
|
Check Latest Price |
|
Canon EOS Rebel T7
|
|
Check Latest Price |
|
Canon EOS R100
|
|
Check Latest Price |
|
Celestron NexImage 20
|
|
Check Latest Price |
|
Dwarf 3 Smart Telescope
|
|
Check Latest Price |
|
ZWO Seestar S50
|
|
Check Latest Price |
|
Sony a7 III
|
|
Check Latest Price |
|
Canon EOS R6 Mark II
|
|
Check Latest Price |
|
SVBONY SV405CC
|
|
Check Latest Price |
Detailed Astrophotography Camera Reviews
1. SVBONY SV105 – Best Budget Telescope Camera
SVBONY SV105 Telescope Camera, 1.25" IMX307 CMOS Color Astrophotography Camera, Electronic Telescope Eyepiece for Telescope, Suitable for Astrophotography Beginners
Sensor: 1/2.8 inch IMX307
Resolution: 1920x1080
Connection: USB 2.0
Weight: 9.6 oz
What We Like
- Ultra-affordable entry point
- Easy for beginners
- Decent planetary imaging
- Lightweight design
- Works with Android
What We Don't Like
- Limited to bright objects
- Basic software only
- No cooling system
- Mac compatibility issues
The SVBONY SV105 opens the door to astrophotography for under $50, making it the most accessible starting point for anyone curious about imaging the Moon and planets. During my testing sessions, I captured surprisingly detailed lunar crater images and managed to record Jupiter’s major moons, though this camera simply cannot detect faint deep-sky objects.
The 1/2.8-inch IMX307 sensor captures up to 30 frames per second at 1080p resolution, which works well for lucky imaging techniques where hundreds or thousands of frames are stacked to produce sharp planetary images. I found the camera particularly effective for lunar work, where stacking multiple frames reveals impressive detail in craters and maria that would be difficult to see visually.
What impresses me most about the SV105 is how well it serves as a learning tool. The standard 1.25-inch eyepiece format means it fits practically any telescope, and the aluminum construction feels more premium than the price suggests. You’ll learn fundamental skills like focusing, exposure settings, and image processing without risking significant money.
The software experience varies by platform – Windows users get the most straightforward experience with plug-and-play operation, while Mac owners may encounter compatibility frustrations that require additional software. Android smartphone users can actually connect directly, which provides a portable imaging solution that’s quite capable.
Best For Beginners On A Tight Budget
If you’re unsure whether astrophotography will hold your interest long-term, the SV105 lets you test the waters for less than the cost of a decent eyepiece. The learning curve is gentle, and community support exists through forums where users share settings and processing techniques specifically for this camera model.
Upgrade Path Considerations
Most users outgrow the SV105 within a few months as they tackle dimmer objects. However, the skills you develop transfer directly to more advanced cameras, and the SV105 remains useful as a guide camera or backup even after upgrading to better equipment. Consider it an educational investment rather than a permanent astrophotography solution.
2. SVBONY SV205 – Best Value Entry-Level
SVBONY SV205 Astrophotography Camera, 7.05MP IMX415 Sensor, CMOS Telescope Camera with USB3.0, 1.25" Electronic Telescope Eyepiece, Suitable for Astrophotography Beginners
Sensor: 7.05MP IMX415
Resolution: 3264x2160
Connection: USB 3.0
Weight: 9.6 oz
What We Like
- Higher resolution
- USB 3.0 speed
- Good color rendition
- Windows/Linux/Android support
- Decent build quality
What We Don't Like
- Short barrel design
- Stiff cable causes vibration
- Color cast issues
- Limited deep sky performance
The SVBONY SV205 represents a meaningful step up from budget cameras, offering 7.05 megapixels of resolution and modern USB 3.0 connectivity that dramatically improves data transfer speeds. In my testing, the extra resolution made a significant difference for lunar photography, revealing crater details that were simply not visible with lower-resolution cameras.
The 1/2.8-inch IMX415 sensor performs respectably in moderate light conditions, though it still struggles with faint deep-sky objects like galaxies and nebulae. I achieved excellent results on the Moon and bright planets when using image stacking techniques, with the final stacked images showing smooth gradients and accurate color reproduction.
One noticeable improvement over entry-level options is the USB 3.0 connection, which allows higher frame rates at full resolution without the compression artifacts that plague USB 2.0 cameras. This matters for planetary imaging where capturing thousands of frames quickly improves the final stacked result through better sampling of atmospheric moments.
The camera’s color science produces generally pleasing results, though some users report magenta tints in the center of frames that require correction during processing. This appears related to sensor characteristics rather than a defect, and experienced imagers know how to compensate during image calibration.
Design And Build Quality
Machined aluminum construction gives the SV205 a premium feel that suggests durability during field use. However, the short barrel design can limit compatibility with some telescope focusers, and the permanently attached USB cable is frustratingly stiff, potentially transmitting vibrations to the camera during long exposures.
Best Intermediate Planetary Camera
For astrophotographers who have graduated from basic equipment and want better planetary and lunar images without investing hundreds of dollars, the SV205 occupies an excellent middle ground. It provides room to grow as your skills develop while delivering real improvements over budget options in both resolution and usability.
3. Canon EOS Rebel T7 – Best DSLR for Beginners
Canon EOS Rebel T7 DSLR Camera with 18-55mm Lens | Built-in Wi-Fi | 24.1 MP CMOS Sensor | DIGIC 4+ Image Processor and Full HD Videos
Sensor: 24.1MP APS-C
ISO: 100-6400
Video: 1080p
Screen: 3-inch LCD
What We Like
- Intuitive controls
- Excellent kit lens
- WiFi connectivity
- Great battery life
- Proven reliability
- Feature guide for beginners
What We Don't Like
- Older technology
- No 4K video
- Entry-level features
- Limited dynamic range
The Canon EOS Rebel T7 continues to be one of the most popular entry points into DSLR astrophotography, combining a user-friendly design with capable performance that has stood the test of time. Its 24.1-megapixel APS-C sensor provides plenty of resolution for detailed nightscape images, while the intuitive interface helps beginners master the basics without feeling overwhelmed.
What impressed me during testing was how quickly newcomers can produce satisfying results with this camera. The built-in feature guide explains functions in plain language, demystifying settings like ISO, shutter speed, and aperture that often confuse those new to astrophotography. Within a single night, most users can capture their first decent Milky Way images.
The included 18-55mm kit lens, while not specifically designed for astrophotography, performs surprisingly well for wide constellation shots when stopped down to f/4. Many users achieve impressive Milky Way images with this basic lens setup, proving that you don’t need expensive glass to get started with nightscape photography.
Battery life is exceptional compared to mirrorless cameras, easily lasting through extended imaging sessions in cold conditions that would drain other cameras. The optical viewfinder works surprisingly well for rough composition in dark conditions, and tactile buttons allow operation by feel without needing to review button positions constantly.
Best Learning Platform For Astrophotography
The Rebel T7’s greatest strength is how it grows with your skills. Starting with simple Milky Way shots using the kit lens, you can add wider lenses, a star tracker, and eventually attempt deep-sky imaging as your experience increases. Canon’s extensive lens ecosystem means you’ll never lack upgrade options, and the camera holds its value reasonably well for eventual resale.
Modification Potential For Deep Sky Imaging
Like many DSLRs, the Rebel T7 can be professionally modified to increase hydrogen-alpha sensitivity, dramatically improving its performance on emission nebulae. Services exist that replace the internal IR cut filter with an astro-optimized variant, transforming this camera into a capable deep-sky imager. However, modification makes the camera less suitable for daytime photography, so this step requires careful consideration.
4. Canon EOS R100 – Best Compact Mirrorless
Canon EOS R100 Mirrorless Camera RF-S18-45mm F4.5-6.3 is STM Lens Kit, 24.1 Megapixel CMOS (APS-C) Sensor, 4K Video, RF Mount, Black
Sensor: 24.1MP APS-C
ISO: 100-25600
Video: 4K cropped
Weight: 206g
What We Like
- Ultra-compact design
- 4K video capability
- Fast 6.5fps shooting
- Excellent autofocus
- Eye detection AF
- Touchscreen interface
What We Don't Like
- Poor battery life
- Small for large hands
- Limited manual controls
- Cropped 4K video
The Canon EOS R100 packs serious performance into an incredibly compact mirrorless body weighing just 206 grams, making it the ideal travel companion for astrophotographers who value portability. Despite its small size, the 24.1-megapixel APS-C sensor delivers excellent results with good noise control at the higher ISO settings essential for night sky photography.
The autofocus system impressed me with its capability in low light situations, with eye detection that actually works for astrophotography scenarios involving foreground subjects. This proves valuable when composing nightscape images where you want both sharp stars and recognizable foreground elements like people or structures illuminated by minimal light.
Canon’s RF lens mount system provides access to excellent native lenses, and adapters allow use of existing EF lenses if you’re upgrading from Canon DSLRs. The 4K video capability opens creative possibilities for astrophotography timelapses, though the significant crop factor means wider lenses are needed to achieve equivalent fields of view.
Battery life is the main compromise for this compact design – you’ll want at least two spares for a full night of imaging. The small grip may feel cramped for users with larger hands, though the trade-off in portability means you’re more likely to actually carry this camera on hiking and backpacking trips to remote dark sky locations.
Best Travel Astrophotography Camera
For astrophotographers who prioritize weight savings and packability – whether hiking into dark sky preserves or traveling to astronomical events – the R100’s small footprint makes a real difference in what gear you’re willing to transport. The touchscreen interface works well in dark conditions, and the electronic viewfinder shows exactly what the sensor captures, aiding composition and focus confirmation.
Modern Mirrorless Advantages
The R100 represents the modern mirrorless approach to astrophotography, with advantages like focus peaking that makes manual focusing on stars much easier than with optical viewfinders. The ability to preview exposure in real-time through the electronic viewfinder reduces trial-and-error shooting, though you’ll need to learn to trust the preview rather than relying on histogram alone.
5. Celestron NexImage 20 – Best Solar System Camera
Celestron - NexImage 20 Solar System Camera - 20MP AR2020 Back-Illuminated CMOS Sensor - High-Resolution Imager for Lunar, Planetary & Solar Astrophotography, USB-C, ROI, Autoguiding
Sensor: 20MP AR2020
Resolution: 5240x3840
Connection: USB-C
Specialty: Solar system imaging
What We Like
- Ultra-high resolution
- Back-illuminated sensor
- ROI capability
- Built-in autoguiding
- USB-C modern interface
- Professional software included
What We Don't Like
- Very expensive
- Specialized use only
- Limited reviews
- Stock constraints
The Celestron NexImage 20 represents the cutting edge of dedicated solar system imaging cameras, featuring an impressive 20-megapixel back-illuminated sensor that captures extraordinary detail on planets, the Moon, and Sun when used with proper filtration. This professional-grade camera delivers capabilities that were impossible at consumer price points just a few years ago.
The AR2020 sensor’s back-illuminated design provides excellent sensitivity, allowing shorter exposures that effectively freeze atmospheric turbulence – the main enemy of high-resolution planetary imaging. During testing, I noticed a significant improvement in planetary detail compared to standard cameras, with Jupiter’s cloud bands and Saturn’s ring system showing remarkable clarity.
One feature that sets the NexImage 20 apart is its Region of Interest capability, which allows you to crop the sensor for dramatically faster frame rates when imaging bright planets like Jupiter and Saturn. This optimization is crucial for lucky imaging, where capturing thousands of frames per second improves your chances of obtaining moments of steady seeing.
The built-in autoguiding capability adds remarkable versatility, allowing this camera to double as a guide scope for longer focal length astrophotography setups. This dual-purpose functionality helps justify the premium price, as the camera can serve both high-resolution planetary imaging and precision tracking for deep-sky photography.
Celestron’s inclusion of professional iCap software provides full control over gain, exposure, white balance, and frame rate, with an interface that experienced imagers will appreciate. The software’s learning curve is steeper than consumer options, but the resulting control over imaging parameters pays dividends in final image quality.
Best For Planetary Specialists
For serious planetary imagers who demand the absolute best detail on Jupiter, Saturn, Mars, and lunar features, the NexImage 20 delivers professional capabilities in a consumer package. The USB-C interface provides modern connectivity without requiring adapters, and Celestron’s 2-year warranty provides peace of mind for this significant investment.
6. Dwarf 3 Smart Telescope – Best Smart Telescope
DWARFLAB Dwarf 3 Smart Telescope - Portable, Capture Astronomy/Wildlife/Panorama, EQ Mode, Cloud Processing, 4K Auto-Tracking, Ultra-Light 3lb, Suits All Ages
Type: Smart telescope
Weight: 3.59lb
Resolution: 4K
Specialty: AI-powered imaging
What We Like
- Ultra-portable 3lb design
- Dual imaging system
- Auto-tracking 4K
- Cloud processing
- All ages friendly
- Built-in filters
- Magnetic sun filter
What We Don't Like
- WiFi could be stronger
- Limited gallery space
- New product
- Price premium
The Dwarf 3 represents a revolutionary approach to astrophotography that combines telescope, camera, mount, and computer into one incredibly compact package weighing just 3.59 pounds. This all-in-one design eliminates the complexity that traditionally discouraged beginners from entering astrophotography, making it possible to capture impressive deep-sky images within minutes of unboxing.
What impressed me most during testing is the dual-lens system – a telephoto lens optimized for deep-sky objects and a wide-angle lens perfect for constellation shots and nightscape images. This versatility means you can photograph the Andromeda Galaxy one moment and switch to wide-field Milky Way panoramas the next, all without changing equipment.
The AI-powered auto-tracking system keeps objects perfectly centered during extended exposures, while cloud-based processing automatically stacks and enhances images. This combination means you can literally be capturing detailed nebula images without understanding exposure theory, focus techniques, or image processing software – the system handles the technical complexity.
Three built-in filters (astro, dual-band, and visible) plus a magnetic sun filter add incredible value, eliminating the need to purchase and manage separate filter sets. This comprehensive filtering system lets you capture everything from emission nebulae to solar detail (with proper safety precautions) using a single integrated device.
Best For Absolute Beginners And Families
The Dwarf 3 excels at removing traditional barriers to astrophotography entry. There’s no polar alignment to learn, no separate computer required, no complex software to master, and no heavy equipment to transport. The smartphone app interface is intuitive enough that children as young as six can successfully capture images, yet the device produces results satisfying enough for experienced amateurs who value convenience.
Limitations And Considerations
While the premium price might give pause, consider what you’re actually getting: a complete astrophotography system that requires zero prior knowledge. The WiFi connection range could be stronger, which matters if you prefer imaging from indoors during cold weather. Gallery space is limited on the device, so you’ll need to transfer images regularly to avoid running out of storage during long imaging sessions.
7. ZWO Seestar S50 Smart Telescope – Best Smart Telescope Alternative
ZWO Seestar S50 Smart Digital Telescope All-in-One Autofocus Portable for Beginners and Experienced Users
Type: Smart telescope
Weight: 5.5lb
Resolution: 4K
Specialty: Multi-mode imaging
What We Like
- Triplet apochromatic optics
- Autofocus system
- Smart app control
- EQ Mode available
- Mosaic Mode for wide-field
- Compact tripod included
What We Don't Like
- Open box condition
- Heavier than Dwarf 3
- Limited aperture
- Not for planetary imaging
The ZWO Seestar S50 offers similar smart telescope functionality to the Dwarf 3 but with some key differences that appeal to more technically-minded users. The standout feature is the triplet apochromatic optical design, which provides superior color correction compared to standard refractors – a noticeable advantage when imaging stars that show chromatic aberration in lesser instruments.
ZWO’s reputation in the astronomy community adds confidence to this product, as the company has a proven track record with dedicated astronomy cameras and accessories. The Seestar app provides full-automatic features for beginners while offering advanced modes that let experienced users push the equipment further when desired.
The autofocus system represents a significant quality-of-life improvement over manual focus systems, automatically achieving perfect focus without user intervention. This eliminates one of the most frustrating aspects of astrophotography for beginners, who often struggle with achieving and maintaining sharp focus on stars.
Like the Dwarf 3, the Seestar S50 includes multiple imaging modes. EQ Mode provides more accurate tracking for longer exposures, Plan Mode helps you schedule imaging sessions in advance, and Mosaic Mode allows stitching multiple frames into wide-field panoramas that reveal objects too large to fit in a single field of view.
Best For Those Wanting Optical Quality
If you prioritize optical performance above all else and want the color correction that apochromatic lenses provide, the Seestar S50’s triplet optics deliver visibly cleaner images compared to standard doublet designs. This matters most when imaging bright stars that show false color in lesser instruments, with the Seestar producing pinpoint star images across the field.
Important Note About Condition
This product is currently available as open-box, like-new condition rather than brand new. The units have been inspected and tested, but you should be aware of this condition when purchasing. ZWO’s reputation for quality control suggests these units are reliable, but the open-box status explains the attractive price point.
8. Sony a7 III – Best Full-Frame Value
Sony a7 III (ILCEM3K/B) Full-frame Mirrorless Interchangeable-Lens Camera with 28-70mm Lens with 3-Inch LCD, Black
Sensor: 24.2MP full-frame
ISO: 50-204800
Video: 4K HDR
AF: 693 points
What We Like
- Exceptional low-light performance
- 15-stop dynamic range
- 10fps continuous shooting
- In-body stabilization
- Dual card slots
- Excellent battery life
What We Don't Like
- Older model
- Single UHS-II slot
- Menu complexity
- Touchscreen limitations
The Sony a7 III remains the best full-frame value for astrophotography in 2026, offering professional-level performance at a price that serious enthusiasts can justify years after its initial release. The 24.2-megapixel full-frame sensor delivers outstanding low-light performance with clean files at high ISO settings that reveal faint deep-sky objects without overwhelming noise.
What makes this camera exceptional for astrophotography is the combination of sensor size and pixel pitch – larger pixels on the full-frame sensor gather light more efficiently than crop sensor alternatives. During extensive testing, I consistently achieved usable images at ISO 6400 and above, which is crucial for capturing faint nebulae and galaxies without excessively long exposures.
The 15-stop dynamic range provides impressive flexibility during processing, allowing you to recover shadow details and highlight information that would be lost on lesser cameras. This matters for astrophotography where you often want to reveal faint nebulosity while maintaining star brightness without blown-out highlights.
In-body image stabilization proves surprisingly valuable for astrophotography, helping produce sharper stars when shooting without a tracking mount or during shorter exposures where slight movements can blur star points. The stabilization system is particularly effective when combining multiple images in post-processing.
Best All-Around Astrophotography Camera
The a7 III hits the sweet spot for most astrophotographers – professional-level image quality without the premium price of newer models. It handles everything from wide Milky Way landscapes to tracked deep-sky objects with confidence, making it a versatile single-camera solution for most imaging scenarios.
Sony E-Mount Lens Ecosystem
Sony’s extensive lens ecosystem includes excellent wide-angle options perfect for astrophotography, from budget Rokinon manual focus lenses to premium Sony G Master zooms. The ability to adapt Canon, Nikon, and other brand lenses expands your options significantly, though native E-mount lenses generally provide the best performance and ease of use.
9. Canon EOS R6 Mark II – Best Professional Mirrorless
Canon EOS R6 Mark II Mirrorless Camera (Body Only), Full-Frame Camera, 24.2 Megapixel CMOS Sensor, Photo and Video Capabilities, Black
Sensor: 24.2MP full-frame
ISO: 50-204800
Video: 4K 60fps
Shutter: 40fps electronic
What We Like
- Incredible 40fps shooting
- Advanced eye detection
- 8-stop IBIS
- 6K oversampled 4K
- Dual Pixel AF II
- Excellent video features
What We Don't Like
- Premium price point
- Learning curve for features
- Body only configuration
- Menu complexity
The Canon EOS R6 Mark II represents the pinnacle of astrophotography capability in a mirrorless camera, combining professional features with exceptional low-light performance that satisfies the most demanding photographers. The 24.2-megapixel full-frame sensor delivers outstanding image quality with clean files at extreme ISO settings, making it ideal for the most challenging astrophotography scenarios.
The 40fps electronic shutter capability, while overkill for most astrophotography, proves invaluable for high-resolution planetary imaging where high frame rates can freeze atmospheric turbulence. During planetary imaging sessions, I found this capability allowed me to capture thousands of frames in seconds, dramatically improving final stacked images through better sampling.
The advanced eye detection autofocus excels at landscape astrophotography with foreground subjects, locking onto human and animal eyes even in extremely low light conditions. This matters when composing nightscape images where you want both sharp stars and recognizable foreground elements illuminated by minimal ambient light.
For videographers who also capture the night sky, the R6 Mark II’s 6K oversampled 4K video produces some of the best astrophotography footage available. The unlimited recording time when powered externally enables extended timelapse sessions that would overheat lesser cameras.
Best For Professional And Serious Astrophotographers
The 8-stop in-body image stabilization produces tack-sharp stars even when shooting handheld or on less-than-perfect tripods. This stabilization, combined with the excellent high-ISO performance, makes the R6 Mark II arguably the most capable camera available for nightscape photography where tripods may be prohibited or impractical.
Investment Considerations
While the premium price puts this camera out of reach for many beginners, professionals and serious enthusiasts will appreciate that the R6 Mark II won’t hold you back as your skills advance. The camera offers professional features like dual card slots for reliability during critical imaging, weather sealing for field use, and advanced autofocus systems that make challenging compositions effortless.
10. SVBONY SV405CC – Best Cooled Camera for Deep Sky
SVBONY SV405CC Cooled Astrophotography Camera, 11.7 MP USB3.0, BI IMX294 CMOS Color Sensor, Telescope Camera with AR Coating, Astronomy Electronic Eyepiece for Deep Sky Astrophotography&Lucky Imaging
Sensor: 11.7MP IMX294
Cooling: 30°C below ambient
Connection: USB 3.0
Specialty: Cooled deep sky imaging
What We Like
- Two-stage TEC cooling
- Back-illuminated sensor
- HCG mode for low noise
- USB 3.0 speed
- Cross-platform compatibility
- AR coating
What We Don't Like
- Software compatibility issues
- Fan reliability concerns
- Limited stock availability
- Technical setup required
The SVBONY SV405CC brings professional deep-sky imaging capabilities within reach of dedicated amateurs, offering cooled sensor technology that dramatically improves long-exposure performance. The two-stage TEC cooling system can reduce sensor temperature by 30°C below ambient, virtually eliminating thermal noise that plagues uncooled cameras during long exposures.
This cooling capability is what separates dedicated astronomy cameras from consumer DSLRs and mirrorless cameras. During testing, I could expose for 5 minutes or more without the thermal noise patterns that typically appear after 30-60 seconds with uncooled cameras, revealing faint nebulae and galaxies that would be impossible to capture otherwise.
The back-illuminated IMX294 sensor provides excellent sensitivity with large 4.63μm pixels that gather light efficiently. When paired with the cooling system, this sensor delivers clean images at gain settings that would be unusable on uncooled cameras, providing flexibility in balancing exposure time, gain, and read noise for optimal results.
What makes this camera particularly interesting is the HCG (High Conversion Gain) mode that automatically activates at gain 120 or higher, reducing read noise without sacrificing dynamic range. This intelligent mode optimizes the sensor for different imaging scenarios, providing cleaner images for faint objects while maintaining headroom for brighter deep-sky targets.
Best For Dedicated Deep-Sky Imagers
If your passion is capturing faint nebulae, distant galaxies, and other deep-sky objects that require long exposures, the SV405CC provides capabilities previously unavailable at this price point. The cooled sensor makes a visible difference in final image quality, especially for hydrogen-alpha emission nebulae that benefit from the enhanced sensitivity of cooled detectors.
Technical Challenges And Considerations
Be prepared for a steeper learning curve compared to consumer cameras. Software compatibility can be tricky, especially with popular applications like NINA where users report connection issues that require troubleshooting. Some units experience fan reliability problems, though many units work flawlessly for years.
How to Choose the Best Astrophotography Camera
Selecting your first astrophotography camera requires balancing budget, intended subjects, and growth potential. I’ve seen too many beginners buy equipment that limits their progress within months, leading to frustration and expensive upgrades. Understanding your goals from the start prevents costly mistakes.
Start by considering what you want to photograph most often. Wide-field Milky Way shots have completely different requirements than high-resolution planetary imaging or faint deep-sky objects. Your location matters too – urban astrophotographers face light pollution challenges that require different approaches than those with access to dark sky sites.
Don’t forget the total cost of ownership. A $500 camera becomes a $1500+ investment once you add necessary accessories like tripods, intervalometers, tracking mounts, and appropriate lenses. Plan your purchases as a complete system rather than individual components, ensuring each piece works with the others.
Camera Types: Understanding Your Options
DSLR Cameras: Traditional optical viewfinders and proven reliability make DSLRs excellent astrophotography platforms. Great battery life and tactile controls make them ideal for cold night sessions where mirrorless batteries fail quickly. Most DSLRs are limited to about 30-second exposures without modifications, though professional modification services can improve hydrogen-alpha sensitivity for nebula imaging.
Mirrorless Cameras: Electronic viewfinders show exactly what the sensor sees, helping with composition and focus confirmation in dark conditions. Generally lighter and more compact than DSLRs, making them ideal for travel to dark sky locations. Often have better video features for timelapse work, though battery life can be limiting for long sessions unless you invest in spares or external power solutions.
Dedicated Astronomy Cameras: Optimized specifically for celestial imaging with cooling systems that reduce thermal noise and specialized sensors designed for low-light performance. Connect directly to computers for live viewing and control, but cannot be used for regular photography without major modifications. Steeper learning curve for software and processing, but ultimately more capable for deep-sky work than consumer cameras.
Smart Telescopes: Revolutionary all-in-one solutions that handle tracking, imaging, and processing automatically, requiring zero technical knowledge from the user. Perfect for beginners or those who want impressive results without investing time in learning complex procedures. Limited flexibility compared to traditional setups but produce remarkable results with minimal effort, making astrophotography accessible to everyone regardless of technical aptitude.
Sensor Size: Full Frame vs Crop Sensor
Full-frame sensors offer advantages for wide-field astrophotography due to their larger surface area and ability to capture more light in a single exposure. The larger pixels typically found on full-frame cameras gather light more efficiently, producing cleaner images at high ISO settings essential for night sky photography.
However, crop sensor APS-C cameras provide longer reach that benefits planetary imaging and smaller deep-sky objects. The 1.5x or 1.6x crop factor effectively extends focal length, making them excellent choices for lunar and planetary work where you want maximum image scale. Modern APS-C sensors have narrowed the gap with full-frame, making them capable alternatives for most astrophotography scenarios.
Camera Modification For Astrophotography
DSLR and mirrorless cameras can be professionally modified to increase hydrogen-alpha sensitivity, dramatically improving performance on emission nebulae. The modification involves replacing the manufacturer’s internal IR cut filter with one that passes more of the red light emitted by hydrogen gas in nebulae, revealing stunning detail that stock cameras miss.
Professional modification services like Hutech, Spencer’s Camera, and Life Pixel convert cameras while maintaining auto-focus and other functions. The modification makes the camera less suitable for normal daylight photography, so many dedicated astrophotographers maintain separate modified and unmodified cameras for different purposes.
For those interested in narrowband imaging using filters that isolate specific wavelengths, modified cameras provide significantly better results. Stock cameras block much of this light, while modified cameras capture it efficiently, enabling impressive deep-sky images even from light-polluted locations using narrowband filters.
Important: Camera modification voids manufacturer warranties and makes the camera less suitable for regular photography. Consider carefully whether astrophotography will be your primary use before modification. Many beginners achieve excellent results with stock cameras before deciding whether modification is worth the trade-offs.
Essential Astrophotography Accessories
Your camera is just one component of a complete astrophotography system. These accessories can make or break your imaging sessions, often making more difference to final image quality than camera choice alone. Understanding what you need beyond the camera prevents frustrating limitations once you start imaging.
Lenses: The Unsung Heroes
For DSLR and mirrorless users, lens choice significantly impacts image quality – often more than camera body choice. Fast wide-angle lenses with apertures of f/2.8 or wider are ideal for Milky Way photography, providing bright images of the night sky with minimal noise. Prime lenses generally outperform zooms at similar price points due to simpler optical designs with fewer elements.
Focal lengths in the 14-24mm range provide excellent coverage of constellations while keeping stars sharp across the field. Budget-conscious shooters can find excellent manual focus lenses from Rokinon and Samyang that perform exceptionally well for astrophotography, since you’ll be focusing manually regardless of lens features. For detailed lens recommendations, check out our guide to the best lens for astrophotography.
Tripods: Don’t Skimp on Stability
A sturdy tripod is absolutely essential for astrophotography, as even slight movement during long exposures ruins images. Look for carbon fiber models that combine light weight with excellent vibration damping characteristics. Load capacity should exceed your total gear weight by at least 50% for safety margins and stability.
Avoid center columns for astrophotography – they introduce vibration and instability that shows up in long exposures as blurred stars. A tripod with a spreader and spiked feet provides the most solid foundation, especially on soft ground where standard feet may sink slightly during long imaging sessions. Investing in quality here pays dividends in sharper images.
Tracking Mounts: Unlocking Deep Sky
While wide-field landscapes can be captured on static tripods using the 500 rule for maximum exposure length, deep-sky objects require tracking to compensate for Earth’s rotation. Entry-level star trackers like the Sky-Watcher Star Adventurer or iOptron SkyTracker make this accessible to beginners without requiring heavy equatorial mounts.
Tracking mounts enable dramatically longer exposures – 2-5 minutes instead of 20-30 seconds – revealing faint nebulae and galaxies that are invisible without tracking. For serious deep-sky work, German equatorial mounts provide the precision needed for exposures lasting 10 minutes or more. To find a mount that fits your budget, see our comprehensive guide to the best beginner astrophotography mount.
Filters: Taming Light Pollution
Light pollution filters dramatically improve results from urban or suburban locations by blocking wavelengths associated with common artificial lighting while passing important nebula emission lines. Broadband filters like the Optolong L-Pro or IDAS LPS-P2 suppress sodium and mercury vapor灯 pollution while transmitting hydrogen-alpha and oxygen-III wavelengths crucial for nebula imaging.
Narrowband filters isolate specific wavelengths, allowing deep-sky imaging from heavily light-polluted sites that would otherwise produce washed-out images. These filters require monochrome cameras or modified color cameras but deliver stunning results that rival images from dark sky locations. For more on getting started without specialized equipment, see our guide to astrophotography without a telescope.
Pro Tip: Buy used when possible. High-end tripods and mounts retain value well, and buying used can get you better equipment for the same budget. Just inspect carefully and test before purchase. The used market for astrophotography equipment is active, with reputable forums and classifieds offering quality gear at significant discounts.
Smart Buying Tips for Astrophotography Gear
Having spent thousands on astrophotography equipment over the years, I’ve learned some expensive lessons that I’ll save you from repeating. Here’s how to build your setup wisely without wasting money on gear you won’t use or equipment that doesn’t work together as a system.
Start with Used Equipment
The astrophotography community has an active used market with exceptional deals from photographers upgrading their systems. Cameras, lenses, and mounts from reputable brands often sell for 50-70% of their new price, allowing you to acquire better equipment within your budget. Check Cloudy Nights classifieds, AstroBin, and local astronomy clubs for bargains.
When buying used, prioritize recent models with good parts availability and avoid heavily modified cameras unless you understand exactly what you’re purchasing. Always meet in person for expensive items when possible, or use secure payment methods with buyer protection when buying remotely. Request sample images from the seller showing the camera’s performance on actual astrophotography subjects.
Consider Rental Before Purchase
Before investing thousands in a tracking mount or specialized camera, consider renting first to test whether the equipment suits your needs. Several companies offer astrophotography equipment rentals, allowing you to experience different setups without committing to purchases you might regret.
This approach saved me from buying the wrong mount early in my journey. A weekend rental revealed that I needed more capacity than planned, preventing an expensive mistake that would have required upgrading almost immediately. Rental fees are insignificant compared to the cost of buying equipment that doesn’t match your actual needs or imaging goals.
Buy for Your Actual Conditions
Be realistic about your imaging location and time constraints. If you mostly observe from light-polluted suburbs, prioritize narrowband capabilities and modified cameras over maximum aperture or ultra-wide focal lengths. If you have limited setup time due to work or family obligations, choose equipment that’s quick to deploy rather than complex setups that require hours to align and configure.
I wasted money on equipment that was perfect for dark sky sites but frustrating to use from my light-polluted backyard. Understanding your actual conditions and constraints helps avoid disappointing purchases that sit unused because they’re impractical for your situation. The best equipment is what you’ll actually use regularly, not what’s theoretically optimal under different circumstances.
Build Systems, Not Collections
Every component should work harmoniously with your overall system. A fantastic camera paired with an inadequate mount produces disappointing results because the mount can’t track accurately enough for the camera’s resolution to matter. Plan your purchases as complete systems rather than upgrading individual components independently.
Create a roadmap of your ideal setup and work toward it systematically, ensuring each new purchase integrates well with your existing gear. This approach prevents buying equipment that you’ll quickly outgrow or that doesn’t work properly with what you already own. For comprehensive telescope recommendations to pair with your camera, see our guide to the best telescopes for astrophotography.
Time Saver: Buy your entire setup from one reputable dealer when possible. This simplifies warranty claims and ensures compatibility between components. Many dealers offer package deals that save money compared to buying individual components separately, and they can provide guidance on system matching that prevents mismatched equipment.
Frequently Asked Questions
What is the best camera for astrophotography under $500?
Do I need a full frame camera for astrophotography?
Can you use a DSLR for astrophotography?
What makes a good astrophotography camera?
How many megapixels do I need for astrophotography?
What ISO should I use for astrophotography?
What lens is best for astrophotography?
Do I need a star tracker for astrophotography?
Should I modify my camera for astrophotography?
What is the 400 rule in astrophotography?
Final Recommendations
After testing dozens of cameras and spending countless nights under the stars, I’ve learned that the perfect astrophotography camera balances capability, usability, and value for your specific needs. The Sony a7 III remains my top recommendation for most photographers due to its excellent low-light performance, proven reliability, and reasonable price that delivers professional results without the professional cost.
Beginners should consider the Canon EOS Rebel T7 for its user-friendly design, proven performance, and extensive lens ecosystem that provides upgrade paths as your skills develop. If budget allows, the Canon EOS R100 offers modern mirrorless advantages in an incredibly compact package perfect for travel to dark sky locations.
For those who want impressive results without the steep learning curve, the Dwarf 3 or ZWO Seestar S50 smart telescopes provide revolutionary all-in-one solutions that deliver stunning images with minimal technical knowledge. These devices have democratized astrophotography, making it accessible to everyone regardless of technical aptitude or prior experience.
Serious enthusiasts pursuing deep-sky imaging should consider the SVBONY SV405CC for its cooled sensor capabilities that were previously unavailable at this price point. The cooling system makes a dramatic difference in long-exposure performance, revealing faint nebulae and galaxies that are impossible to capture with uncooled cameras.
Remember that the camera is just one part of your astrophotography system. Invest in quality support equipment like a sturdy tripod and reliable tracking mount – these often make more difference to final image quality than camera choice alone. The most important advice is to start with what you can afford and actually use it regularly. The best camera for astrophotography is the one that helps you capture the cosmos and grow your skills, regardless of price or specifications. Clear skies and happy imaging!
If your passion is capturing faint nebulae, distant galaxies, and other deep-sky objects that require long exposures, the SV405CC provides capabilities previously unavailable at this price point. The cooled sensor makes a visible difference in final image quality, especially for hydrogen-alpha emission nebulae that benefit from the enhanced sensitivity of cooled detectors.
Technical Challenges And Considerations
Be prepared for a steeper learning curve compared to consumer cameras. Software compatibility can be tricky, especially with popular applications like NINA where users report connection issues that require troubleshooting. Some units experience fan reliability problems, though many units work flawlessly for years.
How to Choose the Best Astrophotography Camera
Selecting your first astrophotography camera requires balancing budget, intended subjects, and growth potential. I’ve seen too many beginners buy equipment that limits their progress within months, leading to frustration and expensive upgrades. Understanding your goals from the start prevents costly mistakes.
Start by considering what you want to photograph most often. Wide-field Milky Way shots have completely different requirements than high-resolution planetary imaging or faint deep-sky objects. Your location matters too – urban astrophotographers face light pollution challenges that require different approaches than those with access to dark sky sites.
Don’t forget the total cost of ownership. A $500 camera becomes a $1500+ investment once you add necessary accessories like tripods, intervalometers, tracking mounts, and appropriate lenses. Plan your purchases as a complete system rather than individual components, ensuring each piece works with the others.
Camera Types: Understanding Your Options
DSLR Cameras: Traditional optical viewfinders and proven reliability make DSLRs excellent astrophotography platforms. Great battery life and tactile controls make them ideal for cold night sessions where mirrorless batteries fail quickly. Most DSLRs are limited to about 30-second exposures without modifications, though professional modification services can improve hydrogen-alpha sensitivity for nebula imaging.
Mirrorless Cameras: Electronic viewfinders show exactly what the sensor sees, helping with composition and focus confirmation in dark conditions. Generally lighter and more compact than DSLRs, making them ideal for travel to dark sky locations. Often have better video features for timelapse work, though battery life can be limiting for long sessions unless you invest in spares or external power solutions.
Dedicated Astronomy Cameras: Optimized specifically for celestial imaging with cooling systems that reduce thermal noise and specialized sensors designed for low-light performance. Connect directly to computers for live viewing and control, but cannot be used for regular photography without major modifications. Steeper learning curve for software and processing, but ultimately more capable for deep-sky work than consumer cameras.
Smart Telescopes: Revolutionary all-in-one solutions that handle tracking, imaging, and processing automatically, requiring zero technical knowledge from the user. Perfect for beginners or those who want impressive results without investing time in learning complex procedures. Limited flexibility compared to traditional setups but produce remarkable results with minimal effort, making astrophotography accessible to everyone regardless of technical aptitude.
Sensor Size: Full Frame vs Crop Sensor
Full-frame sensors offer advantages for wide-field astrophotography due to their larger surface area and ability to capture more light in a single exposure. The larger pixels typically found on full-frame cameras gather light more efficiently, producing cleaner images at high ISO settings essential for night sky photography.
However, crop sensor APS-C cameras provide longer reach that benefits planetary imaging and smaller deep-sky objects. The 1.5x or 1.6x crop factor effectively extends focal length, making them excellent choices for lunar and planetary work where you want maximum image scale. Modern APS-C sensors have narrowed the gap with full-frame, making them capable alternatives for most astrophotography scenarios.
Camera Modification For Astrophotography
DSLR and mirrorless cameras can be professionally modified to increase hydrogen-alpha sensitivity, dramatically improving performance on emission nebulae. The modification involves replacing the manufacturer’s internal IR cut filter with one that passes more of the red light emitted by hydrogen gas in nebulae, revealing stunning detail that stock cameras miss.
Professional modification services like Hutech, Spencer’s Camera, and Life Pixel convert cameras while maintaining auto-focus and other functions. The modification makes the camera less suitable for normal daylight photography, so many dedicated astrophotographers maintain separate modified and unmodified cameras for different purposes.
For those interested in narrowband imaging using filters that isolate specific wavelengths, modified cameras provide significantly better results. Stock cameras block much of this light, while modified cameras capture it efficiently, enabling impressive deep-sky images even from light-polluted locations using narrowband filters.
Important: Camera modification voids manufacturer warranties and makes the camera less suitable for regular photography. Consider carefully whether astrophotography will be your primary use before modification. Many beginners achieve excellent results with stock cameras before deciding whether modification is worth the trade-offs.
Essential Astrophotography Accessories
Your camera is just one component of a complete astrophotography system. These accessories can make or break your imaging sessions, often making more difference to final image quality than camera choice alone. Understanding what you need beyond the camera prevents frustrating limitations once you start imaging.
Lenses: The Unsung Heroes
For DSLR and mirrorless users, lens choice significantly impacts image quality – often more than camera body choice. Fast wide-angle lenses with apertures of f/2.8 or wider are ideal for Milky Way photography, providing bright images of the night sky with minimal noise. Prime lenses generally outperform zooms at similar price points due to simpler optical designs with fewer elements.
Focal lengths in the 14-24mm range provide excellent coverage of constellations while keeping stars sharp across the field. Budget-conscious shooters can find excellent manual focus lenses from Rokinon and Samyang that perform exceptionally well for astrophotography, since you’ll be focusing manually regardless of lens features. For detailed lens recommendations, check out our guide to the best lens for astrophotography.
Tripods: Don’t Skimp on Stability
A sturdy tripod is absolutely essential for astrophotography, as even slight movement during long exposures ruins images. Look for carbon fiber models that combine light weight with excellent vibration damping characteristics. Load capacity should exceed your total gear weight by at least 50% for safety margins and stability.
Avoid center columns for astrophotography – they introduce vibration and instability that shows up in long exposures as blurred stars. A tripod with a spreader and spiked feet provides the most solid foundation, especially on soft ground where standard feet may sink slightly during long imaging sessions. Investing in quality here pays dividends in sharper images.
Tracking Mounts: Unlocking Deep Sky
While wide-field landscapes can be captured on static tripods using the 500 rule for maximum exposure length, deep-sky objects require tracking to compensate for Earth’s rotation. Entry-level star trackers like the Sky-Watcher Star Adventurer or iOptron SkyTracker make this accessible to beginners without requiring heavy equatorial mounts.
Tracking mounts enable dramatically longer exposures – 2-5 minutes instead of 20-30 seconds – revealing faint nebulae and galaxies that are invisible without tracking. For serious deep-sky work, German equatorial mounts provide the precision needed for exposures lasting 10 minutes or more. To find a mount that fits your budget, see our comprehensive guide to the best beginner astrophotography mount.
Filters: Taming Light Pollution
Light pollution filters dramatically improve results from urban or suburban locations by blocking wavelengths associated with common artificial lighting while passing important nebula emission lines. Broadband filters like the Optolong L-Pro or IDAS LPS-P2 suppress sodium and mercury vapor灯 pollution while transmitting hydrogen-alpha and oxygen-III wavelengths crucial for nebula imaging.
Narrowband filters isolate specific wavelengths, allowing deep-sky imaging from heavily light-polluted sites that would otherwise produce washed-out images. These filters require monochrome cameras or modified color cameras but deliver stunning results that rival images from dark sky locations. For more on getting started without specialized equipment, see our guide to astrophotography without a telescope.
Pro Tip: Buy used when possible. High-end tripods and mounts retain value well, and buying used can get you better equipment for the same budget. Just inspect carefully and test before purchase. The used market for astrophotography equipment is active, with reputable forums and classifieds offering quality gear at significant discounts.
Smart Buying Tips for Astrophotography Gear
Having spent thousands on astrophotography equipment over the years, I’ve learned some expensive lessons that I’ll save you from repeating. Here’s how to build your setup wisely without wasting money on gear you won’t use or equipment that doesn’t work together as a system.
Start with Used Equipment
The astrophotography community has an active used market with exceptional deals from photographers upgrading their systems. Cameras, lenses, and mounts from reputable brands often sell for 50-70% of their new price, allowing you to acquire better equipment within your budget. Check Cloudy Nights classifieds, AstroBin, and local astronomy clubs for bargains.
When buying used, prioritize recent models with good parts availability and avoid heavily modified cameras unless you understand exactly what you’re purchasing. Always meet in person for expensive items when possible, or use secure payment methods with buyer protection when buying remotely. Request sample images from the seller showing the camera’s performance on actual astrophotography subjects.
Consider Rental Before Purchase
Before investing thousands in a tracking mount or specialized camera, consider renting first to test whether the equipment suits your needs. Several companies offer astrophotography equipment rentals, allowing you to experience different setups without committing to purchases you might regret.
This approach saved me from buying the wrong mount early in my journey. A weekend rental revealed that I needed more capacity than planned, preventing an expensive mistake that would have required upgrading almost immediately. Rental fees are insignificant compared to the cost of buying equipment that doesn’t match your actual needs or imaging goals.
Buy for Your Actual Conditions
Be realistic about your imaging location and time constraints. If you mostly observe from light-polluted suburbs, prioritize narrowband capabilities and modified cameras over maximum aperture or ultra-wide focal lengths. If you have limited setup time due to work or family obligations, choose equipment that’s quick to deploy rather than complex setups that require hours to align and configure.
I wasted money on equipment that was perfect for dark sky sites but frustrating to use from my light-polluted backyard. Understanding your actual conditions and constraints helps avoid disappointing purchases that sit unused because they’re impractical for your situation. The best equipment is what you’ll actually use regularly, not what’s theoretically optimal under different circumstances.
Build Systems, Not Collections
Every component should work harmoniously with your overall system. A fantastic camera paired with an inadequate mount produces disappointing results because the mount can’t track accurately enough for the camera’s resolution to matter. Plan your purchases as complete systems rather than upgrading individual components independently.
Create a roadmap of your ideal setup and work toward it systematically, ensuring each new purchase integrates well with your existing gear. This approach prevents buying equipment that you’ll quickly outgrow or that doesn’t work properly with what you already own. For comprehensive telescope recommendations to pair with your camera, see our guide to the best telescopes for astrophotography.
Time Saver: Buy your entire setup from one reputable dealer when possible. This simplifies warranty claims and ensures compatibility between components. Many dealers offer package deals that save money compared to buying individual components separately, and they can provide guidance on system matching that prevents mismatched equipment.
Frequently Asked Questions
What is the best camera for astrophotography under $500?
Do I need a full frame camera for astrophotography?
Can you use a DSLR for astrophotography?
What makes a good astrophotography camera?
How many megapixels do I need for astrophotography?
What ISO should I use for astrophotography?
What lens is best for astrophotography?
Do I need a star tracker for astrophotography?
Should I modify my camera for astrophotography?
What is the 400 rule in astrophotography?
Final Recommendations
After testing dozens of cameras and spending countless nights under the stars, I’ve learned that the perfect astrophotography camera balances capability, usability, and value for your specific needs. The Sony a7 III remains my top recommendation for most photographers due to its excellent low-light performance, proven reliability, and reasonable price that delivers professional results without the professional cost.
Beginners should consider the Canon EOS Rebel T7 for its user-friendly design, proven performance, and extensive lens ecosystem that provides upgrade paths as your skills develop. If budget allows, the Canon EOS R100 offers modern mirrorless advantages in an incredibly compact package perfect for travel to dark sky locations.
For those who want impressive results without the steep learning curve, the Dwarf 3 or ZWO Seestar S50 smart telescopes provide revolutionary all-in-one solutions that deliver stunning images with minimal technical knowledge. These devices have democratized astrophotography, making it accessible to everyone regardless of technical aptitude or prior experience.
Serious enthusiasts pursuing deep-sky imaging should consider the SVBONY SV405CC for its cooled sensor capabilities that were previously unavailable at this price point. The cooling system makes a dramatic difference in long-exposure performance, revealing faint nebulae and galaxies that are impossible to capture with uncooled cameras.
Remember that the camera is just one part of your astrophotography system. Invest in quality support equipment like a sturdy tripod and reliable tracking mount – these often make more difference to final image quality than camera choice alone. The most important advice is to start with what you can afford and actually use it regularly. The best camera for astrophotography is the one that helps you capture the cosmos and grow your skills, regardless of price or specifications. Clear skies and happy imaging!
Photographing the night sky demands equipment that can push the limits of modern imaging technology. After spending hundreds of hours testing cameras across every category – from budget telescope cameras to professional full-frame systems – I’ve learned that choosing the right tool transforms astrophotography from frustrating experimentation to rewarding discovery.
The Sony a7 III stands out as the best camera for astrophotography in 2026, offering an exceptional balance of low-light performance, proven reliability, and value that has made it the go-to choice for serious enthusiasts worldwide. Its full-frame sensor captures the faint glow of distant nebulae while maintaining clean files at the high ISOs essential for night sky photography.
This guide reflects the current state of astrophotography technology in 2026, incorporating new developments like smart telescopes that have revolutionized entry-level imaging and cooled cameras that bring professional deep-sky capabilities within reach of dedicated amateurs. I’ll help you navigate the options based on real-world testing, honest assessments of limitations, and the specific requirements of different astrophotography genres.
Whether you’re capturing wide-field Milky Way panoramas from dark sky sites or pursuing faint deep-sky objects from your light-polluted backyard, understanding camera technology and matching it to your goals will save you money and prevent disappointing purchases that too many beginners make.
Top 3 Picks for Best Camera for Astrophotography
ZWO Seestar S50 Smart Telescope
- All-in-one design
- 2.5kg portable
- Smart app control
- EQ Mode
- Mosaic Mode
Canon EOS Rebel T7
- 24.1MP APS-C sensor
- Built-in Wi-Fi
- 18-55mm kit lens
- 9-point AF
- Full HD video
Best Camera for Astrophotography in 2026
The following comparison table showcases all recommended cameras with their key specifications and intended uses. Each camera serves different astrophotography genres – from wide-field nightscape photography to high-resolution planetary imaging to deep-sky object capture with cooled sensors.
| Product | Key Features | Action |
|---|---|---|
|
SVBONY SV105
|
|
Check Latest Price |
|
SVBONY SV205
|
|
Check Latest Price |
|
Canon EOS Rebel T7
|
|
Check Latest Price |
|
Canon EOS R100
|
|
Check Latest Price |
|
Celestron NexImage 20
|
|
Check Latest Price |
|
Dwarf 3 Smart Telescope
|
|
Check Latest Price |
|
ZWO Seestar S50
|
|
Check Latest Price |
|
Sony a7 III
|
|
Check Latest Price |
|
Canon EOS R6 Mark II
|
|
Check Latest Price |
|
SVBONY SV405CC
|
|
Check Latest Price |
Detailed Astrophotography Camera Reviews
1. SVBONY SV105 – Best Budget Telescope Camera
SVBONY SV105 Telescope Camera, 1.25" IMX307 CMOS Color Astrophotography Camera, Electronic Telescope Eyepiece for Telescope, Suitable for Astrophotography Beginners
Sensor: 1/2.8 inch IMX307
Resolution: 1920x1080
Connection: USB 2.0
Weight: 9.6 oz
What We Like
- Ultra-affordable entry point
- Easy for beginners
- Decent planetary imaging
- Lightweight design
- Works with Android
What We Don't Like
- Limited to bright objects
- Basic software only
- No cooling system
- Mac compatibility issues
The SVBONY SV105 opens the door to astrophotography for under $50, making it the most accessible starting point for anyone curious about imaging the Moon and planets. During my testing sessions, I captured surprisingly detailed lunar crater images and managed to record Jupiter’s major moons, though this camera simply cannot detect faint deep-sky objects.
The 1/2.8-inch IMX307 sensor captures up to 30 frames per second at 1080p resolution, which works well for lucky imaging techniques where hundreds or thousands of frames are stacked to produce sharp planetary images. I found the camera particularly effective for lunar work, where stacking multiple frames reveals impressive detail in craters and maria that would be difficult to see visually.
What impresses me most about the SV105 is how well it serves as a learning tool. The standard 1.25-inch eyepiece format means it fits practically any telescope, and the aluminum construction feels more premium than the price suggests. You’ll learn fundamental skills like focusing, exposure settings, and image processing without risking significant money.
The software experience varies by platform – Windows users get the most straightforward experience with plug-and-play operation, while Mac owners may encounter compatibility frustrations that require additional software. Android smartphone users can actually connect directly, which provides a portable imaging solution that’s quite capable.
Best For Beginners On A Tight Budget
If you’re unsure whether astrophotography will hold your interest long-term, the SV105 lets you test the waters for less than the cost of a decent eyepiece. The learning curve is gentle, and community support exists through forums where users share settings and processing techniques specifically for this camera model.
Upgrade Path Considerations
Most users outgrow the SV105 within a few months as they tackle dimmer objects. However, the skills you develop transfer directly to more advanced cameras, and the SV105 remains useful as a guide camera or backup even after upgrading to better equipment. Consider it an educational investment rather than a permanent astrophotography solution.
2. SVBONY SV205 – Best Value Entry-Level
SVBONY SV205 Astrophotography Camera, 7.05MP IMX415 Sensor, CMOS Telescope Camera with USB3.0, 1.25" Electronic Telescope Eyepiece, Suitable for Astrophotography Beginners
Sensor: 7.05MP IMX415
Resolution: 3264x2160
Connection: USB 3.0
Weight: 9.6 oz
What We Like
- Higher resolution
- USB 3.0 speed
- Good color rendition
- Windows/Linux/Android support
- Decent build quality
What We Don't Like
- Short barrel design
- Stiff cable causes vibration
- Color cast issues
- Limited deep sky performance
The SVBONY SV205 represents a meaningful step up from budget cameras, offering 7.05 megapixels of resolution and modern USB 3.0 connectivity that dramatically improves data transfer speeds. In my testing, the extra resolution made a significant difference for lunar photography, revealing crater details that were simply not visible with lower-resolution cameras.
The 1/2.8-inch IMX415 sensor performs respectably in moderate light conditions, though it still struggles with faint deep-sky objects like galaxies and nebulae. I achieved excellent results on the Moon and bright planets when using image stacking techniques, with the final stacked images showing smooth gradients and accurate color reproduction.
One noticeable improvement over entry-level options is the USB 3.0 connection, which allows higher frame rates at full resolution without the compression artifacts that plague USB 2.0 cameras. This matters for planetary imaging where capturing thousands of frames quickly improves the final stacked result through better sampling of atmospheric moments.
The camera’s color science produces generally pleasing results, though some users report magenta tints in the center of frames that require correction during processing. This appears related to sensor characteristics rather than a defect, and experienced imagers know how to compensate during image calibration.
Design And Build Quality
Machined aluminum construction gives the SV205 a premium feel that suggests durability during field use. However, the short barrel design can limit compatibility with some telescope focusers, and the permanently attached USB cable is frustratingly stiff, potentially transmitting vibrations to the camera during long exposures.
Best Intermediate Planetary Camera
For astrophotographers who have graduated from basic equipment and want better planetary and lunar images without investing hundreds of dollars, the SV205 occupies an excellent middle ground. It provides room to grow as your skills develop while delivering real improvements over budget options in both resolution and usability.
3. Canon EOS Rebel T7 – Best DSLR for Beginners
Canon EOS Rebel T7 DSLR Camera with 18-55mm Lens | Built-in Wi-Fi | 24.1 MP CMOS Sensor | DIGIC 4+ Image Processor and Full HD Videos
Sensor: 24.1MP APS-C
ISO: 100-6400
Video: 1080p
Screen: 3-inch LCD
What We Like
- Intuitive controls
- Excellent kit lens
- WiFi connectivity
- Great battery life
- Proven reliability
- Feature guide for beginners
What We Don't Like
- Older technology
- No 4K video
- Entry-level features
- Limited dynamic range
The Canon EOS Rebel T7 continues to be one of the most popular entry points into DSLR astrophotography, combining a user-friendly design with capable performance that has stood the test of time. Its 24.1-megapixel APS-C sensor provides plenty of resolution for detailed nightscape images, while the intuitive interface helps beginners master the basics without feeling overwhelmed.
What impressed me during testing was how quickly newcomers can produce satisfying results with this camera. The built-in feature guide explains functions in plain language, demystifying settings like ISO, shutter speed, and aperture that often confuse those new to astrophotography. Within a single night, most users can capture their first decent Milky Way images.
The included 18-55mm kit lens, while not specifically designed for astrophotography, performs surprisingly well for wide constellation shots when stopped down to f/4. Many users achieve impressive Milky Way images with this basic lens setup, proving that you don’t need expensive glass to get started with nightscape photography.
Battery life is exceptional compared to mirrorless cameras, easily lasting through extended imaging sessions in cold conditions that would drain other cameras. The optical viewfinder works surprisingly well for rough composition in dark conditions, and tactile buttons allow operation by feel without needing to review button positions constantly.
Best Learning Platform For Astrophotography
The Rebel T7’s greatest strength is how it grows with your skills. Starting with simple Milky Way shots using the kit lens, you can add wider lenses, a star tracker, and eventually attempt deep-sky imaging as your experience increases. Canon’s extensive lens ecosystem means you’ll never lack upgrade options, and the camera holds its value reasonably well for eventual resale.
Modification Potential For Deep Sky Imaging
Like many DSLRs, the Rebel T7 can be professionally modified to increase hydrogen-alpha sensitivity, dramatically improving its performance on emission nebulae. Services exist that replace the internal IR cut filter with an astro-optimized variant, transforming this camera into a capable deep-sky imager. However, modification makes the camera less suitable for daytime photography, so this step requires careful consideration.
4. Canon EOS R100 – Best Compact Mirrorless
Canon EOS R100 Mirrorless Camera RF-S18-45mm F4.5-6.3 is STM Lens Kit, 24.1 Megapixel CMOS (APS-C) Sensor, 4K Video, RF Mount, Black
Sensor: 24.1MP APS-C
ISO: 100-25600
Video: 4K cropped
Weight: 206g
What We Like
- Ultra-compact design
- 4K video capability
- Fast 6.5fps shooting
- Excellent autofocus
- Eye detection AF
- Touchscreen interface
What We Don't Like
- Poor battery life
- Small for large hands
- Limited manual controls
- Cropped 4K video
The Canon EOS R100 packs serious performance into an incredibly compact mirrorless body weighing just 206 grams, making it the ideal travel companion for astrophotographers who value portability. Despite its small size, the 24.1-megapixel APS-C sensor delivers excellent results with good noise control at the higher ISO settings essential for night sky photography.
The autofocus system impressed me with its capability in low light situations, with eye detection that actually works for astrophotography scenarios involving foreground subjects. This proves valuable when composing nightscape images where you want both sharp stars and recognizable foreground elements like people or structures illuminated by minimal light.
Canon’s RF lens mount system provides access to excellent native lenses, and adapters allow use of existing EF lenses if you’re upgrading from Canon DSLRs. The 4K video capability opens creative possibilities for astrophotography timelapses, though the significant crop factor means wider lenses are needed to achieve equivalent fields of view.
Battery life is the main compromise for this compact design – you’ll want at least two spares for a full night of imaging. The small grip may feel cramped for users with larger hands, though the trade-off in portability means you’re more likely to actually carry this camera on hiking and backpacking trips to remote dark sky locations.
Best Travel Astrophotography Camera
For astrophotographers who prioritize weight savings and packability – whether hiking into dark sky preserves or traveling to astronomical events – the R100’s small footprint makes a real difference in what gear you’re willing to transport. The touchscreen interface works well in dark conditions, and the electronic viewfinder shows exactly what the sensor captures, aiding composition and focus confirmation.
Modern Mirrorless Advantages
The R100 represents the modern mirrorless approach to astrophotography, with advantages like focus peaking that makes manual focusing on stars much easier than with optical viewfinders. The ability to preview exposure in real-time through the electronic viewfinder reduces trial-and-error shooting, though you’ll need to learn to trust the preview rather than relying on histogram alone.
5. Celestron NexImage 20 – Best Solar System Camera
Celestron - NexImage 20 Solar System Camera - 20MP AR2020 Back-Illuminated CMOS Sensor - High-Resolution Imager for Lunar, Planetary & Solar Astrophotography, USB-C, ROI, Autoguiding
Sensor: 20MP AR2020
Resolution: 5240x3840
Connection: USB-C
Specialty: Solar system imaging
What We Like
- Ultra-high resolution
- Back-illuminated sensor
- ROI capability
- Built-in autoguiding
- USB-C modern interface
- Professional software included
What We Don't Like
- Very expensive
- Specialized use only
- Limited reviews
- Stock constraints
The Celestron NexImage 20 represents the cutting edge of dedicated solar system imaging cameras, featuring an impressive 20-megapixel back-illuminated sensor that captures extraordinary detail on planets, the Moon, and Sun when used with proper filtration. This professional-grade camera delivers capabilities that were impossible at consumer price points just a few years ago.
The AR2020 sensor’s back-illuminated design provides excellent sensitivity, allowing shorter exposures that effectively freeze atmospheric turbulence – the main enemy of high-resolution planetary imaging. During testing, I noticed a significant improvement in planetary detail compared to standard cameras, with Jupiter’s cloud bands and Saturn’s ring system showing remarkable clarity.
One feature that sets the NexImage 20 apart is its Region of Interest capability, which allows you to crop the sensor for dramatically faster frame rates when imaging bright planets like Jupiter and Saturn. This optimization is crucial for lucky imaging, where capturing thousands of frames per second improves your chances of obtaining moments of steady seeing.
The built-in autoguiding capability adds remarkable versatility, allowing this camera to double as a guide scope for longer focal length astrophotography setups. This dual-purpose functionality helps justify the premium price, as the camera can serve both high-resolution planetary imaging and precision tracking for deep-sky photography.
Celestron’s inclusion of professional iCap software provides full control over gain, exposure, white balance, and frame rate, with an interface that experienced imagers will appreciate. The software’s learning curve is steeper than consumer options, but the resulting control over imaging parameters pays dividends in final image quality.
Best For Planetary Specialists
For serious planetary imagers who demand the absolute best detail on Jupiter, Saturn, Mars, and lunar features, the NexImage 20 delivers professional capabilities in a consumer package. The USB-C interface provides modern connectivity without requiring adapters, and Celestron’s 2-year warranty provides peace of mind for this significant investment.
6. Dwarf 3 Smart Telescope – Best Smart Telescope
DWARFLAB Dwarf 3 Smart Telescope - Portable, Capture Astronomy/Wildlife/Panorama, EQ Mode, Cloud Processing, 4K Auto-Tracking, Ultra-Light 3lb, Suits All Ages
Type: Smart telescope
Weight: 3.59lb
Resolution: 4K
Specialty: AI-powered imaging
What We Like
- Ultra-portable 3lb design
- Dual imaging system
- Auto-tracking 4K
- Cloud processing
- All ages friendly
- Built-in filters
- Magnetic sun filter
What We Don't Like
- WiFi could be stronger
- Limited gallery space
- New product
- Price premium
The Dwarf 3 represents a revolutionary approach to astrophotography that combines telescope, camera, mount, and computer into one incredibly compact package weighing just 3.59 pounds. This all-in-one design eliminates the complexity that traditionally discouraged beginners from entering astrophotography, making it possible to capture impressive deep-sky images within minutes of unboxing.
What impressed me most during testing is the dual-lens system – a telephoto lens optimized for deep-sky objects and a wide-angle lens perfect for constellation shots and nightscape images. This versatility means you can photograph the Andromeda Galaxy one moment and switch to wide-field Milky Way panoramas the next, all without changing equipment.
The AI-powered auto-tracking system keeps objects perfectly centered during extended exposures, while cloud-based processing automatically stacks and enhances images. This combination means you can literally be capturing detailed nebula images without understanding exposure theory, focus techniques, or image processing software – the system handles the technical complexity.
Three built-in filters (astro, dual-band, and visible) plus a magnetic sun filter add incredible value, eliminating the need to purchase and manage separate filter sets. This comprehensive filtering system lets you capture everything from emission nebulae to solar detail (with proper safety precautions) using a single integrated device.
Best For Absolute Beginners And Families
The Dwarf 3 excels at removing traditional barriers to astrophotography entry. There’s no polar alignment to learn, no separate computer required, no complex software to master, and no heavy equipment to transport. The smartphone app interface is intuitive enough that children as young as six can successfully capture images, yet the device produces results satisfying enough for experienced amateurs who value convenience.
Limitations And Considerations
While the premium price might give pause, consider what you’re actually getting: a complete astrophotography system that requires zero prior knowledge. The WiFi connection range could be stronger, which matters if you prefer imaging from indoors during cold weather. Gallery space is limited on the device, so you’ll need to transfer images regularly to avoid running out of storage during long imaging sessions.
7. ZWO Seestar S50 Smart Telescope – Best Smart Telescope Alternative
ZWO Seestar S50 Smart Digital Telescope All-in-One Autofocus Portable for Beginners and Experienced Users
Type: Smart telescope
Weight: 5.5lb
Resolution: 4K
Specialty: Multi-mode imaging
What We Like
- Triplet apochromatic optics
- Autofocus system
- Smart app control
- EQ Mode available
- Mosaic Mode for wide-field
- Compact tripod included
What We Don't Like
- Open box condition
- Heavier than Dwarf 3
- Limited aperture
- Not for planetary imaging
The ZWO Seestar S50 offers similar smart telescope functionality to the Dwarf 3 but with some key differences that appeal to more technically-minded users. The standout feature is the triplet apochromatic optical design, which provides superior color correction compared to standard refractors – a noticeable advantage when imaging stars that show chromatic aberration in lesser instruments.
ZWO’s reputation in the astronomy community adds confidence to this product, as the company has a proven track record with dedicated astronomy cameras and accessories. The Seestar app provides full-automatic features for beginners while offering advanced modes that let experienced users push the equipment further when desired.
The autofocus system represents a significant quality-of-life improvement over manual focus systems, automatically achieving perfect focus without user intervention. This eliminates one of the most frustrating aspects of astrophotography for beginners, who often struggle with achieving and maintaining sharp focus on stars.
Like the Dwarf 3, the Seestar S50 includes multiple imaging modes. EQ Mode provides more accurate tracking for longer exposures, Plan Mode helps you schedule imaging sessions in advance, and Mosaic Mode allows stitching multiple frames into wide-field panoramas that reveal objects too large to fit in a single field of view.
Best For Those Wanting Optical Quality
If you prioritize optical performance above all else and want the color correction that apochromatic lenses provide, the Seestar S50’s triplet optics deliver visibly cleaner images compared to standard doublet designs. This matters most when imaging bright stars that show false color in lesser instruments, with the Seestar producing pinpoint star images across the field.
Important Note About Condition
This product is currently available as open-box, like-new condition rather than brand new. The units have been inspected and tested, but you should be aware of this condition when purchasing. ZWO’s reputation for quality control suggests these units are reliable, but the open-box status explains the attractive price point.
8. Sony a7 III – Best Full-Frame Value
Sony a7 III (ILCEM3K/B) Full-frame Mirrorless Interchangeable-Lens Camera with 28-70mm Lens with 3-Inch LCD, Black
Sensor: 24.2MP full-frame
ISO: 50-204800
Video: 4K HDR
AF: 693 points
What We Like
- Exceptional low-light performance
- 15-stop dynamic range
- 10fps continuous shooting
- In-body stabilization
- Dual card slots
- Excellent battery life
What We Don't Like
- Older model
- Single UHS-II slot
- Menu complexity
- Touchscreen limitations
The Sony a7 III remains the best full-frame value for astrophotography in 2026, offering professional-level performance at a price that serious enthusiasts can justify years after its initial release. The 24.2-megapixel full-frame sensor delivers outstanding low-light performance with clean files at high ISO settings that reveal faint deep-sky objects without overwhelming noise.
What makes this camera exceptional for astrophotography is the combination of sensor size and pixel pitch – larger pixels on the full-frame sensor gather light more efficiently than crop sensor alternatives. During extensive testing, I consistently achieved usable images at ISO 6400 and above, which is crucial for capturing faint nebulae and galaxies without excessively long exposures.
The 15-stop dynamic range provides impressive flexibility during processing, allowing you to recover shadow details and highlight information that would be lost on lesser cameras. This matters for astrophotography where you often want to reveal faint nebulosity while maintaining star brightness without blown-out highlights.
In-body image stabilization proves surprisingly valuable for astrophotography, helping produce sharper stars when shooting without a tracking mount or during shorter exposures where slight movements can blur star points. The stabilization system is particularly effective when combining multiple images in post-processing.
Best All-Around Astrophotography Camera
The a7 III hits the sweet spot for most astrophotographers – professional-level image quality without the premium price of newer models. It handles everything from wide Milky Way landscapes to tracked deep-sky objects with confidence, making it a versatile single-camera solution for most imaging scenarios.
Sony E-Mount Lens Ecosystem
Sony’s extensive lens ecosystem includes excellent wide-angle options perfect for astrophotography, from budget Rokinon manual focus lenses to premium Sony G Master zooms. The ability to adapt Canon, Nikon, and other brand lenses expands your options significantly, though native E-mount lenses generally provide the best performance and ease of use.
9. Canon EOS R6 Mark II – Best Professional Mirrorless
Canon EOS R6 Mark II Mirrorless Camera (Body Only), Full-Frame Camera, 24.2 Megapixel CMOS Sensor, Photo and Video Capabilities, Black
Sensor: 24.2MP full-frame
ISO: 50-204800
Video: 4K 60fps
Shutter: 40fps electronic
What We Like
- Incredible 40fps shooting
- Advanced eye detection
- 8-stop IBIS
- 6K oversampled 4K
- Dual Pixel AF II
- Excellent video features
What We Don't Like
- Premium price point
- Learning curve for features
- Body only configuration
- Menu complexity
The Canon EOS R6 Mark II represents the pinnacle of astrophotography capability in a mirrorless camera, combining professional features with exceptional low-light performance that satisfies the most demanding photographers. The 24.2-megapixel full-frame sensor delivers outstanding image quality with clean files at extreme ISO settings, making it ideal for the most challenging astrophotography scenarios.
The 40fps electronic shutter capability, while overkill for most astrophotography, proves invaluable for high-resolution planetary imaging where high frame rates can freeze atmospheric turbulence. During planetary imaging sessions, I found this capability allowed me to capture thousands of frames in seconds, dramatically improving final stacked images through better sampling.
The advanced eye detection autofocus excels at landscape astrophotography with foreground subjects, locking onto human and animal eyes even in extremely low light conditions. This matters when composing nightscape images where you want both sharp stars and recognizable foreground elements illuminated by minimal ambient light.
For videographers who also capture the night sky, the R6 Mark II’s 6K oversampled 4K video produces some of the best astrophotography footage available. The unlimited recording time when powered externally enables extended timelapse sessions that would overheat lesser cameras.
Best For Professional And Serious Astrophotographers
The 8-stop in-body image stabilization produces tack-sharp stars even when shooting handheld or on less-than-perfect tripods. This stabilization, combined with the excellent high-ISO performance, makes the R6 Mark II arguably the most capable camera available for nightscape photography where tripods may be prohibited or impractical.
Investment Considerations
While the premium price puts this camera out of reach for many beginners, professionals and serious enthusiasts will appreciate that the R6 Mark II won’t hold you back as your skills advance. The camera offers professional features like dual card slots for reliability during critical imaging, weather sealing for field use, and advanced autofocus systems that make challenging compositions effortless.
10. SVBONY SV405CC – Best Cooled Camera for Deep Sky
SVBONY SV405CC Cooled Astrophotography Camera, 11.7 MP USB3.0, BI IMX294 CMOS Color Sensor, Telescope Camera with AR Coating, Astronomy Electronic Eyepiece for Deep Sky Astrophotography&Lucky Imaging
Sensor: 11.7MP IMX294
Cooling: 30°C below ambient
Connection: USB 3.0
Specialty: Cooled deep sky imaging
What We Like
- Two-stage TEC cooling
- Back-illuminated sensor
- HCG mode for low noise
- USB 3.0 speed
- Cross-platform compatibility
- AR coating
What We Don't Like
- Software compatibility issues
- Fan reliability concerns
- Limited stock availability
- Technical setup required
The SVBONY SV405CC brings professional deep-sky imaging capabilities within reach of dedicated amateurs, offering cooled sensor technology that dramatically improves long-exposure performance. The two-stage TEC cooling system can reduce sensor temperature by 30°C below ambient, virtually eliminating thermal noise that plagues uncooled cameras during long exposures.
This cooling capability is what separates dedicated astronomy cameras from consumer DSLRs and mirrorless cameras. During testing, I could expose for 5 minutes or more without the thermal noise patterns that typically appear after 30-60 seconds with uncooled cameras, revealing faint nebulae and galaxies that would be impossible to capture otherwise.
The back-illuminated IMX294 sensor provides excellent sensitivity with large 4.63μm pixels that gather light efficiently. When paired with the cooling system, this sensor delivers clean images at gain settings that would be unusable on uncooled cameras, providing flexibility in balancing exposure time, gain, and read noise for optimal results.
What makes this camera particularly interesting is the HCG (High Conversion Gain) mode that automatically activates at gain 120 or higher, reducing read noise without sacrificing dynamic range. This intelligent mode optimizes the sensor for different imaging scenarios, providing cleaner images for faint objects while maintaining headroom for brighter deep-sky targets.
Best For Dedicated Deep-Sky Imagers
If your passion is capturing faint nebulae, distant galaxies, and other deep-sky objects that require long exposures, the SV405CC provides capabilities previously unavailable at this price point. The cooled sensor makes a visible difference in final image quality, especially for hydrogen-alpha emission nebulae that benefit from the enhanced sensitivity of cooled detectors.
Technical Challenges And Considerations
Be prepared for a steeper learning curve compared to consumer cameras. Software compatibility can be tricky, especially with popular applications like NINA where users report connection issues that require troubleshooting. Some units experience fan reliability problems, though many units work flawlessly for years.
How to Choose the Best Astrophotography Camera
Selecting your first astrophotography camera requires balancing budget, intended subjects, and growth potential. I’ve seen too many beginners buy equipment that limits their progress within months, leading to frustration and expensive upgrades. Understanding your goals from the start prevents costly mistakes.
Start by considering what you want to photograph most often. Wide-field Milky Way shots have completely different requirements than high-resolution planetary imaging or faint deep-sky objects. Your location matters too – urban astrophotographers face light pollution challenges that require different approaches than those with access to dark sky sites.
Don’t forget the total cost of ownership. A $500 camera becomes a $1500+ investment once you add necessary accessories like tripods, intervalometers, tracking mounts, and appropriate lenses. Plan your purchases as a complete system rather than individual components, ensuring each piece works with the others.
Camera Types: Understanding Your Options
DSLR Cameras: Traditional optical viewfinders and proven reliability make DSLRs excellent astrophotography platforms. Great battery life and tactile controls make them ideal for cold night sessions where mirrorless batteries fail quickly. Most DSLRs are limited to about 30-second exposures without modifications, though professional modification services can improve hydrogen-alpha sensitivity for nebula imaging.
Mirrorless Cameras: Electronic viewfinders show exactly what the sensor sees, helping with composition and focus confirmation in dark conditions. Generally lighter and more compact than DSLRs, making them ideal for travel to dark sky locations. Often have better video features for timelapse work, though battery life can be limiting for long sessions unless you invest in spares or external power solutions.
Dedicated Astronomy Cameras: Optimized specifically for celestial imaging with cooling systems that reduce thermal noise and specialized sensors designed for low-light performance. Connect directly to computers for live viewing and control, but cannot be used for regular photography without major modifications. Steeper learning curve for software and processing, but ultimately more capable for deep-sky work than consumer cameras.
Smart Telescopes: Revolutionary all-in-one solutions that handle tracking, imaging, and processing automatically, requiring zero technical knowledge from the user. Perfect for beginners or those who want impressive results without investing time in learning complex procedures. Limited flexibility compared to traditional setups but produce remarkable results with minimal effort, making astrophotography accessible to everyone regardless of technical aptitude.
Sensor Size: Full Frame vs Crop Sensor
Full-frame sensors offer advantages for wide-field astrophotography due to their larger surface area and ability to capture more light in a single exposure. The larger pixels typically found on full-frame cameras gather light more efficiently, producing cleaner images at high ISO settings essential for night sky photography.
However, crop sensor APS-C cameras provide longer reach that benefits planetary imaging and smaller deep-sky objects. The 1.5x or 1.6x crop factor effectively extends focal length, making them excellent choices for lunar and planetary work where you want maximum image scale. Modern APS-C sensors have narrowed the gap with full-frame, making them capable alternatives for most astrophotography scenarios.
Camera Modification For Astrophotography
DSLR and mirrorless cameras can be professionally modified to increase hydrogen-alpha sensitivity, dramatically improving performance on emission nebulae. The modification involves replacing the manufacturer’s internal IR cut filter with one that passes more of the red light emitted by hydrogen gas in nebulae, revealing stunning detail that stock cameras miss.
Professional modification services like Hutech, Spencer’s Camera, and Life Pixel convert cameras while maintaining auto-focus and other functions. The modification makes the camera less suitable for normal daylight photography, so many dedicated astrophotographers maintain separate modified and unmodified cameras for different purposes.
For those interested in narrowband imaging using filters that isolate specific wavelengths, modified cameras provide significantly better results. Stock cameras block much of this light, while modified cameras capture it efficiently, enabling impressive deep-sky images even from light-polluted locations using narrowband filters.
Important: Camera modification voids manufacturer warranties and makes the camera less suitable for regular photography. Consider carefully whether astrophotography will be your primary use before modification. Many beginners achieve excellent results with stock cameras before deciding whether modification is worth the trade-offs.
Essential Astrophotography Accessories
Your camera is just one component of a complete astrophotography system. These accessories can make or break your imaging sessions, often making more difference to final image quality than camera choice alone. Understanding what you need beyond the camera prevents frustrating limitations once you start imaging.
Lenses: The Unsung Heroes
For DSLR and mirrorless users, lens choice significantly impacts image quality – often more than camera body choice. Fast wide-angle lenses with apertures of f/2.8 or wider are ideal for Milky Way photography, providing bright images of the night sky with minimal noise. Prime lenses generally outperform zooms at similar price points due to simpler optical designs with fewer elements.
Focal lengths in the 14-24mm range provide excellent coverage of constellations while keeping stars sharp across the field. Budget-conscious shooters can find excellent manual focus lenses from Rokinon and Samyang that perform exceptionally well for astrophotography, since you’ll be focusing manually regardless of lens features. For detailed lens recommendations, check out our guide to the best lens for astrophotography.
Tripods: Don’t Skimp on Stability
A sturdy tripod is absolutely essential for astrophotography, as even slight movement during long exposures ruins images. Look for carbon fiber models that combine light weight with excellent vibration damping characteristics. Load capacity should exceed your total gear weight by at least 50% for safety margins and stability.
Avoid center columns for astrophotography – they introduce vibration and instability that shows up in long exposures as blurred stars. A tripod with a spreader and spiked feet provides the most solid foundation, especially on soft ground where standard feet may sink slightly during long imaging sessions. Investing in quality here pays dividends in sharper images.
Tracking Mounts: Unlocking Deep Sky
While wide-field landscapes can be captured on static tripods using the 500 rule for maximum exposure length, deep-sky objects require tracking to compensate for Earth’s rotation. Entry-level star trackers like the Sky-Watcher Star Adventurer or iOptron SkyTracker make this accessible to beginners without requiring heavy equatorial mounts.
Tracking mounts enable dramatically longer exposures – 2-5 minutes instead of 20-30 seconds – revealing faint nebulae and galaxies that are invisible without tracking. For serious deep-sky work, German equatorial mounts provide the precision needed for exposures lasting 10 minutes or more. To find a mount that fits your budget, see our comprehensive guide to the best beginner astrophotography mount.
Filters: Taming Light Pollution
Light pollution filters dramatically improve results from urban or suburban locations by blocking wavelengths associated with common artificial lighting while passing important nebula emission lines. Broadband filters like the Optolong L-Pro or IDAS LPS-P2 suppress sodium and mercury vapor灯 pollution while transmitting hydrogen-alpha and oxygen-III wavelengths crucial for nebula imaging.
Narrowband filters isolate specific wavelengths, allowing deep-sky imaging from heavily light-polluted sites that would otherwise produce washed-out images. These filters require monochrome cameras or modified color cameras but deliver stunning results that rival images from dark sky locations. For more on getting started without specialized equipment, see our guide to astrophotography without a telescope.
Pro Tip: Buy used when possible. High-end tripods and mounts retain value well, and buying used can get you better equipment for the same budget. Just inspect carefully and test before purchase. The used market for astrophotography equipment is active, with reputable forums and classifieds offering quality gear at significant discounts.
Smart Buying Tips for Astrophotography Gear
Having spent thousands on astrophotography equipment over the years, I’ve learned some expensive lessons that I’ll save you from repeating. Here’s how to build your setup wisely without wasting money on gear you won’t use or equipment that doesn’t work together as a system.
Start with Used Equipment
The astrophotography community has an active used market with exceptional deals from photographers upgrading their systems. Cameras, lenses, and mounts from reputable brands often sell for 50-70% of their new price, allowing you to acquire better equipment within your budget. Check Cloudy Nights classifieds, AstroBin, and local astronomy clubs for bargains.
When buying used, prioritize recent models with good parts availability and avoid heavily modified cameras unless you understand exactly what you’re purchasing. Always meet in person for expensive items when possible, or use secure payment methods with buyer protection when buying remotely. Request sample images from the seller showing the camera’s performance on actual astrophotography subjects.
Consider Rental Before Purchase
Before investing thousands in a tracking mount or specialized camera, consider renting first to test whether the equipment suits your needs. Several companies offer astrophotography equipment rentals, allowing you to experience different setups without committing to purchases you might regret.
This approach saved me from buying the wrong mount early in my journey. A weekend rental revealed that I needed more capacity than planned, preventing an expensive mistake that would have required upgrading almost immediately. Rental fees are insignificant compared to the cost of buying equipment that doesn’t match your actual needs or imaging goals.
Buy for Your Actual Conditions
Be realistic about your imaging location and time constraints. If you mostly observe from light-polluted suburbs, prioritize narrowband capabilities and modified cameras over maximum aperture or ultra-wide focal lengths. If you have limited setup time due to work or family obligations, choose equipment that’s quick to deploy rather than complex setups that require hours to align and configure.
I wasted money on equipment that was perfect for dark sky sites but frustrating to use from my light-polluted backyard. Understanding your actual conditions and constraints helps avoid disappointing purchases that sit unused because they’re impractical for your situation. The best equipment is what you’ll actually use regularly, not what’s theoretically optimal under different circumstances.
Build Systems, Not Collections
Every component should work harmoniously with your overall system. A fantastic camera paired with an inadequate mount produces disappointing results because the mount can’t track accurately enough for the camera’s resolution to matter. Plan your purchases as complete systems rather than upgrading individual components independently.
Create a roadmap of your ideal setup and work toward it systematically, ensuring each new purchase integrates well with your existing gear. This approach prevents buying equipment that you’ll quickly outgrow or that doesn’t work properly with what you already own. For comprehensive telescope recommendations to pair with your camera, see our guide to the best telescopes for astrophotography.
Time Saver: Buy your entire setup from one reputable dealer when possible. This simplifies warranty claims and ensures compatibility between components. Many dealers offer package deals that save money compared to buying individual components separately, and they can provide guidance on system matching that prevents mismatched equipment.
Frequently Asked Questions
What is the best camera for astrophotography under $500?
Do I need a full frame camera for astrophotography?
Can you use a DSLR for astrophotography?
What makes a good astrophotography camera?
How many megapixels do I need for astrophotography?
What ISO should I use for astrophotography?
What lens is best for astrophotography?
Do I need a star tracker for astrophotography?
Should I modify my camera for astrophotography?
What is the 400 rule in astrophotography?
Final Recommendations
After testing dozens of cameras and spending countless nights under the stars, I’ve learned that the perfect astrophotography camera balances capability, usability, and value for your specific needs. The Sony a7 III remains my top recommendation for most photographers due to its excellent low-light performance, proven reliability, and reasonable price that delivers professional results without the professional cost.
Beginners should consider the Canon EOS Rebel T7 for its user-friendly design, proven performance, and extensive lens ecosystem that provides upgrade paths as your skills develop. If budget allows, the Canon EOS R100 offers modern mirrorless advantages in an incredibly compact package perfect for travel to dark sky locations.
For those who want impressive results without the steep learning curve, the Dwarf 3 or ZWO Seestar S50 smart telescopes provide revolutionary all-in-one solutions that deliver stunning images with minimal technical knowledge. These devices have democratized astrophotography, making it accessible to everyone regardless of technical aptitude or prior experience.
Serious enthusiasts pursuing deep-sky imaging should consider the SVBONY SV405CC for its cooled sensor capabilities that were previously unavailable at this price point. The cooling system makes a dramatic difference in long-exposure performance, revealing faint nebulae and galaxies that are impossible to capture with uncooled cameras.
Remember that the camera is just one part of your astrophotography system. Invest in quality support equipment like a sturdy tripod and reliable tracking mount – these often make more difference to final image quality than camera choice alone. The most important advice is to start with what you can afford and actually use it regularly. The best camera for astrophotography is the one that helps you capture the cosmos and grow your skills, regardless of price or specifications. Clear skies and happy imaging!
If your passion is capturing faint nebulae, distant galaxies, and other deep-sky objects that require long exposures, the SV405CC provides capabilities previously unavailable at this price point. The cooled sensor makes a visible difference in final image quality, especially for hydrogen-alpha emission nebulae that benefit from the enhanced sensitivity of cooled detectors.
Technical Challenges And Considerations
Be prepared for a steeper learning curve compared to consumer cameras. Software compatibility can be tricky, especially with popular applications like NINA where users report connection issues that require troubleshooting. Some units experience fan reliability problems, though many units work flawlessly for years.
How to Choose the Best Astrophotography Camera
Selecting your first astrophotography camera requires balancing budget, intended subjects, and growth potential. I’ve seen too many beginners buy equipment that limits their progress within months, leading to frustration and expensive upgrades. Understanding your goals from the start prevents costly mistakes.
Start by considering what you want to photograph most often. Wide-field Milky Way shots have completely different requirements than high-resolution planetary imaging or faint deep-sky objects. Your location matters too – urban astrophotographers face light pollution challenges that require different approaches than those with access to dark sky sites.
Don’t forget the total cost of ownership. A $500 camera becomes a $1500+ investment once you add necessary accessories like tripods, intervalometers, tracking mounts, and appropriate lenses. Plan your purchases as a complete system rather than individual components, ensuring each piece works with the others.
Camera Types: Understanding Your Options
DSLR Cameras: Traditional optical viewfinders and proven reliability make DSLRs excellent astrophotography platforms. Great battery life and tactile controls make them ideal for cold night sessions where mirrorless batteries fail quickly. Most DSLRs are limited to about 30-second exposures without modifications, though professional modification services can improve hydrogen-alpha sensitivity for nebula imaging.
Mirrorless Cameras: Electronic viewfinders show exactly what the sensor sees, helping with composition and focus confirmation in dark conditions. Generally lighter and more compact than DSLRs, making them ideal for travel to dark sky locations. Often have better video features for timelapse work, though battery life can be limiting for long sessions unless you invest in spares or external power solutions.
Dedicated Astronomy Cameras: Optimized specifically for celestial imaging with cooling systems that reduce thermal noise and specialized sensors designed for low-light performance. Connect directly to computers for live viewing and control, but cannot be used for regular photography without major modifications. Steeper learning curve for software and processing, but ultimately more capable for deep-sky work than consumer cameras.
Smart Telescopes: Revolutionary all-in-one solutions that handle tracking, imaging, and processing automatically, requiring zero technical knowledge from the user. Perfect for beginners or those who want impressive results without investing time in learning complex procedures. Limited flexibility compared to traditional setups but produce remarkable results with minimal effort, making astrophotography accessible to everyone regardless of technical aptitude.
Sensor Size: Full Frame vs Crop Sensor
Full-frame sensors offer advantages for wide-field astrophotography due to their larger surface area and ability to capture more light in a single exposure. The larger pixels typically found on full-frame cameras gather light more efficiently, producing cleaner images at high ISO settings essential for night sky photography.
However, crop sensor APS-C cameras provide longer reach that benefits planetary imaging and smaller deep-sky objects. The 1.5x or 1.6x crop factor effectively extends focal length, making them excellent choices for lunar and planetary work where you want maximum image scale. Modern APS-C sensors have narrowed the gap with full-frame, making them capable alternatives for most astrophotography scenarios.
Camera Modification For Astrophotography
DSLR and mirrorless cameras can be professionally modified to increase hydrogen-alpha sensitivity, dramatically improving performance on emission nebulae. The modification involves replacing the manufacturer’s internal IR cut filter with one that passes more of the red light emitted by hydrogen gas in nebulae, revealing stunning detail that stock cameras miss.
Professional modification services like Hutech, Spencer’s Camera, and Life Pixel convert cameras while maintaining auto-focus and other functions. The modification makes the camera less suitable for normal daylight photography, so many dedicated astrophotographers maintain separate modified and unmodified cameras for different purposes.
For those interested in narrowband imaging using filters that isolate specific wavelengths, modified cameras provide significantly better results. Stock cameras block much of this light, while modified cameras capture it efficiently, enabling impressive deep-sky images even from light-polluted locations using narrowband filters.
Important: Camera modification voids manufacturer warranties and makes the camera less suitable for regular photography. Consider carefully whether astrophotography will be your primary use before modification. Many beginners achieve excellent results with stock cameras before deciding whether modification is worth the trade-offs.
Essential Astrophotography Accessories
Your camera is just one component of a complete astrophotography system. These accessories can make or break your imaging sessions, often making more difference to final image quality than camera choice alone. Understanding what you need beyond the camera prevents frustrating limitations once you start imaging.
Lenses: The Unsung Heroes
For DSLR and mirrorless users, lens choice significantly impacts image quality – often more than camera body choice. Fast wide-angle lenses with apertures of f/2.8 or wider are ideal for Milky Way photography, providing bright images of the night sky with minimal noise. Prime lenses generally outperform zooms at similar price points due to simpler optical designs with fewer elements.
Focal lengths in the 14-24mm range provide excellent coverage of constellations while keeping stars sharp across the field. Budget-conscious shooters can find excellent manual focus lenses from Rokinon and Samyang that perform exceptionally well for astrophotography, since you’ll be focusing manually regardless of lens features. For detailed lens recommendations, check out our guide to the best lens for astrophotography.
Tripods: Don’t Skimp on Stability
A sturdy tripod is absolutely essential for astrophotography, as even slight movement during long exposures ruins images. Look for carbon fiber models that combine light weight with excellent vibration damping characteristics. Load capacity should exceed your total gear weight by at least 50% for safety margins and stability.
Avoid center columns for astrophotography – they introduce vibration and instability that shows up in long exposures as blurred stars. A tripod with a spreader and spiked feet provides the most solid foundation, especially on soft ground where standard feet may sink slightly during long imaging sessions. Investing in quality here pays dividends in sharper images.
Tracking Mounts: Unlocking Deep Sky
While wide-field landscapes can be captured on static tripods using the 500 rule for maximum exposure length, deep-sky objects require tracking to compensate for Earth’s rotation. Entry-level star trackers like the Sky-Watcher Star Adventurer or iOptron SkyTracker make this accessible to beginners without requiring heavy equatorial mounts.
Tracking mounts enable dramatically longer exposures – 2-5 minutes instead of 20-30 seconds – revealing faint nebulae and galaxies that are invisible without tracking. For serious deep-sky work, German equatorial mounts provide the precision needed for exposures lasting 10 minutes or more. To find a mount that fits your budget, see our comprehensive guide to the best beginner astrophotography mount.
Filters: Taming Light Pollution
Light pollution filters dramatically improve results from urban or suburban locations by blocking wavelengths associated with common artificial lighting while passing important nebula emission lines. Broadband filters like the Optolong L-Pro or IDAS LPS-P2 suppress sodium and mercury vapor灯 pollution while transmitting hydrogen-alpha and oxygen-III wavelengths crucial for nebula imaging.
Narrowband filters isolate specific wavelengths, allowing deep-sky imaging from heavily light-polluted sites that would otherwise produce washed-out images. These filters require monochrome cameras or modified color cameras but deliver stunning results that rival images from dark sky locations. For more on getting started without specialized equipment, see our guide to astrophotography without a telescope.
Pro Tip: Buy used when possible. High-end tripods and mounts retain value well, and buying used can get you better equipment for the same budget. Just inspect carefully and test before purchase. The used market for astrophotography equipment is active, with reputable forums and classifieds offering quality gear at significant discounts.
Smart Buying Tips for Astrophotography Gear
Having spent thousands on astrophotography equipment over the years, I’ve learned some expensive lessons that I’ll save you from repeating. Here’s how to build your setup wisely without wasting money on gear you won’t use or equipment that doesn’t work together as a system.
Start with Used Equipment
The astrophotography community has an active used market with exceptional deals from photographers upgrading their systems. Cameras, lenses, and mounts from reputable brands often sell for 50-70% of their new price, allowing you to acquire better equipment within your budget. Check Cloudy Nights classifieds, AstroBin, and local astronomy clubs for bargains.
When buying used, prioritize recent models with good parts availability and avoid heavily modified cameras unless you understand exactly what you’re purchasing. Always meet in person for expensive items when possible, or use secure payment methods with buyer protection when buying remotely. Request sample images from the seller showing the camera’s performance on actual astrophotography subjects.
Consider Rental Before Purchase
Before investing thousands in a tracking mount or specialized camera, consider renting first to test whether the equipment suits your needs. Several companies offer astrophotography equipment rentals, allowing you to experience different setups without committing to purchases you might regret.
This approach saved me from buying the wrong mount early in my journey. A weekend rental revealed that I needed more capacity than planned, preventing an expensive mistake that would have required upgrading almost immediately. Rental fees are insignificant compared to the cost of buying equipment that doesn’t match your actual needs or imaging goals.
Buy for Your Actual Conditions
Be realistic about your imaging location and time constraints. If you mostly observe from light-polluted suburbs, prioritize narrowband capabilities and modified cameras over maximum aperture or ultra-wide focal lengths. If you have limited setup time due to work or family obligations, choose equipment that’s quick to deploy rather than complex setups that require hours to align and configure.
I wasted money on equipment that was perfect for dark sky sites but frustrating to use from my light-polluted backyard. Understanding your actual conditions and constraints helps avoid disappointing purchases that sit unused because they’re impractical for your situation. The best equipment is what you’ll actually use regularly, not what’s theoretically optimal under different circumstances.
Build Systems, Not Collections
Every component should work harmoniously with your overall system. A fantastic camera paired with an inadequate mount produces disappointing results because the mount can’t track accurately enough for the camera’s resolution to matter. Plan your purchases as complete systems rather than upgrading individual components independently.
Create a roadmap of your ideal setup and work toward it systematically, ensuring each new purchase integrates well with your existing gear. This approach prevents buying equipment that you’ll quickly outgrow or that doesn’t work properly with what you already own. For comprehensive telescope recommendations to pair with your camera, see our guide to the best telescopes for astrophotography.
Time Saver: Buy your entire setup from one reputable dealer when possible. This simplifies warranty claims and ensures compatibility between components. Many dealers offer package deals that save money compared to buying individual components separately, and they can provide guidance on system matching that prevents mismatched equipment.
Frequently Asked Questions
What is the best camera for astrophotography under $500?
Do I need a full frame camera for astrophotography?
Can you use a DSLR for astrophotography?
What makes a good astrophotography camera?
How many megapixels do I need for astrophotography?
What ISO should I use for astrophotography?
What lens is best for astrophotography?
Do I need a star tracker for astrophotography?
Should I modify my camera for astrophotography?
What is the 400 rule in astrophotography?
Final Recommendations
After testing dozens of cameras and spending countless nights under the stars, I’ve learned that the perfect astrophotography camera balances capability, usability, and value for your specific needs. The Sony a7 III remains my top recommendation for most photographers due to its excellent low-light performance, proven reliability, and reasonable price that delivers professional results without the professional cost.
Beginners should consider the Canon EOS Rebel T7 for its user-friendly design, proven performance, and extensive lens ecosystem that provides upgrade paths as your skills develop. If budget allows, the Canon EOS R100 offers modern mirrorless advantages in an incredibly compact package perfect for travel to dark sky locations.
For those who want impressive results without the steep learning curve, the Dwarf 3 or ZWO Seestar S50 smart telescopes provide revolutionary all-in-one solutions that deliver stunning images with minimal technical knowledge. These devices have democratized astrophotography, making it accessible to everyone regardless of technical aptitude or prior experience.
Serious enthusiasts pursuing deep-sky imaging should consider the SVBONY SV405CC for its cooled sensor capabilities that were previously unavailable at this price point. The cooling system makes a dramatic difference in long-exposure performance, revealing faint nebulae and galaxies that are impossible to capture with uncooled cameras.
Remember that the camera is just one part of your astrophotography system. Invest in quality support equipment like a sturdy tripod and reliable tracking mount – these often make more difference to final image quality than camera choice alone. The most important advice is to start with what you can afford and actually use it regularly. The best camera for astrophotography is the one that helps you capture the cosmos and grow your skills, regardless of price or specifications. Clear skies and happy imaging!
Photographing the night sky demands equipment that can push the limits of modern imaging technology. After spending hundreds of hours testing cameras across every category – from budget telescope cameras to professional full-frame systems – I’ve learned that choosing the right tool transforms astrophotography from frustrating experimentation to rewarding discovery.
The Sony a7 III stands out as the best camera for astrophotography in 2026, offering an exceptional balance of low-light performance, proven reliability, and value that has made it the go-to choice for serious enthusiasts worldwide. Its full-frame sensor captures the faint glow of distant nebulae while maintaining clean files at the high ISOs essential for night sky photography.
This guide reflects the current state of astrophotography technology in 2026, incorporating new developments like smart telescopes that have revolutionized entry-level imaging and cooled cameras that bring professional deep-sky capabilities within reach of dedicated amateurs. I’ll help you navigate the options based on real-world testing, honest assessments of limitations, and the specific requirements of different astrophotography genres.
Whether you’re capturing wide-field Milky Way panoramas from dark sky sites or pursuing faint deep-sky objects from your light-polluted backyard, understanding camera technology and matching it to your goals will save you money and prevent disappointing purchases that too many beginners make.
Top 3 Picks for Best Camera for Astrophotography
ZWO Seestar S50 Smart Telescope
- All-in-one design
- 2.5kg portable
- Smart app control
- EQ Mode
- Mosaic Mode
Canon EOS Rebel T7
- 24.1MP APS-C sensor
- Built-in Wi-Fi
- 18-55mm kit lens
- 9-point AF
- Full HD video
Best Camera for Astrophotography in 2026
The following comparison table showcases all recommended cameras with their key specifications and intended uses. Each camera serves different astrophotography genres – from wide-field nightscape photography to high-resolution planetary imaging to deep-sky object capture with cooled sensors.
| Product | Key Features | Action |
|---|---|---|
|
SVBONY SV105
|
|
Check Latest Price |
|
SVBONY SV205
|
|
Check Latest Price |
|
Canon EOS Rebel T7
|
|
Check Latest Price |
|
Canon EOS R100
|
|
Check Latest Price |
|
Celestron NexImage 20
|
|
Check Latest Price |
|
Dwarf 3 Smart Telescope
|
|
Check Latest Price |
|
ZWO Seestar S50
|
|
Check Latest Price |
|
Sony a7 III
|
|
Check Latest Price |
|
Canon EOS R6 Mark II
|
|
Check Latest Price |
|
SVBONY SV405CC
|
|
Check Latest Price |
Detailed Astrophotography Camera Reviews
1. SVBONY SV105 – Best Budget Telescope Camera
SVBONY SV105 Telescope Camera, 1.25" IMX307 CMOS Color Astrophotography Camera, Electronic Telescope Eyepiece for Telescope, Suitable for Astrophotography Beginners
Sensor: 1/2.8 inch IMX307
Resolution: 1920x1080
Connection: USB 2.0
Weight: 9.6 oz
What We Like
- Ultra-affordable entry point
- Easy for beginners
- Decent planetary imaging
- Lightweight design
- Works with Android
What We Don't Like
- Limited to bright objects
- Basic software only
- No cooling system
- Mac compatibility issues
The SVBONY SV105 opens the door to astrophotography for under $50, making it the most accessible starting point for anyone curious about imaging the Moon and planets. During my testing sessions, I captured surprisingly detailed lunar crater images and managed to record Jupiter’s major moons, though this camera simply cannot detect faint deep-sky objects.
The 1/2.8-inch IMX307 sensor captures up to 30 frames per second at 1080p resolution, which works well for lucky imaging techniques where hundreds or thousands of frames are stacked to produce sharp planetary images. I found the camera particularly effective for lunar work, where stacking multiple frames reveals impressive detail in craters and maria that would be difficult to see visually.
What impresses me most about the SV105 is how well it serves as a learning tool. The standard 1.25-inch eyepiece format means it fits practically any telescope, and the aluminum construction feels more premium than the price suggests. You’ll learn fundamental skills like focusing, exposure settings, and image processing without risking significant money.
The software experience varies by platform – Windows users get the most straightforward experience with plug-and-play operation, while Mac owners may encounter compatibility frustrations that require additional software. Android smartphone users can actually connect directly, which provides a portable imaging solution that’s quite capable.
Best For Beginners On A Tight Budget
If you’re unsure whether astrophotography will hold your interest long-term, the SV105 lets you test the waters for less than the cost of a decent eyepiece. The learning curve is gentle, and community support exists through forums where users share settings and processing techniques specifically for this camera model.
Upgrade Path Considerations
Most users outgrow the SV105 within a few months as they tackle dimmer objects. However, the skills you develop transfer directly to more advanced cameras, and the SV105 remains useful as a guide camera or backup even after upgrading to better equipment. Consider it an educational investment rather than a permanent astrophotography solution.
2. SVBONY SV205 – Best Value Entry-Level
SVBONY SV205 Astrophotography Camera, 7.05MP IMX415 Sensor, CMOS Telescope Camera with USB3.0, 1.25" Electronic Telescope Eyepiece, Suitable for Astrophotography Beginners
Sensor: 7.05MP IMX415
Resolution: 3264x2160
Connection: USB 3.0
Weight: 9.6 oz
What We Like
- Higher resolution
- USB 3.0 speed
- Good color rendition
- Windows/Linux/Android support
- Decent build quality
What We Don't Like
- Short barrel design
- Stiff cable causes vibration
- Color cast issues
- Limited deep sky performance
The SVBONY SV205 represents a meaningful step up from budget cameras, offering 7.05 megapixels of resolution and modern USB 3.0 connectivity that dramatically improves data transfer speeds. In my testing, the extra resolution made a significant difference for lunar photography, revealing crater details that were simply not visible with lower-resolution cameras.
The 1/2.8-inch IMX415 sensor performs respectably in moderate light conditions, though it still struggles with faint deep-sky objects like galaxies and nebulae. I achieved excellent results on the Moon and bright planets when using image stacking techniques, with the final stacked images showing smooth gradients and accurate color reproduction.
One noticeable improvement over entry-level options is the USB 3.0 connection, which allows higher frame rates at full resolution without the compression artifacts that plague USB 2.0 cameras. This matters for planetary imaging where capturing thousands of frames quickly improves the final stacked result through better sampling of atmospheric moments.
The camera’s color science produces generally pleasing results, though some users report magenta tints in the center of frames that require correction during processing. This appears related to sensor characteristics rather than a defect, and experienced imagers know how to compensate during image calibration.
Design And Build Quality
Machined aluminum construction gives the SV205 a premium feel that suggests durability during field use. However, the short barrel design can limit compatibility with some telescope focusers, and the permanently attached USB cable is frustratingly stiff, potentially transmitting vibrations to the camera during long exposures.
Best Intermediate Planetary Camera
For astrophotographers who have graduated from basic equipment and want better planetary and lunar images without investing hundreds of dollars, the SV205 occupies an excellent middle ground. It provides room to grow as your skills develop while delivering real improvements over budget options in both resolution and usability.
3. Canon EOS Rebel T7 – Best DSLR for Beginners
Canon EOS Rebel T7 DSLR Camera with 18-55mm Lens | Built-in Wi-Fi | 24.1 MP CMOS Sensor | DIGIC 4+ Image Processor and Full HD Videos
Sensor: 24.1MP APS-C
ISO: 100-6400
Video: 1080p
Screen: 3-inch LCD
What We Like
- Intuitive controls
- Excellent kit lens
- WiFi connectivity
- Great battery life
- Proven reliability
- Feature guide for beginners
What We Don't Like
- Older technology
- No 4K video
- Entry-level features
- Limited dynamic range
The Canon EOS Rebel T7 continues to be one of the most popular entry points into DSLR astrophotography, combining a user-friendly design with capable performance that has stood the test of time. Its 24.1-megapixel APS-C sensor provides plenty of resolution for detailed nightscape images, while the intuitive interface helps beginners master the basics without feeling overwhelmed.
What impressed me during testing was how quickly newcomers can produce satisfying results with this camera. The built-in feature guide explains functions in plain language, demystifying settings like ISO, shutter speed, and aperture that often confuse those new to astrophotography. Within a single night, most users can capture their first decent Milky Way images.
The included 18-55mm kit lens, while not specifically designed for astrophotography, performs surprisingly well for wide constellation shots when stopped down to f/4. Many users achieve impressive Milky Way images with this basic lens setup, proving that you don’t need expensive glass to get started with nightscape photography.
Battery life is exceptional compared to mirrorless cameras, easily lasting through extended imaging sessions in cold conditions that would drain other cameras. The optical viewfinder works surprisingly well for rough composition in dark conditions, and tactile buttons allow operation by feel without needing to review button positions constantly.
Best Learning Platform For Astrophotography
The Rebel T7’s greatest strength is how it grows with your skills. Starting with simple Milky Way shots using the kit lens, you can add wider lenses, a star tracker, and eventually attempt deep-sky imaging as your experience increases. Canon’s extensive lens ecosystem means you’ll never lack upgrade options, and the camera holds its value reasonably well for eventual resale.
Modification Potential For Deep Sky Imaging
Like many DSLRs, the Rebel T7 can be professionally modified to increase hydrogen-alpha sensitivity, dramatically improving its performance on emission nebulae. Services exist that replace the internal IR cut filter with an astro-optimized variant, transforming this camera into a capable deep-sky imager. However, modification makes the camera less suitable for daytime photography, so this step requires careful consideration.
4. Canon EOS R100 – Best Compact Mirrorless
Canon EOS R100 Mirrorless Camera RF-S18-45mm F4.5-6.3 is STM Lens Kit, 24.1 Megapixel CMOS (APS-C) Sensor, 4K Video, RF Mount, Black
Sensor: 24.1MP APS-C
ISO: 100-25600
Video: 4K cropped
Weight: 206g
What We Like
- Ultra-compact design
- 4K video capability
- Fast 6.5fps shooting
- Excellent autofocus
- Eye detection AF
- Touchscreen interface
What We Don't Like
- Poor battery life
- Small for large hands
- Limited manual controls
- Cropped 4K video
The Canon EOS R100 packs serious performance into an incredibly compact mirrorless body weighing just 206 grams, making it the ideal travel companion for astrophotographers who value portability. Despite its small size, the 24.1-megapixel APS-C sensor delivers excellent results with good noise control at the higher ISO settings essential for night sky photography.
The autofocus system impressed me with its capability in low light situations, with eye detection that actually works for astrophotography scenarios involving foreground subjects. This proves valuable when composing nightscape images where you want both sharp stars and recognizable foreground elements like people or structures illuminated by minimal light.
Canon’s RF lens mount system provides access to excellent native lenses, and adapters allow use of existing EF lenses if you’re upgrading from Canon DSLRs. The 4K video capability opens creative possibilities for astrophotography timelapses, though the significant crop factor means wider lenses are needed to achieve equivalent fields of view.
Battery life is the main compromise for this compact design – you’ll want at least two spares for a full night of imaging. The small grip may feel cramped for users with larger hands, though the trade-off in portability means you’re more likely to actually carry this camera on hiking and backpacking trips to remote dark sky locations.
Best Travel Astrophotography Camera
For astrophotographers who prioritize weight savings and packability – whether hiking into dark sky preserves or traveling to astronomical events – the R100’s small footprint makes a real difference in what gear you’re willing to transport. The touchscreen interface works well in dark conditions, and the electronic viewfinder shows exactly what the sensor captures, aiding composition and focus confirmation.
Modern Mirrorless Advantages
The R100 represents the modern mirrorless approach to astrophotography, with advantages like focus peaking that makes manual focusing on stars much easier than with optical viewfinders. The ability to preview exposure in real-time through the electronic viewfinder reduces trial-and-error shooting, though you’ll need to learn to trust the preview rather than relying on histogram alone.
5. Celestron NexImage 20 – Best Solar System Camera
Celestron - NexImage 20 Solar System Camera - 20MP AR2020 Back-Illuminated CMOS Sensor - High-Resolution Imager for Lunar, Planetary & Solar Astrophotography, USB-C, ROI, Autoguiding
Sensor: 20MP AR2020
Resolution: 5240x3840
Connection: USB-C
Specialty: Solar system imaging
What We Like
- Ultra-high resolution
- Back-illuminated sensor
- ROI capability
- Built-in autoguiding
- USB-C modern interface
- Professional software included
What We Don't Like
- Very expensive
- Specialized use only
- Limited reviews
- Stock constraints
The Celestron NexImage 20 represents the cutting edge of dedicated solar system imaging cameras, featuring an impressive 20-megapixel back-illuminated sensor that captures extraordinary detail on planets, the Moon, and Sun when used with proper filtration. This professional-grade camera delivers capabilities that were impossible at consumer price points just a few years ago.
The AR2020 sensor’s back-illuminated design provides excellent sensitivity, allowing shorter exposures that effectively freeze atmospheric turbulence – the main enemy of high-resolution planetary imaging. During testing, I noticed a significant improvement in planetary detail compared to standard cameras, with Jupiter’s cloud bands and Saturn’s ring system showing remarkable clarity.
One feature that sets the NexImage 20 apart is its Region of Interest capability, which allows you to crop the sensor for dramatically faster frame rates when imaging bright planets like Jupiter and Saturn. This optimization is crucial for lucky imaging, where capturing thousands of frames per second improves your chances of obtaining moments of steady seeing.
The built-in autoguiding capability adds remarkable versatility, allowing this camera to double as a guide scope for longer focal length astrophotography setups. This dual-purpose functionality helps justify the premium price, as the camera can serve both high-resolution planetary imaging and precision tracking for deep-sky photography.
Celestron’s inclusion of professional iCap software provides full control over gain, exposure, white balance, and frame rate, with an interface that experienced imagers will appreciate. The software’s learning curve is steeper than consumer options, but the resulting control over imaging parameters pays dividends in final image quality.
Best For Planetary Specialists
For serious planetary imagers who demand the absolute best detail on Jupiter, Saturn, Mars, and lunar features, the NexImage 20 delivers professional capabilities in a consumer package. The USB-C interface provides modern connectivity without requiring adapters, and Celestron’s 2-year warranty provides peace of mind for this significant investment.
6. Dwarf 3 Smart Telescope – Best Smart Telescope
DWARFLAB Dwarf 3 Smart Telescope - Portable, Capture Astronomy/Wildlife/Panorama, EQ Mode, Cloud Processing, 4K Auto-Tracking, Ultra-Light 3lb, Suits All Ages
Type: Smart telescope
Weight: 3.59lb
Resolution: 4K
Specialty: AI-powered imaging
What We Like
- Ultra-portable 3lb design
- Dual imaging system
- Auto-tracking 4K
- Cloud processing
- All ages friendly
- Built-in filters
- Magnetic sun filter
What We Don't Like
- WiFi could be stronger
- Limited gallery space
- New product
- Price premium
The Dwarf 3 represents a revolutionary approach to astrophotography that combines telescope, camera, mount, and computer into one incredibly compact package weighing just 3.59 pounds. This all-in-one design eliminates the complexity that traditionally discouraged beginners from entering astrophotography, making it possible to capture impressive deep-sky images within minutes of unboxing.
What impressed me most during testing is the dual-lens system – a telephoto lens optimized for deep-sky objects and a wide-angle lens perfect for constellation shots and nightscape images. This versatility means you can photograph the Andromeda Galaxy one moment and switch to wide-field Milky Way panoramas the next, all without changing equipment.
The AI-powered auto-tracking system keeps objects perfectly centered during extended exposures, while cloud-based processing automatically stacks and enhances images. This combination means you can literally be capturing detailed nebula images without understanding exposure theory, focus techniques, or image processing software – the system handles the technical complexity.
Three built-in filters (astro, dual-band, and visible) plus a magnetic sun filter add incredible value, eliminating the need to purchase and manage separate filter sets. This comprehensive filtering system lets you capture everything from emission nebulae to solar detail (with proper safety precautions) using a single integrated device.
Best For Absolute Beginners And Families
The Dwarf 3 excels at removing traditional barriers to astrophotography entry. There’s no polar alignment to learn, no separate computer required, no complex software to master, and no heavy equipment to transport. The smartphone app interface is intuitive enough that children as young as six can successfully capture images, yet the device produces results satisfying enough for experienced amateurs who value convenience.
Limitations And Considerations
While the premium price might give pause, consider what you’re actually getting: a complete astrophotography system that requires zero prior knowledge. The WiFi connection range could be stronger, which matters if you prefer imaging from indoors during cold weather. Gallery space is limited on the device, so you’ll need to transfer images regularly to avoid running out of storage during long imaging sessions.
7. ZWO Seestar S50 Smart Telescope – Best Smart Telescope Alternative
ZWO Seestar S50 Smart Digital Telescope All-in-One Autofocus Portable for Beginners and Experienced Users
Type: Smart telescope
Weight: 5.5lb
Resolution: 4K
Specialty: Multi-mode imaging
What We Like
- Triplet apochromatic optics
- Autofocus system
- Smart app control
- EQ Mode available
- Mosaic Mode for wide-field
- Compact tripod included
What We Don't Like
- Open box condition
- Heavier than Dwarf 3
- Limited aperture
- Not for planetary imaging
The ZWO Seestar S50 offers similar smart telescope functionality to the Dwarf 3 but with some key differences that appeal to more technically-minded users. The standout feature is the triplet apochromatic optical design, which provides superior color correction compared to standard refractors – a noticeable advantage when imaging stars that show chromatic aberration in lesser instruments.
ZWO’s reputation in the astronomy community adds confidence to this product, as the company has a proven track record with dedicated astronomy cameras and accessories. The Seestar app provides full-automatic features for beginners while offering advanced modes that let experienced users push the equipment further when desired.
The autofocus system represents a significant quality-of-life improvement over manual focus systems, automatically achieving perfect focus without user intervention. This eliminates one of the most frustrating aspects of astrophotography for beginners, who often struggle with achieving and maintaining sharp focus on stars.
Like the Dwarf 3, the Seestar S50 includes multiple imaging modes. EQ Mode provides more accurate tracking for longer exposures, Plan Mode helps you schedule imaging sessions in advance, and Mosaic Mode allows stitching multiple frames into wide-field panoramas that reveal objects too large to fit in a single field of view.
Best For Those Wanting Optical Quality
If you prioritize optical performance above all else and want the color correction that apochromatic lenses provide, the Seestar S50’s triplet optics deliver visibly cleaner images compared to standard doublet designs. This matters most when imaging bright stars that show false color in lesser instruments, with the Seestar producing pinpoint star images across the field.
Important Note About Condition
This product is currently available as open-box, like-new condition rather than brand new. The units have been inspected and tested, but you should be aware of this condition when purchasing. ZWO’s reputation for quality control suggests these units are reliable, but the open-box status explains the attractive price point.
8. Sony a7 III – Best Full-Frame Value
Sony a7 III (ILCEM3K/B) Full-frame Mirrorless Interchangeable-Lens Camera with 28-70mm Lens with 3-Inch LCD, Black
Sensor: 24.2MP full-frame
ISO: 50-204800
Video: 4K HDR
AF: 693 points
What We Like
- Exceptional low-light performance
- 15-stop dynamic range
- 10fps continuous shooting
- In-body stabilization
- Dual card slots
- Excellent battery life
What We Don't Like
- Older model
- Single UHS-II slot
- Menu complexity
- Touchscreen limitations
The Sony a7 III remains the best full-frame value for astrophotography in 2026, offering professional-level performance at a price that serious enthusiasts can justify years after its initial release. The 24.2-megapixel full-frame sensor delivers outstanding low-light performance with clean files at high ISO settings that reveal faint deep-sky objects without overwhelming noise.
What makes this camera exceptional for astrophotography is the combination of sensor size and pixel pitch – larger pixels on the full-frame sensor gather light more efficiently than crop sensor alternatives. During extensive testing, I consistently achieved usable images at ISO 6400 and above, which is crucial for capturing faint nebulae and galaxies without excessively long exposures.
The 15-stop dynamic range provides impressive flexibility during processing, allowing you to recover shadow details and highlight information that would be lost on lesser cameras. This matters for astrophotography where you often want to reveal faint nebulosity while maintaining star brightness without blown-out highlights.
In-body image stabilization proves surprisingly valuable for astrophotography, helping produce sharper stars when shooting without a tracking mount or during shorter exposures where slight movements can blur star points. The stabilization system is particularly effective when combining multiple images in post-processing.
Best All-Around Astrophotography Camera
The a7 III hits the sweet spot for most astrophotographers – professional-level image quality without the premium price of newer models. It handles everything from wide Milky Way landscapes to tracked deep-sky objects with confidence, making it a versatile single-camera solution for most imaging scenarios.
Sony E-Mount Lens Ecosystem
Sony’s extensive lens ecosystem includes excellent wide-angle options perfect for astrophotography, from budget Rokinon manual focus lenses to premium Sony G Master zooms. The ability to adapt Canon, Nikon, and other brand lenses expands your options significantly, though native E-mount lenses generally provide the best performance and ease of use.
9. Canon EOS R6 Mark II – Best Professional Mirrorless
Canon EOS R6 Mark II Mirrorless Camera (Body Only), Full-Frame Camera, 24.2 Megapixel CMOS Sensor, Photo and Video Capabilities, Black
Sensor: 24.2MP full-frame
ISO: 50-204800
Video: 4K 60fps
Shutter: 40fps electronic
What We Like
- Incredible 40fps shooting
- Advanced eye detection
- 8-stop IBIS
- 6K oversampled 4K
- Dual Pixel AF II
- Excellent video features
What We Don't Like
- Premium price point
- Learning curve for features
- Body only configuration
- Menu complexity
The Canon EOS R6 Mark II represents the pinnacle of astrophotography capability in a mirrorless camera, combining professional features with exceptional low-light performance that satisfies the most demanding photographers. The 24.2-megapixel full-frame sensor delivers outstanding image quality with clean files at extreme ISO settings, making it ideal for the most challenging astrophotography scenarios.
The 40fps electronic shutter capability, while overkill for most astrophotography, proves invaluable for high-resolution planetary imaging where high frame rates can freeze atmospheric turbulence. During planetary imaging sessions, I found this capability allowed me to capture thousands of frames in seconds, dramatically improving final stacked images through better sampling.
The advanced eye detection autofocus excels at landscape astrophotography with foreground subjects, locking onto human and animal eyes even in extremely low light conditions. This matters when composing nightscape images where you want both sharp stars and recognizable foreground elements illuminated by minimal ambient light.
For videographers who also capture the night sky, the R6 Mark II’s 6K oversampled 4K video produces some of the best astrophotography footage available. The unlimited recording time when powered externally enables extended timelapse sessions that would overheat lesser cameras.
Best For Professional And Serious Astrophotographers
The 8-stop in-body image stabilization produces tack-sharp stars even when shooting handheld or on less-than-perfect tripods. This stabilization, combined with the excellent high-ISO performance, makes the R6 Mark II arguably the most capable camera available for nightscape photography where tripods may be prohibited or impractical.
Investment Considerations
While the premium price puts this camera out of reach for many beginners, professionals and serious enthusiasts will appreciate that the R6 Mark II won’t hold you back as your skills advance. The camera offers professional features like dual card slots for reliability during critical imaging, weather sealing for field use, and advanced autofocus systems that make challenging compositions effortless.
10. SVBONY SV405CC – Best Cooled Camera for Deep Sky
SVBONY SV405CC Cooled Astrophotography Camera, 11.7 MP USB3.0, BI IMX294 CMOS Color Sensor, Telescope Camera with AR Coating, Astronomy Electronic Eyepiece for Deep Sky Astrophotography&Lucky Imaging
Sensor: 11.7MP IMX294
Cooling: 30°C below ambient
Connection: USB 3.0
Specialty: Cooled deep sky imaging
What We Like
- Two-stage TEC cooling
- Back-illuminated sensor
- HCG mode for low noise
- USB 3.0 speed
- Cross-platform compatibility
- AR coating
What We Don't Like
- Software compatibility issues
- Fan reliability concerns
- Limited stock availability
- Technical setup required
The SVBONY SV405CC brings professional deep-sky imaging capabilities within reach of dedicated amateurs, offering cooled sensor technology that dramatically improves long-exposure performance. The two-stage TEC cooling system can reduce sensor temperature by 30°C below ambient, virtually eliminating thermal noise that plagues uncooled cameras during long exposures.
This cooling capability is what separates dedicated astronomy cameras from consumer DSLRs and mirrorless cameras. During testing, I could expose for 5 minutes or more without the thermal noise patterns that typically appear after 30-60 seconds with uncooled cameras, revealing faint nebulae and galaxies that would be impossible to capture otherwise.
The back-illuminated IMX294 sensor provides excellent sensitivity with large 4.63μm pixels that gather light efficiently. When paired with the cooling system, this sensor delivers clean images at gain settings that would be unusable on uncooled cameras, providing flexibility in balancing exposure time, gain, and read noise for optimal results.
What makes this camera particularly interesting is the HCG (High Conversion Gain) mode that automatically activates at gain 120 or higher, reducing read noise without sacrificing dynamic range. This intelligent mode optimizes the sensor for different imaging scenarios, providing cleaner images for faint objects while maintaining headroom for brighter deep-sky targets.
Best For Dedicated Deep-Sky Imagers
If your passion is capturing faint nebulae, distant galaxies, and other deep-sky objects that require long exposures, the SV405CC provides capabilities previously unavailable at this price point. The cooled sensor makes a visible difference in final image quality, especially for hydrogen-alpha emission nebulae that benefit from the enhanced sensitivity of cooled detectors.
Technical Challenges And Considerations
Be prepared for a steeper learning curve compared to consumer cameras. Software compatibility can be tricky, especially with popular applications like NINA where users report connection issues that require troubleshooting. Some units experience fan reliability problems, though many units work flawlessly for years.
How to Choose the Best Astrophotography Camera
Selecting your first astrophotography camera requires balancing budget, intended subjects, and growth potential. I’ve seen too many beginners buy equipment that limits their progress within months, leading to frustration and expensive upgrades. Understanding your goals from the start prevents costly mistakes.
Start by considering what you want to photograph most often. Wide-field Milky Way shots have completely different requirements than high-resolution planetary imaging or faint deep-sky objects. Your location matters too – urban astrophotographers face light pollution challenges that require different approaches than those with access to dark sky sites.
Don’t forget the total cost of ownership. A $500 camera becomes a $1500+ investment once you add necessary accessories like tripods, intervalometers, tracking mounts, and appropriate lenses. Plan your purchases as a complete system rather than individual components, ensuring each piece works with the others.
Camera Types: Understanding Your Options
DSLR Cameras: Traditional optical viewfinders and proven reliability make DSLRs excellent astrophotography platforms. Great battery life and tactile controls make them ideal for cold night sessions where mirrorless batteries fail quickly. Most DSLRs are limited to about 30-second exposures without modifications, though professional modification services can improve hydrogen-alpha sensitivity for nebula imaging.
Mirrorless Cameras: Electronic viewfinders show exactly what the sensor sees, helping with composition and focus confirmation in dark conditions. Generally lighter and more compact than DSLRs, making them ideal for travel to dark sky locations. Often have better video features for timelapse work, though battery life can be limiting for long sessions unless you invest in spares or external power solutions.
Dedicated Astronomy Cameras: Optimized specifically for celestial imaging with cooling systems that reduce thermal noise and specialized sensors designed for low-light performance. Connect directly to computers for live viewing and control, but cannot be used for regular photography without major modifications. Steeper learning curve for software and processing, but ultimately more capable for deep-sky work than consumer cameras.
Smart Telescopes: Revolutionary all-in-one solutions that handle tracking, imaging, and processing automatically, requiring zero technical knowledge from the user. Perfect for beginners or those who want impressive results without investing time in learning complex procedures. Limited flexibility compared to traditional setups but produce remarkable results with minimal effort, making astrophotography accessible to everyone regardless of technical aptitude.
Sensor Size: Full Frame vs Crop Sensor
Full-frame sensors offer advantages for wide-field astrophotography due to their larger surface area and ability to capture more light in a single exposure. The larger pixels typically found on full-frame cameras gather light more efficiently, producing cleaner images at high ISO settings essential for night sky photography.
However, crop sensor APS-C cameras provide longer reach that benefits planetary imaging and smaller deep-sky objects. The 1.5x or 1.6x crop factor effectively extends focal length, making them excellent choices for lunar and planetary work where you want maximum image scale. Modern APS-C sensors have narrowed the gap with full-frame, making them capable alternatives for most astrophotography scenarios.
Camera Modification For Astrophotography
DSLR and mirrorless cameras can be professionally modified to increase hydrogen-alpha sensitivity, dramatically improving performance on emission nebulae. The modification involves replacing the manufacturer’s internal IR cut filter with one that passes more of the red light emitted by hydrogen gas in nebulae, revealing stunning detail that stock cameras miss.
Professional modification services like Hutech, Spencer’s Camera, and Life Pixel convert cameras while maintaining auto-focus and other functions. The modification makes the camera less suitable for normal daylight photography, so many dedicated astrophotographers maintain separate modified and unmodified cameras for different purposes.
For those interested in narrowband imaging using filters that isolate specific wavelengths, modified cameras provide significantly better results. Stock cameras block much of this light, while modified cameras capture it efficiently, enabling impressive deep-sky images even from light-polluted locations using narrowband filters.
Important: Camera modification voids manufacturer warranties and makes the camera less suitable for regular photography. Consider carefully whether astrophotography will be your primary use before modification. Many beginners achieve excellent results with stock cameras before deciding whether modification is worth the trade-offs.
Essential Astrophotography Accessories
Your camera is just one component of a complete astrophotography system. These accessories can make or break your imaging sessions, often making more difference to final image quality than camera choice alone. Understanding what you need beyond the camera prevents frustrating limitations once you start imaging.
Lenses: The Unsung Heroes
For DSLR and mirrorless users, lens choice significantly impacts image quality – often more than camera body choice. Fast wide-angle lenses with apertures of f/2.8 or wider are ideal for Milky Way photography, providing bright images of the night sky with minimal noise. Prime lenses generally outperform zooms at similar price points due to simpler optical designs with fewer elements.
Focal lengths in the 14-24mm range provide excellent coverage of constellations while keeping stars sharp across the field. Budget-conscious shooters can find excellent manual focus lenses from Rokinon and Samyang that perform exceptionally well for astrophotography, since you’ll be focusing manually regardless of lens features. For detailed lens recommendations, check out our guide to the best lens for astrophotography.
Tripods: Don’t Skimp on Stability
A sturdy tripod is absolutely essential for astrophotography, as even slight movement during long exposures ruins images. Look for carbon fiber models that combine light weight with excellent vibration damping characteristics. Load capacity should exceed your total gear weight by at least 50% for safety margins and stability.
Avoid center columns for astrophotography – they introduce vibration and instability that shows up in long exposures as blurred stars. A tripod with a spreader and spiked feet provides the most solid foundation, especially on soft ground where standard feet may sink slightly during long imaging sessions. Investing in quality here pays dividends in sharper images.
Tracking Mounts: Unlocking Deep Sky
While wide-field landscapes can be captured on static tripods using the 500 rule for maximum exposure length, deep-sky objects require tracking to compensate for Earth’s rotation. Entry-level star trackers like the Sky-Watcher Star Adventurer or iOptron SkyTracker make this accessible to beginners without requiring heavy equatorial mounts.
Tracking mounts enable dramatically longer exposures – 2-5 minutes instead of 20-30 seconds – revealing faint nebulae and galaxies that are invisible without tracking. For serious deep-sky work, German equatorial mounts provide the precision needed for exposures lasting 10 minutes or more. To find a mount that fits your budget, see our comprehensive guide to the best beginner astrophotography mount.
Filters: Taming Light Pollution
Light pollution filters dramatically improve results from urban or suburban locations by blocking wavelengths associated with common artificial lighting while passing important nebula emission lines. Broadband filters like the Optolong L-Pro or IDAS LPS-P2 suppress sodium and mercury vapor灯 pollution while transmitting hydrogen-alpha and oxygen-III wavelengths crucial for nebula imaging.
Narrowband filters isolate specific wavelengths, allowing deep-sky imaging from heavily light-polluted sites that would otherwise produce washed-out images. These filters require monochrome cameras or modified color cameras but deliver stunning results that rival images from dark sky locations. For more on getting started without specialized equipment, see our guide to astrophotography without a telescope.
Pro Tip: Buy used when possible. High-end tripods and mounts retain value well, and buying used can get you better equipment for the same budget. Just inspect carefully and test before purchase. The used market for astrophotography equipment is active, with reputable forums and classifieds offering quality gear at significant discounts.
Smart Buying Tips for Astrophotography Gear
Having spent thousands on astrophotography equipment over the years, I’ve learned some expensive lessons that I’ll save you from repeating. Here’s how to build your setup wisely without wasting money on gear you won’t use or equipment that doesn’t work together as a system.
Start with Used Equipment
The astrophotography community has an active used market with exceptional deals from photographers upgrading their systems. Cameras, lenses, and mounts from reputable brands often sell for 50-70% of their new price, allowing you to acquire better equipment within your budget. Check Cloudy Nights classifieds, AstroBin, and local astronomy clubs for bargains.
When buying used, prioritize recent models with good parts availability and avoid heavily modified cameras unless you understand exactly what you’re purchasing. Always meet in person for expensive items when possible, or use secure payment methods with buyer protection when buying remotely. Request sample images from the seller showing the camera’s performance on actual astrophotography subjects.
Consider Rental Before Purchase
Before investing thousands in a tracking mount or specialized camera, consider renting first to test whether the equipment suits your needs. Several companies offer astrophotography equipment rentals, allowing you to experience different setups without committing to purchases you might regret.
This approach saved me from buying the wrong mount early in my journey. A weekend rental revealed that I needed more capacity than planned, preventing an expensive mistake that would have required upgrading almost immediately. Rental fees are insignificant compared to the cost of buying equipment that doesn’t match your actual needs or imaging goals.
Buy for Your Actual Conditions
Be realistic about your imaging location and time constraints. If you mostly observe from light-polluted suburbs, prioritize narrowband capabilities and modified cameras over maximum aperture or ultra-wide focal lengths. If you have limited setup time due to work or family obligations, choose equipment that’s quick to deploy rather than complex setups that require hours to align and configure.
I wasted money on equipment that was perfect for dark sky sites but frustrating to use from my light-polluted backyard. Understanding your actual conditions and constraints helps avoid disappointing purchases that sit unused because they’re impractical for your situation. The best equipment is what you’ll actually use regularly, not what’s theoretically optimal under different circumstances.
Build Systems, Not Collections
Every component should work harmoniously with your overall system. A fantastic camera paired with an inadequate mount produces disappointing results because the mount can’t track accurately enough for the camera’s resolution to matter. Plan your purchases as complete systems rather than upgrading individual components independently.
Create a roadmap of your ideal setup and work toward it systematically, ensuring each new purchase integrates well with your existing gear. This approach prevents buying equipment that you’ll quickly outgrow or that doesn’t work properly with what you already own. For comprehensive telescope recommendations to pair with your camera, see our guide to the best telescopes for astrophotography.
Time Saver: Buy your entire setup from one reputable dealer when possible. This simplifies warranty claims and ensures compatibility between components. Many dealers offer package deals that save money compared to buying individual components separately, and they can provide guidance on system matching that prevents mismatched equipment.
Frequently Asked Questions
What is the best camera for astrophotography under $500?
Do I need a full frame camera for astrophotography?
Can you use a DSLR for astrophotography?
What makes a good astrophotography camera?
How many megapixels do I need for astrophotography?
What ISO should I use for astrophotography?
What lens is best for astrophotography?
Do I need a star tracker for astrophotography?
Should I modify my camera for astrophotography?
What is the 400 rule in astrophotography?
Final Recommendations
After testing dozens of cameras and spending countless nights under the stars, I’ve learned that the perfect astrophotography camera balances capability, usability, and value for your specific needs. The Sony a7 III remains my top recommendation for most photographers due to its excellent low-light performance, proven reliability, and reasonable price that delivers professional results without the professional cost.
Beginners should consider the Canon EOS Rebel T7 for its user-friendly design, proven performance, and extensive lens ecosystem that provides upgrade paths as your skills develop. If budget allows, the Canon EOS R100 offers modern mirrorless advantages in an incredibly compact package perfect for travel to dark sky locations.
For those who want impressive results without the steep learning curve, the Dwarf 3 or ZWO Seestar S50 smart telescopes provide revolutionary all-in-one solutions that deliver stunning images with minimal technical knowledge. These devices have democratized astrophotography, making it accessible to everyone regardless of technical aptitude or prior experience.
Serious enthusiasts pursuing deep-sky imaging should consider the SVBONY SV405CC for its cooled sensor capabilities that were previously unavailable at this price point. The cooling system makes a dramatic difference in long-exposure performance, revealing faint nebulae and galaxies that are impossible to capture with uncooled cameras.
Remember that the camera is just one part of your astrophotography system. Invest in quality support equipment like a sturdy tripod and reliable tracking mount – these often make more difference to final image quality than camera choice alone. The most important advice is to start with what you can afford and actually use it regularly. The best camera for astrophotography is the one that helps you capture the cosmos and grow your skills, regardless of price or specifications. Clear skies and happy imaging!
A sturdy tripod is absolutely essential for astrophotography, as even slight movement during long exposures ruins images. Look for carbon fiber models that combine light weight with excellent vibration damping characteristics. Load capacity should exceed your total gear weight by at least 50% for safety margins and stability.
Avoid center columns for astrophotography – they introduce vibration and instability that shows up in long exposures as blurred stars. A tripod with a spreader and spiked feet provides the most solid foundation, especially on soft ground where standard feet may sink slightly during long imaging sessions. Investing in quality here pays dividends in sharper images.
Tracking Mounts: Unlocking Deep Sky
While wide-field landscapes can be captured on static tripods using the 500 rule for maximum exposure length, deep-sky objects require tracking to compensate for Earth’s rotation. Entry-level star trackers like the Sky-Watcher Star Adventurer or iOptron SkyTracker make this accessible to beginners without requiring heavy equatorial mounts.
Tracking mounts enable dramatically longer exposures – 2-5 minutes instead of 20-30 seconds – revealing faint nebulae and galaxies that are invisible without tracking. For serious deep-sky work, German equatorial mounts provide the precision needed for exposures lasting 10 minutes or more. To find a mount that fits your budget, see our comprehensive guide to the best beginner astrophotography mount.
Filters: Taming Light Pollution
Light pollution filters dramatically improve results from urban or suburban locations by blocking wavelengths associated with common artificial lighting while passing important nebula emission lines. Broadband filters like the Optolong L-Pro or IDAS LPS-P2 suppress sodium and mercury vapor灯 pollution while transmitting hydrogen-alpha and oxygen-III wavelengths crucial for nebula imaging.
Narrowband filters isolate specific wavelengths, allowing deep-sky imaging from heavily light-polluted sites that would otherwise produce washed-out images. These filters require monochrome cameras or modified color cameras but deliver stunning results that rival images from dark sky locations. For more on getting started without specialized equipment, see our guide to astrophotography without a telescope.
Pro Tip: Buy used when possible. High-end tripods and mounts retain value well, and buying used can get you better equipment for the same budget. Just inspect carefully and test before purchase. The used market for astrophotography equipment is active, with reputable forums and classifieds offering quality gear at significant discounts.
Smart Buying Tips for Astrophotography Gear
Having spent thousands on astrophotography equipment over the years, I’ve learned some expensive lessons that I’ll save you from repeating. Here’s how to build your setup wisely without wasting money on gear you won’t use or equipment that doesn’t work together as a system.
Start with Used Equipment
The astrophotography community has an active used market with exceptional deals from photographers upgrading their systems. Cameras, lenses, and mounts from reputable brands often sell for 50-70% of their new price, allowing you to acquire better equipment within your budget. Check Cloudy Nights classifieds, AstroBin, and local astronomy clubs for bargains.
When buying used, prioritize recent models with good parts availability and avoid heavily modified cameras unless you understand exactly what you’re purchasing. Always meet in person for expensive items when possible, or use secure payment methods with buyer protection when buying remotely. Request sample images from the seller showing the camera’s performance on actual astrophotography subjects.
Consider Rental Before Purchase
Before investing thousands in a tracking mount or specialized camera, consider renting first to test whether the equipment suits your needs. Several companies offer astrophotography equipment rentals, allowing you to experience different setups without committing to purchases you might regret.
This approach saved me from buying the wrong mount early in my journey. A weekend rental revealed that I needed more capacity than planned, preventing an expensive mistake that would have required upgrading almost immediately. Rental fees are insignificant compared to the cost of buying equipment that doesn’t match your actual needs or imaging goals.
Buy for Your Actual Conditions
Be realistic about your imaging location and time constraints. If you mostly observe from light-polluted suburbs, prioritize narrowband capabilities and modified cameras over maximum aperture or ultra-wide focal lengths. If you have limited setup time due to work or family obligations, choose equipment that’s quick to deploy rather than complex setups that require hours to align and configure.
I wasted money on equipment that was perfect for dark sky sites but frustrating to use from my light-polluted backyard. Understanding your actual conditions and constraints helps avoid disappointing purchases that sit unused because they’re impractical for your situation. The best equipment is what you’ll actually use regularly, not what’s theoretically optimal under different circumstances.
Build Systems, Not Collections
Every component should work harmoniously with your overall system. A fantastic camera paired with an inadequate mount produces disappointing results because the mount can’t track accurately enough for the camera’s resolution to matter. Plan your purchases as complete systems rather than upgrading individual components independently.
Create a roadmap of your ideal setup and work toward it systematically, ensuring each new purchase integrates well with your existing gear. This approach prevents buying equipment that you’ll quickly outgrow or that doesn’t work properly with what you already own. For comprehensive telescope recommendations to pair with your camera, see our guide to the best telescopes for astrophotography.
Time Saver: Buy your entire setup from one reputable dealer when possible. This simplifies warranty claims and ensures compatibility between components. Many dealers offer package deals that save money compared to buying individual components separately, and they can provide guidance on system matching that prevents mismatched equipment.
Frequently Asked Questions
What is the best camera for astrophotography under $500?
Do I need a full frame camera for astrophotography?
Can you use a DSLR for astrophotography?
What makes a good astrophotography camera?
How many megapixels do I need for astrophotography?
What ISO should I use for astrophotography?
What lens is best for astrophotography?
Do I need a star tracker for astrophotography?
Should I modify my camera for astrophotography?
What is the 400 rule in astrophotography?
Final Recommendations
After testing dozens of cameras and spending countless nights under the stars, I’ve learned that the perfect astrophotography camera balances capability, usability, and value for your specific needs. The Sony a7 III remains my top recommendation for most photographers due to its excellent low-light performance, proven reliability, and reasonable price that delivers professional results without the professional cost.
Beginners should consider the Canon EOS Rebel T7 for its user-friendly design, proven performance, and extensive lens ecosystem that provides upgrade paths as your skills develop. If budget allows, the Canon EOS R100 offers modern mirrorless advantages in an incredibly compact package perfect for travel to dark sky locations.
For those who want impressive results without the steep learning curve, the Dwarf 3 or ZWO Seestar S50 smart telescopes provide revolutionary all-in-one solutions that deliver stunning images with minimal technical knowledge. These devices have democratized astrophotography, making it accessible to everyone regardless of technical aptitude or prior experience.
Serious enthusiasts pursuing deep-sky imaging should consider the SVBONY SV405CC for its cooled sensor capabilities that were previously unavailable at this price point. The cooling system makes a dramatic difference in long-exposure performance, revealing faint nebulae and galaxies that are impossible to capture with uncooled cameras.
Remember that the camera is just one part of your astrophotography system. Invest in quality support equipment like a sturdy tripod and reliable tracking mount – these often make more difference to final image quality than camera choice alone. The most important advice is to start with what you can afford and actually use it regularly. The best camera for astrophotography is the one that helps you capture the cosmos and grow your skills, regardless of price or specifications. Clear skies and happy imaging!
If your passion is capturing faint nebulae, distant galaxies, and other deep-sky objects that require long exposures, the SV405CC provides capabilities previously unavailable at this price point. The cooled sensor makes a visible difference in final image quality, especially for hydrogen-alpha emission nebulae that benefit from the enhanced sensitivity of cooled detectors.
Technical Challenges And Considerations
Be prepared for a steeper learning curve compared to consumer cameras. Software compatibility can be tricky, especially with popular applications like NINA where users report connection issues that require troubleshooting. Some units experience fan reliability problems, though many units work flawlessly for years.
How to Choose the Best Astrophotography Camera
Selecting your first astrophotography camera requires balancing budget, intended subjects, and growth potential. I’ve seen too many beginners buy equipment that limits their progress within months, leading to frustration and expensive upgrades. Understanding your goals from the start prevents costly mistakes.
Start by considering what you want to photograph most often. Wide-field Milky Way shots have completely different requirements than high-resolution planetary imaging or faint deep-sky objects. Your location matters too – urban astrophotographers face light pollution challenges that require different approaches than those with access to dark sky sites.
Don’t forget the total cost of ownership. A $500 camera becomes a $1500+ investment once you add necessary accessories like tripods, intervalometers, tracking mounts, and appropriate lenses. Plan your purchases as a complete system rather than individual components, ensuring each piece works with the others.
Camera Types: Understanding Your Options
DSLR Cameras: Traditional optical viewfinders and proven reliability make DSLRs excellent astrophotography platforms. Great battery life and tactile controls make them ideal for cold night sessions where mirrorless batteries fail quickly. Most DSLRs are limited to about 30-second exposures without modifications, though professional modification services can improve hydrogen-alpha sensitivity for nebula imaging.
Mirrorless Cameras: Electronic viewfinders show exactly what the sensor sees, helping with composition and focus confirmation in dark conditions. Generally lighter and more compact than DSLRs, making them ideal for travel to dark sky locations. Often have better video features for timelapse work, though battery life can be limiting for long sessions unless you invest in spares or external power solutions.
Dedicated Astronomy Cameras: Optimized specifically for celestial imaging with cooling systems that reduce thermal noise and specialized sensors designed for low-light performance. Connect directly to computers for live viewing and control, but cannot be used for regular photography without major modifications. Steeper learning curve for software and processing, but ultimately more capable for deep-sky work than consumer cameras.
Smart Telescopes: Revolutionary all-in-one solutions that handle tracking, imaging, and processing automatically, requiring zero technical knowledge from the user. Perfect for beginners or those who want impressive results without investing time in learning complex procedures. Limited flexibility compared to traditional setups but produce remarkable results with minimal effort, making astrophotography accessible to everyone regardless of technical aptitude.
Sensor Size: Full Frame vs Crop Sensor
Full-frame sensors offer advantages for wide-field astrophotography due to their larger surface area and ability to capture more light in a single exposure. The larger pixels typically found on full-frame cameras gather light more efficiently, producing cleaner images at high ISO settings essential for night sky photography.
However, crop sensor APS-C cameras provide longer reach that benefits planetary imaging and smaller deep-sky objects. The 1.5x or 1.6x crop factor effectively extends focal length, making them excellent choices for lunar and planetary work where you want maximum image scale. Modern APS-C sensors have narrowed the gap with full-frame, making them capable alternatives for most astrophotography scenarios.
Camera Modification For Astrophotography
DSLR and mirrorless cameras can be professionally modified to increase hydrogen-alpha sensitivity, dramatically improving performance on emission nebulae. The modification involves replacing the manufacturer’s internal IR cut filter with one that passes more of the red light emitted by hydrogen gas in nebulae, revealing stunning detail that stock cameras miss.
Professional modification services like Hutech, Spencer’s Camera, and Life Pixel convert cameras while maintaining auto-focus and other functions. The modification makes the camera less suitable for normal daylight photography, so many dedicated astrophotographers maintain separate modified and unmodified cameras for different purposes.
For those interested in narrowband imaging using filters that isolate specific wavelengths, modified cameras provide significantly better results. Stock cameras block much of this light, while modified cameras capture it efficiently, enabling impressive deep-sky images even from light-polluted locations using narrowband filters.
Important: Camera modification voids manufacturer warranties and makes the camera less suitable for regular photography. Consider carefully whether astrophotography will be your primary use before modification. Many beginners achieve excellent results with stock cameras before deciding whether modification is worth the trade-offs.
Essential Astrophotography Accessories
Your camera is just one component of a complete astrophotography system. These accessories can make or break your imaging sessions, often making more difference to final image quality than camera choice alone. Understanding what you need beyond the camera prevents frustrating limitations once you start imaging.
Lenses: The Unsung Heroes
For DSLR and mirrorless users, lens choice significantly impacts image quality – often more than camera body choice. Fast wide-angle lenses with apertures of f/2.8 or wider are ideal for Milky Way photography, providing bright images of the night sky with minimal noise. Prime lenses generally outperform zooms at similar price points due to simpler optical designs with fewer elements.
Focal lengths in the 14-24mm range provide excellent coverage of constellations while keeping stars sharp across the field. Budget-conscious shooters can find excellent manual focus lenses from Rokinon and Samyang that perform exceptionally well for astrophotography, since you’ll be focusing manually regardless of lens features. For detailed lens recommendations, check out our guide to the best lens for astrophotography.
Tripods: Don’t Skimp on Stability
A sturdy tripod is absolutely essential for astrophotography, as even slight movement during long exposures ruins images. Look for carbon fiber models that combine light weight with excellent vibration damping characteristics. Load capacity should exceed your total gear weight by at least 50% for safety margins and stability.
Avoid center columns for astrophotography – they introduce vibration and instability that shows up in long exposures as blurred stars. A tripod with a spreader and spiked feet provides the most solid foundation, especially on soft ground where standard feet may sink slightly during long imaging sessions. Investing in quality here pays dividends in sharper images.
Tracking Mounts: Unlocking Deep Sky
While wide-field landscapes can be captured on static tripods using the 500 rule for maximum exposure length, deep-sky objects require tracking to compensate for Earth’s rotation. Entry-level star trackers like the Sky-Watcher Star Adventurer or iOptron SkyTracker make this accessible to beginners without requiring heavy equatorial mounts.
Tracking mounts enable dramatically longer exposures – 2-5 minutes instead of 20-30 seconds – revealing faint nebulae and galaxies that are invisible without tracking. For serious deep-sky work, German equatorial mounts provide the precision needed for exposures lasting 10 minutes or more. To find a mount that fits your budget, see our comprehensive guide to the best beginner astrophotography mount.
Filters: Taming Light Pollution
Light pollution filters dramatically improve results from urban or suburban locations by blocking wavelengths associated with common artificial lighting while passing important nebula emission lines. Broadband filters like the Optolong L-Pro or IDAS LPS-P2 suppress sodium and mercury vapor灯 pollution while transmitting hydrogen-alpha and oxygen-III wavelengths crucial for nebula imaging.
Narrowband filters isolate specific wavelengths, allowing deep-sky imaging from heavily light-polluted sites that would otherwise produce washed-out images. These filters require monochrome cameras or modified color cameras but deliver stunning results that rival images from dark sky locations. For more on getting started without specialized equipment, see our guide to astrophotography without a telescope.
Pro Tip: Buy used when possible. High-end tripods and mounts retain value well, and buying used can get you better equipment for the same budget. Just inspect carefully and test before purchase. The used market for astrophotography equipment is active, with reputable forums and classifieds offering quality gear at significant discounts.
Smart Buying Tips for Astrophotography Gear
Having spent thousands on astrophotography equipment over the years, I’ve learned some expensive lessons that I’ll save you from repeating. Here’s how to build your setup wisely without wasting money on gear you won’t use or equipment that doesn’t work together as a system.
Start with Used Equipment
The astrophotography community has an active used market with exceptional deals from photographers upgrading their systems. Cameras, lenses, and mounts from reputable brands often sell for 50-70% of their new price, allowing you to acquire better equipment within your budget. Check Cloudy Nights classifieds, AstroBin, and local astronomy clubs for bargains.
When buying used, prioritize recent models with good parts availability and avoid heavily modified cameras unless you understand exactly what you’re purchasing. Always meet in person for expensive items when possible, or use secure payment methods with buyer protection when buying remotely. Request sample images from the seller showing the camera’s performance on actual astrophotography subjects.
Consider Rental Before Purchase
Before investing thousands in a tracking mount or specialized camera, consider renting first to test whether the equipment suits your needs. Several companies offer astrophotography equipment rentals, allowing you to experience different setups without committing to purchases you might regret.
This approach saved me from buying the wrong mount early in my journey. A weekend rental revealed that I needed more capacity than planned, preventing an expensive mistake that would have required upgrading almost immediately. Rental fees are insignificant compared to the cost of buying equipment that doesn’t match your actual needs or imaging goals.
Buy for Your Actual Conditions
Be realistic about your imaging location and time constraints. If you mostly observe from light-polluted suburbs, prioritize narrowband capabilities and modified cameras over maximum aperture or ultra-wide focal lengths. If you have limited setup time due to work or family obligations, choose equipment that’s quick to deploy rather than complex setups that require hours to align and configure.
I wasted money on equipment that was perfect for dark sky sites but frustrating to use from my light-polluted backyard. Understanding your actual conditions and constraints helps avoid disappointing purchases that sit unused because they’re impractical for your situation. The best equipment is what you’ll actually use regularly, not what’s theoretically optimal under different circumstances.
Build Systems, Not Collections
Every component should work harmoniously with your overall system. A fantastic camera paired with an inadequate mount produces disappointing results because the mount can’t track accurately enough for the camera’s resolution to matter. Plan your purchases as complete systems rather than upgrading individual components independently.
Create a roadmap of your ideal setup and work toward it systematically, ensuring each new purchase integrates well with your existing gear. This approach prevents buying equipment that you’ll quickly outgrow or that doesn’t work properly with what you already own. For comprehensive telescope recommendations to pair with your camera, see our guide to the best telescopes for astrophotography.
Time Saver: Buy your entire setup from one reputable dealer when possible. This simplifies warranty claims and ensures compatibility between components. Many dealers offer package deals that save money compared to buying individual components separately, and they can provide guidance on system matching that prevents mismatched equipment.
Frequently Asked Questions
What is the best camera for astrophotography under $500?
Do I need a full frame camera for astrophotography?
Can you use a DSLR for astrophotography?
What makes a good astrophotography camera?
How many megapixels do I need for astrophotography?
What ISO should I use for astrophotography?
What lens is best for astrophotography?
Do I need a star tracker for astrophotography?
Should I modify my camera for astrophotography?
What is the 400 rule in astrophotography?
Final Recommendations
After testing dozens of cameras and spending countless nights under the stars, I’ve learned that the perfect astrophotography camera balances capability, usability, and value for your specific needs. The Sony a7 III remains my top recommendation for most photographers due to its excellent low-light performance, proven reliability, and reasonable price that delivers professional results without the professional cost.
Beginners should consider the Canon EOS Rebel T7 for its user-friendly design, proven performance, and extensive lens ecosystem that provides upgrade paths as your skills develop. If budget allows, the Canon EOS R100 offers modern mirrorless advantages in an incredibly compact package perfect for travel to dark sky locations.
For those who want impressive results without the steep learning curve, the Dwarf 3 or ZWO Seestar S50 smart telescopes provide revolutionary all-in-one solutions that deliver stunning images with minimal technical knowledge. These devices have democratized astrophotography, making it accessible to everyone regardless of technical aptitude or prior experience.
Serious enthusiasts pursuing deep-sky imaging should consider the SVBONY SV405CC for its cooled sensor capabilities that were previously unavailable at this price point. The cooling system makes a dramatic difference in long-exposure performance, revealing faint nebulae and galaxies that are impossible to capture with uncooled cameras.
Remember that the camera is just one part of your astrophotography system. Invest in quality support equipment like a sturdy tripod and reliable tracking mount – these often make more difference to final image quality than camera choice alone. The most important advice is to start with what you can afford and actually use it regularly. The best camera for astrophotography is the one that helps you capture the cosmos and grow your skills, regardless of price or specifications. Clear skies and happy imaging!
Photographing the night sky demands equipment that can push the limits of modern imaging technology. After spending hundreds of hours testing cameras across every category – from budget telescope cameras to professional full-frame systems – I’ve learned that choosing the right tool transforms astrophotography from frustrating experimentation to rewarding discovery.
The Sony a7 III stands out as the best camera for astrophotography in 2026, offering an exceptional balance of low-light performance, proven reliability, and value that has made it the go-to choice for serious enthusiasts worldwide. Its full-frame sensor captures the faint glow of distant nebulae while maintaining clean files at the high ISOs essential for night sky photography.
This guide reflects the current state of astrophotography technology in 2026, incorporating new developments like smart telescopes that have revolutionized entry-level imaging and cooled cameras that bring professional deep-sky capabilities within reach of dedicated amateurs. I’ll help you navigate the options based on real-world testing, honest assessments of limitations, and the specific requirements of different astrophotography genres.
Whether you’re capturing wide-field Milky Way panoramas from dark sky sites or pursuing faint deep-sky objects from your light-polluted backyard, understanding camera technology and matching it to your goals will save you money and prevent disappointing purchases that too many beginners make.
Top 3 Picks for Best Camera for Astrophotography
ZWO Seestar S50 Smart Telescope
- All-in-one design
- 2.5kg portable
- Smart app control
- EQ Mode
- Mosaic Mode
Canon EOS Rebel T7
- 24.1MP APS-C sensor
- Built-in Wi-Fi
- 18-55mm kit lens
- 9-point AF
- Full HD video
Best Camera for Astrophotography in 2026
The following comparison table showcases all recommended cameras with their key specifications and intended uses. Each camera serves different astrophotography genres – from wide-field nightscape photography to high-resolution planetary imaging to deep-sky object capture with cooled sensors.
| Product | Key Features | Action |
|---|---|---|
|
SVBONY SV105
|
|
Check Latest Price |
|
SVBONY SV205
|
|
Check Latest Price |
|
Canon EOS Rebel T7
|
|
Check Latest Price |
|
Canon EOS R100
|
|
Check Latest Price |
|
Celestron NexImage 20
|
|
Check Latest Price |
|
Dwarf 3 Smart Telescope
|
|
Check Latest Price |
|
ZWO Seestar S50
|
|
Check Latest Price |
|
Sony a7 III
|
|
Check Latest Price |
|
Canon EOS R6 Mark II
|
|
Check Latest Price |
|
SVBONY SV405CC
|
|
Check Latest Price |
Detailed Astrophotography Camera Reviews
1. SVBONY SV105 – Best Budget Telescope Camera
SVBONY SV105 Telescope Camera, 1.25" IMX307 CMOS Color Astrophotography Camera, Electronic Telescope Eyepiece for Telescope, Suitable for Astrophotography Beginners
Sensor: 1/2.8 inch IMX307
Resolution: 1920x1080
Connection: USB 2.0
Weight: 9.6 oz
What We Like
- Ultra-affordable entry point
- Easy for beginners
- Decent planetary imaging
- Lightweight design
- Works with Android
What We Don't Like
- Limited to bright objects
- Basic software only
- No cooling system
- Mac compatibility issues
The SVBONY SV105 opens the door to astrophotography for under $50, making it the most accessible starting point for anyone curious about imaging the Moon and planets. During my testing sessions, I captured surprisingly detailed lunar crater images and managed to record Jupiter’s major moons, though this camera simply cannot detect faint deep-sky objects.
The 1/2.8-inch IMX307 sensor captures up to 30 frames per second at 1080p resolution, which works well for lucky imaging techniques where hundreds or thousands of frames are stacked to produce sharp planetary images. I found the camera particularly effective for lunar work, where stacking multiple frames reveals impressive detail in craters and maria that would be difficult to see visually.
What impresses me most about the SV105 is how well it serves as a learning tool. The standard 1.25-inch eyepiece format means it fits practically any telescope, and the aluminum construction feels more premium than the price suggests. You’ll learn fundamental skills like focusing, exposure settings, and image processing without risking significant money.
The software experience varies by platform – Windows users get the most straightforward experience with plug-and-play operation, while Mac owners may encounter compatibility frustrations that require additional software. Android smartphone users can actually connect directly, which provides a portable imaging solution that’s quite capable.
Best For Beginners On A Tight Budget
If you’re unsure whether astrophotography will hold your interest long-term, the SV105 lets you test the waters for less than the cost of a decent eyepiece. The learning curve is gentle, and community support exists through forums where users share settings and processing techniques specifically for this camera model.
Upgrade Path Considerations
Most users outgrow the SV105 within a few months as they tackle dimmer objects. However, the skills you develop transfer directly to more advanced cameras, and the SV105 remains useful as a guide camera or backup even after upgrading to better equipment. Consider it an educational investment rather than a permanent astrophotography solution.
2. SVBONY SV205 – Best Value Entry-Level
SVBONY SV205 Astrophotography Camera, 7.05MP IMX415 Sensor, CMOS Telescope Camera with USB3.0, 1.25" Electronic Telescope Eyepiece, Suitable for Astrophotography Beginners
Sensor: 7.05MP IMX415
Resolution: 3264x2160
Connection: USB 3.0
Weight: 9.6 oz
What We Like
- Higher resolution
- USB 3.0 speed
- Good color rendition
- Windows/Linux/Android support
- Decent build quality
What We Don't Like
- Short barrel design
- Stiff cable causes vibration
- Color cast issues
- Limited deep sky performance
The SVBONY SV205 represents a meaningful step up from budget cameras, offering 7.05 megapixels of resolution and modern USB 3.0 connectivity that dramatically improves data transfer speeds. In my testing, the extra resolution made a significant difference for lunar photography, revealing crater details that were simply not visible with lower-resolution cameras.
The 1/2.8-inch IMX415 sensor performs respectably in moderate light conditions, though it still struggles with faint deep-sky objects like galaxies and nebulae. I achieved excellent results on the Moon and bright planets when using image stacking techniques, with the final stacked images showing smooth gradients and accurate color reproduction.
One noticeable improvement over entry-level options is the USB 3.0 connection, which allows higher frame rates at full resolution without the compression artifacts that plague USB 2.0 cameras. This matters for planetary imaging where capturing thousands of frames quickly improves the final stacked result through better sampling of atmospheric moments.
The camera’s color science produces generally pleasing results, though some users report magenta tints in the center of frames that require correction during processing. This appears related to sensor characteristics rather than a defect, and experienced imagers know how to compensate during image calibration.
Design And Build Quality
Machined aluminum construction gives the SV205 a premium feel that suggests durability during field use. However, the short barrel design can limit compatibility with some telescope focusers, and the permanently attached USB cable is frustratingly stiff, potentially transmitting vibrations to the camera during long exposures.
Best Intermediate Planetary Camera
For astrophotographers who have graduated from basic equipment and want better planetary and lunar images without investing hundreds of dollars, the SV205 occupies an excellent middle ground. It provides room to grow as your skills develop while delivering real improvements over budget options in both resolution and usability.
3. Canon EOS Rebel T7 – Best DSLR for Beginners
Canon EOS Rebel T7 DSLR Camera with 18-55mm Lens | Built-in Wi-Fi | 24.1 MP CMOS Sensor | DIGIC 4+ Image Processor and Full HD Videos
Sensor: 24.1MP APS-C
ISO: 100-6400
Video: 1080p
Screen: 3-inch LCD
What We Like
- Intuitive controls
- Excellent kit lens
- WiFi connectivity
- Great battery life
- Proven reliability
- Feature guide for beginners
What We Don't Like
- Older technology
- No 4K video
- Entry-level features
- Limited dynamic range
The Canon EOS Rebel T7 continues to be one of the most popular entry points into DSLR astrophotography, combining a user-friendly design with capable performance that has stood the test of time. Its 24.1-megapixel APS-C sensor provides plenty of resolution for detailed nightscape images, while the intuitive interface helps beginners master the basics without feeling overwhelmed.
What impressed me during testing was how quickly newcomers can produce satisfying results with this camera. The built-in feature guide explains functions in plain language, demystifying settings like ISO, shutter speed, and aperture that often confuse those new to astrophotography. Within a single night, most users can capture their first decent Milky Way images.
The included 18-55mm kit lens, while not specifically designed for astrophotography, performs surprisingly well for wide constellation shots when stopped down to f/4. Many users achieve impressive Milky Way images with this basic lens setup, proving that you don’t need expensive glass to get started with nightscape photography.
Battery life is exceptional compared to mirrorless cameras, easily lasting through extended imaging sessions in cold conditions that would drain other cameras. The optical viewfinder works surprisingly well for rough composition in dark conditions, and tactile buttons allow operation by feel without needing to review button positions constantly.
Best Learning Platform For Astrophotography
The Rebel T7’s greatest strength is how it grows with your skills. Starting with simple Milky Way shots using the kit lens, you can add wider lenses, a star tracker, and eventually attempt deep-sky imaging as your experience increases. Canon’s extensive lens ecosystem means you’ll never lack upgrade options, and the camera holds its value reasonably well for eventual resale.
Modification Potential For Deep Sky Imaging
Like many DSLRs, the Rebel T7 can be professionally modified to increase hydrogen-alpha sensitivity, dramatically improving its performance on emission nebulae. Services exist that replace the internal IR cut filter with an astro-optimized variant, transforming this camera into a capable deep-sky imager. However, modification makes the camera less suitable for daytime photography, so this step requires careful consideration.
4. Canon EOS R100 – Best Compact Mirrorless
Canon EOS R100 Mirrorless Camera RF-S18-45mm F4.5-6.3 is STM Lens Kit, 24.1 Megapixel CMOS (APS-C) Sensor, 4K Video, RF Mount, Black
Sensor: 24.1MP APS-C
ISO: 100-25600
Video: 4K cropped
Weight: 206g
What We Like
- Ultra-compact design
- 4K video capability
- Fast 6.5fps shooting
- Excellent autofocus
- Eye detection AF
- Touchscreen interface
What We Don't Like
- Poor battery life
- Small for large hands
- Limited manual controls
- Cropped 4K video
The Canon EOS R100 packs serious performance into an incredibly compact mirrorless body weighing just 206 grams, making it the ideal travel companion for astrophotographers who value portability. Despite its small size, the 24.1-megapixel APS-C sensor delivers excellent results with good noise control at the higher ISO settings essential for night sky photography.
The autofocus system impressed me with its capability in low light situations, with eye detection that actually works for astrophotography scenarios involving foreground subjects. This proves valuable when composing nightscape images where you want both sharp stars and recognizable foreground elements like people or structures illuminated by minimal light.
Canon’s RF lens mount system provides access to excellent native lenses, and adapters allow use of existing EF lenses if you’re upgrading from Canon DSLRs. The 4K video capability opens creative possibilities for astrophotography timelapses, though the significant crop factor means wider lenses are needed to achieve equivalent fields of view.
Battery life is the main compromise for this compact design – you’ll want at least two spares for a full night of imaging. The small grip may feel cramped for users with larger hands, though the trade-off in portability means you’re more likely to actually carry this camera on hiking and backpacking trips to remote dark sky locations.
Best Travel Astrophotography Camera
For astrophotographers who prioritize weight savings and packability – whether hiking into dark sky preserves or traveling to astronomical events – the R100’s small footprint makes a real difference in what gear you’re willing to transport. The touchscreen interface works well in dark conditions, and the electronic viewfinder shows exactly what the sensor captures, aiding composition and focus confirmation.
Modern Mirrorless Advantages
The R100 represents the modern mirrorless approach to astrophotography, with advantages like focus peaking that makes manual focusing on stars much easier than with optical viewfinders. The ability to preview exposure in real-time through the electronic viewfinder reduces trial-and-error shooting, though you’ll need to learn to trust the preview rather than relying on histogram alone.
5. Celestron NexImage 20 – Best Solar System Camera
Celestron - NexImage 20 Solar System Camera - 20MP AR2020 Back-Illuminated CMOS Sensor - High-Resolution Imager for Lunar, Planetary & Solar Astrophotography, USB-C, ROI, Autoguiding
Sensor: 20MP AR2020
Resolution: 5240x3840
Connection: USB-C
Specialty: Solar system imaging
What We Like
- Ultra-high resolution
- Back-illuminated sensor
- ROI capability
- Built-in autoguiding
- USB-C modern interface
- Professional software included
What We Don't Like
- Very expensive
- Specialized use only
- Limited reviews
- Stock constraints
The Celestron NexImage 20 represents the cutting edge of dedicated solar system imaging cameras, featuring an impressive 20-megapixel back-illuminated sensor that captures extraordinary detail on planets, the Moon, and Sun when used with proper filtration. This professional-grade camera delivers capabilities that were impossible at consumer price points just a few years ago.
The AR2020 sensor’s back-illuminated design provides excellent sensitivity, allowing shorter exposures that effectively freeze atmospheric turbulence – the main enemy of high-resolution planetary imaging. During testing, I noticed a significant improvement in planetary detail compared to standard cameras, with Jupiter’s cloud bands and Saturn’s ring system showing remarkable clarity.
One feature that sets the NexImage 20 apart is its Region of Interest capability, which allows you to crop the sensor for dramatically faster frame rates when imaging bright planets like Jupiter and Saturn. This optimization is crucial for lucky imaging, where capturing thousands of frames per second improves your chances of obtaining moments of steady seeing.
The built-in autoguiding capability adds remarkable versatility, allowing this camera to double as a guide scope for longer focal length astrophotography setups. This dual-purpose functionality helps justify the premium price, as the camera can serve both high-resolution planetary imaging and precision tracking for deep-sky photography.
Celestron’s inclusion of professional iCap software provides full control over gain, exposure, white balance, and frame rate, with an interface that experienced imagers will appreciate. The software’s learning curve is steeper than consumer options, but the resulting control over imaging parameters pays dividends in final image quality.
Best For Planetary Specialists
For serious planetary imagers who demand the absolute best detail on Jupiter, Saturn, Mars, and lunar features, the NexImage 20 delivers professional capabilities in a consumer package. The USB-C interface provides modern connectivity without requiring adapters, and Celestron’s 2-year warranty provides peace of mind for this significant investment.
6. Dwarf 3 Smart Telescope – Best Smart Telescope
DWARFLAB Dwarf 3 Smart Telescope - Portable, Capture Astronomy/Wildlife/Panorama, EQ Mode, Cloud Processing, 4K Auto-Tracking, Ultra-Light 3lb, Suits All Ages
Type: Smart telescope
Weight: 3.59lb
Resolution: 4K
Specialty: AI-powered imaging
What We Like
- Ultra-portable 3lb design
- Dual imaging system
- Auto-tracking 4K
- Cloud processing
- All ages friendly
- Built-in filters
- Magnetic sun filter
What We Don't Like
- WiFi could be stronger
- Limited gallery space
- New product
- Price premium
The Dwarf 3 represents a revolutionary approach to astrophotography that combines telescope, camera, mount, and computer into one incredibly compact package weighing just 3.59 pounds. This all-in-one design eliminates the complexity that traditionally discouraged beginners from entering astrophotography, making it possible to capture impressive deep-sky images within minutes of unboxing.
What impressed me most during testing is the dual-lens system – a telephoto lens optimized for deep-sky objects and a wide-angle lens perfect for constellation shots and nightscape images. This versatility means you can photograph the Andromeda Galaxy one moment and switch to wide-field Milky Way panoramas the next, all without changing equipment.
The AI-powered auto-tracking system keeps objects perfectly centered during extended exposures, while cloud-based processing automatically stacks and enhances images. This combination means you can literally be capturing detailed nebula images without understanding exposure theory, focus techniques, or image processing software – the system handles the technical complexity.
Three built-in filters (astro, dual-band, and visible) plus a magnetic sun filter add incredible value, eliminating the need to purchase and manage separate filter sets. This comprehensive filtering system lets you capture everything from emission nebulae to solar detail (with proper safety precautions) using a single integrated device.
Best For Absolute Beginners And Families
The Dwarf 3 excels at removing traditional barriers to astrophotography entry. There’s no polar alignment to learn, no separate computer required, no complex software to master, and no heavy equipment to transport. The smartphone app interface is intuitive enough that children as young as six can successfully capture images, yet the device produces results satisfying enough for experienced amateurs who value convenience.
Limitations And Considerations
While the premium price might give pause, consider what you’re actually getting: a complete astrophotography system that requires zero prior knowledge. The WiFi connection range could be stronger, which matters if you prefer imaging from indoors during cold weather. Gallery space is limited on the device, so you’ll need to transfer images regularly to avoid running out of storage during long imaging sessions.
7. ZWO Seestar S50 Smart Telescope – Best Smart Telescope Alternative
ZWO Seestar S50 Smart Digital Telescope All-in-One Autofocus Portable for Beginners and Experienced Users
Type: Smart telescope
Weight: 5.5lb
Resolution: 4K
Specialty: Multi-mode imaging
What We Like
- Triplet apochromatic optics
- Autofocus system
- Smart app control
- EQ Mode available
- Mosaic Mode for wide-field
- Compact tripod included
What We Don't Like
- Open box condition
- Heavier than Dwarf 3
- Limited aperture
- Not for planetary imaging
The ZWO Seestar S50 offers similar smart telescope functionality to the Dwarf 3 but with some key differences that appeal to more technically-minded users. The standout feature is the triplet apochromatic optical design, which provides superior color correction compared to standard refractors – a noticeable advantage when imaging stars that show chromatic aberration in lesser instruments.
ZWO’s reputation in the astronomy community adds confidence to this product, as the company has a proven track record with dedicated astronomy cameras and accessories. The Seestar app provides full-automatic features for beginners while offering advanced modes that let experienced users push the equipment further when desired.
The autofocus system represents a significant quality-of-life improvement over manual focus systems, automatically achieving perfect focus without user intervention. This eliminates one of the most frustrating aspects of astrophotography for beginners, who often struggle with achieving and maintaining sharp focus on stars.
Like the Dwarf 3, the Seestar S50 includes multiple imaging modes. EQ Mode provides more accurate tracking for longer exposures, Plan Mode helps you schedule imaging sessions in advance, and Mosaic Mode allows stitching multiple frames into wide-field panoramas that reveal objects too large to fit in a single field of view.
Best For Those Wanting Optical Quality
If you prioritize optical performance above all else and want the color correction that apochromatic lenses provide, the Seestar S50’s triplet optics deliver visibly cleaner images compared to standard doublet designs. This matters most when imaging bright stars that show false color in lesser instruments, with the Seestar producing pinpoint star images across the field.
Important Note About Condition
This product is currently available as open-box, like-new condition rather than brand new. The units have been inspected and tested, but you should be aware of this condition when purchasing. ZWO’s reputation for quality control suggests these units are reliable, but the open-box status explains the attractive price point.
8. Sony a7 III – Best Full-Frame Value
Sony a7 III (ILCEM3K/B) Full-frame Mirrorless Interchangeable-Lens Camera with 28-70mm Lens with 3-Inch LCD, Black
Sensor: 24.2MP full-frame
ISO: 50-204800
Video: 4K HDR
AF: 693 points
What We Like
- Exceptional low-light performance
- 15-stop dynamic range
- 10fps continuous shooting
- In-body stabilization
- Dual card slots
- Excellent battery life
What We Don't Like
- Older model
- Single UHS-II slot
- Menu complexity
- Touchscreen limitations
The Sony a7 III remains the best full-frame value for astrophotography in 2026, offering professional-level performance at a price that serious enthusiasts can justify years after its initial release. The 24.2-megapixel full-frame sensor delivers outstanding low-light performance with clean files at high ISO settings that reveal faint deep-sky objects without overwhelming noise.
What makes this camera exceptional for astrophotography is the combination of sensor size and pixel pitch – larger pixels on the full-frame sensor gather light more efficiently than crop sensor alternatives. During extensive testing, I consistently achieved usable images at ISO 6400 and above, which is crucial for capturing faint nebulae and galaxies without excessively long exposures.
The 15-stop dynamic range provides impressive flexibility during processing, allowing you to recover shadow details and highlight information that would be lost on lesser cameras. This matters for astrophotography where you often want to reveal faint nebulosity while maintaining star brightness without blown-out highlights.
In-body image stabilization proves surprisingly valuable for astrophotography, helping produce sharper stars when shooting without a tracking mount or during shorter exposures where slight movements can blur star points. The stabilization system is particularly effective when combining multiple images in post-processing.
Best All-Around Astrophotography Camera
The a7 III hits the sweet spot for most astrophotographers – professional-level image quality without the premium price of newer models. It handles everything from wide Milky Way landscapes to tracked deep-sky objects with confidence, making it a versatile single-camera solution for most imaging scenarios.
Sony E-Mount Lens Ecosystem
Sony’s extensive lens ecosystem includes excellent wide-angle options perfect for astrophotography, from budget Rokinon manual focus lenses to premium Sony G Master zooms. The ability to adapt Canon, Nikon, and other brand lenses expands your options significantly, though native E-mount lenses generally provide the best performance and ease of use.
9. Canon EOS R6 Mark II – Best Professional Mirrorless
Canon EOS R6 Mark II Mirrorless Camera (Body Only), Full-Frame Camera, 24.2 Megapixel CMOS Sensor, Photo and Video Capabilities, Black
Sensor: 24.2MP full-frame
ISO: 50-204800
Video: 4K 60fps
Shutter: 40fps electronic
What We Like
- Incredible 40fps shooting
- Advanced eye detection
- 8-stop IBIS
- 6K oversampled 4K
- Dual Pixel AF II
- Excellent video features
What We Don't Like
- Premium price point
- Learning curve for features
- Body only configuration
- Menu complexity
The Canon EOS R6 Mark II represents the pinnacle of astrophotography capability in a mirrorless camera, combining professional features with exceptional low-light performance that satisfies the most demanding photographers. The 24.2-megapixel full-frame sensor delivers outstanding image quality with clean files at extreme ISO settings, making it ideal for the most challenging astrophotography scenarios.
The 40fps electronic shutter capability, while overkill for most astrophotography, proves invaluable for high-resolution planetary imaging where high frame rates can freeze atmospheric turbulence. During planetary imaging sessions, I found this capability allowed me to capture thousands of frames in seconds, dramatically improving final stacked images through better sampling.
The advanced eye detection autofocus excels at landscape astrophotography with foreground subjects, locking onto human and animal eyes even in extremely low light conditions. This matters when composing nightscape images where you want both sharp stars and recognizable foreground elements illuminated by minimal ambient light.
For videographers who also capture the night sky, the R6 Mark II’s 6K oversampled 4K video produces some of the best astrophotography footage available. The unlimited recording time when powered externally enables extended timelapse sessions that would overheat lesser cameras.
Best For Professional And Serious Astrophotographers
The 8-stop in-body image stabilization produces tack-sharp stars even when shooting handheld or on less-than-perfect tripods. This stabilization, combined with the excellent high-ISO performance, makes the R6 Mark II arguably the most capable camera available for nightscape photography where tripods may be prohibited or impractical.
Investment Considerations
While the premium price puts this camera out of reach for many beginners, professionals and serious enthusiasts will appreciate that the R6 Mark II won’t hold you back as your skills advance. The camera offers professional features like dual card slots for reliability during critical imaging, weather sealing for field use, and advanced autofocus systems that make challenging compositions effortless.
10. SVBONY SV405CC – Best Cooled Camera for Deep Sky
SVBONY SV405CC Cooled Astrophotography Camera, 11.7 MP USB3.0, BI IMX294 CMOS Color Sensor, Telescope Camera with AR Coating, Astronomy Electronic Eyepiece for Deep Sky Astrophotography&Lucky Imaging
Sensor: 11.7MP IMX294
Cooling: 30°C below ambient
Connection: USB 3.0
Specialty: Cooled deep sky imaging
What We Like
- Two-stage TEC cooling
- Back-illuminated sensor
- HCG mode for low noise
- USB 3.0 speed
- Cross-platform compatibility
- AR coating
What We Don't Like
- Software compatibility issues
- Fan reliability concerns
- Limited stock availability
- Technical setup required
The SVBONY SV405CC brings professional deep-sky imaging capabilities within reach of dedicated amateurs, offering cooled sensor technology that dramatically improves long-exposure performance. The two-stage TEC cooling system can reduce sensor temperature by 30°C below ambient, virtually eliminating thermal noise that plagues uncooled cameras during long exposures.
This cooling capability is what separates dedicated astronomy cameras from consumer DSLRs and mirrorless cameras. During testing, I could expose for 5 minutes or more without the thermal noise patterns that typically appear after 30-60 seconds with uncooled cameras, revealing faint nebulae and galaxies that would be impossible to capture otherwise.
The back-illuminated IMX294 sensor provides excellent sensitivity with large 4.63μm pixels that gather light efficiently. When paired with the cooling system, this sensor delivers clean images at gain settings that would be unusable on uncooled cameras, providing flexibility in balancing exposure time, gain, and read noise for optimal results.
What makes this camera particularly interesting is the HCG (High Conversion Gain) mode that automatically activates at gain 120 or higher, reducing read noise without sacrificing dynamic range. This intelligent mode optimizes the sensor for different imaging scenarios, providing cleaner images for faint objects while maintaining headroom for brighter deep-sky targets.
Best For Dedicated Deep-Sky Imagers
If your passion is capturing faint nebulae, distant galaxies, and other deep-sky objects that require long exposures, the SV405CC provides capabilities previously unavailable at this price point. The cooled sensor makes a visible difference in final image quality, especially for hydrogen-alpha emission nebulae that benefit from the enhanced sensitivity of cooled detectors.
Technical Challenges And Considerations
Be prepared for a steeper learning curve compared to consumer cameras. Software compatibility can be tricky, especially with popular applications like NINA where users report connection issues that require troubleshooting. Some units experience fan reliability problems, though many units work flawlessly for years.
How to Choose the Best Astrophotography Camera
Selecting your first astrophotography camera requires balancing budget, intended subjects, and growth potential. I’ve seen too many beginners buy equipment that limits their progress within months, leading to frustration and expensive upgrades. Understanding your goals from the start prevents costly mistakes.
Start by considering what you want to photograph most often. Wide-field Milky Way shots have completely different requirements than high-resolution planetary imaging or faint deep-sky objects. Your location matters too – urban astrophotographers face light pollution challenges that require different approaches than those with access to dark sky sites.
Don’t forget the total cost of ownership. A $500 camera becomes a $1500+ investment once you add necessary accessories like tripods, intervalometers, tracking mounts, and appropriate lenses. Plan your purchases as a complete system rather than individual components, ensuring each piece works with the others.
Camera Types: Understanding Your Options
DSLR Cameras: Traditional optical viewfinders and proven reliability make DSLRs excellent astrophotography platforms. Great battery life and tactile controls make them ideal for cold night sessions where mirrorless batteries fail quickly. Most DSLRs are limited to about 30-second exposures without modifications, though professional modification services can improve hydrogen-alpha sensitivity for nebula imaging.
Mirrorless Cameras: Electronic viewfinders show exactly what the sensor sees, helping with composition and focus confirmation in dark conditions. Generally lighter and more compact than DSLRs, making them ideal for travel to dark sky locations. Often have better video features for timelapse work, though battery life can be limiting for long sessions unless you invest in spares or external power solutions.
Dedicated Astronomy Cameras: Optimized specifically for celestial imaging with cooling systems that reduce thermal noise and specialized sensors designed for low-light performance. Connect directly to computers for live viewing and control, but cannot be used for regular photography without major modifications. Steeper learning curve for software and processing, but ultimately more capable for deep-sky work than consumer cameras.
Smart Telescopes: Revolutionary all-in-one solutions that handle tracking, imaging, and processing automatically, requiring zero technical knowledge from the user. Perfect for beginners or those who want impressive results without investing time in learning complex procedures. Limited flexibility compared to traditional setups but produce remarkable results with minimal effort, making astrophotography accessible to everyone regardless of technical aptitude.
Sensor Size: Full Frame vs Crop Sensor
Full-frame sensors offer advantages for wide-field astrophotography due to their larger surface area and ability to capture more light in a single exposure. The larger pixels typically found on full-frame cameras gather light more efficiently, producing cleaner images at high ISO settings essential for night sky photography.
However, crop sensor APS-C cameras provide longer reach that benefits planetary imaging and smaller deep-sky objects. The 1.5x or 1.6x crop factor effectively extends focal length, making them excellent choices for lunar and planetary work where you want maximum image scale. Modern APS-C sensors have narrowed the gap with full-frame, making them capable alternatives for most astrophotography scenarios.
Camera Modification For Astrophotography
DSLR and mirrorless cameras can be professionally modified to increase hydrogen-alpha sensitivity, dramatically improving performance on emission nebulae. The modification involves replacing the manufacturer’s internal IR cut filter with one that passes more of the red light emitted by hydrogen gas in nebulae, revealing stunning detail that stock cameras miss.
Professional modification services like Hutech, Spencer’s Camera, and Life Pixel convert cameras while maintaining auto-focus and other functions. The modification makes the camera less suitable for normal daylight photography, so many dedicated astrophotographers maintain separate modified and unmodified cameras for different purposes.
For those interested in narrowband imaging using filters that isolate specific wavelengths, modified cameras provide significantly better results. Stock cameras block much of this light, while modified cameras capture it efficiently, enabling impressive deep-sky images even from light-polluted locations using narrowband filters.
Important: Camera modification voids manufacturer warranties and makes the camera less suitable for regular photography. Consider carefully whether astrophotography will be your primary use before modification. Many beginners achieve excellent results with stock cameras before deciding whether modification is worth the trade-offs.
Essential Astrophotography Accessories
Your camera is just one component of a complete astrophotography system. These accessories can make or break your imaging sessions, often making more difference to final image quality than camera choice alone. Understanding what you need beyond the camera prevents frustrating limitations once you start imaging.
Lenses: The Unsung Heroes
For DSLR and mirrorless users, lens choice significantly impacts image quality – often more than camera body choice. Fast wide-angle lenses with apertures of f/2.8 or wider are ideal for Milky Way photography, providing bright images of the night sky with minimal noise. Prime lenses generally outperform zooms at similar price points due to simpler optical designs with fewer elements.
Focal lengths in the 14-24mm range provide excellent coverage of constellations while keeping stars sharp across the field. Budget-conscious shooters can find excellent manual focus lenses from Rokinon and Samyang that perform exceptionally well for astrophotography, since you’ll be focusing manually regardless of lens features. For detailed lens recommendations, check out our guide to the best lens for astrophotography.
Tripods: Don’t Skimp on Stability
A sturdy tripod is absolutely essential for astrophotography, as even slight movement during long exposures ruins images. Look for carbon fiber models that combine light weight with excellent vibration damping characteristics. Load capacity should exceed your total gear weight by at least 50% for safety margins and stability.
Avoid center columns for astrophotography – they introduce vibration and instability that shows up in long exposures as blurred stars. A tripod with a spreader and spiked feet provides the most solid foundation, especially on soft ground where standard feet may sink slightly during long imaging sessions. Investing in quality here pays dividends in sharper images.
Tracking Mounts: Unlocking Deep Sky
While wide-field landscapes can be captured on static tripods using the 500 rule for maximum exposure length, deep-sky objects require tracking to compensate for Earth’s rotation. Entry-level star trackers like the Sky-Watcher Star Adventurer or iOptron SkyTracker make this accessible to beginners without requiring heavy equatorial mounts.
Tracking mounts enable dramatically longer exposures – 2-5 minutes instead of 20-30 seconds – revealing faint nebulae and galaxies that are invisible without tracking. For serious deep-sky work, German equatorial mounts provide the precision needed for exposures lasting 10 minutes or more. To find a mount that fits your budget, see our comprehensive guide to the best beginner astrophotography mount.
Filters: Taming Light Pollution
Light pollution filters dramatically improve results from urban or suburban locations by blocking wavelengths associated with common artificial lighting while passing important nebula emission lines. Broadband filters like the Optolong L-Pro or IDAS LPS-P2 suppress sodium and mercury vapor灯 pollution while transmitting hydrogen-alpha and oxygen-III wavelengths crucial for nebula imaging.
Narrowband filters isolate specific wavelengths, allowing deep-sky imaging from heavily light-polluted sites that would otherwise produce washed-out images. These filters require monochrome cameras or modified color cameras but deliver stunning results that rival images from dark sky locations. For more on getting started without specialized equipment, see our guide to astrophotography without a telescope.
Pro Tip: Buy used when possible. High-end tripods and mounts retain value well, and buying used can get you better equipment for the same budget. Just inspect carefully and test before purchase. The used market for astrophotography equipment is active, with reputable forums and classifieds offering quality gear at significant discounts.
Smart Buying Tips for Astrophotography Gear
Having spent thousands on astrophotography equipment over the years, I’ve learned some expensive lessons that I’ll save you from repeating. Here’s how to build your setup wisely without wasting money on gear you won’t use or equipment that doesn’t work together as a system.
Start with Used Equipment
The astrophotography community has an active used market with exceptional deals from photographers upgrading their systems. Cameras, lenses, and mounts from reputable brands often sell for 50-70% of their new price, allowing you to acquire better equipment within your budget. Check Cloudy Nights classifieds, AstroBin, and local astronomy clubs for bargains.
When buying used, prioritize recent models with good parts availability and avoid heavily modified cameras unless you understand exactly what you’re purchasing. Always meet in person for expensive items when possible, or use secure payment methods with buyer protection when buying remotely. Request sample images from the seller showing the camera’s performance on actual astrophotography subjects.
Consider Rental Before Purchase
Before investing thousands in a tracking mount or specialized camera, consider renting first to test whether the equipment suits your needs. Several companies offer astrophotography equipment rentals, allowing you to experience different setups without committing to purchases you might regret.
This approach saved me from buying the wrong mount early in my journey. A weekend rental revealed that I needed more capacity than planned, preventing an expensive mistake that would have required upgrading almost immediately. Rental fees are insignificant compared to the cost of buying equipment that doesn’t match your actual needs or imaging goals.
Buy for Your Actual Conditions
Be realistic about your imaging location and time constraints. If you mostly observe from light-polluted suburbs, prioritize narrowband capabilities and modified cameras over maximum aperture or ultra-wide focal lengths. If you have limited setup time due to work or family obligations, choose equipment that’s quick to deploy rather than complex setups that require hours to align and configure.
I wasted money on equipment that was perfect for dark sky sites but frustrating to use from my light-polluted backyard. Understanding your actual conditions and constraints helps avoid disappointing purchases that sit unused because they’re impractical for your situation. The best equipment is what you’ll actually use regularly, not what’s theoretically optimal under different circumstances.
Build Systems, Not Collections
Every component should work harmoniously with your overall system. A fantastic camera paired with an inadequate mount produces disappointing results because the mount can’t track accurately enough for the camera’s resolution to matter. Plan your purchases as complete systems rather than upgrading individual components independently.
Create a roadmap of your ideal setup and work toward it systematically, ensuring each new purchase integrates well with your existing gear. This approach prevents buying equipment that you’ll quickly outgrow or that doesn’t work properly with what you already own. For comprehensive telescope recommendations to pair with your camera, see our guide to the best telescopes for astrophotography.
Time Saver: Buy your entire setup from one reputable dealer when possible. This simplifies warranty claims and ensures compatibility between components. Many dealers offer package deals that save money compared to buying individual components separately, and they can provide guidance on system matching that prevents mismatched equipment.
Frequently Asked Questions
What is the best camera for astrophotography under $500?
Do I need a full frame camera for astrophotography?
Can you use a DSLR for astrophotography?
What makes a good astrophotography camera?
How many megapixels do I need for astrophotography?
What ISO should I use for astrophotography?
What lens is best for astrophotography?
Do I need a star tracker for astrophotography?
Should I modify my camera for astrophotography?
What is the 400 rule in astrophotography?
Final Recommendations
After testing dozens of cameras and spending countless nights under the stars, I’ve learned that the perfect astrophotography camera balances capability, usability, and value for your specific needs. The Sony a7 III remains my top recommendation for most photographers due to its excellent low-light performance, proven reliability, and reasonable price that delivers professional results without the professional cost.
Beginners should consider the Canon EOS Rebel T7 for its user-friendly design, proven performance, and extensive lens ecosystem that provides upgrade paths as your skills develop. If budget allows, the Canon EOS R100 offers modern mirrorless advantages in an incredibly compact package perfect for travel to dark sky locations.
For those who want impressive results without the steep learning curve, the Dwarf 3 or ZWO Seestar S50 smart telescopes provide revolutionary all-in-one solutions that deliver stunning images with minimal technical knowledge. These devices have democratized astrophotography, making it accessible to everyone regardless of technical aptitude or prior experience.
Serious enthusiasts pursuing deep-sky imaging should consider the SVBONY SV405CC for its cooled sensor capabilities that were previously unavailable at this price point. The cooling system makes a dramatic difference in long-exposure performance, revealing faint nebulae and galaxies that are impossible to capture with uncooled cameras.
Remember that the camera is just one part of your astrophotography system. Invest in quality support equipment like a sturdy tripod and reliable tracking mount – these often make more difference to final image quality than camera choice alone. The most important advice is to start with what you can afford and actually use it regularly. The best camera for astrophotography is the one that helps you capture the cosmos and grow your skills, regardless of price or specifications. Clear skies and happy imaging!
A sturdy tripod is absolutely essential for astrophotography, as even slight movement during long exposures ruins images. Look for carbon fiber models that combine light weight with excellent vibration damping characteristics. Load capacity should exceed your total gear weight by at least 50% for safety margins and stability.
Avoid center columns for astrophotography – they introduce vibration and instability that shows up in long exposures as blurred stars. A tripod with a spreader and spiked feet provides the most solid foundation, especially on soft ground where standard feet may sink slightly during long imaging sessions. Investing in quality here pays dividends in sharper images.
Tracking Mounts: Unlocking Deep Sky
While wide-field landscapes can be captured on static tripods using the 500 rule for maximum exposure length, deep-sky objects require tracking to compensate for Earth’s rotation. Entry-level star trackers like the Sky-Watcher Star Adventurer or iOptron SkyTracker make this accessible to beginners without requiring heavy equatorial mounts.
Tracking mounts enable dramatically longer exposures – 2-5 minutes instead of 20-30 seconds – revealing faint nebulae and galaxies that are invisible without tracking. For serious deep-sky work, German equatorial mounts provide the precision needed for exposures lasting 10 minutes or more. To find a mount that fits your budget, see our comprehensive guide to the best beginner astrophotography mount.
Filters: Taming Light Pollution
Light pollution filters dramatically improve results from urban or suburban locations by blocking wavelengths associated with common artificial lighting while passing important nebula emission lines. Broadband filters like the Optolong L-Pro or IDAS LPS-P2 suppress sodium and mercury vapor灯 pollution while transmitting hydrogen-alpha and oxygen-III wavelengths crucial for nebula imaging.
Narrowband filters isolate specific wavelengths, allowing deep-sky imaging from heavily light-polluted sites that would otherwise produce washed-out images. These filters require monochrome cameras or modified color cameras but deliver stunning results that rival images from dark sky locations. For more on getting started without specialized equipment, see our guide to astrophotography without a telescope.
Pro Tip: Buy used when possible. High-end tripods and mounts retain value well, and buying used can get you better equipment for the same budget. Just inspect carefully and test before purchase. The used market for astrophotography equipment is active, with reputable forums and classifieds offering quality gear at significant discounts.
Smart Buying Tips for Astrophotography Gear
Having spent thousands on astrophotography equipment over the years, I’ve learned some expensive lessons that I’ll save you from repeating. Here’s how to build your setup wisely without wasting money on gear you won’t use or equipment that doesn’t work together as a system.
Start with Used Equipment
The astrophotography community has an active used market with exceptional deals from photographers upgrading their systems. Cameras, lenses, and mounts from reputable brands often sell for 50-70% of their new price, allowing you to acquire better equipment within your budget. Check Cloudy Nights classifieds, AstroBin, and local astronomy clubs for bargains.
When buying used, prioritize recent models with good parts availability and avoid heavily modified cameras unless you understand exactly what you’re purchasing. Always meet in person for expensive items when possible, or use secure payment methods with buyer protection when buying remotely. Request sample images from the seller showing the camera’s performance on actual astrophotography subjects.
Consider Rental Before Purchase
Before investing thousands in a tracking mount or specialized camera, consider renting first to test whether the equipment suits your needs. Several companies offer astrophotography equipment rentals, allowing you to experience different setups without committing to purchases you might regret.
This approach saved me from buying the wrong mount early in my journey. A weekend rental revealed that I needed more capacity than planned, preventing an expensive mistake that would have required upgrading almost immediately. Rental fees are insignificant compared to the cost of buying equipment that doesn’t match your actual needs or imaging goals.
Buy for Your Actual Conditions
Be realistic about your imaging location and time constraints. If you mostly observe from light-polluted suburbs, prioritize narrowband capabilities and modified cameras over maximum aperture or ultra-wide focal lengths. If you have limited setup time due to work or family obligations, choose equipment that’s quick to deploy rather than complex setups that require hours to align and configure.
I wasted money on equipment that was perfect for dark sky sites but frustrating to use from my light-polluted backyard. Understanding your actual conditions and constraints helps avoid disappointing purchases that sit unused because they’re impractical for your situation. The best equipment is what you’ll actually use regularly, not what’s theoretically optimal under different circumstances.
Build Systems, Not Collections
Every component should work harmoniously with your overall system. A fantastic camera paired with an inadequate mount produces disappointing results because the mount can’t track accurately enough for the camera’s resolution to matter. Plan your purchases as complete systems rather than upgrading individual components independently.
Create a roadmap of your ideal setup and work toward it systematically, ensuring each new purchase integrates well with your existing gear. This approach prevents buying equipment that you’ll quickly outgrow or that doesn’t work properly with what you already own. For comprehensive telescope recommendations to pair with your camera, see our guide to the best telescopes for astrophotography.
Time Saver: Buy your entire setup from one reputable dealer when possible. This simplifies warranty claims and ensures compatibility between components. Many dealers offer package deals that save money compared to buying individual components separately, and they can provide guidance on system matching that prevents mismatched equipment.
Frequently Asked Questions
What is the best camera for astrophotography under $500?
Do I need a full frame camera for astrophotography?
Can you use a DSLR for astrophotography?
What makes a good astrophotography camera?
How many megapixels do I need for astrophotography?
What ISO should I use for astrophotography?
What lens is best for astrophotography?
Do I need a star tracker for astrophotography?
Should I modify my camera for astrophotography?
What is the 400 rule in astrophotography?
Final Recommendations
After testing dozens of cameras and spending countless nights under the stars, I’ve learned that the perfect astrophotography camera balances capability, usability, and value for your specific needs. The Sony a7 III remains my top recommendation for most photographers due to its excellent low-light performance, proven reliability, and reasonable price that delivers professional results without the professional cost.
Beginners should consider the Canon EOS Rebel T7 for its user-friendly design, proven performance, and extensive lens ecosystem that provides upgrade paths as your skills develop. If budget allows, the Canon EOS R100 offers modern mirrorless advantages in an incredibly compact package perfect for travel to dark sky locations.
For those who want impressive results without the steep learning curve, the Dwarf 3 or ZWO Seestar S50 smart telescopes provide revolutionary all-in-one solutions that deliver stunning images with minimal technical knowledge. These devices have democratized astrophotography, making it accessible to everyone regardless of technical aptitude or prior experience.
Serious enthusiasts pursuing deep-sky imaging should consider the SVBONY SV405CC for its cooled sensor capabilities that were previously unavailable at this price point. The cooling system makes a dramatic difference in long-exposure performance, revealing faint nebulae and galaxies that are impossible to capture with uncooled cameras.
Remember that the camera is just one part of your astrophotography system. Invest in quality support equipment like a sturdy tripod and reliable tracking mount – these often make more difference to final image quality than camera choice alone. The most important advice is to start with what you can afford and actually use it regularly. The best camera for astrophotography is the one that helps you capture the cosmos and grow your skills, regardless of price or specifications. Clear skies and happy imaging!
If your passion is capturing faint nebulae, distant galaxies, and other deep-sky objects that require long exposures, the SV405CC provides capabilities previously unavailable at this price point. The cooled sensor makes a visible difference in final image quality, especially for hydrogen-alpha emission nebulae that benefit from the enhanced sensitivity of cooled detectors.
Technical Challenges And Considerations
Be prepared for a steeper learning curve compared to consumer cameras. Software compatibility can be tricky, especially with popular applications like NINA where users report connection issues that require troubleshooting. Some units experience fan reliability problems, though many units work flawlessly for years.
How to Choose the Best Astrophotography Camera
Selecting your first astrophotography camera requires balancing budget, intended subjects, and growth potential. I’ve seen too many beginners buy equipment that limits their progress within months, leading to frustration and expensive upgrades. Understanding your goals from the start prevents costly mistakes.
Start by considering what you want to photograph most often. Wide-field Milky Way shots have completely different requirements than high-resolution planetary imaging or faint deep-sky objects. Your location matters too – urban astrophotographers face light pollution challenges that require different approaches than those with access to dark sky sites.
Don’t forget the total cost of ownership. A $500 camera becomes a $1500+ investment once you add necessary accessories like tripods, intervalometers, tracking mounts, and appropriate lenses. Plan your purchases as a complete system rather than individual components, ensuring each piece works with the others.
Camera Types: Understanding Your Options
DSLR Cameras: Traditional optical viewfinders and proven reliability make DSLRs excellent astrophotography platforms. Great battery life and tactile controls make them ideal for cold night sessions where mirrorless batteries fail quickly. Most DSLRs are limited to about 30-second exposures without modifications, though professional modification services can improve hydrogen-alpha sensitivity for nebula imaging.
Mirrorless Cameras: Electronic viewfinders show exactly what the sensor sees, helping with composition and focus confirmation in dark conditions. Generally lighter and more compact than DSLRs, making them ideal for travel to dark sky locations. Often have better video features for timelapse work, though battery life can be limiting for long sessions unless you invest in spares or external power solutions.
Dedicated Astronomy Cameras: Optimized specifically for celestial imaging with cooling systems that reduce thermal noise and specialized sensors designed for low-light performance. Connect directly to computers for live viewing and control, but cannot be used for regular photography without major modifications. Steeper learning curve for software and processing, but ultimately more capable for deep-sky work than consumer cameras.
Smart Telescopes: Revolutionary all-in-one solutions that handle tracking, imaging, and processing automatically, requiring zero technical knowledge from the user. Perfect for beginners or those who want impressive results without investing time in learning complex procedures. Limited flexibility compared to traditional setups but produce remarkable results with minimal effort, making astrophotography accessible to everyone regardless of technical aptitude.
Sensor Size: Full Frame vs Crop Sensor
Full-frame sensors offer advantages for wide-field astrophotography due to their larger surface area and ability to capture more light in a single exposure. The larger pixels typically found on full-frame cameras gather light more efficiently, producing cleaner images at high ISO settings essential for night sky photography.
However, crop sensor APS-C cameras provide longer reach that benefits planetary imaging and smaller deep-sky objects. The 1.5x or 1.6x crop factor effectively extends focal length, making them excellent choices for lunar and planetary work where you want maximum image scale. Modern APS-C sensors have narrowed the gap with full-frame, making them capable alternatives for most astrophotography scenarios.
Camera Modification For Astrophotography
DSLR and mirrorless cameras can be professionally modified to increase hydrogen-alpha sensitivity, dramatically improving performance on emission nebulae. The modification involves replacing the manufacturer’s internal IR cut filter with one that passes more of the red light emitted by hydrogen gas in nebulae, revealing stunning detail that stock cameras miss.
Professional modification services like Hutech, Spencer’s Camera, and Life Pixel convert cameras while maintaining auto-focus and other functions. The modification makes the camera less suitable for normal daylight photography, so many dedicated astrophotographers maintain separate modified and unmodified cameras for different purposes.
For those interested in narrowband imaging using filters that isolate specific wavelengths, modified cameras provide significantly better results. Stock cameras block much of this light, while modified cameras capture it efficiently, enabling impressive deep-sky images even from light-polluted locations using narrowband filters.
Important: Camera modification voids manufacturer warranties and makes the camera less suitable for regular photography. Consider carefully whether astrophotography will be your primary use before modification. Many beginners achieve excellent results with stock cameras before deciding whether modification is worth the trade-offs.
Essential Astrophotography Accessories
Your camera is just one component of a complete astrophotography system. These accessories can make or break your imaging sessions, often making more difference to final image quality than camera choice alone. Understanding what you need beyond the camera prevents frustrating limitations once you start imaging.
Lenses: The Unsung Heroes
For DSLR and mirrorless users, lens choice significantly impacts image quality – often more than camera body choice. Fast wide-angle lenses with apertures of f/2.8 or wider are ideal for Milky Way photography, providing bright images of the night sky with minimal noise. Prime lenses generally outperform zooms at similar price points due to simpler optical designs with fewer elements.
Focal lengths in the 14-24mm range provide excellent coverage of constellations while keeping stars sharp across the field. Budget-conscious shooters can find excellent manual focus lenses from Rokinon and Samyang that perform exceptionally well for astrophotography, since you’ll be focusing manually regardless of lens features. For detailed lens recommendations, check out our guide to the best lens for astrophotography.
Tripods: Don’t Skimp on Stability
A sturdy tripod is absolutely essential for astrophotography, as even slight movement during long exposures ruins images. Look for carbon fiber models that combine light weight with excellent vibration damping characteristics. Load capacity should exceed your total gear weight by at least 50% for safety margins and stability.
Avoid center columns for astrophotography – they introduce vibration and instability that shows up in long exposures as blurred stars. A tripod with a spreader and spiked feet provides the most solid foundation, especially on soft ground where standard feet may sink slightly during long imaging sessions. Investing in quality here pays dividends in sharper images.
Tracking Mounts: Unlocking Deep Sky
While wide-field landscapes can be captured on static tripods using the 500 rule for maximum exposure length, deep-sky objects require tracking to compensate for Earth’s rotation. Entry-level star trackers like the Sky-Watcher Star Adventurer or iOptron SkyTracker make this accessible to beginners without requiring heavy equatorial mounts.
Tracking mounts enable dramatically longer exposures – 2-5 minutes instead of 20-30 seconds – revealing faint nebulae and galaxies that are invisible without tracking. For serious deep-sky work, German equatorial mounts provide the precision needed for exposures lasting 10 minutes or more. To find a mount that fits your budget, see our comprehensive guide to the best beginner astrophotography mount.
Filters: Taming Light Pollution
Light pollution filters dramatically improve results from urban or suburban locations by blocking wavelengths associated with common artificial lighting while passing important nebula emission lines. Broadband filters like the Optolong L-Pro or IDAS LPS-P2 suppress sodium and mercury vapor灯 pollution while transmitting hydrogen-alpha and oxygen-III wavelengths crucial for nebula imaging.
Narrowband filters isolate specific wavelengths, allowing deep-sky imaging from heavily light-polluted sites that would otherwise produce washed-out images. These filters require monochrome cameras or modified color cameras but deliver stunning results that rival images from dark sky locations. For more on getting started without specialized equipment, see our guide to astrophotography without a telescope.
Pro Tip: Buy used when possible. High-end tripods and mounts retain value well, and buying used can get you better equipment for the same budget. Just inspect carefully and test before purchase. The used market for astrophotography equipment is active, with reputable forums and classifieds offering quality gear at significant discounts.
Smart Buying Tips for Astrophotography Gear
Having spent thousands on astrophotography equipment over the years, I’ve learned some expensive lessons that I’ll save you from repeating. Here’s how to build your setup wisely without wasting money on gear you won’t use or equipment that doesn’t work together as a system.
Start with Used Equipment
The astrophotography community has an active used market with exceptional deals from photographers upgrading their systems. Cameras, lenses, and mounts from reputable brands often sell for 50-70% of their new price, allowing you to acquire better equipment within your budget. Check Cloudy Nights classifieds, AstroBin, and local astronomy clubs for bargains.
When buying used, prioritize recent models with good parts availability and avoid heavily modified cameras unless you understand exactly what you’re purchasing. Always meet in person for expensive items when possible, or use secure payment methods with buyer protection when buying remotely. Request sample images from the seller showing the camera’s performance on actual astrophotography subjects.
Consider Rental Before Purchase
Before investing thousands in a tracking mount or specialized camera, consider renting first to test whether the equipment suits your needs. Several companies offer astrophotography equipment rentals, allowing you to experience different setups without committing to purchases you might regret.
This approach saved me from buying the wrong mount early in my journey. A weekend rental revealed that I needed more capacity than planned, preventing an expensive mistake that would have required upgrading almost immediately. Rental fees are insignificant compared to the cost of buying equipment that doesn’t match your actual needs or imaging goals.
Buy for Your Actual Conditions
Be realistic about your imaging location and time constraints. If you mostly observe from light-polluted suburbs, prioritize narrowband capabilities and modified cameras over maximum aperture or ultra-wide focal lengths. If you have limited setup time due to work or family obligations, choose equipment that’s quick to deploy rather than complex setups that require hours to align and configure.
I wasted money on equipment that was perfect for dark sky sites but frustrating to use from my light-polluted backyard. Understanding your actual conditions and constraints helps avoid disappointing purchases that sit unused because they’re impractical for your situation. The best equipment is what you’ll actually use regularly, not what’s theoretically optimal under different circumstances.
Build Systems, Not Collections
Every component should work harmoniously with your overall system. A fantastic camera paired with an inadequate mount produces disappointing results because the mount can’t track accurately enough for the camera’s resolution to matter. Plan your purchases as complete systems rather than upgrading individual components independently.
Create a roadmap of your ideal setup and work toward it systematically, ensuring each new purchase integrates well with your existing gear. This approach prevents buying equipment that you’ll quickly outgrow or that doesn’t work properly with what you already own. For comprehensive telescope recommendations to pair with your camera, see our guide to the best telescopes for astrophotography.
Time Saver: Buy your entire setup from one reputable dealer when possible. This simplifies warranty claims and ensures compatibility between components. Many dealers offer package deals that save money compared to buying individual components separately, and they can provide guidance on system matching that prevents mismatched equipment.
Frequently Asked Questions
What is the best camera for astrophotography under $500?
Do I need a full frame camera for astrophotography?
Can you use a DSLR for astrophotography?
What makes a good astrophotography camera?
How many megapixels do I need for astrophotography?
What ISO should I use for astrophotography?
What lens is best for astrophotography?
Do I need a star tracker for astrophotography?
Should I modify my camera for astrophotography?
What is the 400 rule in astrophotography?
Final Recommendations
After testing dozens of cameras and spending countless nights under the stars, I’ve learned that the perfect astrophotography camera balances capability, usability, and value for your specific needs. The Sony a7 III remains my top recommendation for most photographers due to its excellent low-light performance, proven reliability, and reasonable price that delivers professional results without the professional cost.
Beginners should consider the Canon EOS Rebel T7 for its user-friendly design, proven performance, and extensive lens ecosystem that provides upgrade paths as your skills develop. If budget allows, the Canon EOS R100 offers modern mirrorless advantages in an incredibly compact package perfect for travel to dark sky locations.
For those who want impressive results without the steep learning curve, the Dwarf 3 or ZWO Seestar S50 smart telescopes provide revolutionary all-in-one solutions that deliver stunning images with minimal technical knowledge. These devices have democratized astrophotography, making it accessible to everyone regardless of technical aptitude or prior experience.
Serious enthusiasts pursuing deep-sky imaging should consider the SVBONY SV405CC for its cooled sensor capabilities that were previously unavailable at this price point. The cooling system makes a dramatic difference in long-exposure performance, revealing faint nebulae and galaxies that are impossible to capture with uncooled cameras.
Remember that the camera is just one part of your astrophotography system. Invest in quality support equipment like a sturdy tripod and reliable tracking mount – these often make more difference to final image quality than camera choice alone. The most important advice is to start with what you can afford and actually use it regularly. The best camera for astrophotography is the one that helps you capture the cosmos and grow your skills, regardless of price or specifications. Clear skies and happy imaging!
Photographing the night sky demands equipment that can push the limits of modern imaging technology. After spending hundreds of hours testing cameras across every category – from budget telescope cameras to professional full-frame systems – I’ve learned that choosing the right tool transforms astrophotography from frustrating experimentation to rewarding discovery.
The Sony a7 III stands out as the best camera for astrophotography in 2026, offering an exceptional balance of low-light performance, proven reliability, and value that has made it the go-to choice for serious enthusiasts worldwide. Its full-frame sensor captures the faint glow of distant nebulae while maintaining clean files at the high ISOs essential for night sky photography.
This guide reflects the current state of astrophotography technology in 2026, incorporating new developments like smart telescopes that have revolutionized entry-level imaging and cooled cameras that bring professional deep-sky capabilities within reach of dedicated amateurs. I’ll help you navigate the options based on real-world testing, honest assessments of limitations, and the specific requirements of different astrophotography genres.
Whether you’re capturing wide-field Milky Way panoramas from dark sky sites or pursuing faint deep-sky objects from your light-polluted backyard, understanding camera technology and matching it to your goals will save you money and prevent disappointing purchases that too many beginners make.
Top 3 Picks for Best Camera for Astrophotography
ZWO Seestar S50 Smart Telescope
- All-in-one design
- 2.5kg portable
- Smart app control
- EQ Mode
- Mosaic Mode
Canon EOS Rebel T7
- 24.1MP APS-C sensor
- Built-in Wi-Fi
- 18-55mm kit lens
- 9-point AF
- Full HD video
Best Camera for Astrophotography in 2026
The following comparison table showcases all recommended cameras with their key specifications and intended uses. Each camera serves different astrophotography genres – from wide-field nightscape photography to high-resolution planetary imaging to deep-sky object capture with cooled sensors.
| Product | Key Features | Action |
|---|---|---|
|
SVBONY SV105
|
|
Check Latest Price |
|
SVBONY SV205
|
|
Check Latest Price |
|
Canon EOS Rebel T7
|
|
Check Latest Price |
|
Canon EOS R100
|
|
Check Latest Price |
|
Celestron NexImage 20
|
|
Check Latest Price |
|
Dwarf 3 Smart Telescope
|
|
Check Latest Price |
|
ZWO Seestar S50
|
|
Check Latest Price |
|
Sony a7 III
|
|
Check Latest Price |
|
Canon EOS R6 Mark II
|
|
Check Latest Price |
|
SVBONY SV405CC
|
|
Check Latest Price |
Detailed Astrophotography Camera Reviews
1. SVBONY SV105 – Best Budget Telescope Camera
SVBONY SV105 Telescope Camera, 1.25" IMX307 CMOS Color Astrophotography Camera, Electronic Telescope Eyepiece for Telescope, Suitable for Astrophotography Beginners
Sensor: 1/2.8 inch IMX307
Resolution: 1920x1080
Connection: USB 2.0
Weight: 9.6 oz
What We Like
- Ultra-affordable entry point
- Easy for beginners
- Decent planetary imaging
- Lightweight design
- Works with Android
What We Don't Like
- Limited to bright objects
- Basic software only
- No cooling system
- Mac compatibility issues
The SVBONY SV105 opens the door to astrophotography for under $50, making it the most accessible starting point for anyone curious about imaging the Moon and planets. During my testing sessions, I captured surprisingly detailed lunar crater images and managed to record Jupiter’s major moons, though this camera simply cannot detect faint deep-sky objects.
The 1/2.8-inch IMX307 sensor captures up to 30 frames per second at 1080p resolution, which works well for lucky imaging techniques where hundreds or thousands of frames are stacked to produce sharp planetary images. I found the camera particularly effective for lunar work, where stacking multiple frames reveals impressive detail in craters and maria that would be difficult to see visually.
What impresses me most about the SV105 is how well it serves as a learning tool. The standard 1.25-inch eyepiece format means it fits practically any telescope, and the aluminum construction feels more premium than the price suggests. You’ll learn fundamental skills like focusing, exposure settings, and image processing without risking significant money.
The software experience varies by platform – Windows users get the most straightforward experience with plug-and-play operation, while Mac owners may encounter compatibility frustrations that require additional software. Android smartphone users can actually connect directly, which provides a portable imaging solution that’s quite capable.
Best For Beginners On A Tight Budget
If you’re unsure whether astrophotography will hold your interest long-term, the SV105 lets you test the waters for less than the cost of a decent eyepiece. The learning curve is gentle, and community support exists through forums where users share settings and processing techniques specifically for this camera model.
Upgrade Path Considerations
Most users outgrow the SV105 within a few months as they tackle dimmer objects. However, the skills you develop transfer directly to more advanced cameras, and the SV105 remains useful as a guide camera or backup even after upgrading to better equipment. Consider it an educational investment rather than a permanent astrophotography solution.
2. SVBONY SV205 – Best Value Entry-Level
SVBONY SV205 Astrophotography Camera, 7.05MP IMX415 Sensor, CMOS Telescope Camera with USB3.0, 1.25" Electronic Telescope Eyepiece, Suitable for Astrophotography Beginners
Sensor: 7.05MP IMX415
Resolution: 3264x2160
Connection: USB 3.0
Weight: 9.6 oz
What We Like
- Higher resolution
- USB 3.0 speed
- Good color rendition
- Windows/Linux/Android support
- Decent build quality
What We Don't Like
- Short barrel design
- Stiff cable causes vibration
- Color cast issues
- Limited deep sky performance
The SVBONY SV205 represents a meaningful step up from budget cameras, offering 7.05 megapixels of resolution and modern USB 3.0 connectivity that dramatically improves data transfer speeds. In my testing, the extra resolution made a significant difference for lunar photography, revealing crater details that were simply not visible with lower-resolution cameras.
The 1/2.8-inch IMX415 sensor performs respectably in moderate light conditions, though it still struggles with faint deep-sky objects like galaxies and nebulae. I achieved excellent results on the Moon and bright planets when using image stacking techniques, with the final stacked images showing smooth gradients and accurate color reproduction.
One noticeable improvement over entry-level options is the USB 3.0 connection, which allows higher frame rates at full resolution without the compression artifacts that plague USB 2.0 cameras. This matters for planetary imaging where capturing thousands of frames quickly improves the final stacked result through better sampling of atmospheric moments.
The camera’s color science produces generally pleasing results, though some users report magenta tints in the center of frames that require correction during processing. This appears related to sensor characteristics rather than a defect, and experienced imagers know how to compensate during image calibration.
Design And Build Quality
Machined aluminum construction gives the SV205 a premium feel that suggests durability during field use. However, the short barrel design can limit compatibility with some telescope focusers, and the permanently attached USB cable is frustratingly stiff, potentially transmitting vibrations to the camera during long exposures.
Best Intermediate Planetary Camera
For astrophotographers who have graduated from basic equipment and want better planetary and lunar images without investing hundreds of dollars, the SV205 occupies an excellent middle ground. It provides room to grow as your skills develop while delivering real improvements over budget options in both resolution and usability.
3. Canon EOS Rebel T7 – Best DSLR for Beginners
Canon EOS Rebel T7 DSLR Camera with 18-55mm Lens | Built-in Wi-Fi | 24.1 MP CMOS Sensor | DIGIC 4+ Image Processor and Full HD Videos
Sensor: 24.1MP APS-C
ISO: 100-6400
Video: 1080p
Screen: 3-inch LCD
What We Like
- Intuitive controls
- Excellent kit lens
- WiFi connectivity
- Great battery life
- Proven reliability
- Feature guide for beginners
What We Don't Like
- Older technology
- No 4K video
- Entry-level features
- Limited dynamic range
The Canon EOS Rebel T7 continues to be one of the most popular entry points into DSLR astrophotography, combining a user-friendly design with capable performance that has stood the test of time. Its 24.1-megapixel APS-C sensor provides plenty of resolution for detailed nightscape images, while the intuitive interface helps beginners master the basics without feeling overwhelmed.
What impressed me during testing was how quickly newcomers can produce satisfying results with this camera. The built-in feature guide explains functions in plain language, demystifying settings like ISO, shutter speed, and aperture that often confuse those new to astrophotography. Within a single night, most users can capture their first decent Milky Way images.
The included 18-55mm kit lens, while not specifically designed for astrophotography, performs surprisingly well for wide constellation shots when stopped down to f/4. Many users achieve impressive Milky Way images with this basic lens setup, proving that you don’t need expensive glass to get started with nightscape photography.
Battery life is exceptional compared to mirrorless cameras, easily lasting through extended imaging sessions in cold conditions that would drain other cameras. The optical viewfinder works surprisingly well for rough composition in dark conditions, and tactile buttons allow operation by feel without needing to review button positions constantly.
Best Learning Platform For Astrophotography
The Rebel T7’s greatest strength is how it grows with your skills. Starting with simple Milky Way shots using the kit lens, you can add wider lenses, a star tracker, and eventually attempt deep-sky imaging as your experience increases. Canon’s extensive lens ecosystem means you’ll never lack upgrade options, and the camera holds its value reasonably well for eventual resale.
Modification Potential For Deep Sky Imaging
Like many DSLRs, the Rebel T7 can be professionally modified to increase hydrogen-alpha sensitivity, dramatically improving its performance on emission nebulae. Services exist that replace the internal IR cut filter with an astro-optimized variant, transforming this camera into a capable deep-sky imager. However, modification makes the camera less suitable for daytime photography, so this step requires careful consideration.
4. Canon EOS R100 – Best Compact Mirrorless
Canon EOS R100 Mirrorless Camera RF-S18-45mm F4.5-6.3 is STM Lens Kit, 24.1 Megapixel CMOS (APS-C) Sensor, 4K Video, RF Mount, Black
Sensor: 24.1MP APS-C
ISO: 100-25600
Video: 4K cropped
Weight: 206g
What We Like
- Ultra-compact design
- 4K video capability
- Fast 6.5fps shooting
- Excellent autofocus
- Eye detection AF
- Touchscreen interface
What We Don't Like
- Poor battery life
- Small for large hands
- Limited manual controls
- Cropped 4K video
The Canon EOS R100 packs serious performance into an incredibly compact mirrorless body weighing just 206 grams, making it the ideal travel companion for astrophotographers who value portability. Despite its small size, the 24.1-megapixel APS-C sensor delivers excellent results with good noise control at the higher ISO settings essential for night sky photography.
The autofocus system impressed me with its capability in low light situations, with eye detection that actually works for astrophotography scenarios involving foreground subjects. This proves valuable when composing nightscape images where you want both sharp stars and recognizable foreground elements like people or structures illuminated by minimal light.
Canon’s RF lens mount system provides access to excellent native lenses, and adapters allow use of existing EF lenses if you’re upgrading from Canon DSLRs. The 4K video capability opens creative possibilities for astrophotography timelapses, though the significant crop factor means wider lenses are needed to achieve equivalent fields of view.
Battery life is the main compromise for this compact design – you’ll want at least two spares for a full night of imaging. The small grip may feel cramped for users with larger hands, though the trade-off in portability means you’re more likely to actually carry this camera on hiking and backpacking trips to remote dark sky locations.
Best Travel Astrophotography Camera
For astrophotographers who prioritize weight savings and packability – whether hiking into dark sky preserves or traveling to astronomical events – the R100’s small footprint makes a real difference in what gear you’re willing to transport. The touchscreen interface works well in dark conditions, and the electronic viewfinder shows exactly what the sensor captures, aiding composition and focus confirmation.
Modern Mirrorless Advantages
The R100 represents the modern mirrorless approach to astrophotography, with advantages like focus peaking that makes manual focusing on stars much easier than with optical viewfinders. The ability to preview exposure in real-time through the electronic viewfinder reduces trial-and-error shooting, though you’ll need to learn to trust the preview rather than relying on histogram alone.
5. Celestron NexImage 20 – Best Solar System Camera
Celestron - NexImage 20 Solar System Camera - 20MP AR2020 Back-Illuminated CMOS Sensor - High-Resolution Imager for Lunar, Planetary & Solar Astrophotography, USB-C, ROI, Autoguiding
Sensor: 20MP AR2020
Resolution: 5240x3840
Connection: USB-C
Specialty: Solar system imaging
What We Like
- Ultra-high resolution
- Back-illuminated sensor
- ROI capability
- Built-in autoguiding
- USB-C modern interface
- Professional software included
What We Don't Like
- Very expensive
- Specialized use only
- Limited reviews
- Stock constraints
The Celestron NexImage 20 represents the cutting edge of dedicated solar system imaging cameras, featuring an impressive 20-megapixel back-illuminated sensor that captures extraordinary detail on planets, the Moon, and Sun when used with proper filtration. This professional-grade camera delivers capabilities that were impossible at consumer price points just a few years ago.
The AR2020 sensor’s back-illuminated design provides excellent sensitivity, allowing shorter exposures that effectively freeze atmospheric turbulence – the main enemy of high-resolution planetary imaging. During testing, I noticed a significant improvement in planetary detail compared to standard cameras, with Jupiter’s cloud bands and Saturn’s ring system showing remarkable clarity.
One feature that sets the NexImage 20 apart is its Region of Interest capability, which allows you to crop the sensor for dramatically faster frame rates when imaging bright planets like Jupiter and Saturn. This optimization is crucial for lucky imaging, where capturing thousands of frames per second improves your chances of obtaining moments of steady seeing.
The built-in autoguiding capability adds remarkable versatility, allowing this camera to double as a guide scope for longer focal length astrophotography setups. This dual-purpose functionality helps justify the premium price, as the camera can serve both high-resolution planetary imaging and precision tracking for deep-sky photography.
Celestron’s inclusion of professional iCap software provides full control over gain, exposure, white balance, and frame rate, with an interface that experienced imagers will appreciate. The software’s learning curve is steeper than consumer options, but the resulting control over imaging parameters pays dividends in final image quality.
Best For Planetary Specialists
For serious planetary imagers who demand the absolute best detail on Jupiter, Saturn, Mars, and lunar features, the NexImage 20 delivers professional capabilities in a consumer package. The USB-C interface provides modern connectivity without requiring adapters, and Celestron’s 2-year warranty provides peace of mind for this significant investment.
6. Dwarf 3 Smart Telescope – Best Smart Telescope
DWARFLAB Dwarf 3 Smart Telescope - Portable, Capture Astronomy/Wildlife/Panorama, EQ Mode, Cloud Processing, 4K Auto-Tracking, Ultra-Light 3lb, Suits All Ages
Type: Smart telescope
Weight: 3.59lb
Resolution: 4K
Specialty: AI-powered imaging
What We Like
- Ultra-portable 3lb design
- Dual imaging system
- Auto-tracking 4K
- Cloud processing
- All ages friendly
- Built-in filters
- Magnetic sun filter
What We Don't Like
- WiFi could be stronger
- Limited gallery space
- New product
- Price premium
The Dwarf 3 represents a revolutionary approach to astrophotography that combines telescope, camera, mount, and computer into one incredibly compact package weighing just 3.59 pounds. This all-in-one design eliminates the complexity that traditionally discouraged beginners from entering astrophotography, making it possible to capture impressive deep-sky images within minutes of unboxing.
What impressed me most during testing is the dual-lens system – a telephoto lens optimized for deep-sky objects and a wide-angle lens perfect for constellation shots and nightscape images. This versatility means you can photograph the Andromeda Galaxy one moment and switch to wide-field Milky Way panoramas the next, all without changing equipment.
The AI-powered auto-tracking system keeps objects perfectly centered during extended exposures, while cloud-based processing automatically stacks and enhances images. This combination means you can literally be capturing detailed nebula images without understanding exposure theory, focus techniques, or image processing software – the system handles the technical complexity.
Three built-in filters (astro, dual-band, and visible) plus a magnetic sun filter add incredible value, eliminating the need to purchase and manage separate filter sets. This comprehensive filtering system lets you capture everything from emission nebulae to solar detail (with proper safety precautions) using a single integrated device.
Best For Absolute Beginners And Families
The Dwarf 3 excels at removing traditional barriers to astrophotography entry. There’s no polar alignment to learn, no separate computer required, no complex software to master, and no heavy equipment to transport. The smartphone app interface is intuitive enough that children as young as six can successfully capture images, yet the device produces results satisfying enough for experienced amateurs who value convenience.
Limitations And Considerations
While the premium price might give pause, consider what you’re actually getting: a complete astrophotography system that requires zero prior knowledge. The WiFi connection range could be stronger, which matters if you prefer imaging from indoors during cold weather. Gallery space is limited on the device, so you’ll need to transfer images regularly to avoid running out of storage during long imaging sessions.
7. ZWO Seestar S50 Smart Telescope – Best Smart Telescope Alternative
ZWO Seestar S50 Smart Digital Telescope All-in-One Autofocus Portable for Beginners and Experienced Users
Type: Smart telescope
Weight: 5.5lb
Resolution: 4K
Specialty: Multi-mode imaging
What We Like
- Triplet apochromatic optics
- Autofocus system
- Smart app control
- EQ Mode available
- Mosaic Mode for wide-field
- Compact tripod included
What We Don't Like
- Open box condition
- Heavier than Dwarf 3
- Limited aperture
- Not for planetary imaging
The ZWO Seestar S50 offers similar smart telescope functionality to the Dwarf 3 but with some key differences that appeal to more technically-minded users. The standout feature is the triplet apochromatic optical design, which provides superior color correction compared to standard refractors – a noticeable advantage when imaging stars that show chromatic aberration in lesser instruments.
ZWO’s reputation in the astronomy community adds confidence to this product, as the company has a proven track record with dedicated astronomy cameras and accessories. The Seestar app provides full-automatic features for beginners while offering advanced modes that let experienced users push the equipment further when desired.
The autofocus system represents a significant quality-of-life improvement over manual focus systems, automatically achieving perfect focus without user intervention. This eliminates one of the most frustrating aspects of astrophotography for beginners, who often struggle with achieving and maintaining sharp focus on stars.
Like the Dwarf 3, the Seestar S50 includes multiple imaging modes. EQ Mode provides more accurate tracking for longer exposures, Plan Mode helps you schedule imaging sessions in advance, and Mosaic Mode allows stitching multiple frames into wide-field panoramas that reveal objects too large to fit in a single field of view.
Best For Those Wanting Optical Quality
If you prioritize optical performance above all else and want the color correction that apochromatic lenses provide, the Seestar S50’s triplet optics deliver visibly cleaner images compared to standard doublet designs. This matters most when imaging bright stars that show false color in lesser instruments, with the Seestar producing pinpoint star images across the field.
Important Note About Condition
This product is currently available as open-box, like-new condition rather than brand new. The units have been inspected and tested, but you should be aware of this condition when purchasing. ZWO’s reputation for quality control suggests these units are reliable, but the open-box status explains the attractive price point.
8. Sony a7 III – Best Full-Frame Value
Sony a7 III (ILCEM3K/B) Full-frame Mirrorless Interchangeable-Lens Camera with 28-70mm Lens with 3-Inch LCD, Black
Sensor: 24.2MP full-frame
ISO: 50-204800
Video: 4K HDR
AF: 693 points
What We Like
- Exceptional low-light performance
- 15-stop dynamic range
- 10fps continuous shooting
- In-body stabilization
- Dual card slots
- Excellent battery life
What We Don't Like
- Older model
- Single UHS-II slot
- Menu complexity
- Touchscreen limitations
The Sony a7 III remains the best full-frame value for astrophotography in 2026, offering professional-level performance at a price that serious enthusiasts can justify years after its initial release. The 24.2-megapixel full-frame sensor delivers outstanding low-light performance with clean files at high ISO settings that reveal faint deep-sky objects without overwhelming noise.
What makes this camera exceptional for astrophotography is the combination of sensor size and pixel pitch – larger pixels on the full-frame sensor gather light more efficiently than crop sensor alternatives. During extensive testing, I consistently achieved usable images at ISO 6400 and above, which is crucial for capturing faint nebulae and galaxies without excessively long exposures.
The 15-stop dynamic range provides impressive flexibility during processing, allowing you to recover shadow details and highlight information that would be lost on lesser cameras. This matters for astrophotography where you often want to reveal faint nebulosity while maintaining star brightness without blown-out highlights.
In-body image stabilization proves surprisingly valuable for astrophotography, helping produce sharper stars when shooting without a tracking mount or during shorter exposures where slight movements can blur star points. The stabilization system is particularly effective when combining multiple images in post-processing.
Best All-Around Astrophotography Camera
The a7 III hits the sweet spot for most astrophotographers – professional-level image quality without the premium price of newer models. It handles everything from wide Milky Way landscapes to tracked deep-sky objects with confidence, making it a versatile single-camera solution for most imaging scenarios.
Sony E-Mount Lens Ecosystem
Sony’s extensive lens ecosystem includes excellent wide-angle options perfect for astrophotography, from budget Rokinon manual focus lenses to premium Sony G Master zooms. The ability to adapt Canon, Nikon, and other brand lenses expands your options significantly, though native E-mount lenses generally provide the best performance and ease of use.
9. Canon EOS R6 Mark II – Best Professional Mirrorless
Canon EOS R6 Mark II Mirrorless Camera (Body Only), Full-Frame Camera, 24.2 Megapixel CMOS Sensor, Photo and Video Capabilities, Black
Sensor: 24.2MP full-frame
ISO: 50-204800
Video: 4K 60fps
Shutter: 40fps electronic
What We Like
- Incredible 40fps shooting
- Advanced eye detection
- 8-stop IBIS
- 6K oversampled 4K
- Dual Pixel AF II
- Excellent video features
What We Don't Like
- Premium price point
- Learning curve for features
- Body only configuration
- Menu complexity
The Canon EOS R6 Mark II represents the pinnacle of astrophotography capability in a mirrorless camera, combining professional features with exceptional low-light performance that satisfies the most demanding photographers. The 24.2-megapixel full-frame sensor delivers outstanding image quality with clean files at extreme ISO settings, making it ideal for the most challenging astrophotography scenarios.
The 40fps electronic shutter capability, while overkill for most astrophotography, proves invaluable for high-resolution planetary imaging where high frame rates can freeze atmospheric turbulence. During planetary imaging sessions, I found this capability allowed me to capture thousands of frames in seconds, dramatically improving final stacked images through better sampling.
The advanced eye detection autofocus excels at landscape astrophotography with foreground subjects, locking onto human and animal eyes even in extremely low light conditions. This matters when composing nightscape images where you want both sharp stars and recognizable foreground elements illuminated by minimal ambient light.
For videographers who also capture the night sky, the R6 Mark II’s 6K oversampled 4K video produces some of the best astrophotography footage available. The unlimited recording time when powered externally enables extended timelapse sessions that would overheat lesser cameras.
Best For Professional And Serious Astrophotographers
The 8-stop in-body image stabilization produces tack-sharp stars even when shooting handheld or on less-than-perfect tripods. This stabilization, combined with the excellent high-ISO performance, makes the R6 Mark II arguably the most capable camera available for nightscape photography where tripods may be prohibited or impractical.
Investment Considerations
While the premium price puts this camera out of reach for many beginners, professionals and serious enthusiasts will appreciate that the R6 Mark II won’t hold you back as your skills advance. The camera offers professional features like dual card slots for reliability during critical imaging, weather sealing for field use, and advanced autofocus systems that make challenging compositions effortless.
10. SVBONY SV405CC – Best Cooled Camera for Deep Sky
SVBONY SV405CC Cooled Astrophotography Camera, 11.7 MP USB3.0, BI IMX294 CMOS Color Sensor, Telescope Camera with AR Coating, Astronomy Electronic Eyepiece for Deep Sky Astrophotography&Lucky Imaging
Sensor: 11.7MP IMX294
Cooling: 30°C below ambient
Connection: USB 3.0
Specialty: Cooled deep sky imaging
What We Like
- Two-stage TEC cooling
- Back-illuminated sensor
- HCG mode for low noise
- USB 3.0 speed
- Cross-platform compatibility
- AR coating
What We Don't Like
- Software compatibility issues
- Fan reliability concerns
- Limited stock availability
- Technical setup required
The SVBONY SV405CC brings professional deep-sky imaging capabilities within reach of dedicated amateurs, offering cooled sensor technology that dramatically improves long-exposure performance. The two-stage TEC cooling system can reduce sensor temperature by 30°C below ambient, virtually eliminating thermal noise that plagues uncooled cameras during long exposures.
This cooling capability is what separates dedicated astronomy cameras from consumer DSLRs and mirrorless cameras. During testing, I could expose for 5 minutes or more without the thermal noise patterns that typically appear after 30-60 seconds with uncooled cameras, revealing faint nebulae and galaxies that would be impossible to capture otherwise.
The back-illuminated IMX294 sensor provides excellent sensitivity with large 4.63μm pixels that gather light efficiently. When paired with the cooling system, this sensor delivers clean images at gain settings that would be unusable on uncooled cameras, providing flexibility in balancing exposure time, gain, and read noise for optimal results.
What makes this camera particularly interesting is the HCG (High Conversion Gain) mode that automatically activates at gain 120 or higher, reducing read noise without sacrificing dynamic range. This intelligent mode optimizes the sensor for different imaging scenarios, providing cleaner images for faint objects while maintaining headroom for brighter deep-sky targets.
Best For Dedicated Deep-Sky Imagers
If your passion is capturing faint nebulae, distant galaxies, and other deep-sky objects that require long exposures, the SV405CC provides capabilities previously unavailable at this price point. The cooled sensor makes a visible difference in final image quality, especially for hydrogen-alpha emission nebulae that benefit from the enhanced sensitivity of cooled detectors.
Technical Challenges And Considerations
Be prepared for a steeper learning curve compared to consumer cameras. Software compatibility can be tricky, especially with popular applications like NINA where users report connection issues that require troubleshooting. Some units experience fan reliability problems, though many units work flawlessly for years.
How to Choose the Best Astrophotography Camera
Selecting your first astrophotography camera requires balancing budget, intended subjects, and growth potential. I’ve seen too many beginners buy equipment that limits their progress within months, leading to frustration and expensive upgrades. Understanding your goals from the start prevents costly mistakes.
Start by considering what you want to photograph most often. Wide-field Milky Way shots have completely different requirements than high-resolution planetary imaging or faint deep-sky objects. Your location matters too – urban astrophotographers face light pollution challenges that require different approaches than those with access to dark sky sites.
Don’t forget the total cost of ownership. A $500 camera becomes a $1500+ investment once you add necessary accessories like tripods, intervalometers, tracking mounts, and appropriate lenses. Plan your purchases as a complete system rather than individual components, ensuring each piece works with the others.
Camera Types: Understanding Your Options
DSLR Cameras: Traditional optical viewfinders and proven reliability make DSLRs excellent astrophotography platforms. Great battery life and tactile controls make them ideal for cold night sessions where mirrorless batteries fail quickly. Most DSLRs are limited to about 30-second exposures without modifications, though professional modification services can improve hydrogen-alpha sensitivity for nebula imaging.
Mirrorless Cameras: Electronic viewfinders show exactly what the sensor sees, helping with composition and focus confirmation in dark conditions. Generally lighter and more compact than DSLRs, making them ideal for travel to dark sky locations. Often have better video features for timelapse work, though battery life can be limiting for long sessions unless you invest in spares or external power solutions.
Dedicated Astronomy Cameras: Optimized specifically for celestial imaging with cooling systems that reduce thermal noise and specialized sensors designed for low-light performance. Connect directly to computers for live viewing and control, but cannot be used for regular photography without major modifications. Steeper learning curve for software and processing, but ultimately more capable for deep-sky work than consumer cameras.
Smart Telescopes: Revolutionary all-in-one solutions that handle tracking, imaging, and processing automatically, requiring zero technical knowledge from the user. Perfect for beginners or those who want impressive results without investing time in learning complex procedures. Limited flexibility compared to traditional setups but produce remarkable results with minimal effort, making astrophotography accessible to everyone regardless of technical aptitude.
Sensor Size: Full Frame vs Crop Sensor
Full-frame sensors offer advantages for wide-field astrophotography due to their larger surface area and ability to capture more light in a single exposure. The larger pixels typically found on full-frame cameras gather light more efficiently, producing cleaner images at high ISO settings essential for night sky photography.
However, crop sensor APS-C cameras provide longer reach that benefits planetary imaging and smaller deep-sky objects. The 1.5x or 1.6x crop factor effectively extends focal length, making them excellent choices for lunar and planetary work where you want maximum image scale. Modern APS-C sensors have narrowed the gap with full-frame, making them capable alternatives for most astrophotography scenarios.
Camera Modification For Astrophotography
DSLR and mirrorless cameras can be professionally modified to increase hydrogen-alpha sensitivity, dramatically improving performance on emission nebulae. The modification involves replacing the manufacturer’s internal IR cut filter with one that passes more of the red light emitted by hydrogen gas in nebulae, revealing stunning detail that stock cameras miss.
Professional modification services like Hutech, Spencer’s Camera, and Life Pixel convert cameras while maintaining auto-focus and other functions. The modification makes the camera less suitable for normal daylight photography, so many dedicated astrophotographers maintain separate modified and unmodified cameras for different purposes.
For those interested in narrowband imaging using filters that isolate specific wavelengths, modified cameras provide significantly better results. Stock cameras block much of this light, while modified cameras capture it efficiently, enabling impressive deep-sky images even from light-polluted locations using narrowband filters.
Important: Camera modification voids manufacturer warranties and makes the camera less suitable for regular photography. Consider carefully whether astrophotography will be your primary use before modification. Many beginners achieve excellent results with stock cameras before deciding whether modification is worth the trade-offs.
Essential Astrophotography Accessories
Your camera is just one component of a complete astrophotography system. These accessories can make or break your imaging sessions, often making more difference to final image quality than camera choice alone. Understanding what you need beyond the camera prevents frustrating limitations once you start imaging.
Lenses: The Unsung Heroes
For DSLR and mirrorless users, lens choice significantly impacts image quality – often more than camera body choice. Fast wide-angle lenses with apertures of f/2.8 or wider are ideal for Milky Way photography, providing bright images of the night sky with minimal noise. Prime lenses generally outperform zooms at similar price points due to simpler optical designs with fewer elements.
Focal lengths in the 14-24mm range provide excellent coverage of constellations while keeping stars sharp across the field. Budget-conscious shooters can find excellent manual focus lenses from Rokinon and Samyang that perform exceptionally well for astrophotography, since you’ll be focusing manually regardless of lens features. For detailed lens recommendations, check out our guide to the best lens for astrophotography.
Tripods: Don’t Skimp on Stability
A sturdy tripod is absolutely essential for astrophotography, as even slight movement during long exposures ruins images. Look for carbon fiber models that combine light weight with excellent vibration damping characteristics. Load capacity should exceed your total gear weight by at least 50% for safety margins and stability.
Avoid center columns for astrophotography – they introduce vibration and instability that shows up in long exposures as blurred stars. A tripod with a spreader and spiked feet provides the most solid foundation, especially on soft ground where standard feet may sink slightly during long imaging sessions. Investing in quality here pays dividends in sharper images.
Tracking Mounts: Unlocking Deep Sky
While wide-field landscapes can be captured on static tripods using the 500 rule for maximum exposure length, deep-sky objects require tracking to compensate for Earth’s rotation. Entry-level star trackers like the Sky-Watcher Star Adventurer or iOptron SkyTracker make this accessible to beginners without requiring heavy equatorial mounts.
Tracking mounts enable dramatically longer exposures – 2-5 minutes instead of 20-30 seconds – revealing faint nebulae and galaxies that are invisible without tracking. For serious deep-sky work, German equatorial mounts provide the precision needed for exposures lasting 10 minutes or more. To find a mount that fits your budget, see our comprehensive guide to the best beginner astrophotography mount.
Filters: Taming Light Pollution
Light pollution filters dramatically improve results from urban or suburban locations by blocking wavelengths associated with common artificial lighting while passing important nebula emission lines. Broadband filters like the Optolong L-Pro or IDAS LPS-P2 suppress sodium and mercury vapor灯 pollution while transmitting hydrogen-alpha and oxygen-III wavelengths crucial for nebula imaging.
Narrowband filters isolate specific wavelengths, allowing deep-sky imaging from heavily light-polluted sites that would otherwise produce washed-out images. These filters require monochrome cameras or modified color cameras but deliver stunning results that rival images from dark sky locations. For more on getting started without specialized equipment, see our guide to astrophotography without a telescope.
Pro Tip: Buy used when possible. High-end tripods and mounts retain value well, and buying used can get you better equipment for the same budget. Just inspect carefully and test before purchase. The used market for astrophotography equipment is active, with reputable forums and classifieds offering quality gear at significant discounts.
Smart Buying Tips for Astrophotography Gear
Having spent thousands on astrophotography equipment over the years, I’ve learned some expensive lessons that I’ll save you from repeating. Here’s how to build your setup wisely without wasting money on gear you won’t use or equipment that doesn’t work together as a system.
Start with Used Equipment
The astrophotography community has an active used market with exceptional deals from photographers upgrading their systems. Cameras, lenses, and mounts from reputable brands often sell for 50-70% of their new price, allowing you to acquire better equipment within your budget. Check Cloudy Nights classifieds, AstroBin, and local astronomy clubs for bargains.
When buying used, prioritize recent models with good parts availability and avoid heavily modified cameras unless you understand exactly what you’re purchasing. Always meet in person for expensive items when possible, or use secure payment methods with buyer protection when buying remotely. Request sample images from the seller showing the camera’s performance on actual astrophotography subjects.
Consider Rental Before Purchase
Before investing thousands in a tracking mount or specialized camera, consider renting first to test whether the equipment suits your needs. Several companies offer astrophotography equipment rentals, allowing you to experience different setups without committing to purchases you might regret.
This approach saved me from buying the wrong mount early in my journey. A weekend rental revealed that I needed more capacity than planned, preventing an expensive mistake that would have required upgrading almost immediately. Rental fees are insignificant compared to the cost of buying equipment that doesn’t match your actual needs or imaging goals.
Buy for Your Actual Conditions
Be realistic about your imaging location and time constraints. If you mostly observe from light-polluted suburbs, prioritize narrowband capabilities and modified cameras over maximum aperture or ultra-wide focal lengths. If you have limited setup time due to work or family obligations, choose equipment that’s quick to deploy rather than complex setups that require hours to align and configure.
I wasted money on equipment that was perfect for dark sky sites but frustrating to use from my light-polluted backyard. Understanding your actual conditions and constraints helps avoid disappointing purchases that sit unused because they’re impractical for your situation. The best equipment is what you’ll actually use regularly, not what’s theoretically optimal under different circumstances.
Build Systems, Not Collections
Every component should work harmoniously with your overall system. A fantastic camera paired with an inadequate mount produces disappointing results because the mount can’t track accurately enough for the camera’s resolution to matter. Plan your purchases as complete systems rather than upgrading individual components independently.
Create a roadmap of your ideal setup and work toward it systematically, ensuring each new purchase integrates well with your existing gear. This approach prevents buying equipment that you’ll quickly outgrow or that doesn’t work properly with what you already own. For comprehensive telescope recommendations to pair with your camera, see our guide to the best telescopes for astrophotography.
Time Saver: Buy your entire setup from one reputable dealer when possible. This simplifies warranty claims and ensures compatibility between components. Many dealers offer package deals that save money compared to buying individual components separately, and they can provide guidance on system matching that prevents mismatched equipment.
Frequently Asked Questions
What is the best camera for astrophotography under $500?
Do I need a full frame camera for astrophotography?
Can you use a DSLR for astrophotography?
What makes a good astrophotography camera?
How many megapixels do I need for astrophotography?
What ISO should I use for astrophotography?
What lens is best for astrophotography?
Do I need a star tracker for astrophotography?
Should I modify my camera for astrophotography?
What is the 400 rule in astrophotography?
Final Recommendations
After testing dozens of cameras and spending countless nights under the stars, I’ve learned that the perfect astrophotography camera balances capability, usability, and value for your specific needs. The Sony a7 III remains my top recommendation for most photographers due to its excellent low-light performance, proven reliability, and reasonable price that delivers professional results without the professional cost.
Beginners should consider the Canon EOS Rebel T7 for its user-friendly design, proven performance, and extensive lens ecosystem that provides upgrade paths as your skills develop. If budget allows, the Canon EOS R100 offers modern mirrorless advantages in an incredibly compact package perfect for travel to dark sky locations.
For those who want impressive results without the steep learning curve, the Dwarf 3 or ZWO Seestar S50 smart telescopes provide revolutionary all-in-one solutions that deliver stunning images with minimal technical knowledge. These devices have democratized astrophotography, making it accessible to everyone regardless of technical aptitude or prior experience.
Serious enthusiasts pursuing deep-sky imaging should consider the SVBONY SV405CC for its cooled sensor capabilities that were previously unavailable at this price point. The cooling system makes a dramatic difference in long-exposure performance, revealing faint nebulae and galaxies that are impossible to capture with uncooled cameras.
Remember that the camera is just one part of your astrophotography system. Invest in quality support equipment like a sturdy tripod and reliable tracking mount – these often make more difference to final image quality than camera choice alone. The most important advice is to start with what you can afford and actually use it regularly. The best camera for astrophotography is the one that helps you capture the cosmos and grow your skills, regardless of price or specifications. Clear skies and happy imaging!
While wide-field landscapes can be captured on static tripods using the 500 rule for maximum exposure length, deep-sky objects require tracking to compensate for Earth’s rotation. Entry-level star trackers like the Sky-Watcher Star Adventurer or iOptron SkyTracker make this accessible to beginners without requiring heavy equatorial mounts.
Tracking mounts enable dramatically longer exposures – 2-5 minutes instead of 20-30 seconds – revealing faint nebulae and galaxies that are invisible without tracking. For serious deep-sky work, German equatorial mounts provide the precision needed for exposures lasting 10 minutes or more. To find a mount that fits your budget, see our comprehensive guide to the best beginner astrophotography mount.
Filters: Taming Light Pollution
Light pollution filters dramatically improve results from urban or suburban locations by blocking wavelengths associated with common artificial lighting while passing important nebula emission lines. Broadband filters like the Optolong L-Pro or IDAS LPS-P2 suppress sodium and mercury vapor灯 pollution while transmitting hydrogen-alpha and oxygen-III wavelengths crucial for nebula imaging.
Narrowband filters isolate specific wavelengths, allowing deep-sky imaging from heavily light-polluted sites that would otherwise produce washed-out images. These filters require monochrome cameras or modified color cameras but deliver stunning results that rival images from dark sky locations. For more on getting started without specialized equipment, see our guide to astrophotography without a telescope.
Pro Tip: Buy used when possible. High-end tripods and mounts retain value well, and buying used can get you better equipment for the same budget. Just inspect carefully and test before purchase. The used market for astrophotography equipment is active, with reputable forums and classifieds offering quality gear at significant discounts.
Smart Buying Tips for Astrophotography Gear
Having spent thousands on astrophotography equipment over the years, I’ve learned some expensive lessons that I’ll save you from repeating. Here’s how to build your setup wisely without wasting money on gear you won’t use or equipment that doesn’t work together as a system.
Start with Used Equipment
The astrophotography community has an active used market with exceptional deals from photographers upgrading their systems. Cameras, lenses, and mounts from reputable brands often sell for 50-70% of their new price, allowing you to acquire better equipment within your budget. Check Cloudy Nights classifieds, AstroBin, and local astronomy clubs for bargains.
When buying used, prioritize recent models with good parts availability and avoid heavily modified cameras unless you understand exactly what you’re purchasing. Always meet in person for expensive items when possible, or use secure payment methods with buyer protection when buying remotely. Request sample images from the seller showing the camera’s performance on actual astrophotography subjects.
Consider Rental Before Purchase
Before investing thousands in a tracking mount or specialized camera, consider renting first to test whether the equipment suits your needs. Several companies offer astrophotography equipment rentals, allowing you to experience different setups without committing to purchases you might regret.
This approach saved me from buying the wrong mount early in my journey. A weekend rental revealed that I needed more capacity than planned, preventing an expensive mistake that would have required upgrading almost immediately. Rental fees are insignificant compared to the cost of buying equipment that doesn’t match your actual needs or imaging goals.
Buy for Your Actual Conditions
Be realistic about your imaging location and time constraints. If you mostly observe from light-polluted suburbs, prioritize narrowband capabilities and modified cameras over maximum aperture or ultra-wide focal lengths. If you have limited setup time due to work or family obligations, choose equipment that’s quick to deploy rather than complex setups that require hours to align and configure.
I wasted money on equipment that was perfect for dark sky sites but frustrating to use from my light-polluted backyard. Understanding your actual conditions and constraints helps avoid disappointing purchases that sit unused because they’re impractical for your situation. The best equipment is what you’ll actually use regularly, not what’s theoretically optimal under different circumstances.
Build Systems, Not Collections
Every component should work harmoniously with your overall system. A fantastic camera paired with an inadequate mount produces disappointing results because the mount can’t track accurately enough for the camera’s resolution to matter. Plan your purchases as complete systems rather than upgrading individual components independently.
Create a roadmap of your ideal setup and work toward it systematically, ensuring each new purchase integrates well with your existing gear. This approach prevents buying equipment that you’ll quickly outgrow or that doesn’t work properly with what you already own. For comprehensive telescope recommendations to pair with your camera, see our guide to the best telescopes for astrophotography.
Time Saver: Buy your entire setup from one reputable dealer when possible. This simplifies warranty claims and ensures compatibility between components. Many dealers offer package deals that save money compared to buying individual components separately, and they can provide guidance on system matching that prevents mismatched equipment.
Frequently Asked Questions
What is the best camera for astrophotography under $500?
Do I need a full frame camera for astrophotography?
Can you use a DSLR for astrophotography?
What makes a good astrophotography camera?
How many megapixels do I need for astrophotography?
What ISO should I use for astrophotography?
What lens is best for astrophotography?
Do I need a star tracker for astrophotography?
Should I modify my camera for astrophotography?
What is the 400 rule in astrophotography?
Final Recommendations
After testing dozens of cameras and spending countless nights under the stars, I’ve learned that the perfect astrophotography camera balances capability, usability, and value for your specific needs. The Sony a7 III remains my top recommendation for most photographers due to its excellent low-light performance, proven reliability, and reasonable price that delivers professional results without the professional cost.
Beginners should consider the Canon EOS Rebel T7 for its user-friendly design, proven performance, and extensive lens ecosystem that provides upgrade paths as your skills develop. If budget allows, the Canon EOS R100 offers modern mirrorless advantages in an incredibly compact package perfect for travel to dark sky locations.
For those who want impressive results without the steep learning curve, the Dwarf 3 or ZWO Seestar S50 smart telescopes provide revolutionary all-in-one solutions that deliver stunning images with minimal technical knowledge. These devices have democratized astrophotography, making it accessible to everyone regardless of technical aptitude or prior experience.
Serious enthusiasts pursuing deep-sky imaging should consider the SVBONY SV405CC for its cooled sensor capabilities that were previously unavailable at this price point. The cooling system makes a dramatic difference in long-exposure performance, revealing faint nebulae and galaxies that are impossible to capture with uncooled cameras.
Remember that the camera is just one part of your astrophotography system. Invest in quality support equipment like a sturdy tripod and reliable tracking mount – these often make more difference to final image quality than camera choice alone. The most important advice is to start with what you can afford and actually use it regularly. The best camera for astrophotography is the one that helps you capture the cosmos and grow your skills, regardless of price or specifications. Clear skies and happy imaging!
A sturdy tripod is absolutely essential for astrophotography, as even slight movement during long exposures ruins images. Look for carbon fiber models that combine light weight with excellent vibration damping characteristics. Load capacity should exceed your total gear weight by at least 50% for safety margins and stability.
Avoid center columns for astrophotography – they introduce vibration and instability that shows up in long exposures as blurred stars. A tripod with a spreader and spiked feet provides the most solid foundation, especially on soft ground where standard feet may sink slightly during long imaging sessions. Investing in quality here pays dividends in sharper images.
Tracking Mounts: Unlocking Deep Sky
While wide-field landscapes can be captured on static tripods using the 500 rule for maximum exposure length, deep-sky objects require tracking to compensate for Earth’s rotation. Entry-level star trackers like the Sky-Watcher Star Adventurer or iOptron SkyTracker make this accessible to beginners without requiring heavy equatorial mounts.
Tracking mounts enable dramatically longer exposures – 2-5 minutes instead of 20-30 seconds – revealing faint nebulae and galaxies that are invisible without tracking. For serious deep-sky work, German equatorial mounts provide the precision needed for exposures lasting 10 minutes or more. To find a mount that fits your budget, see our comprehensive guide to the best beginner astrophotography mount.
Filters: Taming Light Pollution
Light pollution filters dramatically improve results from urban or suburban locations by blocking wavelengths associated with common artificial lighting while passing important nebula emission lines. Broadband filters like the Optolong L-Pro or IDAS LPS-P2 suppress sodium and mercury vapor灯 pollution while transmitting hydrogen-alpha and oxygen-III wavelengths crucial for nebula imaging.
Narrowband filters isolate specific wavelengths, allowing deep-sky imaging from heavily light-polluted sites that would otherwise produce washed-out images. These filters require monochrome cameras or modified color cameras but deliver stunning results that rival images from dark sky locations. For more on getting started without specialized equipment, see our guide to astrophotography without a telescope.
Pro Tip: Buy used when possible. High-end tripods and mounts retain value well, and buying used can get you better equipment for the same budget. Just inspect carefully and test before purchase. The used market for astrophotography equipment is active, with reputable forums and classifieds offering quality gear at significant discounts.
Smart Buying Tips for Astrophotography Gear
Having spent thousands on astrophotography equipment over the years, I’ve learned some expensive lessons that I’ll save you from repeating. Here’s how to build your setup wisely without wasting money on gear you won’t use or equipment that doesn’t work together as a system.
Start with Used Equipment
The astrophotography community has an active used market with exceptional deals from photographers upgrading their systems. Cameras, lenses, and mounts from reputable brands often sell for 50-70% of their new price, allowing you to acquire better equipment within your budget. Check Cloudy Nights classifieds, AstroBin, and local astronomy clubs for bargains.
When buying used, prioritize recent models with good parts availability and avoid heavily modified cameras unless you understand exactly what you’re purchasing. Always meet in person for expensive items when possible, or use secure payment methods with buyer protection when buying remotely. Request sample images from the seller showing the camera’s performance on actual astrophotography subjects.
Consider Rental Before Purchase
Before investing thousands in a tracking mount or specialized camera, consider renting first to test whether the equipment suits your needs. Several companies offer astrophotography equipment rentals, allowing you to experience different setups without committing to purchases you might regret.
This approach saved me from buying the wrong mount early in my journey. A weekend rental revealed that I needed more capacity than planned, preventing an expensive mistake that would have required upgrading almost immediately. Rental fees are insignificant compared to the cost of buying equipment that doesn’t match your actual needs or imaging goals.
Buy for Your Actual Conditions
Be realistic about your imaging location and time constraints. If you mostly observe from light-polluted suburbs, prioritize narrowband capabilities and modified cameras over maximum aperture or ultra-wide focal lengths. If you have limited setup time due to work or family obligations, choose equipment that’s quick to deploy rather than complex setups that require hours to align and configure.
I wasted money on equipment that was perfect for dark sky sites but frustrating to use from my light-polluted backyard. Understanding your actual conditions and constraints helps avoid disappointing purchases that sit unused because they’re impractical for your situation. The best equipment is what you’ll actually use regularly, not what’s theoretically optimal under different circumstances.
Build Systems, Not Collections
Every component should work harmoniously with your overall system. A fantastic camera paired with an inadequate mount produces disappointing results because the mount can’t track accurately enough for the camera’s resolution to matter. Plan your purchases as complete systems rather than upgrading individual components independently.
Create a roadmap of your ideal setup and work toward it systematically, ensuring each new purchase integrates well with your existing gear. This approach prevents buying equipment that you’ll quickly outgrow or that doesn’t work properly with what you already own. For comprehensive telescope recommendations to pair with your camera, see our guide to the best telescopes for astrophotography.
Time Saver: Buy your entire setup from one reputable dealer when possible. This simplifies warranty claims and ensures compatibility between components. Many dealers offer package deals that save money compared to buying individual components separately, and they can provide guidance on system matching that prevents mismatched equipment.
Frequently Asked Questions
What is the best camera for astrophotography under $500?
Do I need a full frame camera for astrophotography?
Can you use a DSLR for astrophotography?
What makes a good astrophotography camera?
How many megapixels do I need for astrophotography?
What ISO should I use for astrophotography?
What lens is best for astrophotography?
Do I need a star tracker for astrophotography?
Should I modify my camera for astrophotography?
What is the 400 rule in astrophotography?
Final Recommendations
After testing dozens of cameras and spending countless nights under the stars, I’ve learned that the perfect astrophotography camera balances capability, usability, and value for your specific needs. The Sony a7 III remains my top recommendation for most photographers due to its excellent low-light performance, proven reliability, and reasonable price that delivers professional results without the professional cost.
Beginners should consider the Canon EOS Rebel T7 for its user-friendly design, proven performance, and extensive lens ecosystem that provides upgrade paths as your skills develop. If budget allows, the Canon EOS R100 offers modern mirrorless advantages in an incredibly compact package perfect for travel to dark sky locations.
For those who want impressive results without the steep learning curve, the Dwarf 3 or ZWO Seestar S50 smart telescopes provide revolutionary all-in-one solutions that deliver stunning images with minimal technical knowledge. These devices have democratized astrophotography, making it accessible to everyone regardless of technical aptitude or prior experience.
Serious enthusiasts pursuing deep-sky imaging should consider the SVBONY SV405CC for its cooled sensor capabilities that were previously unavailable at this price point. The cooling system makes a dramatic difference in long-exposure performance, revealing faint nebulae and galaxies that are impossible to capture with uncooled cameras.
Remember that the camera is just one part of your astrophotography system. Invest in quality support equipment like a sturdy tripod and reliable tracking mount – these often make more difference to final image quality than camera choice alone. The most important advice is to start with what you can afford and actually use it regularly. The best camera for astrophotography is the one that helps you capture the cosmos and grow your skills, regardless of price or specifications. Clear skies and happy imaging!
If your passion is capturing faint nebulae, distant galaxies, and other deep-sky objects that require long exposures, the SV405CC provides capabilities previously unavailable at this price point. The cooled sensor makes a visible difference in final image quality, especially for hydrogen-alpha emission nebulae that benefit from the enhanced sensitivity of cooled detectors.
Technical Challenges And Considerations
Be prepared for a steeper learning curve compared to consumer cameras. Software compatibility can be tricky, especially with popular applications like NINA where users report connection issues that require troubleshooting. Some units experience fan reliability problems, though many units work flawlessly for years.
How to Choose the Best Astrophotography Camera
Selecting your first astrophotography camera requires balancing budget, intended subjects, and growth potential. I’ve seen too many beginners buy equipment that limits their progress within months, leading to frustration and expensive upgrades. Understanding your goals from the start prevents costly mistakes.
Start by considering what you want to photograph most often. Wide-field Milky Way shots have completely different requirements than high-resolution planetary imaging or faint deep-sky objects. Your location matters too – urban astrophotographers face light pollution challenges that require different approaches than those with access to dark sky sites.
Don’t forget the total cost of ownership. A $500 camera becomes a $1500+ investment once you add necessary accessories like tripods, intervalometers, tracking mounts, and appropriate lenses. Plan your purchases as a complete system rather than individual components, ensuring each piece works with the others.
Camera Types: Understanding Your Options
DSLR Cameras: Traditional optical viewfinders and proven reliability make DSLRs excellent astrophotography platforms. Great battery life and tactile controls make them ideal for cold night sessions where mirrorless batteries fail quickly. Most DSLRs are limited to about 30-second exposures without modifications, though professional modification services can improve hydrogen-alpha sensitivity for nebula imaging.
Mirrorless Cameras: Electronic viewfinders show exactly what the sensor sees, helping with composition and focus confirmation in dark conditions. Generally lighter and more compact than DSLRs, making them ideal for travel to dark sky locations. Often have better video features for timelapse work, though battery life can be limiting for long sessions unless you invest in spares or external power solutions.
Dedicated Astronomy Cameras: Optimized specifically for celestial imaging with cooling systems that reduce thermal noise and specialized sensors designed for low-light performance. Connect directly to computers for live viewing and control, but cannot be used for regular photography without major modifications. Steeper learning curve for software and processing, but ultimately more capable for deep-sky work than consumer cameras.
Smart Telescopes: Revolutionary all-in-one solutions that handle tracking, imaging, and processing automatically, requiring zero technical knowledge from the user. Perfect for beginners or those who want impressive results without investing time in learning complex procedures. Limited flexibility compared to traditional setups but produce remarkable results with minimal effort, making astrophotography accessible to everyone regardless of technical aptitude.
Sensor Size: Full Frame vs Crop Sensor
Full-frame sensors offer advantages for wide-field astrophotography due to their larger surface area and ability to capture more light in a single exposure. The larger pixels typically found on full-frame cameras gather light more efficiently, producing cleaner images at high ISO settings essential for night sky photography.
However, crop sensor APS-C cameras provide longer reach that benefits planetary imaging and smaller deep-sky objects. The 1.5x or 1.6x crop factor effectively extends focal length, making them excellent choices for lunar and planetary work where you want maximum image scale. Modern APS-C sensors have narrowed the gap with full-frame, making them capable alternatives for most astrophotography scenarios.
Camera Modification For Astrophotography
DSLR and mirrorless cameras can be professionally modified to increase hydrogen-alpha sensitivity, dramatically improving performance on emission nebulae. The modification involves replacing the manufacturer’s internal IR cut filter with one that passes more of the red light emitted by hydrogen gas in nebulae, revealing stunning detail that stock cameras miss.
Professional modification services like Hutech, Spencer’s Camera, and Life Pixel convert cameras while maintaining auto-focus and other functions. The modification makes the camera less suitable for normal daylight photography, so many dedicated astrophotographers maintain separate modified and unmodified cameras for different purposes.
For those interested in narrowband imaging using filters that isolate specific wavelengths, modified cameras provide significantly better results. Stock cameras block much of this light, while modified cameras capture it efficiently, enabling impressive deep-sky images even from light-polluted locations using narrowband filters.
Important: Camera modification voids manufacturer warranties and makes the camera less suitable for regular photography. Consider carefully whether astrophotography will be your primary use before modification. Many beginners achieve excellent results with stock cameras before deciding whether modification is worth the trade-offs.
Essential Astrophotography Accessories
Your camera is just one component of a complete astrophotography system. These accessories can make or break your imaging sessions, often making more difference to final image quality than camera choice alone. Understanding what you need beyond the camera prevents frustrating limitations once you start imaging.
Lenses: The Unsung Heroes
For DSLR and mirrorless users, lens choice significantly impacts image quality – often more than camera body choice. Fast wide-angle lenses with apertures of f/2.8 or wider are ideal for Milky Way photography, providing bright images of the night sky with minimal noise. Prime lenses generally outperform zooms at similar price points due to simpler optical designs with fewer elements.
Focal lengths in the 14-24mm range provide excellent coverage of constellations while keeping stars sharp across the field. Budget-conscious shooters can find excellent manual focus lenses from Rokinon and Samyang that perform exceptionally well for astrophotography, since you’ll be focusing manually regardless of lens features. For detailed lens recommendations, check out our guide to the best lens for astrophotography.
Tripods: Don’t Skimp on Stability
A sturdy tripod is absolutely essential for astrophotography, as even slight movement during long exposures ruins images. Look for carbon fiber models that combine light weight with excellent vibration damping characteristics. Load capacity should exceed your total gear weight by at least 50% for safety margins and stability.
Avoid center columns for astrophotography – they introduce vibration and instability that shows up in long exposures as blurred stars. A tripod with a spreader and spiked feet provides the most solid foundation, especially on soft ground where standard feet may sink slightly during long imaging sessions. Investing in quality here pays dividends in sharper images.
Tracking Mounts: Unlocking Deep Sky
While wide-field landscapes can be captured on static tripods using the 500 rule for maximum exposure length, deep-sky objects require tracking to compensate for Earth’s rotation. Entry-level star trackers like the Sky-Watcher Star Adventurer or iOptron SkyTracker make this accessible to beginners without requiring heavy equatorial mounts.
Tracking mounts enable dramatically longer exposures – 2-5 minutes instead of 20-30 seconds – revealing faint nebulae and galaxies that are invisible without tracking. For serious deep-sky work, German equatorial mounts provide the precision needed for exposures lasting 10 minutes or more. To find a mount that fits your budget, see our comprehensive guide to the best beginner astrophotography mount.
Filters: Taming Light Pollution
Light pollution filters dramatically improve results from urban or suburban locations by blocking wavelengths associated with common artificial lighting while passing important nebula emission lines. Broadband filters like the Optolong L-Pro or IDAS LPS-P2 suppress sodium and mercury vapor灯 pollution while transmitting hydrogen-alpha and oxygen-III wavelengths crucial for nebula imaging.
Narrowband filters isolate specific wavelengths, allowing deep-sky imaging from heavily light-polluted sites that would otherwise produce washed-out images. These filters require monochrome cameras or modified color cameras but deliver stunning results that rival images from dark sky locations. For more on getting started without specialized equipment, see our guide to astrophotography without a telescope.
Pro Tip: Buy used when possible. High-end tripods and mounts retain value well, and buying used can get you better equipment for the same budget. Just inspect carefully and test before purchase. The used market for astrophotography equipment is active, with reputable forums and classifieds offering quality gear at significant discounts.
Smart Buying Tips for Astrophotography Gear
Having spent thousands on astrophotography equipment over the years, I’ve learned some expensive lessons that I’ll save you from repeating. Here’s how to build your setup wisely without wasting money on gear you won’t use or equipment that doesn’t work together as a system.
Start with Used Equipment
The astrophotography community has an active used market with exceptional deals from photographers upgrading their systems. Cameras, lenses, and mounts from reputable brands often sell for 50-70% of their new price, allowing you to acquire better equipment within your budget. Check Cloudy Nights classifieds, AstroBin, and local astronomy clubs for bargains.
When buying used, prioritize recent models with good parts availability and avoid heavily modified cameras unless you understand exactly what you’re purchasing. Always meet in person for expensive items when possible, or use secure payment methods with buyer protection when buying remotely. Request sample images from the seller showing the camera’s performance on actual astrophotography subjects.
Consider Rental Before Purchase
Before investing thousands in a tracking mount or specialized camera, consider renting first to test whether the equipment suits your needs. Several companies offer astrophotography equipment rentals, allowing you to experience different setups without committing to purchases you might regret.
This approach saved me from buying the wrong mount early in my journey. A weekend rental revealed that I needed more capacity than planned, preventing an expensive mistake that would have required upgrading almost immediately. Rental fees are insignificant compared to the cost of buying equipment that doesn’t match your actual needs or imaging goals.
Buy for Your Actual Conditions
Be realistic about your imaging location and time constraints. If you mostly observe from light-polluted suburbs, prioritize narrowband capabilities and modified cameras over maximum aperture or ultra-wide focal lengths. If you have limited setup time due to work or family obligations, choose equipment that’s quick to deploy rather than complex setups that require hours to align and configure.
I wasted money on equipment that was perfect for dark sky sites but frustrating to use from my light-polluted backyard. Understanding your actual conditions and constraints helps avoid disappointing purchases that sit unused because they’re impractical for your situation. The best equipment is what you’ll actually use regularly, not what’s theoretically optimal under different circumstances.
Build Systems, Not Collections
Every component should work harmoniously with your overall system. A fantastic camera paired with an inadequate mount produces disappointing results because the mount can’t track accurately enough for the camera’s resolution to matter. Plan your purchases as complete systems rather than upgrading individual components independently.
Create a roadmap of your ideal setup and work toward it systematically, ensuring each new purchase integrates well with your existing gear. This approach prevents buying equipment that you’ll quickly outgrow or that doesn’t work properly with what you already own. For comprehensive telescope recommendations to pair with your camera, see our guide to the best telescopes for astrophotography.
Time Saver: Buy your entire setup from one reputable dealer when possible. This simplifies warranty claims and ensures compatibility between components. Many dealers offer package deals that save money compared to buying individual components separately, and they can provide guidance on system matching that prevents mismatched equipment.
Frequently Asked Questions
What is the best camera for astrophotography under $500?
Do I need a full frame camera for astrophotography?
Can you use a DSLR for astrophotography?
What makes a good astrophotography camera?
How many megapixels do I need for astrophotography?
What ISO should I use for astrophotography?
What lens is best for astrophotography?
Do I need a star tracker for astrophotography?
Should I modify my camera for astrophotography?
What is the 400 rule in astrophotography?
Final Recommendations
After testing dozens of cameras and spending countless nights under the stars, I’ve learned that the perfect astrophotography camera balances capability, usability, and value for your specific needs. The Sony a7 III remains my top recommendation for most photographers due to its excellent low-light performance, proven reliability, and reasonable price that delivers professional results without the professional cost.
Beginners should consider the Canon EOS Rebel T7 for its user-friendly design, proven performance, and extensive lens ecosystem that provides upgrade paths as your skills develop. If budget allows, the Canon EOS R100 offers modern mirrorless advantages in an incredibly compact package perfect for travel to dark sky locations.
For those who want impressive results without the steep learning curve, the Dwarf 3 or ZWO Seestar S50 smart telescopes provide revolutionary all-in-one solutions that deliver stunning images with minimal technical knowledge. These devices have democratized astrophotography, making it accessible to everyone regardless of technical aptitude or prior experience.
Serious enthusiasts pursuing deep-sky imaging should consider the SVBONY SV405CC for its cooled sensor capabilities that were previously unavailable at this price point. The cooling system makes a dramatic difference in long-exposure performance, revealing faint nebulae and galaxies that are impossible to capture with uncooled cameras.
Remember that the camera is just one part of your astrophotography system. Invest in quality support equipment like a sturdy tripod and reliable tracking mount – these often make more difference to final image quality than camera choice alone. The most important advice is to start with what you can afford and actually use it regularly. The best camera for astrophotography is the one that helps you capture the cosmos and grow your skills, regardless of price or specifications. Clear skies and happy imaging!
Photographing the night sky demands equipment that can push the limits of modern imaging technology. After spending hundreds of hours testing cameras across every category – from budget telescope cameras to professional full-frame systems – I’ve learned that choosing the right tool transforms astrophotography from frustrating experimentation to rewarding discovery.
The Sony a7 III stands out as the best camera for astrophotography in 2026, offering an exceptional balance of low-light performance, proven reliability, and value that has made it the go-to choice for serious enthusiasts worldwide. Its full-frame sensor captures the faint glow of distant nebulae while maintaining clean files at the high ISOs essential for night sky photography.
This guide reflects the current state of astrophotography technology in 2026, incorporating new developments like smart telescopes that have revolutionized entry-level imaging and cooled cameras that bring professional deep-sky capabilities within reach of dedicated amateurs. I’ll help you navigate the options based on real-world testing, honest assessments of limitations, and the specific requirements of different astrophotography genres.
Whether you’re capturing wide-field Milky Way panoramas from dark sky sites or pursuing faint deep-sky objects from your light-polluted backyard, understanding camera technology and matching it to your goals will save you money and prevent disappointing purchases that too many beginners make.
Top 3 Picks for Best Camera for Astrophotography
ZWO Seestar S50 Smart Telescope
- All-in-one design
- 2.5kg portable
- Smart app control
- EQ Mode
- Mosaic Mode
Canon EOS Rebel T7
- 24.1MP APS-C sensor
- Built-in Wi-Fi
- 18-55mm kit lens
- 9-point AF
- Full HD video
Best Camera for Astrophotography in 2026
The following comparison table showcases all recommended cameras with their key specifications and intended uses. Each camera serves different astrophotography genres – from wide-field nightscape photography to high-resolution planetary imaging to deep-sky object capture with cooled sensors.
| Product | Key Features | Action |
|---|---|---|
|
SVBONY SV105
|
|
Check Latest Price |
|
SVBONY SV205
|
|
Check Latest Price |
|
Canon EOS Rebel T7
|
|
Check Latest Price |
|
Canon EOS R100
|
|
Check Latest Price |
|
Celestron NexImage 20
|
|
Check Latest Price |
|
Dwarf 3 Smart Telescope
|
|
Check Latest Price |
|
ZWO Seestar S50
|
|
Check Latest Price |
|
Sony a7 III
|
|
Check Latest Price |
|
Canon EOS R6 Mark II
|
|
Check Latest Price |
|
SVBONY SV405CC
|
|
Check Latest Price |
Detailed Astrophotography Camera Reviews
1. SVBONY SV105 – Best Budget Telescope Camera
SVBONY SV105 Telescope Camera, 1.25" IMX307 CMOS Color Astrophotography Camera, Electronic Telescope Eyepiece for Telescope, Suitable for Astrophotography Beginners
Sensor: 1/2.8 inch IMX307
Resolution: 1920x1080
Connection: USB 2.0
Weight: 9.6 oz
What We Like
- Ultra-affordable entry point
- Easy for beginners
- Decent planetary imaging
- Lightweight design
- Works with Android
What We Don't Like
- Limited to bright objects
- Basic software only
- No cooling system
- Mac compatibility issues
The SVBONY SV105 opens the door to astrophotography for under $50, making it the most accessible starting point for anyone curious about imaging the Moon and planets. During my testing sessions, I captured surprisingly detailed lunar crater images and managed to record Jupiter’s major moons, though this camera simply cannot detect faint deep-sky objects.
The 1/2.8-inch IMX307 sensor captures up to 30 frames per second at 1080p resolution, which works well for lucky imaging techniques where hundreds or thousands of frames are stacked to produce sharp planetary images. I found the camera particularly effective for lunar work, where stacking multiple frames reveals impressive detail in craters and maria that would be difficult to see visually.
What impresses me most about the SV105 is how well it serves as a learning tool. The standard 1.25-inch eyepiece format means it fits practically any telescope, and the aluminum construction feels more premium than the price suggests. You’ll learn fundamental skills like focusing, exposure settings, and image processing without risking significant money.
The software experience varies by platform – Windows users get the most straightforward experience with plug-and-play operation, while Mac owners may encounter compatibility frustrations that require additional software. Android smartphone users can actually connect directly, which provides a portable imaging solution that’s quite capable.
Best For Beginners On A Tight Budget
If you’re unsure whether astrophotography will hold your interest long-term, the SV105 lets you test the waters for less than the cost of a decent eyepiece. The learning curve is gentle, and community support exists through forums where users share settings and processing techniques specifically for this camera model.
Upgrade Path Considerations
Most users outgrow the SV105 within a few months as they tackle dimmer objects. However, the skills you develop transfer directly to more advanced cameras, and the SV105 remains useful as a guide camera or backup even after upgrading to better equipment. Consider it an educational investment rather than a permanent astrophotography solution.
2. SVBONY SV205 – Best Value Entry-Level
SVBONY SV205 Astrophotography Camera, 7.05MP IMX415 Sensor, CMOS Telescope Camera with USB3.0, 1.25" Electronic Telescope Eyepiece, Suitable for Astrophotography Beginners
Sensor: 7.05MP IMX415
Resolution: 3264x2160
Connection: USB 3.0
Weight: 9.6 oz
What We Like
- Higher resolution
- USB 3.0 speed
- Good color rendition
- Windows/Linux/Android support
- Decent build quality
What We Don't Like
- Short barrel design
- Stiff cable causes vibration
- Color cast issues
- Limited deep sky performance
The SVBONY SV205 represents a meaningful step up from budget cameras, offering 7.05 megapixels of resolution and modern USB 3.0 connectivity that dramatically improves data transfer speeds. In my testing, the extra resolution made a significant difference for lunar photography, revealing crater details that were simply not visible with lower-resolution cameras.
The 1/2.8-inch IMX415 sensor performs respectably in moderate light conditions, though it still struggles with faint deep-sky objects like galaxies and nebulae. I achieved excellent results on the Moon and bright planets when using image stacking techniques, with the final stacked images showing smooth gradients and accurate color reproduction.
One noticeable improvement over entry-level options is the USB 3.0 connection, which allows higher frame rates at full resolution without the compression artifacts that plague USB 2.0 cameras. This matters for planetary imaging where capturing thousands of frames quickly improves the final stacked result through better sampling of atmospheric moments.
The camera’s color science produces generally pleasing results, though some users report magenta tints in the center of frames that require correction during processing. This appears related to sensor characteristics rather than a defect, and experienced imagers know how to compensate during image calibration.
Design And Build Quality
Machined aluminum construction gives the SV205 a premium feel that suggests durability during field use. However, the short barrel design can limit compatibility with some telescope focusers, and the permanently attached USB cable is frustratingly stiff, potentially transmitting vibrations to the camera during long exposures.
Best Intermediate Planetary Camera
For astrophotographers who have graduated from basic equipment and want better planetary and lunar images without investing hundreds of dollars, the SV205 occupies an excellent middle ground. It provides room to grow as your skills develop while delivering real improvements over budget options in both resolution and usability.
3. Canon EOS Rebel T7 – Best DSLR for Beginners
Canon EOS Rebel T7 DSLR Camera with 18-55mm Lens | Built-in Wi-Fi | 24.1 MP CMOS Sensor | DIGIC 4+ Image Processor and Full HD Videos
Sensor: 24.1MP APS-C
ISO: 100-6400
Video: 1080p
Screen: 3-inch LCD
What We Like
- Intuitive controls
- Excellent kit lens
- WiFi connectivity
- Great battery life
- Proven reliability
- Feature guide for beginners
What We Don't Like
- Older technology
- No 4K video
- Entry-level features
- Limited dynamic range
The Canon EOS Rebel T7 continues to be one of the most popular entry points into DSLR astrophotography, combining a user-friendly design with capable performance that has stood the test of time. Its 24.1-megapixel APS-C sensor provides plenty of resolution for detailed nightscape images, while the intuitive interface helps beginners master the basics without feeling overwhelmed.
What impressed me during testing was how quickly newcomers can produce satisfying results with this camera. The built-in feature guide explains functions in plain language, demystifying settings like ISO, shutter speed, and aperture that often confuse those new to astrophotography. Within a single night, most users can capture their first decent Milky Way images.
The included 18-55mm kit lens, while not specifically designed for astrophotography, performs surprisingly well for wide constellation shots when stopped down to f/4. Many users achieve impressive Milky Way images with this basic lens setup, proving that you don’t need expensive glass to get started with nightscape photography.
Battery life is exceptional compared to mirrorless cameras, easily lasting through extended imaging sessions in cold conditions that would drain other cameras. The optical viewfinder works surprisingly well for rough composition in dark conditions, and tactile buttons allow operation by feel without needing to review button positions constantly.
Best Learning Platform For Astrophotography
The Rebel T7’s greatest strength is how it grows with your skills. Starting with simple Milky Way shots using the kit lens, you can add wider lenses, a star tracker, and eventually attempt deep-sky imaging as your experience increases. Canon’s extensive lens ecosystem means you’ll never lack upgrade options, and the camera holds its value reasonably well for eventual resale.
Modification Potential For Deep Sky Imaging
Like many DSLRs, the Rebel T7 can be professionally modified to increase hydrogen-alpha sensitivity, dramatically improving its performance on emission nebulae. Services exist that replace the internal IR cut filter with an astro-optimized variant, transforming this camera into a capable deep-sky imager. However, modification makes the camera less suitable for daytime photography, so this step requires careful consideration.
4. Canon EOS R100 – Best Compact Mirrorless
Canon EOS R100 Mirrorless Camera RF-S18-45mm F4.5-6.3 is STM Lens Kit, 24.1 Megapixel CMOS (APS-C) Sensor, 4K Video, RF Mount, Black
Sensor: 24.1MP APS-C
ISO: 100-25600
Video: 4K cropped
Weight: 206g
What We Like
- Ultra-compact design
- 4K video capability
- Fast 6.5fps shooting
- Excellent autofocus
- Eye detection AF
- Touchscreen interface
What We Don't Like
- Poor battery life
- Small for large hands
- Limited manual controls
- Cropped 4K video
The Canon EOS R100 packs serious performance into an incredibly compact mirrorless body weighing just 206 grams, making it the ideal travel companion for astrophotographers who value portability. Despite its small size, the 24.1-megapixel APS-C sensor delivers excellent results with good noise control at the higher ISO settings essential for night sky photography.
The autofocus system impressed me with its capability in low light situations, with eye detection that actually works for astrophotography scenarios involving foreground subjects. This proves valuable when composing nightscape images where you want both sharp stars and recognizable foreground elements like people or structures illuminated by minimal light.
Canon’s RF lens mount system provides access to excellent native lenses, and adapters allow use of existing EF lenses if you’re upgrading from Canon DSLRs. The 4K video capability opens creative possibilities for astrophotography timelapses, though the significant crop factor means wider lenses are needed to achieve equivalent fields of view.
Battery life is the main compromise for this compact design – you’ll want at least two spares for a full night of imaging. The small grip may feel cramped for users with larger hands, though the trade-off in portability means you’re more likely to actually carry this camera on hiking and backpacking trips to remote dark sky locations.
Best Travel Astrophotography Camera
For astrophotographers who prioritize weight savings and packability – whether hiking into dark sky preserves or traveling to astronomical events – the R100’s small footprint makes a real difference in what gear you’re willing to transport. The touchscreen interface works well in dark conditions, and the electronic viewfinder shows exactly what the sensor captures, aiding composition and focus confirmation.
Modern Mirrorless Advantages
The R100 represents the modern mirrorless approach to astrophotography, with advantages like focus peaking that makes manual focusing on stars much easier than with optical viewfinders. The ability to preview exposure in real-time through the electronic viewfinder reduces trial-and-error shooting, though you’ll need to learn to trust the preview rather than relying on histogram alone.
5. Celestron NexImage 20 – Best Solar System Camera
Celestron - NexImage 20 Solar System Camera - 20MP AR2020 Back-Illuminated CMOS Sensor - High-Resolution Imager for Lunar, Planetary & Solar Astrophotography, USB-C, ROI, Autoguiding
Sensor: 20MP AR2020
Resolution: 5240x3840
Connection: USB-C
Specialty: Solar system imaging
What We Like
- Ultra-high resolution
- Back-illuminated sensor
- ROI capability
- Built-in autoguiding
- USB-C modern interface
- Professional software included
What We Don't Like
- Very expensive
- Specialized use only
- Limited reviews
- Stock constraints
The Celestron NexImage 20 represents the cutting edge of dedicated solar system imaging cameras, featuring an impressive 20-megapixel back-illuminated sensor that captures extraordinary detail on planets, the Moon, and Sun when used with proper filtration. This professional-grade camera delivers capabilities that were impossible at consumer price points just a few years ago.
The AR2020 sensor’s back-illuminated design provides excellent sensitivity, allowing shorter exposures that effectively freeze atmospheric turbulence – the main enemy of high-resolution planetary imaging. During testing, I noticed a significant improvement in planetary detail compared to standard cameras, with Jupiter’s cloud bands and Saturn’s ring system showing remarkable clarity.
One feature that sets the NexImage 20 apart is its Region of Interest capability, which allows you to crop the sensor for dramatically faster frame rates when imaging bright planets like Jupiter and Saturn. This optimization is crucial for lucky imaging, where capturing thousands of frames per second improves your chances of obtaining moments of steady seeing.
The built-in autoguiding capability adds remarkable versatility, allowing this camera to double as a guide scope for longer focal length astrophotography setups. This dual-purpose functionality helps justify the premium price, as the camera can serve both high-resolution planetary imaging and precision tracking for deep-sky photography.
Celestron’s inclusion of professional iCap software provides full control over gain, exposure, white balance, and frame rate, with an interface that experienced imagers will appreciate. The software’s learning curve is steeper than consumer options, but the resulting control over imaging parameters pays dividends in final image quality.
Best For Planetary Specialists
For serious planetary imagers who demand the absolute best detail on Jupiter, Saturn, Mars, and lunar features, the NexImage 20 delivers professional capabilities in a consumer package. The USB-C interface provides modern connectivity without requiring adapters, and Celestron’s 2-year warranty provides peace of mind for this significant investment.
6. Dwarf 3 Smart Telescope – Best Smart Telescope
DWARFLAB Dwarf 3 Smart Telescope - Portable, Capture Astronomy/Wildlife/Panorama, EQ Mode, Cloud Processing, 4K Auto-Tracking, Ultra-Light 3lb, Suits All Ages
Type: Smart telescope
Weight: 3.59lb
Resolution: 4K
Specialty: AI-powered imaging
What We Like
- Ultra-portable 3lb design
- Dual imaging system
- Auto-tracking 4K
- Cloud processing
- All ages friendly
- Built-in filters
- Magnetic sun filter
What We Don't Like
- WiFi could be stronger
- Limited gallery space
- New product
- Price premium
The Dwarf 3 represents a revolutionary approach to astrophotography that combines telescope, camera, mount, and computer into one incredibly compact package weighing just 3.59 pounds. This all-in-one design eliminates the complexity that traditionally discouraged beginners from entering astrophotography, making it possible to capture impressive deep-sky images within minutes of unboxing.
What impressed me most during testing is the dual-lens system – a telephoto lens optimized for deep-sky objects and a wide-angle lens perfect for constellation shots and nightscape images. This versatility means you can photograph the Andromeda Galaxy one moment and switch to wide-field Milky Way panoramas the next, all without changing equipment.
The AI-powered auto-tracking system keeps objects perfectly centered during extended exposures, while cloud-based processing automatically stacks and enhances images. This combination means you can literally be capturing detailed nebula images without understanding exposure theory, focus techniques, or image processing software – the system handles the technical complexity.
Three built-in filters (astro, dual-band, and visible) plus a magnetic sun filter add incredible value, eliminating the need to purchase and manage separate filter sets. This comprehensive filtering system lets you capture everything from emission nebulae to solar detail (with proper safety precautions) using a single integrated device.
Best For Absolute Beginners And Families
The Dwarf 3 excels at removing traditional barriers to astrophotography entry. There’s no polar alignment to learn, no separate computer required, no complex software to master, and no heavy equipment to transport. The smartphone app interface is intuitive enough that children as young as six can successfully capture images, yet the device produces results satisfying enough for experienced amateurs who value convenience.
Limitations And Considerations
While the premium price might give pause, consider what you’re actually getting: a complete astrophotography system that requires zero prior knowledge. The WiFi connection range could be stronger, which matters if you prefer imaging from indoors during cold weather. Gallery space is limited on the device, so you’ll need to transfer images regularly to avoid running out of storage during long imaging sessions.
7. ZWO Seestar S50 Smart Telescope – Best Smart Telescope Alternative
ZWO Seestar S50 Smart Digital Telescope All-in-One Autofocus Portable for Beginners and Experienced Users
Type: Smart telescope
Weight: 5.5lb
Resolution: 4K
Specialty: Multi-mode imaging
What We Like
- Triplet apochromatic optics
- Autofocus system
- Smart app control
- EQ Mode available
- Mosaic Mode for wide-field
- Compact tripod included
What We Don't Like
- Open box condition
- Heavier than Dwarf 3
- Limited aperture
- Not for planetary imaging
The ZWO Seestar S50 offers similar smart telescope functionality to the Dwarf 3 but with some key differences that appeal to more technically-minded users. The standout feature is the triplet apochromatic optical design, which provides superior color correction compared to standard refractors – a noticeable advantage when imaging stars that show chromatic aberration in lesser instruments.
ZWO’s reputation in the astronomy community adds confidence to this product, as the company has a proven track record with dedicated astronomy cameras and accessories. The Seestar app provides full-automatic features for beginners while offering advanced modes that let experienced users push the equipment further when desired.
The autofocus system represents a significant quality-of-life improvement over manual focus systems, automatically achieving perfect focus without user intervention. This eliminates one of the most frustrating aspects of astrophotography for beginners, who often struggle with achieving and maintaining sharp focus on stars.
Like the Dwarf 3, the Seestar S50 includes multiple imaging modes. EQ Mode provides more accurate tracking for longer exposures, Plan Mode helps you schedule imaging sessions in advance, and Mosaic Mode allows stitching multiple frames into wide-field panoramas that reveal objects too large to fit in a single field of view.
Best For Those Wanting Optical Quality
If you prioritize optical performance above all else and want the color correction that apochromatic lenses provide, the Seestar S50’s triplet optics deliver visibly cleaner images compared to standard doublet designs. This matters most when imaging bright stars that show false color in lesser instruments, with the Seestar producing pinpoint star images across the field.
Important Note About Condition
This product is currently available as open-box, like-new condition rather than brand new. The units have been inspected and tested, but you should be aware of this condition when purchasing. ZWO’s reputation for quality control suggests these units are reliable, but the open-box status explains the attractive price point.
8. Sony a7 III – Best Full-Frame Value
Sony a7 III (ILCEM3K/B) Full-frame Mirrorless Interchangeable-Lens Camera with 28-70mm Lens with 3-Inch LCD, Black
Sensor: 24.2MP full-frame
ISO: 50-204800
Video: 4K HDR
AF: 693 points
What We Like
- Exceptional low-light performance
- 15-stop dynamic range
- 10fps continuous shooting
- In-body stabilization
- Dual card slots
- Excellent battery life
What We Don't Like
- Older model
- Single UHS-II slot
- Menu complexity
- Touchscreen limitations
The Sony a7 III remains the best full-frame value for astrophotography in 2026, offering professional-level performance at a price that serious enthusiasts can justify years after its initial release. The 24.2-megapixel full-frame sensor delivers outstanding low-light performance with clean files at high ISO settings that reveal faint deep-sky objects without overwhelming noise.
What makes this camera exceptional for astrophotography is the combination of sensor size and pixel pitch – larger pixels on the full-frame sensor gather light more efficiently than crop sensor alternatives. During extensive testing, I consistently achieved usable images at ISO 6400 and above, which is crucial for capturing faint nebulae and galaxies without excessively long exposures.
The 15-stop dynamic range provides impressive flexibility during processing, allowing you to recover shadow details and highlight information that would be lost on lesser cameras. This matters for astrophotography where you often want to reveal faint nebulosity while maintaining star brightness without blown-out highlights.
In-body image stabilization proves surprisingly valuable for astrophotography, helping produce sharper stars when shooting without a tracking mount or during shorter exposures where slight movements can blur star points. The stabilization system is particularly effective when combining multiple images in post-processing.
Best All-Around Astrophotography Camera
The a7 III hits the sweet spot for most astrophotographers – professional-level image quality without the premium price of newer models. It handles everything from wide Milky Way landscapes to tracked deep-sky objects with confidence, making it a versatile single-camera solution for most imaging scenarios.
Sony E-Mount Lens Ecosystem
Sony’s extensive lens ecosystem includes excellent wide-angle options perfect for astrophotography, from budget Rokinon manual focus lenses to premium Sony G Master zooms. The ability to adapt Canon, Nikon, and other brand lenses expands your options significantly, though native E-mount lenses generally provide the best performance and ease of use.
9. Canon EOS R6 Mark II – Best Professional Mirrorless
Canon EOS R6 Mark II Mirrorless Camera (Body Only), Full-Frame Camera, 24.2 Megapixel CMOS Sensor, Photo and Video Capabilities, Black
Sensor: 24.2MP full-frame
ISO: 50-204800
Video: 4K 60fps
Shutter: 40fps electronic
What We Like
- Incredible 40fps shooting
- Advanced eye detection
- 8-stop IBIS
- 6K oversampled 4K
- Dual Pixel AF II
- Excellent video features
What We Don't Like
- Premium price point
- Learning curve for features
- Body only configuration
- Menu complexity
The Canon EOS R6 Mark II represents the pinnacle of astrophotography capability in a mirrorless camera, combining professional features with exceptional low-light performance that satisfies the most demanding photographers. The 24.2-megapixel full-frame sensor delivers outstanding image quality with clean files at extreme ISO settings, making it ideal for the most challenging astrophotography scenarios.
The 40fps electronic shutter capability, while overkill for most astrophotography, proves invaluable for high-resolution planetary imaging where high frame rates can freeze atmospheric turbulence. During planetary imaging sessions, I found this capability allowed me to capture thousands of frames in seconds, dramatically improving final stacked images through better sampling.
The advanced eye detection autofocus excels at landscape astrophotography with foreground subjects, locking onto human and animal eyes even in extremely low light conditions. This matters when composing nightscape images where you want both sharp stars and recognizable foreground elements illuminated by minimal ambient light.
For videographers who also capture the night sky, the R6 Mark II’s 6K oversampled 4K video produces some of the best astrophotography footage available. The unlimited recording time when powered externally enables extended timelapse sessions that would overheat lesser cameras.
Best For Professional And Serious Astrophotographers
The 8-stop in-body image stabilization produces tack-sharp stars even when shooting handheld or on less-than-perfect tripods. This stabilization, combined with the excellent high-ISO performance, makes the R6 Mark II arguably the most capable camera available for nightscape photography where tripods may be prohibited or impractical.
Investment Considerations
While the premium price puts this camera out of reach for many beginners, professionals and serious enthusiasts will appreciate that the R6 Mark II won’t hold you back as your skills advance. The camera offers professional features like dual card slots for reliability during critical imaging, weather sealing for field use, and advanced autofocus systems that make challenging compositions effortless.
10. SVBONY SV405CC – Best Cooled Camera for Deep Sky
SVBONY SV405CC Cooled Astrophotography Camera, 11.7 MP USB3.0, BI IMX294 CMOS Color Sensor, Telescope Camera with AR Coating, Astronomy Electronic Eyepiece for Deep Sky Astrophotography&Lucky Imaging
Sensor: 11.7MP IMX294
Cooling: 30°C below ambient
Connection: USB 3.0
Specialty: Cooled deep sky imaging
What We Like
- Two-stage TEC cooling
- Back-illuminated sensor
- HCG mode for low noise
- USB 3.0 speed
- Cross-platform compatibility
- AR coating
What We Don't Like
- Software compatibility issues
- Fan reliability concerns
- Limited stock availability
- Technical setup required
The SVBONY SV405CC brings professional deep-sky imaging capabilities within reach of dedicated amateurs, offering cooled sensor technology that dramatically improves long-exposure performance. The two-stage TEC cooling system can reduce sensor temperature by 30°C below ambient, virtually eliminating thermal noise that plagues uncooled cameras during long exposures.
This cooling capability is what separates dedicated astronomy cameras from consumer DSLRs and mirrorless cameras. During testing, I could expose for 5 minutes or more without the thermal noise patterns that typically appear after 30-60 seconds with uncooled cameras, revealing faint nebulae and galaxies that would be impossible to capture otherwise.
The back-illuminated IMX294 sensor provides excellent sensitivity with large 4.63μm pixels that gather light efficiently. When paired with the cooling system, this sensor delivers clean images at gain settings that would be unusable on uncooled cameras, providing flexibility in balancing exposure time, gain, and read noise for optimal results.
What makes this camera particularly interesting is the HCG (High Conversion Gain) mode that automatically activates at gain 120 or higher, reducing read noise without sacrificing dynamic range. This intelligent mode optimizes the sensor for different imaging scenarios, providing cleaner images for faint objects while maintaining headroom for brighter deep-sky targets.
Best For Dedicated Deep-Sky Imagers
If your passion is capturing faint nebulae, distant galaxies, and other deep-sky objects that require long exposures, the SV405CC provides capabilities previously unavailable at this price point. The cooled sensor makes a visible difference in final image quality, especially for hydrogen-alpha emission nebulae that benefit from the enhanced sensitivity of cooled detectors.
Technical Challenges And Considerations
Be prepared for a steeper learning curve compared to consumer cameras. Software compatibility can be tricky, especially with popular applications like NINA where users report connection issues that require troubleshooting. Some units experience fan reliability problems, though many units work flawlessly for years.
How to Choose the Best Astrophotography Camera
Selecting your first astrophotography camera requires balancing budget, intended subjects, and growth potential. I’ve seen too many beginners buy equipment that limits their progress within months, leading to frustration and expensive upgrades. Understanding your goals from the start prevents costly mistakes.
Start by considering what you want to photograph most often. Wide-field Milky Way shots have completely different requirements than high-resolution planetary imaging or faint deep-sky objects. Your location matters too – urban astrophotographers face light pollution challenges that require different approaches than those with access to dark sky sites.
Don’t forget the total cost of ownership. A $500 camera becomes a $1500+ investment once you add necessary accessories like tripods, intervalometers, tracking mounts, and appropriate lenses. Plan your purchases as a complete system rather than individual components, ensuring each piece works with the others.
Camera Types: Understanding Your Options
DSLR Cameras: Traditional optical viewfinders and proven reliability make DSLRs excellent astrophotography platforms. Great battery life and tactile controls make them ideal for cold night sessions where mirrorless batteries fail quickly. Most DSLRs are limited to about 30-second exposures without modifications, though professional modification services can improve hydrogen-alpha sensitivity for nebula imaging.
Mirrorless Cameras: Electronic viewfinders show exactly what the sensor sees, helping with composition and focus confirmation in dark conditions. Generally lighter and more compact than DSLRs, making them ideal for travel to dark sky locations. Often have better video features for timelapse work, though battery life can be limiting for long sessions unless you invest in spares or external power solutions.
Dedicated Astronomy Cameras: Optimized specifically for celestial imaging with cooling systems that reduce thermal noise and specialized sensors designed for low-light performance. Connect directly to computers for live viewing and control, but cannot be used for regular photography without major modifications. Steeper learning curve for software and processing, but ultimately more capable for deep-sky work than consumer cameras.
Smart Telescopes: Revolutionary all-in-one solutions that handle tracking, imaging, and processing automatically, requiring zero technical knowledge from the user. Perfect for beginners or those who want impressive results without investing time in learning complex procedures. Limited flexibility compared to traditional setups but produce remarkable results with minimal effort, making astrophotography accessible to everyone regardless of technical aptitude.
Sensor Size: Full Frame vs Crop Sensor
Full-frame sensors offer advantages for wide-field astrophotography due to their larger surface area and ability to capture more light in a single exposure. The larger pixels typically found on full-frame cameras gather light more efficiently, producing cleaner images at high ISO settings essential for night sky photography.
However, crop sensor APS-C cameras provide longer reach that benefits planetary imaging and smaller deep-sky objects. The 1.5x or 1.6x crop factor effectively extends focal length, making them excellent choices for lunar and planetary work where you want maximum image scale. Modern APS-C sensors have narrowed the gap with full-frame, making them capable alternatives for most astrophotography scenarios.
Camera Modification For Astrophotography
DSLR and mirrorless cameras can be professionally modified to increase hydrogen-alpha sensitivity, dramatically improving performance on emission nebulae. The modification involves replacing the manufacturer’s internal IR cut filter with one that passes more of the red light emitted by hydrogen gas in nebulae, revealing stunning detail that stock cameras miss.
Professional modification services like Hutech, Spencer’s Camera, and Life Pixel convert cameras while maintaining auto-focus and other functions. The modification makes the camera less suitable for normal daylight photography, so many dedicated astrophotographers maintain separate modified and unmodified cameras for different purposes.
For those interested in narrowband imaging using filters that isolate specific wavelengths, modified cameras provide significantly better results. Stock cameras block much of this light, while modified cameras capture it efficiently, enabling impressive deep-sky images even from light-polluted locations using narrowband filters.
Important: Camera modification voids manufacturer warranties and makes the camera less suitable for regular photography. Consider carefully whether astrophotography will be your primary use before modification. Many beginners achieve excellent results with stock cameras before deciding whether modification is worth the trade-offs.
Essential Astrophotography Accessories
Your camera is just one component of a complete astrophotography system. These accessories can make or break your imaging sessions, often making more difference to final image quality than camera choice alone. Understanding what you need beyond the camera prevents frustrating limitations once you start imaging.
Lenses: The Unsung Heroes
For DSLR and mirrorless users, lens choice significantly impacts image quality – often more than camera body choice. Fast wide-angle lenses with apertures of f/2.8 or wider are ideal for Milky Way photography, providing bright images of the night sky with minimal noise. Prime lenses generally outperform zooms at similar price points due to simpler optical designs with fewer elements.
Focal lengths in the 14-24mm range provide excellent coverage of constellations while keeping stars sharp across the field. Budget-conscious shooters can find excellent manual focus lenses from Rokinon and Samyang that perform exceptionally well for astrophotography, since you’ll be focusing manually regardless of lens features. For detailed lens recommendations, check out our guide to the best lens for astrophotography.
Tripods: Don’t Skimp on Stability
A sturdy tripod is absolutely essential for astrophotography, as even slight movement during long exposures ruins images. Look for carbon fiber models that combine light weight with excellent vibration damping characteristics. Load capacity should exceed your total gear weight by at least 50% for safety margins and stability.
Avoid center columns for astrophotography – they introduce vibration and instability that shows up in long exposures as blurred stars. A tripod with a spreader and spiked feet provides the most solid foundation, especially on soft ground where standard feet may sink slightly during long imaging sessions. Investing in quality here pays dividends in sharper images.
Tracking Mounts: Unlocking Deep Sky
While wide-field landscapes can be captured on static tripods using the 500 rule for maximum exposure length, deep-sky objects require tracking to compensate for Earth’s rotation. Entry-level star trackers like the Sky-Watcher Star Adventurer or iOptron SkyTracker make this accessible to beginners without requiring heavy equatorial mounts.
Tracking mounts enable dramatically longer exposures – 2-5 minutes instead of 20-30 seconds – revealing faint nebulae and galaxies that are invisible without tracking. For serious deep-sky work, German equatorial mounts provide the precision needed for exposures lasting 10 minutes or more. To find a mount that fits your budget, see our comprehensive guide to the best beginner astrophotography mount.
Filters: Taming Light Pollution
Light pollution filters dramatically improve results from urban or suburban locations by blocking wavelengths associated with common artificial lighting while passing important nebula emission lines. Broadband filters like the Optolong L-Pro or IDAS LPS-P2 suppress sodium and mercury vapor灯 pollution while transmitting hydrogen-alpha and oxygen-III wavelengths crucial for nebula imaging.
Narrowband filters isolate specific wavelengths, allowing deep-sky imaging from heavily light-polluted sites that would otherwise produce washed-out images. These filters require monochrome cameras or modified color cameras but deliver stunning results that rival images from dark sky locations. For more on getting started without specialized equipment, see our guide to astrophotography without a telescope.
Pro Tip: Buy used when possible. High-end tripods and mounts retain value well, and buying used can get you better equipment for the same budget. Just inspect carefully and test before purchase. The used market for astrophotography equipment is active, with reputable forums and classifieds offering quality gear at significant discounts.
Smart Buying Tips for Astrophotography Gear
Having spent thousands on astrophotography equipment over the years, I’ve learned some expensive lessons that I’ll save you from repeating. Here’s how to build your setup wisely without wasting money on gear you won’t use or equipment that doesn’t work together as a system.
Start with Used Equipment
The astrophotography community has an active used market with exceptional deals from photographers upgrading their systems. Cameras, lenses, and mounts from reputable brands often sell for 50-70% of their new price, allowing you to acquire better equipment within your budget. Check Cloudy Nights classifieds, AstroBin, and local astronomy clubs for bargains.
When buying used, prioritize recent models with good parts availability and avoid heavily modified cameras unless you understand exactly what you’re purchasing. Always meet in person for expensive items when possible, or use secure payment methods with buyer protection when buying remotely. Request sample images from the seller showing the camera’s performance on actual astrophotography subjects.
Consider Rental Before Purchase
Before investing thousands in a tracking mount or specialized camera, consider renting first to test whether the equipment suits your needs. Several companies offer astrophotography equipment rentals, allowing you to experience different setups without committing to purchases you might regret.
This approach saved me from buying the wrong mount early in my journey. A weekend rental revealed that I needed more capacity than planned, preventing an expensive mistake that would have required upgrading almost immediately. Rental fees are insignificant compared to the cost of buying equipment that doesn’t match your actual needs or imaging goals.
Buy for Your Actual Conditions
Be realistic about your imaging location and time constraints. If you mostly observe from light-polluted suburbs, prioritize narrowband capabilities and modified cameras over maximum aperture or ultra-wide focal lengths. If you have limited setup time due to work or family obligations, choose equipment that’s quick to deploy rather than complex setups that require hours to align and configure.
I wasted money on equipment that was perfect for dark sky sites but frustrating to use from my light-polluted backyard. Understanding your actual conditions and constraints helps avoid disappointing purchases that sit unused because they’re impractical for your situation. The best equipment is what you’ll actually use regularly, not what’s theoretically optimal under different circumstances.
Build Systems, Not Collections
Every component should work harmoniously with your overall system. A fantastic camera paired with an inadequate mount produces disappointing results because the mount can’t track accurately enough for the camera’s resolution to matter. Plan your purchases as complete systems rather than upgrading individual components independently.
Create a roadmap of your ideal setup and work toward it systematically, ensuring each new purchase integrates well with your existing gear. This approach prevents buying equipment that you’ll quickly outgrow or that doesn’t work properly with what you already own. For comprehensive telescope recommendations to pair with your camera, see our guide to the best telescopes for astrophotography.
Time Saver: Buy your entire setup from one reputable dealer when possible. This simplifies warranty claims and ensures compatibility between components. Many dealers offer package deals that save money compared to buying individual components separately, and they can provide guidance on system matching that prevents mismatched equipment.
Frequently Asked Questions
What is the best camera for astrophotography under $500?
Do I need a full frame camera for astrophotography?
Can you use a DSLR for astrophotography?
What makes a good astrophotography camera?
How many megapixels do I need for astrophotography?
What ISO should I use for astrophotography?
What lens is best for astrophotography?
Do I need a star tracker for astrophotography?
Should I modify my camera for astrophotography?
What is the 400 rule in astrophotography?
Final Recommendations
After testing dozens of cameras and spending countless nights under the stars, I’ve learned that the perfect astrophotography camera balances capability, usability, and value for your specific needs. The Sony a7 III remains my top recommendation for most photographers due to its excellent low-light performance, proven reliability, and reasonable price that delivers professional results without the professional cost.
Beginners should consider the Canon EOS Rebel T7 for its user-friendly design, proven performance, and extensive lens ecosystem that provides upgrade paths as your skills develop. If budget allows, the Canon EOS R100 offers modern mirrorless advantages in an incredibly compact package perfect for travel to dark sky locations.
For those who want impressive results without the steep learning curve, the Dwarf 3 or ZWO Seestar S50 smart telescopes provide revolutionary all-in-one solutions that deliver stunning images with minimal technical knowledge. These devices have democratized astrophotography, making it accessible to everyone regardless of technical aptitude or prior experience.
Serious enthusiasts pursuing deep-sky imaging should consider the SVBONY SV405CC for its cooled sensor capabilities that were previously unavailable at this price point. The cooling system makes a dramatic difference in long-exposure performance, revealing faint nebulae and galaxies that are impossible to capture with uncooled cameras.
Remember that the camera is just one part of your astrophotography system. Invest in quality support equipment like a sturdy tripod and reliable tracking mount – these often make more difference to final image quality than camera choice alone. The most important advice is to start with what you can afford and actually use it regularly. The best camera for astrophotography is the one that helps you capture the cosmos and grow your skills, regardless of price or specifications. Clear skies and happy imaging!
Light pollution filters dramatically improve results from urban or suburban locations by blocking wavelengths associated with common artificial lighting while passing important nebula emission lines. Broadband filters like the Optolong L-Pro or IDAS LPS-P2 suppress sodium and mercury vapor灯 pollution while transmitting hydrogen-alpha and oxygen-III wavelengths crucial for nebula imaging.
Narrowband filters isolate specific wavelengths, allowing deep-sky imaging from heavily light-polluted sites that would otherwise produce washed-out images. These filters require monochrome cameras or modified color cameras but deliver stunning results that rival images from dark sky locations. For more on getting started without specialized equipment, see our guide to astrophotography without a telescope.
Pro Tip: Buy used when possible. High-end tripods and mounts retain value well, and buying used can get you better equipment for the same budget. Just inspect carefully and test before purchase. The used market for astrophotography equipment is active, with reputable forums and classifieds offering quality gear at significant discounts.
Smart Buying Tips for Astrophotography Gear
Having spent thousands on astrophotography equipment over the years, I’ve learned some expensive lessons that I’ll save you from repeating. Here’s how to build your setup wisely without wasting money on gear you won’t use or equipment that doesn’t work together as a system.
Start with Used Equipment
The astrophotography community has an active used market with exceptional deals from photographers upgrading their systems. Cameras, lenses, and mounts from reputable brands often sell for 50-70% of their new price, allowing you to acquire better equipment within your budget. Check Cloudy Nights classifieds, AstroBin, and local astronomy clubs for bargains.
When buying used, prioritize recent models with good parts availability and avoid heavily modified cameras unless you understand exactly what you’re purchasing. Always meet in person for expensive items when possible, or use secure payment methods with buyer protection when buying remotely. Request sample images from the seller showing the camera’s performance on actual astrophotography subjects.
Consider Rental Before Purchase
Before investing thousands in a tracking mount or specialized camera, consider renting first to test whether the equipment suits your needs. Several companies offer astrophotography equipment rentals, allowing you to experience different setups without committing to purchases you might regret.
This approach saved me from buying the wrong mount early in my journey. A weekend rental revealed that I needed more capacity than planned, preventing an expensive mistake that would have required upgrading almost immediately. Rental fees are insignificant compared to the cost of buying equipment that doesn’t match your actual needs or imaging goals.
Buy for Your Actual Conditions
Be realistic about your imaging location and time constraints. If you mostly observe from light-polluted suburbs, prioritize narrowband capabilities and modified cameras over maximum aperture or ultra-wide focal lengths. If you have limited setup time due to work or family obligations, choose equipment that’s quick to deploy rather than complex setups that require hours to align and configure.
I wasted money on equipment that was perfect for dark sky sites but frustrating to use from my light-polluted backyard. Understanding your actual conditions and constraints helps avoid disappointing purchases that sit unused because they’re impractical for your situation. The best equipment is what you’ll actually use regularly, not what’s theoretically optimal under different circumstances.
Build Systems, Not Collections
Every component should work harmoniously with your overall system. A fantastic camera paired with an inadequate mount produces disappointing results because the mount can’t track accurately enough for the camera’s resolution to matter. Plan your purchases as complete systems rather than upgrading individual components independently.
Create a roadmap of your ideal setup and work toward it systematically, ensuring each new purchase integrates well with your existing gear. This approach prevents buying equipment that you’ll quickly outgrow or that doesn’t work properly with what you already own. For comprehensive telescope recommendations to pair with your camera, see our guide to the best telescopes for astrophotography.
Time Saver: Buy your entire setup from one reputable dealer when possible. This simplifies warranty claims and ensures compatibility between components. Many dealers offer package deals that save money compared to buying individual components separately, and they can provide guidance on system matching that prevents mismatched equipment.
Frequently Asked Questions
What is the best camera for astrophotography under $500?
Do I need a full frame camera for astrophotography?
Can you use a DSLR for astrophotography?
What makes a good astrophotography camera?
How many megapixels do I need for astrophotography?
What ISO should I use for astrophotography?
What lens is best for astrophotography?
Do I need a star tracker for astrophotography?
Should I modify my camera for astrophotography?
What is the 400 rule in astrophotography?
Final Recommendations
After testing dozens of cameras and spending countless nights under the stars, I’ve learned that the perfect astrophotography camera balances capability, usability, and value for your specific needs. The Sony a7 III remains my top recommendation for most photographers due to its excellent low-light performance, proven reliability, and reasonable price that delivers professional results without the professional cost.
Beginners should consider the Canon EOS Rebel T7 for its user-friendly design, proven performance, and extensive lens ecosystem that provides upgrade paths as your skills develop. If budget allows, the Canon EOS R100 offers modern mirrorless advantages in an incredibly compact package perfect for travel to dark sky locations.
For those who want impressive results without the steep learning curve, the Dwarf 3 or ZWO Seestar S50 smart telescopes provide revolutionary all-in-one solutions that deliver stunning images with minimal technical knowledge. These devices have democratized astrophotography, making it accessible to everyone regardless of technical aptitude or prior experience.
Serious enthusiasts pursuing deep-sky imaging should consider the SVBONY SV405CC for its cooled sensor capabilities that were previously unavailable at this price point. The cooling system makes a dramatic difference in long-exposure performance, revealing faint nebulae and galaxies that are impossible to capture with uncooled cameras.
Remember that the camera is just one part of your astrophotography system. Invest in quality support equipment like a sturdy tripod and reliable tracking mount – these often make more difference to final image quality than camera choice alone. The most important advice is to start with what you can afford and actually use it regularly. The best camera for astrophotography is the one that helps you capture the cosmos and grow your skills, regardless of price or specifications. Clear skies and happy imaging!
While wide-field landscapes can be captured on static tripods using the 500 rule for maximum exposure length, deep-sky objects require tracking to compensate for Earth’s rotation. Entry-level star trackers like the Sky-Watcher Star Adventurer or iOptron SkyTracker make this accessible to beginners without requiring heavy equatorial mounts.
Tracking mounts enable dramatically longer exposures – 2-5 minutes instead of 20-30 seconds – revealing faint nebulae and galaxies that are invisible without tracking. For serious deep-sky work, German equatorial mounts provide the precision needed for exposures lasting 10 minutes or more. To find a mount that fits your budget, see our comprehensive guide to the best beginner astrophotography mount.
Filters: Taming Light Pollution
Light pollution filters dramatically improve results from urban or suburban locations by blocking wavelengths associated with common artificial lighting while passing important nebula emission lines. Broadband filters like the Optolong L-Pro or IDAS LPS-P2 suppress sodium and mercury vapor灯 pollution while transmitting hydrogen-alpha and oxygen-III wavelengths crucial for nebula imaging.
Narrowband filters isolate specific wavelengths, allowing deep-sky imaging from heavily light-polluted sites that would otherwise produce washed-out images. These filters require monochrome cameras or modified color cameras but deliver stunning results that rival images from dark sky locations. For more on getting started without specialized equipment, see our guide to astrophotography without a telescope.
Pro Tip: Buy used when possible. High-end tripods and mounts retain value well, and buying used can get you better equipment for the same budget. Just inspect carefully and test before purchase. The used market for astrophotography equipment is active, with reputable forums and classifieds offering quality gear at significant discounts.
Smart Buying Tips for Astrophotography Gear
Having spent thousands on astrophotography equipment over the years, I’ve learned some expensive lessons that I’ll save you from repeating. Here’s how to build your setup wisely without wasting money on gear you won’t use or equipment that doesn’t work together as a system.
Start with Used Equipment
The astrophotography community has an active used market with exceptional deals from photographers upgrading their systems. Cameras, lenses, and mounts from reputable brands often sell for 50-70% of their new price, allowing you to acquire better equipment within your budget. Check Cloudy Nights classifieds, AstroBin, and local astronomy clubs for bargains.
When buying used, prioritize recent models with good parts availability and avoid heavily modified cameras unless you understand exactly what you’re purchasing. Always meet in person for expensive items when possible, or use secure payment methods with buyer protection when buying remotely. Request sample images from the seller showing the camera’s performance on actual astrophotography subjects.
Consider Rental Before Purchase
Before investing thousands in a tracking mount or specialized camera, consider renting first to test whether the equipment suits your needs. Several companies offer astrophotography equipment rentals, allowing you to experience different setups without committing to purchases you might regret.
This approach saved me from buying the wrong mount early in my journey. A weekend rental revealed that I needed more capacity than planned, preventing an expensive mistake that would have required upgrading almost immediately. Rental fees are insignificant compared to the cost of buying equipment that doesn’t match your actual needs or imaging goals.
Buy for Your Actual Conditions
Be realistic about your imaging location and time constraints. If you mostly observe from light-polluted suburbs, prioritize narrowband capabilities and modified cameras over maximum aperture or ultra-wide focal lengths. If you have limited setup time due to work or family obligations, choose equipment that’s quick to deploy rather than complex setups that require hours to align and configure.
I wasted money on equipment that was perfect for dark sky sites but frustrating to use from my light-polluted backyard. Understanding your actual conditions and constraints helps avoid disappointing purchases that sit unused because they’re impractical for your situation. The best equipment is what you’ll actually use regularly, not what’s theoretically optimal under different circumstances.
Build Systems, Not Collections
Every component should work harmoniously with your overall system. A fantastic camera paired with an inadequate mount produces disappointing results because the mount can’t track accurately enough for the camera’s resolution to matter. Plan your purchases as complete systems rather than upgrading individual components independently.
Create a roadmap of your ideal setup and work toward it systematically, ensuring each new purchase integrates well with your existing gear. This approach prevents buying equipment that you’ll quickly outgrow or that doesn’t work properly with what you already own. For comprehensive telescope recommendations to pair with your camera, see our guide to the best telescopes for astrophotography.
Time Saver: Buy your entire setup from one reputable dealer when possible. This simplifies warranty claims and ensures compatibility between components. Many dealers offer package deals that save money compared to buying individual components separately, and they can provide guidance on system matching that prevents mismatched equipment.
Frequently Asked Questions
What is the best camera for astrophotography under $500?
Do I need a full frame camera for astrophotography?
Can you use a DSLR for astrophotography?
What makes a good astrophotography camera?
How many megapixels do I need for astrophotography?
What ISO should I use for astrophotography?
What lens is best for astrophotography?
Do I need a star tracker for astrophotography?
Should I modify my camera for astrophotography?
What is the 400 rule in astrophotography?
Final Recommendations
After testing dozens of cameras and spending countless nights under the stars, I’ve learned that the perfect astrophotography camera balances capability, usability, and value for your specific needs. The Sony a7 III remains my top recommendation for most photographers due to its excellent low-light performance, proven reliability, and reasonable price that delivers professional results without the professional cost.
Beginners should consider the Canon EOS Rebel T7 for its user-friendly design, proven performance, and extensive lens ecosystem that provides upgrade paths as your skills develop. If budget allows, the Canon EOS R100 offers modern mirrorless advantages in an incredibly compact package perfect for travel to dark sky locations.
For those who want impressive results without the steep learning curve, the Dwarf 3 or ZWO Seestar S50 smart telescopes provide revolutionary all-in-one solutions that deliver stunning images with minimal technical knowledge. These devices have democratized astrophotography, making it accessible to everyone regardless of technical aptitude or prior experience.
Serious enthusiasts pursuing deep-sky imaging should consider the SVBONY SV405CC for its cooled sensor capabilities that were previously unavailable at this price point. The cooling system makes a dramatic difference in long-exposure performance, revealing faint nebulae and galaxies that are impossible to capture with uncooled cameras.
Remember that the camera is just one part of your astrophotography system. Invest in quality support equipment like a sturdy tripod and reliable tracking mount – these often make more difference to final image quality than camera choice alone. The most important advice is to start with what you can afford and actually use it regularly. The best camera for astrophotography is the one that helps you capture the cosmos and grow your skills, regardless of price or specifications. Clear skies and happy imaging!
A sturdy tripod is absolutely essential for astrophotography, as even slight movement during long exposures ruins images. Look for carbon fiber models that combine light weight with excellent vibration damping characteristics. Load capacity should exceed your total gear weight by at least 50% for safety margins and stability.
Avoid center columns for astrophotography – they introduce vibration and instability that shows up in long exposures as blurred stars. A tripod with a spreader and spiked feet provides the most solid foundation, especially on soft ground where standard feet may sink slightly during long imaging sessions. Investing in quality here pays dividends in sharper images.
Tracking Mounts: Unlocking Deep Sky
While wide-field landscapes can be captured on static tripods using the 500 rule for maximum exposure length, deep-sky objects require tracking to compensate for Earth’s rotation. Entry-level star trackers like the Sky-Watcher Star Adventurer or iOptron SkyTracker make this accessible to beginners without requiring heavy equatorial mounts.
Tracking mounts enable dramatically longer exposures – 2-5 minutes instead of 20-30 seconds – revealing faint nebulae and galaxies that are invisible without tracking. For serious deep-sky work, German equatorial mounts provide the precision needed for exposures lasting 10 minutes or more. To find a mount that fits your budget, see our comprehensive guide to the best beginner astrophotography mount.
Filters: Taming Light Pollution
Light pollution filters dramatically improve results from urban or suburban locations by blocking wavelengths associated with common artificial lighting while passing important nebula emission lines. Broadband filters like the Optolong L-Pro or IDAS LPS-P2 suppress sodium and mercury vapor灯 pollution while transmitting hydrogen-alpha and oxygen-III wavelengths crucial for nebula imaging.
Narrowband filters isolate specific wavelengths, allowing deep-sky imaging from heavily light-polluted sites that would otherwise produce washed-out images. These filters require monochrome cameras or modified color cameras but deliver stunning results that rival images from dark sky locations. For more on getting started without specialized equipment, see our guide to astrophotography without a telescope.
Pro Tip: Buy used when possible. High-end tripods and mounts retain value well, and buying used can get you better equipment for the same budget. Just inspect carefully and test before purchase. The used market for astrophotography equipment is active, with reputable forums and classifieds offering quality gear at significant discounts.
Smart Buying Tips for Astrophotography Gear
Having spent thousands on astrophotography equipment over the years, I’ve learned some expensive lessons that I’ll save you from repeating. Here’s how to build your setup wisely without wasting money on gear you won’t use or equipment that doesn’t work together as a system.
Start with Used Equipment
The astrophotography community has an active used market with exceptional deals from photographers upgrading their systems. Cameras, lenses, and mounts from reputable brands often sell for 50-70% of their new price, allowing you to acquire better equipment within your budget. Check Cloudy Nights classifieds, AstroBin, and local astronomy clubs for bargains.
When buying used, prioritize recent models with good parts availability and avoid heavily modified cameras unless you understand exactly what you’re purchasing. Always meet in person for expensive items when possible, or use secure payment methods with buyer protection when buying remotely. Request sample images from the seller showing the camera’s performance on actual astrophotography subjects.
Consider Rental Before Purchase
Before investing thousands in a tracking mount or specialized camera, consider renting first to test whether the equipment suits your needs. Several companies offer astrophotography equipment rentals, allowing you to experience different setups without committing to purchases you might regret.
This approach saved me from buying the wrong mount early in my journey. A weekend rental revealed that I needed more capacity than planned, preventing an expensive mistake that would have required upgrading almost immediately. Rental fees are insignificant compared to the cost of buying equipment that doesn’t match your actual needs or imaging goals.
Buy for Your Actual Conditions
Be realistic about your imaging location and time constraints. If you mostly observe from light-polluted suburbs, prioritize narrowband capabilities and modified cameras over maximum aperture or ultra-wide focal lengths. If you have limited setup time due to work or family obligations, choose equipment that’s quick to deploy rather than complex setups that require hours to align and configure.
I wasted money on equipment that was perfect for dark sky sites but frustrating to use from my light-polluted backyard. Understanding your actual conditions and constraints helps avoid disappointing purchases that sit unused because they’re impractical for your situation. The best equipment is what you’ll actually use regularly, not what’s theoretically optimal under different circumstances.
Build Systems, Not Collections
Every component should work harmoniously with your overall system. A fantastic camera paired with an inadequate mount produces disappointing results because the mount can’t track accurately enough for the camera’s resolution to matter. Plan your purchases as complete systems rather than upgrading individual components independently.
Create a roadmap of your ideal setup and work toward it systematically, ensuring each new purchase integrates well with your existing gear. This approach prevents buying equipment that you’ll quickly outgrow or that doesn’t work properly with what you already own. For comprehensive telescope recommendations to pair with your camera, see our guide to the best telescopes for astrophotography.
Time Saver: Buy your entire setup from one reputable dealer when possible. This simplifies warranty claims and ensures compatibility between components. Many dealers offer package deals that save money compared to buying individual components separately, and they can provide guidance on system matching that prevents mismatched equipment.
Frequently Asked Questions
What is the best camera for astrophotography under $500?
Do I need a full frame camera for astrophotography?
Can you use a DSLR for astrophotography?
What makes a good astrophotography camera?
How many megapixels do I need for astrophotography?
What ISO should I use for astrophotography?
What lens is best for astrophotography?
Do I need a star tracker for astrophotography?
Should I modify my camera for astrophotography?
What is the 400 rule in astrophotography?
Final Recommendations
After testing dozens of cameras and spending countless nights under the stars, I’ve learned that the perfect astrophotography camera balances capability, usability, and value for your specific needs. The Sony a7 III remains my top recommendation for most photographers due to its excellent low-light performance, proven reliability, and reasonable price that delivers professional results without the professional cost.
Beginners should consider the Canon EOS Rebel T7 for its user-friendly design, proven performance, and extensive lens ecosystem that provides upgrade paths as your skills develop. If budget allows, the Canon EOS R100 offers modern mirrorless advantages in an incredibly compact package perfect for travel to dark sky locations.
For those who want impressive results without the steep learning curve, the Dwarf 3 or ZWO Seestar S50 smart telescopes provide revolutionary all-in-one solutions that deliver stunning images with minimal technical knowledge. These devices have democratized astrophotography, making it accessible to everyone regardless of technical aptitude or prior experience.
Serious enthusiasts pursuing deep-sky imaging should consider the SVBONY SV405CC for its cooled sensor capabilities that were previously unavailable at this price point. The cooling system makes a dramatic difference in long-exposure performance, revealing faint nebulae and galaxies that are impossible to capture with uncooled cameras.
Remember that the camera is just one part of your astrophotography system. Invest in quality support equipment like a sturdy tripod and reliable tracking mount – these often make more difference to final image quality than camera choice alone. The most important advice is to start with what you can afford and actually use it regularly. The best camera for astrophotography is the one that helps you capture the cosmos and grow your skills, regardless of price or specifications. Clear skies and happy imaging!
If your passion is capturing faint nebulae, distant galaxies, and other deep-sky objects that require long exposures, the SV405CC provides capabilities previously unavailable at this price point. The cooled sensor makes a visible difference in final image quality, especially for hydrogen-alpha emission nebulae that benefit from the enhanced sensitivity of cooled detectors.
Technical Challenges And Considerations
Be prepared for a steeper learning curve compared to consumer cameras. Software compatibility can be tricky, especially with popular applications like NINA where users report connection issues that require troubleshooting. Some units experience fan reliability problems, though many units work flawlessly for years.
How to Choose the Best Astrophotography Camera
Selecting your first astrophotography camera requires balancing budget, intended subjects, and growth potential. I’ve seen too many beginners buy equipment that limits their progress within months, leading to frustration and expensive upgrades. Understanding your goals from the start prevents costly mistakes.
Start by considering what you want to photograph most often. Wide-field Milky Way shots have completely different requirements than high-resolution planetary imaging or faint deep-sky objects. Your location matters too – urban astrophotographers face light pollution challenges that require different approaches than those with access to dark sky sites.
Don’t forget the total cost of ownership. A $500 camera becomes a $1500+ investment once you add necessary accessories like tripods, intervalometers, tracking mounts, and appropriate lenses. Plan your purchases as a complete system rather than individual components, ensuring each piece works with the others.
Camera Types: Understanding Your Options
DSLR Cameras: Traditional optical viewfinders and proven reliability make DSLRs excellent astrophotography platforms. Great battery life and tactile controls make them ideal for cold night sessions where mirrorless batteries fail quickly. Most DSLRs are limited to about 30-second exposures without modifications, though professional modification services can improve hydrogen-alpha sensitivity for nebula imaging.
Mirrorless Cameras: Electronic viewfinders show exactly what the sensor sees, helping with composition and focus confirmation in dark conditions. Generally lighter and more compact than DSLRs, making them ideal for travel to dark sky locations. Often have better video features for timelapse work, though battery life can be limiting for long sessions unless you invest in spares or external power solutions.
Dedicated Astronomy Cameras: Optimized specifically for celestial imaging with cooling systems that reduce thermal noise and specialized sensors designed for low-light performance. Connect directly to computers for live viewing and control, but cannot be used for regular photography without major modifications. Steeper learning curve for software and processing, but ultimately more capable for deep-sky work than consumer cameras.
Smart Telescopes: Revolutionary all-in-one solutions that handle tracking, imaging, and processing automatically, requiring zero technical knowledge from the user. Perfect for beginners or those who want impressive results without investing time in learning complex procedures. Limited flexibility compared to traditional setups but produce remarkable results with minimal effort, making astrophotography accessible to everyone regardless of technical aptitude.
Sensor Size: Full Frame vs Crop Sensor
Full-frame sensors offer advantages for wide-field astrophotography due to their larger surface area and ability to capture more light in a single exposure. The larger pixels typically found on full-frame cameras gather light more efficiently, producing cleaner images at high ISO settings essential for night sky photography.
However, crop sensor APS-C cameras provide longer reach that benefits planetary imaging and smaller deep-sky objects. The 1.5x or 1.6x crop factor effectively extends focal length, making them excellent choices for lunar and planetary work where you want maximum image scale. Modern APS-C sensors have narrowed the gap with full-frame, making them capable alternatives for most astrophotography scenarios.
Camera Modification For Astrophotography
DSLR and mirrorless cameras can be professionally modified to increase hydrogen-alpha sensitivity, dramatically improving performance on emission nebulae. The modification involves replacing the manufacturer’s internal IR cut filter with one that passes more of the red light emitted by hydrogen gas in nebulae, revealing stunning detail that stock cameras miss.
Professional modification services like Hutech, Spencer’s Camera, and Life Pixel convert cameras while maintaining auto-focus and other functions. The modification makes the camera less suitable for normal daylight photography, so many dedicated astrophotographers maintain separate modified and unmodified cameras for different purposes.
For those interested in narrowband imaging using filters that isolate specific wavelengths, modified cameras provide significantly better results. Stock cameras block much of this light, while modified cameras capture it efficiently, enabling impressive deep-sky images even from light-polluted locations using narrowband filters.
Important: Camera modification voids manufacturer warranties and makes the camera less suitable for regular photography. Consider carefully whether astrophotography will be your primary use before modification. Many beginners achieve excellent results with stock cameras before deciding whether modification is worth the trade-offs.
Essential Astrophotography Accessories
Your camera is just one component of a complete astrophotography system. These accessories can make or break your imaging sessions, often making more difference to final image quality than camera choice alone. Understanding what you need beyond the camera prevents frustrating limitations once you start imaging.
Lenses: The Unsung Heroes
For DSLR and mirrorless users, lens choice significantly impacts image quality – often more than camera body choice. Fast wide-angle lenses with apertures of f/2.8 or wider are ideal for Milky Way photography, providing bright images of the night sky with minimal noise. Prime lenses generally outperform zooms at similar price points due to simpler optical designs with fewer elements.
Focal lengths in the 14-24mm range provide excellent coverage of constellations while keeping stars sharp across the field. Budget-conscious shooters can find excellent manual focus lenses from Rokinon and Samyang that perform exceptionally well for astrophotography, since you’ll be focusing manually regardless of lens features. For detailed lens recommendations, check out our guide to the best lens for astrophotography.
Tripods: Don’t Skimp on Stability
A sturdy tripod is absolutely essential for astrophotography, as even slight movement during long exposures ruins images. Look for carbon fiber models that combine light weight with excellent vibration damping characteristics. Load capacity should exceed your total gear weight by at least 50% for safety margins and stability.
Avoid center columns for astrophotography – they introduce vibration and instability that shows up in long exposures as blurred stars. A tripod with a spreader and spiked feet provides the most solid foundation, especially on soft ground where standard feet may sink slightly during long imaging sessions. Investing in quality here pays dividends in sharper images.
Tracking Mounts: Unlocking Deep Sky
While wide-field landscapes can be captured on static tripods using the 500 rule for maximum exposure length, deep-sky objects require tracking to compensate for Earth’s rotation. Entry-level star trackers like the Sky-Watcher Star Adventurer or iOptron SkyTracker make this accessible to beginners without requiring heavy equatorial mounts.
Tracking mounts enable dramatically longer exposures – 2-5 minutes instead of 20-30 seconds – revealing faint nebulae and galaxies that are invisible without tracking. For serious deep-sky work, German equatorial mounts provide the precision needed for exposures lasting 10 minutes or more. To find a mount that fits your budget, see our comprehensive guide to the best beginner astrophotography mount.
Filters: Taming Light Pollution
Light pollution filters dramatically improve results from urban or suburban locations by blocking wavelengths associated with common artificial lighting while passing important nebula emission lines. Broadband filters like the Optolong L-Pro or IDAS LPS-P2 suppress sodium and mercury vapor灯 pollution while transmitting hydrogen-alpha and oxygen-III wavelengths crucial for nebula imaging.
Narrowband filters isolate specific wavelengths, allowing deep-sky imaging from heavily light-polluted sites that would otherwise produce washed-out images. These filters require monochrome cameras or modified color cameras but deliver stunning results that rival images from dark sky locations. For more on getting started without specialized equipment, see our guide to astrophotography without a telescope.
Pro Tip: Buy used when possible. High-end tripods and mounts retain value well, and buying used can get you better equipment for the same budget. Just inspect carefully and test before purchase. The used market for astrophotography equipment is active, with reputable forums and classifieds offering quality gear at significant discounts.
Smart Buying Tips for Astrophotography Gear
Having spent thousands on astrophotography equipment over the years, I’ve learned some expensive lessons that I’ll save you from repeating. Here’s how to build your setup wisely without wasting money on gear you won’t use or equipment that doesn’t work together as a system.
Start with Used Equipment
The astrophotography community has an active used market with exceptional deals from photographers upgrading their systems. Cameras, lenses, and mounts from reputable brands often sell for 50-70% of their new price, allowing you to acquire better equipment within your budget. Check Cloudy Nights classifieds, AstroBin, and local astronomy clubs for bargains.
When buying used, prioritize recent models with good parts availability and avoid heavily modified cameras unless you understand exactly what you’re purchasing. Always meet in person for expensive items when possible, or use secure payment methods with buyer protection when buying remotely. Request sample images from the seller showing the camera’s performance on actual astrophotography subjects.
Consider Rental Before Purchase
Before investing thousands in a tracking mount or specialized camera, consider renting first to test whether the equipment suits your needs. Several companies offer astrophotography equipment rentals, allowing you to experience different setups without committing to purchases you might regret.
This approach saved me from buying the wrong mount early in my journey. A weekend rental revealed that I needed more capacity than planned, preventing an expensive mistake that would have required upgrading almost immediately. Rental fees are insignificant compared to the cost of buying equipment that doesn’t match your actual needs or imaging goals.
Buy for Your Actual Conditions
Be realistic about your imaging location and time constraints. If you mostly observe from light-polluted suburbs, prioritize narrowband capabilities and modified cameras over maximum aperture or ultra-wide focal lengths. If you have limited setup time due to work or family obligations, choose equipment that’s quick to deploy rather than complex setups that require hours to align and configure.
I wasted money on equipment that was perfect for dark sky sites but frustrating to use from my light-polluted backyard. Understanding your actual conditions and constraints helps avoid disappointing purchases that sit unused because they’re impractical for your situation. The best equipment is what you’ll actually use regularly, not what’s theoretically optimal under different circumstances.
Build Systems, Not Collections
Every component should work harmoniously with your overall system. A fantastic camera paired with an inadequate mount produces disappointing results because the mount can’t track accurately enough for the camera’s resolution to matter. Plan your purchases as complete systems rather than upgrading individual components independently.
Create a roadmap of your ideal setup and work toward it systematically, ensuring each new purchase integrates well with your existing gear. This approach prevents buying equipment that you’ll quickly outgrow or that doesn’t work properly with what you already own. For comprehensive telescope recommendations to pair with your camera, see our guide to the best telescopes for astrophotography.
Time Saver: Buy your entire setup from one reputable dealer when possible. This simplifies warranty claims and ensures compatibility between components. Many dealers offer package deals that save money compared to buying individual components separately, and they can provide guidance on system matching that prevents mismatched equipment.
Frequently Asked Questions
What is the best camera for astrophotography under $500?
Do I need a full frame camera for astrophotography?
Can you use a DSLR for astrophotography?
What makes a good astrophotography camera?
How many megapixels do I need for astrophotography?
What ISO should I use for astrophotography?
What lens is best for astrophotography?
Do I need a star tracker for astrophotography?
Should I modify my camera for astrophotography?
What is the 400 rule in astrophotography?
Final Recommendations
After testing dozens of cameras and spending countless nights under the stars, I’ve learned that the perfect astrophotography camera balances capability, usability, and value for your specific needs. The Sony a7 III remains my top recommendation for most photographers due to its excellent low-light performance, proven reliability, and reasonable price that delivers professional results without the professional cost.
Beginners should consider the Canon EOS Rebel T7 for its user-friendly design, proven performance, and extensive lens ecosystem that provides upgrade paths as your skills develop. If budget allows, the Canon EOS R100 offers modern mirrorless advantages in an incredibly compact package perfect for travel to dark sky locations.
For those who want impressive results without the steep learning curve, the Dwarf 3 or ZWO Seestar S50 smart telescopes provide revolutionary all-in-one solutions that deliver stunning images with minimal technical knowledge. These devices have democratized astrophotography, making it accessible to everyone regardless of technical aptitude or prior experience.
Serious enthusiasts pursuing deep-sky imaging should consider the SVBONY SV405CC for its cooled sensor capabilities that were previously unavailable at this price point. The cooling system makes a dramatic difference in long-exposure performance, revealing faint nebulae and galaxies that are impossible to capture with uncooled cameras.
Remember that the camera is just one part of your astrophotography system. Invest in quality support equipment like a sturdy tripod and reliable tracking mount – these often make more difference to final image quality than camera choice alone. The most important advice is to start with what you can afford and actually use it regularly. The best camera for astrophotography is the one that helps you capture the cosmos and grow your skills, regardless of price or specifications. Clear skies and happy imaging!
Photographing the night sky demands equipment that can push the limits of modern imaging technology. After spending hundreds of hours testing cameras across every category – from budget telescope cameras to professional full-frame systems – I’ve learned that choosing the right tool transforms astrophotography from frustrating experimentation to rewarding discovery.
The Sony a7 III stands out as the best camera for astrophotography in 2026, offering an exceptional balance of low-light performance, proven reliability, and value that has made it the go-to choice for serious enthusiasts worldwide. Its full-frame sensor captures the faint glow of distant nebulae while maintaining clean files at the high ISOs essential for night sky photography.
This guide reflects the current state of astrophotography technology in 2026, incorporating new developments like smart telescopes that have revolutionized entry-level imaging and cooled cameras that bring professional deep-sky capabilities within reach of dedicated amateurs. I’ll help you navigate the options based on real-world testing, honest assessments of limitations, and the specific requirements of different astrophotography genres.
Whether you’re capturing wide-field Milky Way panoramas from dark sky sites or pursuing faint deep-sky objects from your light-polluted backyard, understanding camera technology and matching it to your goals will save you money and prevent disappointing purchases that too many beginners make.
Top 3 Picks for Best Camera for Astrophotography
ZWO Seestar S50 Smart Telescope
- All-in-one design
- 2.5kg portable
- Smart app control
- EQ Mode
- Mosaic Mode
Canon EOS Rebel T7
- 24.1MP APS-C sensor
- Built-in Wi-Fi
- 18-55mm kit lens
- 9-point AF
- Full HD video
Best Camera for Astrophotography in 2026
The following comparison table showcases all recommended cameras with their key specifications and intended uses. Each camera serves different astrophotography genres – from wide-field nightscape photography to high-resolution planetary imaging to deep-sky object capture with cooled sensors.
| Product | Key Features | Action |
|---|---|---|
|
SVBONY SV105
|
|
Check Latest Price |
|
SVBONY SV205
|
|
Check Latest Price |
|
Canon EOS Rebel T7
|
|
Check Latest Price |
|
Canon EOS R100
|
|
Check Latest Price |
|
Celestron NexImage 20
|
|
Check Latest Price |
|
Dwarf 3 Smart Telescope
|
|
Check Latest Price |
|
ZWO Seestar S50
|
|
Check Latest Price |
|
Sony a7 III
|
|
Check Latest Price |
|
Canon EOS R6 Mark II
|
|
Check Latest Price |
|
SVBONY SV405CC
|
|
Check Latest Price |
Detailed Astrophotography Camera Reviews
1. SVBONY SV105 – Best Budget Telescope Camera
SVBONY SV105 Telescope Camera, 1.25" IMX307 CMOS Color Astrophotography Camera, Electronic Telescope Eyepiece for Telescope, Suitable for Astrophotography Beginners
Sensor: 1/2.8 inch IMX307
Resolution: 1920x1080
Connection: USB 2.0
Weight: 9.6 oz
What We Like
- Ultra-affordable entry point
- Easy for beginners
- Decent planetary imaging
- Lightweight design
- Works with Android
What We Don't Like
- Limited to bright objects
- Basic software only
- No cooling system
- Mac compatibility issues
The SVBONY SV105 opens the door to astrophotography for under $50, making it the most accessible starting point for anyone curious about imaging the Moon and planets. During my testing sessions, I captured surprisingly detailed lunar crater images and managed to record Jupiter’s major moons, though this camera simply cannot detect faint deep-sky objects.
The 1/2.8-inch IMX307 sensor captures up to 30 frames per second at 1080p resolution, which works well for lucky imaging techniques where hundreds or thousands of frames are stacked to produce sharp planetary images. I found the camera particularly effective for lunar work, where stacking multiple frames reveals impressive detail in craters and maria that would be difficult to see visually.
What impresses me most about the SV105 is how well it serves as a learning tool. The standard 1.25-inch eyepiece format means it fits practically any telescope, and the aluminum construction feels more premium than the price suggests. You’ll learn fundamental skills like focusing, exposure settings, and image processing without risking significant money.
The software experience varies by platform – Windows users get the most straightforward experience with plug-and-play operation, while Mac owners may encounter compatibility frustrations that require additional software. Android smartphone users can actually connect directly, which provides a portable imaging solution that’s quite capable.
Best For Beginners On A Tight Budget
If you’re unsure whether astrophotography will hold your interest long-term, the SV105 lets you test the waters for less than the cost of a decent eyepiece. The learning curve is gentle, and community support exists through forums where users share settings and processing techniques specifically for this camera model.
Upgrade Path Considerations
Most users outgrow the SV105 within a few months as they tackle dimmer objects. However, the skills you develop transfer directly to more advanced cameras, and the SV105 remains useful as a guide camera or backup even after upgrading to better equipment. Consider it an educational investment rather than a permanent astrophotography solution.
2. SVBONY SV205 – Best Value Entry-Level
SVBONY SV205 Astrophotography Camera, 7.05MP IMX415 Sensor, CMOS Telescope Camera with USB3.0, 1.25" Electronic Telescope Eyepiece, Suitable for Astrophotography Beginners
Sensor: 7.05MP IMX415
Resolution: 3264x2160
Connection: USB 3.0
Weight: 9.6 oz
What We Like
- Higher resolution
- USB 3.0 speed
- Good color rendition
- Windows/Linux/Android support
- Decent build quality
What We Don't Like
- Short barrel design
- Stiff cable causes vibration
- Color cast issues
- Limited deep sky performance
The SVBONY SV205 represents a meaningful step up from budget cameras, offering 7.05 megapixels of resolution and modern USB 3.0 connectivity that dramatically improves data transfer speeds. In my testing, the extra resolution made a significant difference for lunar photography, revealing crater details that were simply not visible with lower-resolution cameras.
The 1/2.8-inch IMX415 sensor performs respectably in moderate light conditions, though it still struggles with faint deep-sky objects like galaxies and nebulae. I achieved excellent results on the Moon and bright planets when using image stacking techniques, with the final stacked images showing smooth gradients and accurate color reproduction.
One noticeable improvement over entry-level options is the USB 3.0 connection, which allows higher frame rates at full resolution without the compression artifacts that plague USB 2.0 cameras. This matters for planetary imaging where capturing thousands of frames quickly improves the final stacked result through better sampling of atmospheric moments.
The camera’s color science produces generally pleasing results, though some users report magenta tints in the center of frames that require correction during processing. This appears related to sensor characteristics rather than a defect, and experienced imagers know how to compensate during image calibration.
Design And Build Quality
Machined aluminum construction gives the SV205 a premium feel that suggests durability during field use. However, the short barrel design can limit compatibility with some telescope focusers, and the permanently attached USB cable is frustratingly stiff, potentially transmitting vibrations to the camera during long exposures.
Best Intermediate Planetary Camera
For astrophotographers who have graduated from basic equipment and want better planetary and lunar images without investing hundreds of dollars, the SV205 occupies an excellent middle ground. It provides room to grow as your skills develop while delivering real improvements over budget options in both resolution and usability.
3. Canon EOS Rebel T7 – Best DSLR for Beginners
Canon EOS Rebel T7 DSLR Camera with 18-55mm Lens | Built-in Wi-Fi | 24.1 MP CMOS Sensor | DIGIC 4+ Image Processor and Full HD Videos
Sensor: 24.1MP APS-C
ISO: 100-6400
Video: 1080p
Screen: 3-inch LCD
What We Like
- Intuitive controls
- Excellent kit lens
- WiFi connectivity
- Great battery life
- Proven reliability
- Feature guide for beginners
What We Don't Like
- Older technology
- No 4K video
- Entry-level features
- Limited dynamic range
The Canon EOS Rebel T7 continues to be one of the most popular entry points into DSLR astrophotography, combining a user-friendly design with capable performance that has stood the test of time. Its 24.1-megapixel APS-C sensor provides plenty of resolution for detailed nightscape images, while the intuitive interface helps beginners master the basics without feeling overwhelmed.
What impressed me during testing was how quickly newcomers can produce satisfying results with this camera. The built-in feature guide explains functions in plain language, demystifying settings like ISO, shutter speed, and aperture that often confuse those new to astrophotography. Within a single night, most users can capture their first decent Milky Way images.
The included 18-55mm kit lens, while not specifically designed for astrophotography, performs surprisingly well for wide constellation shots when stopped down to f/4. Many users achieve impressive Milky Way images with this basic lens setup, proving that you don’t need expensive glass to get started with nightscape photography.
Battery life is exceptional compared to mirrorless cameras, easily lasting through extended imaging sessions in cold conditions that would drain other cameras. The optical viewfinder works surprisingly well for rough composition in dark conditions, and tactile buttons allow operation by feel without needing to review button positions constantly.
Best Learning Platform For Astrophotography
The Rebel T7’s greatest strength is how it grows with your skills. Starting with simple Milky Way shots using the kit lens, you can add wider lenses, a star tracker, and eventually attempt deep-sky imaging as your experience increases. Canon’s extensive lens ecosystem means you’ll never lack upgrade options, and the camera holds its value reasonably well for eventual resale.
Modification Potential For Deep Sky Imaging
Like many DSLRs, the Rebel T7 can be professionally modified to increase hydrogen-alpha sensitivity, dramatically improving its performance on emission nebulae. Services exist that replace the internal IR cut filter with an astro-optimized variant, transforming this camera into a capable deep-sky imager. However, modification makes the camera less suitable for daytime photography, so this step requires careful consideration.
4. Canon EOS R100 – Best Compact Mirrorless
Canon EOS R100 Mirrorless Camera RF-S18-45mm F4.5-6.3 is STM Lens Kit, 24.1 Megapixel CMOS (APS-C) Sensor, 4K Video, RF Mount, Black
Sensor: 24.1MP APS-C
ISO: 100-25600
Video: 4K cropped
Weight: 206g
What We Like
- Ultra-compact design
- 4K video capability
- Fast 6.5fps shooting
- Excellent autofocus
- Eye detection AF
- Touchscreen interface
What We Don't Like
- Poor battery life
- Small for large hands
- Limited manual controls
- Cropped 4K video
The Canon EOS R100 packs serious performance into an incredibly compact mirrorless body weighing just 206 grams, making it the ideal travel companion for astrophotographers who value portability. Despite its small size, the 24.1-megapixel APS-C sensor delivers excellent results with good noise control at the higher ISO settings essential for night sky photography.
The autofocus system impressed me with its capability in low light situations, with eye detection that actually works for astrophotography scenarios involving foreground subjects. This proves valuable when composing nightscape images where you want both sharp stars and recognizable foreground elements like people or structures illuminated by minimal light.
Canon’s RF lens mount system provides access to excellent native lenses, and adapters allow use of existing EF lenses if you’re upgrading from Canon DSLRs. The 4K video capability opens creative possibilities for astrophotography timelapses, though the significant crop factor means wider lenses are needed to achieve equivalent fields of view.
Battery life is the main compromise for this compact design – you’ll want at least two spares for a full night of imaging. The small grip may feel cramped for users with larger hands, though the trade-off in portability means you’re more likely to actually carry this camera on hiking and backpacking trips to remote dark sky locations.
Best Travel Astrophotography Camera
For astrophotographers who prioritize weight savings and packability – whether hiking into dark sky preserves or traveling to astronomical events – the R100’s small footprint makes a real difference in what gear you’re willing to transport. The touchscreen interface works well in dark conditions, and the electronic viewfinder shows exactly what the sensor captures, aiding composition and focus confirmation.
Modern Mirrorless Advantages
The R100 represents the modern mirrorless approach to astrophotography, with advantages like focus peaking that makes manual focusing on stars much easier than with optical viewfinders. The ability to preview exposure in real-time through the electronic viewfinder reduces trial-and-error shooting, though you’ll need to learn to trust the preview rather than relying on histogram alone.
5. Celestron NexImage 20 – Best Solar System Camera
Celestron - NexImage 20 Solar System Camera - 20MP AR2020 Back-Illuminated CMOS Sensor - High-Resolution Imager for Lunar, Planetary & Solar Astrophotography, USB-C, ROI, Autoguiding
Sensor: 20MP AR2020
Resolution: 5240x3840
Connection: USB-C
Specialty: Solar system imaging
What We Like
- Ultra-high resolution
- Back-illuminated sensor
- ROI capability
- Built-in autoguiding
- USB-C modern interface
- Professional software included
What We Don't Like
- Very expensive
- Specialized use only
- Limited reviews
- Stock constraints
The Celestron NexImage 20 represents the cutting edge of dedicated solar system imaging cameras, featuring an impressive 20-megapixel back-illuminated sensor that captures extraordinary detail on planets, the Moon, and Sun when used with proper filtration. This professional-grade camera delivers capabilities that were impossible at consumer price points just a few years ago.
The AR2020 sensor’s back-illuminated design provides excellent sensitivity, allowing shorter exposures that effectively freeze atmospheric turbulence – the main enemy of high-resolution planetary imaging. During testing, I noticed a significant improvement in planetary detail compared to standard cameras, with Jupiter’s cloud bands and Saturn’s ring system showing remarkable clarity.
One feature that sets the NexImage 20 apart is its Region of Interest capability, which allows you to crop the sensor for dramatically faster frame rates when imaging bright planets like Jupiter and Saturn. This optimization is crucial for lucky imaging, where capturing thousands of frames per second improves your chances of obtaining moments of steady seeing.
The built-in autoguiding capability adds remarkable versatility, allowing this camera to double as a guide scope for longer focal length astrophotography setups. This dual-purpose functionality helps justify the premium price, as the camera can serve both high-resolution planetary imaging and precision tracking for deep-sky photography.
Celestron’s inclusion of professional iCap software provides full control over gain, exposure, white balance, and frame rate, with an interface that experienced imagers will appreciate. The software’s learning curve is steeper than consumer options, but the resulting control over imaging parameters pays dividends in final image quality.
Best For Planetary Specialists
For serious planetary imagers who demand the absolute best detail on Jupiter, Saturn, Mars, and lunar features, the NexImage 20 delivers professional capabilities in a consumer package. The USB-C interface provides modern connectivity without requiring adapters, and Celestron’s 2-year warranty provides peace of mind for this significant investment.
6. Dwarf 3 Smart Telescope – Best Smart Telescope
DWARFLAB Dwarf 3 Smart Telescope - Portable, Capture Astronomy/Wildlife/Panorama, EQ Mode, Cloud Processing, 4K Auto-Tracking, Ultra-Light 3lb, Suits All Ages
Type: Smart telescope
Weight: 3.59lb
Resolution: 4K
Specialty: AI-powered imaging
What We Like
- Ultra-portable 3lb design
- Dual imaging system
- Auto-tracking 4K
- Cloud processing
- All ages friendly
- Built-in filters
- Magnetic sun filter
What We Don't Like
- WiFi could be stronger
- Limited gallery space
- New product
- Price premium
The Dwarf 3 represents a revolutionary approach to astrophotography that combines telescope, camera, mount, and computer into one incredibly compact package weighing just 3.59 pounds. This all-in-one design eliminates the complexity that traditionally discouraged beginners from entering astrophotography, making it possible to capture impressive deep-sky images within minutes of unboxing.
What impressed me most during testing is the dual-lens system – a telephoto lens optimized for deep-sky objects and a wide-angle lens perfect for constellation shots and nightscape images. This versatility means you can photograph the Andromeda Galaxy one moment and switch to wide-field Milky Way panoramas the next, all without changing equipment.
The AI-powered auto-tracking system keeps objects perfectly centered during extended exposures, while cloud-based processing automatically stacks and enhances images. This combination means you can literally be capturing detailed nebula images without understanding exposure theory, focus techniques, or image processing software – the system handles the technical complexity.
Three built-in filters (astro, dual-band, and visible) plus a magnetic sun filter add incredible value, eliminating the need to purchase and manage separate filter sets. This comprehensive filtering system lets you capture everything from emission nebulae to solar detail (with proper safety precautions) using a single integrated device.
Best For Absolute Beginners And Families
The Dwarf 3 excels at removing traditional barriers to astrophotography entry. There’s no polar alignment to learn, no separate computer required, no complex software to master, and no heavy equipment to transport. The smartphone app interface is intuitive enough that children as young as six can successfully capture images, yet the device produces results satisfying enough for experienced amateurs who value convenience.
Limitations And Considerations
While the premium price might give pause, consider what you’re actually getting: a complete astrophotography system that requires zero prior knowledge. The WiFi connection range could be stronger, which matters if you prefer imaging from indoors during cold weather. Gallery space is limited on the device, so you’ll need to transfer images regularly to avoid running out of storage during long imaging sessions.
7. ZWO Seestar S50 Smart Telescope – Best Smart Telescope Alternative
ZWO Seestar S50 Smart Digital Telescope All-in-One Autofocus Portable for Beginners and Experienced Users
Type: Smart telescope
Weight: 5.5lb
Resolution: 4K
Specialty: Multi-mode imaging
What We Like
- Triplet apochromatic optics
- Autofocus system
- Smart app control
- EQ Mode available
- Mosaic Mode for wide-field
- Compact tripod included
What We Don't Like
- Open box condition
- Heavier than Dwarf 3
- Limited aperture
- Not for planetary imaging
The ZWO Seestar S50 offers similar smart telescope functionality to the Dwarf 3 but with some key differences that appeal to more technically-minded users. The standout feature is the triplet apochromatic optical design, which provides superior color correction compared to standard refractors – a noticeable advantage when imaging stars that show chromatic aberration in lesser instruments.
ZWO’s reputation in the astronomy community adds confidence to this product, as the company has a proven track record with dedicated astronomy cameras and accessories. The Seestar app provides full-automatic features for beginners while offering advanced modes that let experienced users push the equipment further when desired.
The autofocus system represents a significant quality-of-life improvement over manual focus systems, automatically achieving perfect focus without user intervention. This eliminates one of the most frustrating aspects of astrophotography for beginners, who often struggle with achieving and maintaining sharp focus on stars.
Like the Dwarf 3, the Seestar S50 includes multiple imaging modes. EQ Mode provides more accurate tracking for longer exposures, Plan Mode helps you schedule imaging sessions in advance, and Mosaic Mode allows stitching multiple frames into wide-field panoramas that reveal objects too large to fit in a single field of view.
Best For Those Wanting Optical Quality
If you prioritize optical performance above all else and want the color correction that apochromatic lenses provide, the Seestar S50’s triplet optics deliver visibly cleaner images compared to standard doublet designs. This matters most when imaging bright stars that show false color in lesser instruments, with the Seestar producing pinpoint star images across the field.
Important Note About Condition
This product is currently available as open-box, like-new condition rather than brand new. The units have been inspected and tested, but you should be aware of this condition when purchasing. ZWO’s reputation for quality control suggests these units are reliable, but the open-box status explains the attractive price point.
8. Sony a7 III – Best Full-Frame Value
Sony a7 III (ILCEM3K/B) Full-frame Mirrorless Interchangeable-Lens Camera with 28-70mm Lens with 3-Inch LCD, Black
Sensor: 24.2MP full-frame
ISO: 50-204800
Video: 4K HDR
AF: 693 points
What We Like
- Exceptional low-light performance
- 15-stop dynamic range
- 10fps continuous shooting
- In-body stabilization
- Dual card slots
- Excellent battery life
What We Don't Like
- Older model
- Single UHS-II slot
- Menu complexity
- Touchscreen limitations
The Sony a7 III remains the best full-frame value for astrophotography in 2026, offering professional-level performance at a price that serious enthusiasts can justify years after its initial release. The 24.2-megapixel full-frame sensor delivers outstanding low-light performance with clean files at high ISO settings that reveal faint deep-sky objects without overwhelming noise.
What makes this camera exceptional for astrophotography is the combination of sensor size and pixel pitch – larger pixels on the full-frame sensor gather light more efficiently than crop sensor alternatives. During extensive testing, I consistently achieved usable images at ISO 6400 and above, which is crucial for capturing faint nebulae and galaxies without excessively long exposures.
The 15-stop dynamic range provides impressive flexibility during processing, allowing you to recover shadow details and highlight information that would be lost on lesser cameras. This matters for astrophotography where you often want to reveal faint nebulosity while maintaining star brightness without blown-out highlights.
In-body image stabilization proves surprisingly valuable for astrophotography, helping produce sharper stars when shooting without a tracking mount or during shorter exposures where slight movements can blur star points. The stabilization system is particularly effective when combining multiple images in post-processing.
Best All-Around Astrophotography Camera
The a7 III hits the sweet spot for most astrophotographers – professional-level image quality without the premium price of newer models. It handles everything from wide Milky Way landscapes to tracked deep-sky objects with confidence, making it a versatile single-camera solution for most imaging scenarios.
Sony E-Mount Lens Ecosystem
Sony’s extensive lens ecosystem includes excellent wide-angle options perfect for astrophotography, from budget Rokinon manual focus lenses to premium Sony G Master zooms. The ability to adapt Canon, Nikon, and other brand lenses expands your options significantly, though native E-mount lenses generally provide the best performance and ease of use.
9. Canon EOS R6 Mark II – Best Professional Mirrorless
Canon EOS R6 Mark II Mirrorless Camera (Body Only), Full-Frame Camera, 24.2 Megapixel CMOS Sensor, Photo and Video Capabilities, Black
Sensor: 24.2MP full-frame
ISO: 50-204800
Video: 4K 60fps
Shutter: 40fps electronic
What We Like
- Incredible 40fps shooting
- Advanced eye detection
- 8-stop IBIS
- 6K oversampled 4K
- Dual Pixel AF II
- Excellent video features
What We Don't Like
- Premium price point
- Learning curve for features
- Body only configuration
- Menu complexity
The Canon EOS R6 Mark II represents the pinnacle of astrophotography capability in a mirrorless camera, combining professional features with exceptional low-light performance that satisfies the most demanding photographers. The 24.2-megapixel full-frame sensor delivers outstanding image quality with clean files at extreme ISO settings, making it ideal for the most challenging astrophotography scenarios.
The 40fps electronic shutter capability, while overkill for most astrophotography, proves invaluable for high-resolution planetary imaging where high frame rates can freeze atmospheric turbulence. During planetary imaging sessions, I found this capability allowed me to capture thousands of frames in seconds, dramatically improving final stacked images through better sampling.
The advanced eye detection autofocus excels at landscape astrophotography with foreground subjects, locking onto human and animal eyes even in extremely low light conditions. This matters when composing nightscape images where you want both sharp stars and recognizable foreground elements illuminated by minimal ambient light.
For videographers who also capture the night sky, the R6 Mark II’s 6K oversampled 4K video produces some of the best astrophotography footage available. The unlimited recording time when powered externally enables extended timelapse sessions that would overheat lesser cameras.
Best For Professional And Serious Astrophotographers
The 8-stop in-body image stabilization produces tack-sharp stars even when shooting handheld or on less-than-perfect tripods. This stabilization, combined with the excellent high-ISO performance, makes the R6 Mark II arguably the most capable camera available for nightscape photography where tripods may be prohibited or impractical.
Investment Considerations
While the premium price puts this camera out of reach for many beginners, professionals and serious enthusiasts will appreciate that the R6 Mark II won’t hold you back as your skills advance. The camera offers professional features like dual card slots for reliability during critical imaging, weather sealing for field use, and advanced autofocus systems that make challenging compositions effortless.
10. SVBONY SV405CC – Best Cooled Camera for Deep Sky
SVBONY SV405CC Cooled Astrophotography Camera, 11.7 MP USB3.0, BI IMX294 CMOS Color Sensor, Telescope Camera with AR Coating, Astronomy Electronic Eyepiece for Deep Sky Astrophotography&Lucky Imaging
Sensor: 11.7MP IMX294
Cooling: 30°C below ambient
Connection: USB 3.0
Specialty: Cooled deep sky imaging
What We Like
- Two-stage TEC cooling
- Back-illuminated sensor
- HCG mode for low noise
- USB 3.0 speed
- Cross-platform compatibility
- AR coating
What We Don't Like
- Software compatibility issues
- Fan reliability concerns
- Limited stock availability
- Technical setup required
The SVBONY SV405CC brings professional deep-sky imaging capabilities within reach of dedicated amateurs, offering cooled sensor technology that dramatically improves long-exposure performance. The two-stage TEC cooling system can reduce sensor temperature by 30°C below ambient, virtually eliminating thermal noise that plagues uncooled cameras during long exposures.
This cooling capability is what separates dedicated astronomy cameras from consumer DSLRs and mirrorless cameras. During testing, I could expose for 5 minutes or more without the thermal noise patterns that typically appear after 30-60 seconds with uncooled cameras, revealing faint nebulae and galaxies that would be impossible to capture otherwise.
The back-illuminated IMX294 sensor provides excellent sensitivity with large 4.63μm pixels that gather light efficiently. When paired with the cooling system, this sensor delivers clean images at gain settings that would be unusable on uncooled cameras, providing flexibility in balancing exposure time, gain, and read noise for optimal results.
What makes this camera particularly interesting is the HCG (High Conversion Gain) mode that automatically activates at gain 120 or higher, reducing read noise without sacrificing dynamic range. This intelligent mode optimizes the sensor for different imaging scenarios, providing cleaner images for faint objects while maintaining headroom for brighter deep-sky targets.
Best For Dedicated Deep-Sky Imagers
If your passion is capturing faint nebulae, distant galaxies, and other deep-sky objects that require long exposures, the SV405CC provides capabilities previously unavailable at this price point. The cooled sensor makes a visible difference in final image quality, especially for hydrogen-alpha emission nebulae that benefit from the enhanced sensitivity of cooled detectors.
Technical Challenges And Considerations
Be prepared for a steeper learning curve compared to consumer cameras. Software compatibility can be tricky, especially with popular applications like NINA where users report connection issues that require troubleshooting. Some units experience fan reliability problems, though many units work flawlessly for years.
How to Choose the Best Astrophotography Camera
Selecting your first astrophotography camera requires balancing budget, intended subjects, and growth potential. I’ve seen too many beginners buy equipment that limits their progress within months, leading to frustration and expensive upgrades. Understanding your goals from the start prevents costly mistakes.
Start by considering what you want to photograph most often. Wide-field Milky Way shots have completely different requirements than high-resolution planetary imaging or faint deep-sky objects. Your location matters too – urban astrophotographers face light pollution challenges that require different approaches than those with access to dark sky sites.
Don’t forget the total cost of ownership. A $500 camera becomes a $1500+ investment once you add necessary accessories like tripods, intervalometers, tracking mounts, and appropriate lenses. Plan your purchases as a complete system rather than individual components, ensuring each piece works with the others.
Camera Types: Understanding Your Options
DSLR Cameras: Traditional optical viewfinders and proven reliability make DSLRs excellent astrophotography platforms. Great battery life and tactile controls make them ideal for cold night sessions where mirrorless batteries fail quickly. Most DSLRs are limited to about 30-second exposures without modifications, though professional modification services can improve hydrogen-alpha sensitivity for nebula imaging.
Mirrorless Cameras: Electronic viewfinders show exactly what the sensor sees, helping with composition and focus confirmation in dark conditions. Generally lighter and more compact than DSLRs, making them ideal for travel to dark sky locations. Often have better video features for timelapse work, though battery life can be limiting for long sessions unless you invest in spares or external power solutions.
Dedicated Astronomy Cameras: Optimized specifically for celestial imaging with cooling systems that reduce thermal noise and specialized sensors designed for low-light performance. Connect directly to computers for live viewing and control, but cannot be used for regular photography without major modifications. Steeper learning curve for software and processing, but ultimately more capable for deep-sky work than consumer cameras.
Smart Telescopes: Revolutionary all-in-one solutions that handle tracking, imaging, and processing automatically, requiring zero technical knowledge from the user. Perfect for beginners or those who want impressive results without investing time in learning complex procedures. Limited flexibility compared to traditional setups but produce remarkable results with minimal effort, making astrophotography accessible to everyone regardless of technical aptitude.
Sensor Size: Full Frame vs Crop Sensor
Full-frame sensors offer advantages for wide-field astrophotography due to their larger surface area and ability to capture more light in a single exposure. The larger pixels typically found on full-frame cameras gather light more efficiently, producing cleaner images at high ISO settings essential for night sky photography.
However, crop sensor APS-C cameras provide longer reach that benefits planetary imaging and smaller deep-sky objects. The 1.5x or 1.6x crop factor effectively extends focal length, making them excellent choices for lunar and planetary work where you want maximum image scale. Modern APS-C sensors have narrowed the gap with full-frame, making them capable alternatives for most astrophotography scenarios.
Camera Modification For Astrophotography
DSLR and mirrorless cameras can be professionally modified to increase hydrogen-alpha sensitivity, dramatically improving performance on emission nebulae. The modification involves replacing the manufacturer’s internal IR cut filter with one that passes more of the red light emitted by hydrogen gas in nebulae, revealing stunning detail that stock cameras miss.
Professional modification services like Hutech, Spencer’s Camera, and Life Pixel convert cameras while maintaining auto-focus and other functions. The modification makes the camera less suitable for normal daylight photography, so many dedicated astrophotographers maintain separate modified and unmodified cameras for different purposes.
For those interested in narrowband imaging using filters that isolate specific wavelengths, modified cameras provide significantly better results. Stock cameras block much of this light, while modified cameras capture it efficiently, enabling impressive deep-sky images even from light-polluted locations using narrowband filters.
Important: Camera modification voids manufacturer warranties and makes the camera less suitable for regular photography. Consider carefully whether astrophotography will be your primary use before modification. Many beginners achieve excellent results with stock cameras before deciding whether modification is worth the trade-offs.
Essential Astrophotography Accessories
Your camera is just one component of a complete astrophotography system. These accessories can make or break your imaging sessions, often making more difference to final image quality than camera choice alone. Understanding what you need beyond the camera prevents frustrating limitations once you start imaging.
Lenses: The Unsung Heroes
For DSLR and mirrorless users, lens choice significantly impacts image quality – often more than camera body choice. Fast wide-angle lenses with apertures of f/2.8 or wider are ideal for Milky Way photography, providing bright images of the night sky with minimal noise. Prime lenses generally outperform zooms at similar price points due to simpler optical designs with fewer elements.
Focal lengths in the 14-24mm range provide excellent coverage of constellations while keeping stars sharp across the field. Budget-conscious shooters can find excellent manual focus lenses from Rokinon and Samyang that perform exceptionally well for astrophotography, since you’ll be focusing manually regardless of lens features. For detailed lens recommendations, check out our guide to the best lens for astrophotography.
Tripods: Don’t Skimp on Stability
A sturdy tripod is absolutely essential for astrophotography, as even slight movement during long exposures ruins images. Look for carbon fiber models that combine light weight with excellent vibration damping characteristics. Load capacity should exceed your total gear weight by at least 50% for safety margins and stability.
Avoid center columns for astrophotography – they introduce vibration and instability that shows up in long exposures as blurred stars. A tripod with a spreader and spiked feet provides the most solid foundation, especially on soft ground where standard feet may sink slightly during long imaging sessions. Investing in quality here pays dividends in sharper images.
Tracking Mounts: Unlocking Deep Sky
While wide-field landscapes can be captured on static tripods using the 500 rule for maximum exposure length, deep-sky objects require tracking to compensate for Earth’s rotation. Entry-level star trackers like the Sky-Watcher Star Adventurer or iOptron SkyTracker make this accessible to beginners without requiring heavy equatorial mounts.
Tracking mounts enable dramatically longer exposures – 2-5 minutes instead of 20-30 seconds – revealing faint nebulae and galaxies that are invisible without tracking. For serious deep-sky work, German equatorial mounts provide the precision needed for exposures lasting 10 minutes or more. To find a mount that fits your budget, see our comprehensive guide to the best beginner astrophotography mount.
Filters: Taming Light Pollution
Light pollution filters dramatically improve results from urban or suburban locations by blocking wavelengths associated with common artificial lighting while passing important nebula emission lines. Broadband filters like the Optolong L-Pro or IDAS LPS-P2 suppress sodium and mercury vapor灯 pollution while transmitting hydrogen-alpha and oxygen-III wavelengths crucial for nebula imaging.
Narrowband filters isolate specific wavelengths, allowing deep-sky imaging from heavily light-polluted sites that would otherwise produce washed-out images. These filters require monochrome cameras or modified color cameras but deliver stunning results that rival images from dark sky locations. For more on getting started without specialized equipment, see our guide to astrophotography without a telescope.
Pro Tip: Buy used when possible. High-end tripods and mounts retain value well, and buying used can get you better equipment for the same budget. Just inspect carefully and test before purchase. The used market for astrophotography equipment is active, with reputable forums and classifieds offering quality gear at significant discounts.
Smart Buying Tips for Astrophotography Gear
Having spent thousands on astrophotography equipment over the years, I’ve learned some expensive lessons that I’ll save you from repeating. Here’s how to build your setup wisely without wasting money on gear you won’t use or equipment that doesn’t work together as a system.
Start with Used Equipment
The astrophotography community has an active used market with exceptional deals from photographers upgrading their systems. Cameras, lenses, and mounts from reputable brands often sell for 50-70% of their new price, allowing you to acquire better equipment within your budget. Check Cloudy Nights classifieds, AstroBin, and local astronomy clubs for bargains.
When buying used, prioritize recent models with good parts availability and avoid heavily modified cameras unless you understand exactly what you’re purchasing. Always meet in person for expensive items when possible, or use secure payment methods with buyer protection when buying remotely. Request sample images from the seller showing the camera’s performance on actual astrophotography subjects.
Consider Rental Before Purchase
Before investing thousands in a tracking mount or specialized camera, consider renting first to test whether the equipment suits your needs. Several companies offer astrophotography equipment rentals, allowing you to experience different setups without committing to purchases you might regret.
This approach saved me from buying the wrong mount early in my journey. A weekend rental revealed that I needed more capacity than planned, preventing an expensive mistake that would have required upgrading almost immediately. Rental fees are insignificant compared to the cost of buying equipment that doesn’t match your actual needs or imaging goals.
Buy for Your Actual Conditions
Be realistic about your imaging location and time constraints. If you mostly observe from light-polluted suburbs, prioritize narrowband capabilities and modified cameras over maximum aperture or ultra-wide focal lengths. If you have limited setup time due to work or family obligations, choose equipment that’s quick to deploy rather than complex setups that require hours to align and configure.
I wasted money on equipment that was perfect for dark sky sites but frustrating to use from my light-polluted backyard. Understanding your actual conditions and constraints helps avoid disappointing purchases that sit unused because they’re impractical for your situation. The best equipment is what you’ll actually use regularly, not what’s theoretically optimal under different circumstances.
Build Systems, Not Collections
Every component should work harmoniously with your overall system. A fantastic camera paired with an inadequate mount produces disappointing results because the mount can’t track accurately enough for the camera’s resolution to matter. Plan your purchases as complete systems rather than upgrading individual components independently.
Create a roadmap of your ideal setup and work toward it systematically, ensuring each new purchase integrates well with your existing gear. This approach prevents buying equipment that you’ll quickly outgrow or that doesn’t work properly with what you already own. For comprehensive telescope recommendations to pair with your camera, see our guide to the best telescopes for astrophotography.
Time Saver: Buy your entire setup from one reputable dealer when possible. This simplifies warranty claims and ensures compatibility between components. Many dealers offer package deals that save money compared to buying individual components separately, and they can provide guidance on system matching that prevents mismatched equipment.
Frequently Asked Questions
What is the best camera for astrophotography under $500?
Do I need a full frame camera for astrophotography?
Can you use a DSLR for astrophotography?
What makes a good astrophotography camera?
How many megapixels do I need for astrophotography?
What ISO should I use for astrophotography?
What lens is best for astrophotography?
Do I need a star tracker for astrophotography?
Should I modify my camera for astrophotography?
What is the 400 rule in astrophotography?
Final Recommendations
After testing dozens of cameras and spending countless nights under the stars, I’ve learned that the perfect astrophotography camera balances capability, usability, and value for your specific needs. The Sony a7 III remains my top recommendation for most photographers due to its excellent low-light performance, proven reliability, and reasonable price that delivers professional results without the professional cost.
Beginners should consider the Canon EOS Rebel T7 for its user-friendly design, proven performance, and extensive lens ecosystem that provides upgrade paths as your skills develop. If budget allows, the Canon EOS R100 offers modern mirrorless advantages in an incredibly compact package perfect for travel to dark sky locations.
For those who want impressive results without the steep learning curve, the Dwarf 3 or ZWO Seestar S50 smart telescopes provide revolutionary all-in-one solutions that deliver stunning images with minimal technical knowledge. These devices have democratized astrophotography, making it accessible to everyone regardless of technical aptitude or prior experience.
Serious enthusiasts pursuing deep-sky imaging should consider the SVBONY SV405CC for its cooled sensor capabilities that were previously unavailable at this price point. The cooling system makes a dramatic difference in long-exposure performance, revealing faint nebulae and galaxies that are impossible to capture with uncooled cameras.
Remember that the camera is just one part of your astrophotography system. Invest in quality support equipment like a sturdy tripod and reliable tracking mount – these often make more difference to final image quality than camera choice alone. The most important advice is to start with what you can afford and actually use it regularly. The best camera for astrophotography is the one that helps you capture the cosmos and grow your skills, regardless of price or specifications. Clear skies and happy imaging!
Comments