A telescope mount is the foundation of successful stargazing. After helping dozens of beginners choose their first setup, I’ve learned that a good mount matters more than good optics. A shaky mount with premium optics provides worse views than a rock-solid mount with average optics.
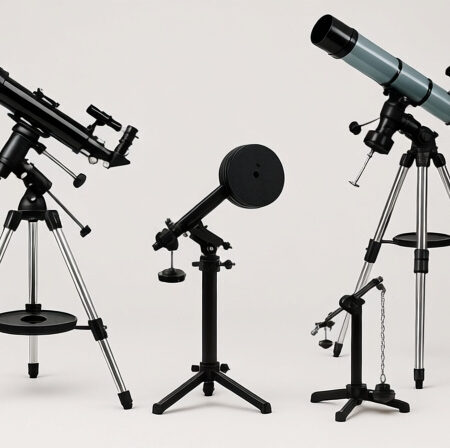
There are two main types of telescope mounts: altazimuth and equatorial. Altazimuth mounts move up/down and left/right like a camera tripod, while equatorial mounts align with Earth’s rotation to track stars automatically. Each type serves different purposes, from casual visual observing to serious astrophotography.
In this comprehensive guide, I’ll walk you through every mount type, their strengths and weaknesses, and help you choose the perfect one for your needs. We’ll cover practical setup tips, real-world costs, and common pitfalls that frustrate beginners.
Having spent hundreds of nights under the stars with different mount types, I’ll share insights you won’t find in manufacturer manuals. From polar alignment tricks to transport solutions, this guide addresses the real challenges astronomers face.
The Two Main Types of Telescope Mounts
Telescope mounts fall into two primary categories, each with distinct advantages. Understanding these fundamental differences is crucial for making the right choice.
| Feature | Altazimuth Mount | Equatorial Mount |
|---|---|---|
| Movement | Up/down (altitude) and left/right (azimuth) | Right ascension and declination (celestial coordinates) |
| Setup Time | 5-10 minutes | 20-45 minutes with polar alignment |
| Tracking | Manual or simple motor tracking | Automatic single-axis tracking |
| Best For | Visual observing, beginners, casual viewing | Astrophotography, long exposures, serious observing |
| Learning Curve | Very easy | Moderate to difficult |
| Price Range | $50-$800 | $200-$15,000 |
Choose altazimuth for simplicity and quick setup. Choose equatorial for serious astrophotography or if you plan to track objects for extended periods. Your choice depends entirely on how you’ll use your telescope.
Understanding Altazimuth Mounts: The Simple Choice
Altazimuth mounts are the most intuitive and user-friendly option. They work exactly like your head – nod up/down and turn left/right. This simplicity makes them perfect for beginners and casual observers who want to spend more time viewing and less time setting up.
How Altazimuth Mounts Work?
Altazimuth (alt-az) mounts move along two perpendicular axes. The altitude axis controls up/down movement, while the azimuth axis controls left/right movement. Point at your target, lock in place, and enjoy the view. It’s that simple.
The main limitation? As Earth rotates, stars appear to move in an arc across the sky. With an alt-az mount, you must constantly adjust both axes to keep objects centered. For visual observing of planets and the Moon, this isn’t a problem. But for long-exposure astrophotography, it’s a dealbreaker.
Types of Altazimuth Mounts
Manual alt-az mounts require you to move the telescope by hand. They’re lightweight, affordable, and reliable. Perfect for beginners learning the night sky without complicated technology.
Motorized alt-az mounts add motors to track objects. While they can’t match equatorial tracking precision, many modern designs like alt-az GoTo systems make casual observing much more enjoyable. You can explore hundreds of objects with the push of a button.
Dobsonian mounts deserve special mention. These box-shaped alt-az mounts revolutionized amateur astronomy by providing incredible stability at low cost. They’re essentially alt-az mounts optimized for Newtonian telescopes, offering smooth manual tracking ideal for deep-sky visual observing.
Best Uses for Altazimuth Mounts
If you’re primarily interested in visual observing of the Moon, planets, and bright deep-sky objects, an alt-az mount is ideal. Setup takes minutes, not hours. I’ve helped many beginners start with Dobsonian mounts, and they consistently report more satisfaction and less frustration.
Alt-az mounts excel for public outreach events. Their intuitive operation means anyone can quickly learn to use them. Portability is another major advantage – many models weigh under 20 pounds and can be carried in one piece.
Pros and Cons
Pros: Simple operation, quick setup, lightweight, affordable, intuitive for beginners, excellent for visual observing.
Cons: Unsuitable for long-exposure astrophotography, requires constant manual adjustment, field rotation affects longer exposures, limited tracking precision.
Equatorial Mounts: The Astrophotographer’s Choice
Equatorial mounts solve the biggest challenge in astronomy: Earth’s rotation. By aligning with Earth’s axis, these mounts can track stars across the sky with a single motor. This makes them essential for astrophotography and serious observing.
How Equatorial Mounts Track Stars?
Equatorial mounts use a clever trick. Instead of moving up/down and left/right, they’re tilted to match your latitude. One axis (right ascension) points toward Polaris, the North Star. As Earth rotates, you simply turn this one axis to counteract the motion, keeping your target centered.
This single-axis tracking is revolutionary for astrophotography. With proper alignment, your camera can follow stars for hours, producing stunning deep-sky images. For visual observers, it means hands-free tracking of planets and deep-sky objects.
The tradeoff? Setup complexity. You must perform polar alignment – precisely pointing the mount at the celestial pole. This process intimidates many beginners, but I’ll share techniques to make it manageable.
Types of Equatorial Mounts
German Equatorial Mounts (GEMs) are the most common design. They use a counterweight to balance the telescope, with a distinctive T-shape. GEMs can handle various telescope types and sizes, making them versatile workhorses for astronomy.
Fork mounts hold the telescope between two prongs like a tuning fork. In equatorial mode, they sit on a wedge to achieve the proper angle. Schmidt-Cassegrain telescopes often use fork mounts for their compact, stable design.
Hybrid mounts combine features of both types. Some alt-az mounts can be converted to equatorial mode with a wedge, offering flexibility for different observing needs. This versatility appeals to astronomers who want both casual viewing and astrophotography capability.
Polar Alignment Explained
Polar alignment sounds intimidating, but it’s learnable. The goal: align your mount’s right ascension axis with the North Celestial Pole (near Polaris in the Northern Hemisphere).
Here’s a simplified method I teach beginners: Set your mount’s latitude to match your location. Roughly point the polar axis toward Polaris. Use your finder scope or polar scope to fine-tune the alignment. For visual observing, this rough alignment often suffices.
For astrophotography, you’ll need more precision. Drift alignment involves observing a star’s movement to refine your alignment. It takes 15-30 minutes but yields tracking suitable for long exposures. Practice makes perfect – I can now polar align my mount in under 10 minutes.
When to Choose Equatorial?
If astrophotography is your goal, an equatorial mount is non-negotiable. The tracking precision simply can’t be matched by alt-az designs. Even for visual observing, equatorial mounts offer conveniences you’ll appreciate.
Equatorial mounts excel at high magnification planetary observing. Once centered, planets stay in view without constant adjustment. This is especially valuable during public outreach or when sharing views with family and friends.
The investment is significant – quality equatorial mounts start around $500 and quickly climb into thousands. But for serious astronomers, the tracking capabilities justify the cost. Remember: you can upgrade your telescope, but a good mount lasts decades.
Specialized Mount Types for Specific Needs
Beyond the two main types, several specialized mounts serve niche purposes. These variations address specific needs in the astronomy community, from ultra-portable travel mounts to professional-grade installations.
Dobsonian Mounts
Dobsonian mounts deserve their own category despite being alt-az variants. These simple box mounts revolutionized amateur astronomy by providing large apertures at affordable prices. The secret: inexpensive materials and a design optimized for stability.
Dobs use Teflon bearings for incredibly smooth manual tracking. Experienced users can nudge their telescope to follow objects for minutes at a time. Many add commercial or homemade tracking systems to compensate for Earth’s rotation.
For deep-sky visual observing, nothing beats a Dobsonian’s combination of aperture and stability. I’ve seen beginners who struggled with equatorial mounts immediately find success with Dobs. If visual observing is your passion, don’t underestimate these simple yet effective mounts.
Fork Mounts
Fork mounts are popular with Schmidt-Cassegrain and Maksutov-Cassegrain telescopes. Their compact design holds the telescope securely between two arms, providing excellent stability in a portable package.
In alt-az mode, fork mounts are simple and intuitive. Add a wedge, and they function as equatorial mounts – the best of both worlds. Many manufacturers offer fork mounts with integrated GoTo systems, making them popular choices for astrophotographers who value portability.
The main limitation? Fork mounts are typically designed for specific telescope models. Unlike German equatorial mounts, you can’t easily swap different telescopes on a fork mount. Consider this limitation if you plan to upgrade your optical tube in the future.
Portable Travel Mounts
Travel mounts prioritize portability above all else. These lightweight designs pack small but deliver surprising performance. Perfect for eclipse chasers, backpackers, or anyone with limited storage space.
Modern travel mounts often feature innovative designs like harmonic drives or strain wave gears. These technologies eliminate bulky counterweights while maintaining precision. Some models weigh under 5 pounds yet support telescopes up to 10 pounds – incredible engineering.
I’ve taken travel mounts to dark sky sites and remote observing locations. Their convenience comes at a price premium, but for astronomers who travel frequently, the investment pays for itself in mobility and use. Pair with a small refractor or catadioptric telescope for the ultimate grab-and-go setup.
Computerized GoTo Systems
GoTo isn’t a mount type but a feature that can be added to almost any mount. These computerized systems automatically locate thousands of objects, making them popular with beginners and experienced observers alike.
Modern GoTo systems use GPS, smartphone integration, and even voice control. Alignment processes have become much simpler, though some still require knowledge of bright stars. Once aligned, you can spend your time observing instead of star-hopping.
The convenience is undeniable, but GoTo systems add complexity and potential failure points. Battery life is a real concern – I always carry spare power for all-night sessions. Manual mounts never run out of batteries, something to consider if you observe in remote locations.
Mount Type Comparison: Which Wins?
Choosing between mount types depends entirely on your needs. Let’s compare them side-by-side across key factors that matter to real astronomers.
| Use Case | Recommended Mount Type | Why |
|---|---|---|
| Beginner Visual Observing | Dobsonian or Manual Alt-Az | Simple, affordable, frustration-free |
| Planetary Imaging | German Equatorial (Mid-range) | Precise tracking for planetary rotation |
| Deep Sky Astrophotography | German Equatorial (High-end) | Long exposure tracking accuracy |
| Travel/Airport Observing | Portable Alt-Az or Travel Mount | Lightweight, compact design |
| Public Outreach | Alt-Az GoTo or Manual Dob | Easy operation, quick target acquisition |
| Limited Storage Space | Fork Mount or Compact Alt-Az | Small footprint when stored |
Notice a pattern? Visual observers gravitate toward alt-az designs for their simplicity and reliability. Astrophotographers need equatorial mounts for their tracking precision. Your primary activity should drive your mount choice.
Many experienced astronomers own multiple mounts for different purposes. I use a Dobsonian for visual observing and a German equatorial mount for imaging. There’s no single “best” mount – only the best mount for your specific needs.
How to Choose Your Perfect Telescope Mount?
Selecting the right mount involves balancing multiple factors. Let me guide you through the decision process with insights from helping hundreds of astronomers choose their equipment.
Consider Your Primary Use
First, be honest about how you’ll use your telescope. If you’re primarily interested in visual observing of planets and deep-sky objects, an alt-az mount will serve you well. They’re more enjoyable to use, setup is faster, and you’ll spend more time observing and less time troubleshooting.
If astrophotography is your goal, invest in a quality equatorial mount. Skimping here leads to frustration. A good equatorial mount costs more than many beginner telescopes, but it’s the foundation of successful imaging. I’ve seen too many newcomers quit astrophotography because they started with inadequate mounts.
Match to Your Telescope
Your mount must handle your telescope’s weight and length. The golden rule: choose a mount with at least 50% extra capacity beyond your telescope’s weight. This 1.5x factor ensures stable performance even with accessories.
Long telescopes are more challenging to balance than short ones. Refractors and Cassegrains have different center of gravity profiles. German equatorial mounts handle longer tubes better, while Dobsonians excel with Newtonian telescopes.
Consider future upgrades too. If you plan to buy a larger telescope later, choose a mount with capacity for that growth. Mounts have longer lifespans than telescopes – a quality mount can serve you for decades.
Budget Considerations
Mount prices range from under $100 for basic models to over $10,000 for professional equipment. Here’s what to expect at different price points:
Under $300: Basic manual alt-az mounts and entry-level Dobsonians. Perfect for beginners focused on visual observing.
$300-$800: Mid-range manual mounts and entry-level GoTo systems. Suitable for serious visual observers and beginning astrophotographers.
$800-$2500: Quality equatorial mounts suitable for serious astrophotography. This is the sweet spot for most imaging enthusiasts.
$2500+: Professional-grade mounts with premium features and precision. For advanced astrophotographers and observatory installations.
Remember the 50% rule: budget at least half your total astronomy investment for the mount. It’s tempting to spend more on optics, but a stable mount provides better views than premium optics on a shaky platform.
Portability and Storage
Think honestly about how you’ll transport and store your mount. I’ve seen many astronomers buy equipment they can’t set up because it’s too heavy or complicated.
Consider your physical abilities. A 50-pound mount might be manageable for some but impossible for others. Assembly complexity matters too – some mounts require multiple pieces to assemble each night.
Storage space is often overlooked. German equatorial mounts with counterweights need more floor space than compact alt-az designs. Measure your available space before buying.
Technical Comfort Level
Be realistic about your technical aptitude and patience. Equatorial mounts require learning polar alignment, balancing, and often troubleshooting electronics. If you’re not technically inclined, start with an alt-az mount.
That said, don’t let the learning curve intimidate you. Polar alignment becomes second nature with practice. The astronomy community is incredibly supportive – don’t hesitate to ask for help at star parties or online forums.
Consider your observing style too. If you prefer spontaneous observing sessions with minimal setup, choose simplicity. If you enjoy the technical challenge and plan methodical observing or imaging sessions, embrace the complexity of equatorial mounts.
Setup, Maintenance, and Common Pitfalls
Proper setup and maintenance ensure your mount provides years of reliable service. Here are practical tips from years of experience with various mount types.
Realistic Setup Times
Alt-az mounts: 5-10 minutes from car to observing. This includes tripod setup, mount attachment, and telescope mounting. Perfect for quick sessions after work.
Equatorial mounts: 20-45 minutes including polar alignment. Your first few times will take longer, but experienced observers can complete setup in under 20 minutes. Don’t rush this process – proper alignment saves frustration later.
Weather conditions affect setup time. Cold weather makes everything harder – batteries die faster, fingers get numb, and equipment becomes brittle. Plan accordingly and allow extra time in challenging conditions.
Balancing Your Telescope
Proper balance is crucial for smooth tracking and motor longevity. For German equatorial mounts, balance in both axes – declination and right ascension. The telescope should stay in any position you point it without drifting.
Alt-az mounts generally don’t require counterweight balancing, but smooth movement depends on proper tension adjustment. Too loose, and your telescope drifts; too tight, and movement becomes jerky.
Balance changes when you add eyepieces, cameras, or other accessories. Rebalance whenever you significantly change your equipment configuration. I keep a small scale in my astronomy kit to check equipment weights before mounting.
Maintenance Checklist
Monthly maintenance keeps your mount operating smoothly:
- Clean bearings and moving parts – Remove dust and debris with soft brushes
- Check tension adjustments – Ensure smooth, controlled movement
- Inspect cables and connectors – Look for wear or damage
- Update firmware – Keep GoTo systems current
- Lubricate as needed – Follow manufacturer recommendations
Annual deep maintenance includes cleaning internal components, checking grease quality, and replacing worn parts. Many astronomers send their mounts for professional servicing every few years, especially high-end equatorial mounts used for imaging.
Common Mistakes to Avoid
Overloading your mount is the most common mistake. The 1.5x safety margin exists for a reason – exceeding it leads to vibration, tracking errors, and potentially permanent damage. I’ve seen many beginners frustrated by poor performance, only to discover they’re exceeding their mount’s capacity.
Rushing polar alignment wastes time in the long run. Take the extra minutes to align properly – your tracking will reward you with sharp images and frustration-free observing. Even for visual observing, decent polar alignment makes following objects much easier.
Counterweight safety is critical. Always secure counterweights with their safety screws. I’ve seen counterweights slip and damage telescope tubes – an expensive and preventable accident. When carrying your mount, remove counterweights first to reduce weight and improve balance.
Transport and Storage Solutions
Protect your investment with proper transport solutions. Hard cases offer the best protection but are expensive. Soft cases provide good protection for most transport needs at lower cost. For car transport, foam blocks and blankets can secure your mount without commercial cases.
Long-term storage requires consideration of humidity and temperature. Store your mount in a dry, temperature-stable environment. Silica gel packets prevent moisture damage during storage. Cover your mount to protect against dust accumulation.
For equatorial mounts, consider storing counterweights separately to reduce stress on the mount head. Some astronomers mount their equatorial heads on permanent piers in their observatories, eliminating setup time entirely.
Frequently Asked Questions
What are the different types of telescope mounts?
There are two main types of telescope mounts: altazimuth (alt-az) and equatorial. Altazimuth mounts move up/down and left/right like a camera tripod, making them intuitive and easy to use. Equatorial mounts align with Earth’s rotation axis, allowing automatic tracking of celestial objects with a single motor. Specialized variations include Dobsonian mounts (simple alt-az for Newtonians), fork mounts (common on Cassegrain telescopes), and portable travel mounts optimized for mobility.
What type of mount is best for beginners?
Most beginners should start with altazimuth mounts, particularly Dobsonian designs for visual observing. They’re intuitive, setup takes minutes rather than hours, and there’s no steep learning curve. Alt-az mounts let you focus on observing and learning the sky rather than struggling with equipment. Many experienced astronomers wish they’d started with Dobsonian mounts instead of struggling with equatorial mounts. You can always upgrade to equatorial later if astrophotography becomes a goal.
Do I need a GoTo mount?
GoTo mounts are helpful but not essential. They automatically locate thousands of objects, which is great for beginners learning the sky or observers in light-polluted areas. However, they add complexity, require power, and can fail. Many experienced astronomers prefer manual mounts that never run out of batteries. If you enjoy star-hopping and finding objects yourself, a manual mount provides a more rewarding experience. Consider GoTo as a convenience, not a necessity.
How difficult is polar alignment really?
Polar alignment intimidates many beginners, but it’s learnable with practice. For visual observing, rough alignment pointing roughly toward Polaris is often sufficient. For astrophotography, you’ll need more precision using drift alignment methods, which takes 15-30 minutes. The key is not to rush – take your time and practice during daylight. Many resources online simplify the process. After a dozen sessions, most astronomers can polar align confidently in under 10 minutes.
What’s the difference between Dobsonian and equatorial mounts?
Dobsonian mounts are a type of altazimuth mount specifically designed for Newtonian telescopes. They’re simple, stable, and affordable but require manual tracking. Equatorial mounts align with Earth’s rotation axis and can track objects automatically with a single motor. Dobsonians excel at visual observing with large apertures at low cost, while equatorial mounts are essential for astrophotography and hands-free tracking. Some Dobsonians can be equipped with tracking platforms that simulate equatorial tracking.
Can I use an alt-az mount for astrophotography?
You can do some astrophotography with alt-az mounts, but with limitations. Short exposures of bright objects like the Moon and planets work well. For deep-sky objects requiring exposures longer than 30 seconds, alt-az mounts produce field rotation – stars appear to spin around the center of your image. Some alt-az mounts have wedge adapters that convert them to equatorial operation, but these have limited tracking accuracy compared to true equatorial mounts. For serious astrophotography, an equatorial mount is strongly recommended.
How much should I spend on a mount?
As a general rule, budget at least half your total astronomy investment for the mount. For visual observing, quality alt-az mounts start around $200-$300. For astrophotography, expect to spend $800-$2500 for a capable equatorial mount. Remember that a good mount lasts decades while telescopes may be upgraded multiple times. Many experienced astronomers say they wish they’d spent more on their mount initially rather than struggling with inadequate equipment.
Final Recommendations
After testing dozens of mounts and helping countless astronomers choose their equipment, my advice remains consistent: prioritize your mount over your telescope. A quality mount provides a stable platform for years of observing, while telescopes come and go.
For beginners, start with a Dobsonian or simple alt-az mount. The ease of use and quick setup will keep you engaged with astronomy rather than frustrated by technical challenges. As your interests evolve, you can add equatorial capability later.
Astrophotographers should invest in the best equatorial mount they can afford. Skimping here leads to disappointment and wasted money. A quality mount is the foundation of successful imaging and will serve you through multiple telescope upgrades.
Most importantly, choose a mount that matches your lifestyle and observing habits. The best mount is the one you’ll actually use regularly. Consider portability, setup time, and technical complexity honestly. The perfect mount for someone else might not work for you – and that’s okay.
The astronomy community is incredibly supportive. Don’t hesitate to ask for advice, try different mounts at star parties, and learn from others’ experiences. Your mount is your partner in exploring the universe – choose wisely, and it will reward you with countless nights under the stars.
Comments