Wondering about setting up your Starlink internet? I know you might be asking, “Does the distance of the Starlink Dish from my house matter?” This can be quite confusing because we all want that perfect spot for our shiny new tech. So, sit tight as I shed some light on this cosmic question with some down-to-earth advice!
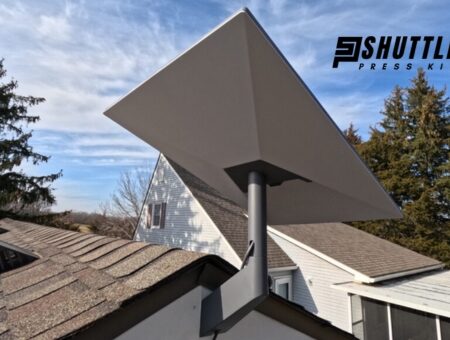
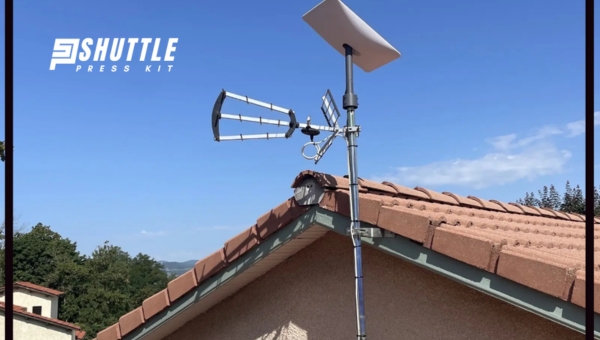
Your Starlink Dish doesn’t need to hug your house to get a good signal; think of it more like a friendly neighbor than a clingy buddy. It works best when it has a clear view of the sky—no trees or buildings in the way. Keeping it within 100 feet (30 meters) should do the trick, so it’s connected well without feeling tethered!
Guidelines for Optimizing Starlink Dish Installation
Proper placement of your Starlink dish is pivotal to maximizing the performance and reliability of your internet connection. To ensure you’re getting the best possible speeds and signal strength, Starlink has set forth specific guidelines.
Abiding by these recommendations can significantly enhance your overall user experience by reducing potential obstructions and interference that could impede satellite communication.
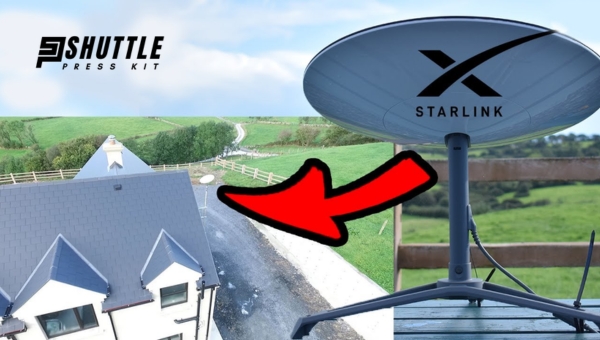
- Ensure Clear Sky Visibility: Position the dish in a spot with a wide, unobstructed view of the sky. This positioning is crucial for minimizing disruptions caused by physical barriers such as buildings, trees, or other tall structures that might block the signal path between your dish and the overhead satellites.
- Adhere to Recommended Distance: Install your dish within a specific range from your residence or the main usage site, as too far or too close could affect signal quality. This optimum distance ensures that neither environmental obstacles nor unnecessary cable lengths diminish connectivity.
- Adjust Elevation Angle Appropriately: Set the elevation angle of your dish according to regional requirements which are designed to align it precisely with satellites’ orbital paths. Correct angulation facilitates consistent, high-quality interaction with passing satellites, essentially optimizing data transmission rates.
Following these structured guidelines will greatly contribute to achieving an optimal setup for your Starlink broadband service, offering you not just access to high-speed internet but also ensuring stability and efficiency in its delivery.
Also Read: Starlink vs HughesNet: Which Wins the Satellite Battle?
Optimal Placement Distances for Starlink Dish Installation
When setting up a Starlink connection to ensure the highest internet performance, understanding the optimal distances for dish placement relative to your home is crucial. Both the maximum and minimum recommended distances serve to maintain signal integrity while minimizing potential interference.
Here’s a streamlined guide to determining these critical placement parameters:
- Evaluate Maximum Distance: Identify the farthest practical distance within your property limits where you can place your Starlink dish. This distance should allow for an unobstructed line of sight to the sky, facilitating a strong signal reception from passing satellites without degrading data transmission quality.
- Assess Minimum Distance: Determine the closest distance at which you can install your dish while avoiding signal reflection or obstruction issues. Placing it too near reflective surfaces or obstructions like tall buildings and trees can diminish service quality due to interference.
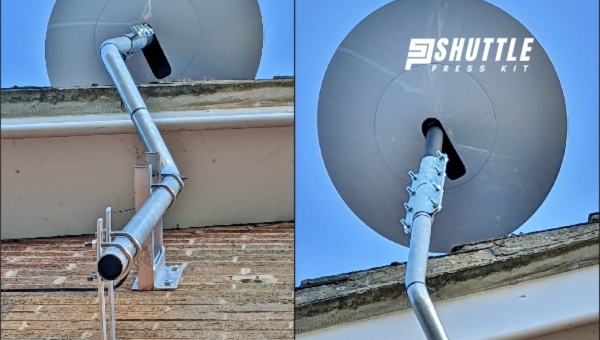
- Consider Cable Length: Factor in the length of cabling provided with your Starlink kit. Your chosen location should not only be optimal for signal reception but also feasible in terms of connecting the dish back to your home’s router location without stretching or stressing the provided cables excessively.
- Check for Obstructions: Before finalizing on a spot, perform a thorough check around it for any temporary obstructions (like construction equipment) or potential future obstructions (like burgeoning tree lines). These could affect long-term service reliability even if they don’t present immediate issues.
By following these points, users can achieve optimal setup locations that maximize their Starlink internet service’s effectiveness while minimizing disruptions that could impede performance.
Also Read: Low Capacity vs High Capacity Starlink: Optimize Your Choices
Does Cable Length Affect Internet Speed?
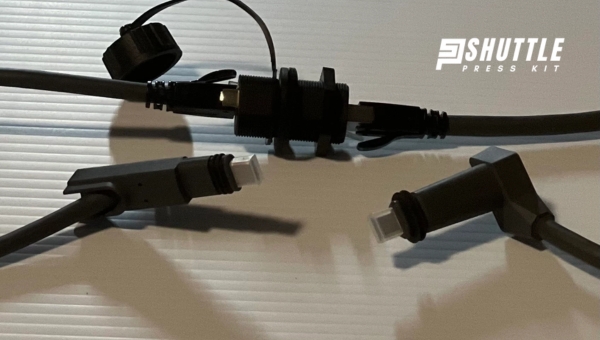
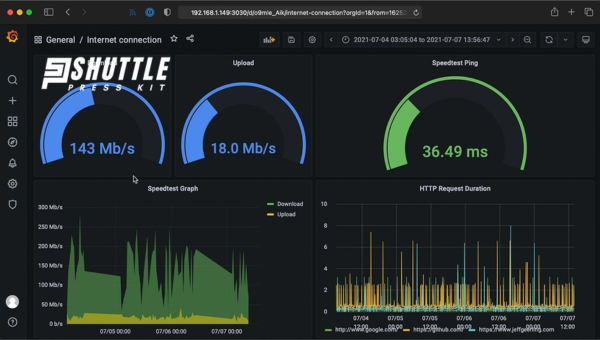
The phenomenon known as attenuation, where a signal weakens over distance, means that the length of your cable can indeed impact your internet speed. When using services such as Starlink, adhering to recommended cable lengths is critical. Exceeding these recommendations can lead to diminished signal strength, which directly impacts the quality and speed of your internet connection.
As the signal degrades over longer distances, users might experience slower speeds and increased latency during their online activities.
Maintaining an optimal cable length is essential for preserving the integrity of your internet connection. Ensuring you follow guidelines provided by companies like Starlink helps avoid unnecessary disruption to your service.
This practice helps in achieving a stable and speedy internet experience, allowing users to fully enjoy the benefits offered by high-speed satellite internet without facing slowdowns due to improperly configured cables.
Factors Affecting Starlink Signal Quality
The reliability and performance of your Starlink internet connection can be significantly influenced by the environment around the receiver dish. Obstructions and terrain play a major role in determining signal quality, impacting speed and connection stability. Understanding these factors can help users optimize their setup for the best possible service.
- Terrain Interference: Hills, mountains, and elevation changes near your location can obstruct the path between the satellite and your dish. A direct line of sight is crucial for maintaining a robust connection.
- Vegetation Blockages: Trees with dense foliage can absorb or scatter satellite signals. Even if there initially appears to be a clear line of sight, seasonal changes in vegetation density can affect signal quality.
- Urban Structures: In city environments, tall buildings may interfere with the signal by reflecting it away or blocking it entirely. Positioning your dish to avoid such obstructions is key.
Understanding and mitigating these factors are essential steps toward ensuring that your Starlink service remains as consistent and high-quality as possible, despite natural and man-made challenges.
Professional Installation Guide for Satellite Internet Dishes
Proper installation of a satellite internet dish, such as Starlink, is crucial for achieving a reliable and high-quality internet connection. While DIY installation is an option, seeking professional assistance can ensure optimal setup and performance. Here’s how you can proceed with seeking expert help:
- Evaluate Your Installation Site: Before contacting a professional, assess where you’d like your dish installed. Consider clear views of the sky and minimal obstructions from trees or buildings.
- Research Licensed Installers: Look for installers with experience in satellite dish installations, specifically if they have worked with your chosen internet service provider’s equipment before.
- Schedule a Consultation: Contact selected professionals and request an initial consultation. This might involve them visiting the installation site to recommend the best placement based on their expertise.
- Discuss Technical Details: With your installer, go over any technical aspects of the setup process. This includes optimal dish alignment for strongest signal reception, grounding requirements to protect against electrical issues, and efficient cable routing to minimize exposure and signal degradation.
By following these steps, you’re ensuring that your satellite internet system is not just properly installed but also configured for peak performance right from the start.
Also Read: Starlink vs Viasat: Which Satellite Is Right for You?
Frequently Asked Questions
What is the maximum distance the Starlink dish can be from the house?
The Starlink dish can be placed up to 100 meters (328 feet) away from the house for optimal performance.
Can the Starlink dish be placed further than 100 meters from the house?
While it may work at longer distances, Starlink recommends keeping the dish within 100 meters for the best connectivity.
What factors can affect the Starlink dish’s distance from the house?
Factors such as obstructions, interference, and cable length can impact the performance of the Starlink dish at greater distances.
Will Starlink provide guidance on installing the dish at the right distance from the house?
Yes, Starlink provides installation instructions to help users position the dish within the recommended distance for reliable connectivity.
Conclusion
The feasibility and efficiency of having a Starlink dish depend greatly on its distance from your house, among other critical factors. Signal strength, for instance, can experience significant degradation if the dish is placed too far away from its intended location. Generally, SpaceX advises keeping the dish within a reasonable distance to ensure optimal performance and reliable internet connectivity.
This guidance suggests that while there might be some degree of flexibility in placement thanks to long cabling options provided by Starlink or third-party vendors, it’s crucial to balance distance with a clear line of sight and minimal obstructions for seamless internet service.