
Ever hit a snag with your internet and found yourself staring at your Starlink router wondering what to do? Well, you’re not alone. Sometimes all it takes is a simple reset to get things running smoothly again. In this quick guide, I’ll walk you through resetting your Starlink router so you can get back to what’s important without any fuss.
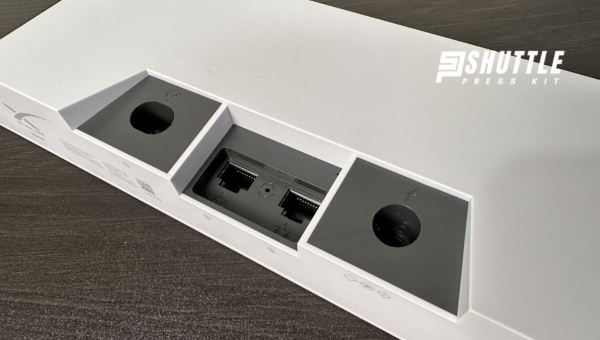
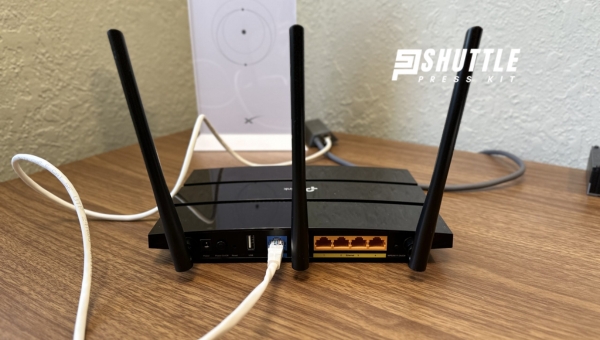
Resetting your Starlink router is straightforward. First, locate the reset button on the back of the device; it’s typically a small, recessed button that may require a paperclip or similar tool to press. Hold down this button for several seconds until the router’s lights start to blink indicating it’s resetting. After this step, give it a moment—it will reboot and then you should be good to go!
Steps to Perform a Starlink Router Reset
Resetting your Starlink router can resolve many connectivity issues you might be facing. Whether it’s slow internet speeds or frequent disconnections, a simple reset could potentially fix these problems. Below are the steps to reset your router efficiently:
- Turn Off the Router: The first step involves powering down your router. Make sure to disconnect the power adapter from both the electrical outlet and the router itself, ensuring all lights on the device turn off.
- Find the Reset Button: Locate a small, recessed button labeled “Reset” on your router. This is usually found on the back or bottom of the device and may require a pin or paperclip to press.
- Press and Hold Reset Button: Using a pin or unfolded paperclip, press and hold down the reset button. You should do this for about 10 to 15 seconds which initializes the reset process.
- Reconnect Power While Holding Button: While continuing to hold down the reset button, reconnect your router’s power adapter. Powering up with this button pressed initiates a more comprehensive reset.
- Release Reset Button after Seconds: After holding down for another 10 to 15 seconds following power-up, release the button. This step concludes resetting efforts, allowing for fresh setup procedures if necessary.
- Wait for Router Reboot: Allow some time for your Starlink router to reboot completely. This is indicated by stable light indicators signaling that it’s ready for use again.
By following these simple steps, you can effectively reset your Starlink router and potentially enhance your internet connection’s performance.
Also Read: Low Capacity vs High Capacity Starlink: Optimize Your Choices
Pre-Reset Troubleshooting for Connectivity Issues
Before initiating a reset of your router or device, it’s important to explore and resolve underlying problems that might be affecting your connection. Conducting these pre-reset checks can often save time and prevent unnecessary adjustments to your system’s settings. Here’s how you can troubleshoot common connectivity issues:

- Ensure Proper Power and Connections: First, make sure that your router and modem are correctly plugged in and turned on. Inspect all physical connections between your modem, router, and any connected devices for looseness or damage.
- Restart Devices and Modem: Simply turning off your router, modem, and computing device for about 30 seconds before turning them back on can resolve many connectivity issues.
- Investigate Interference Sources: Keep an eye out for anything that could interfere with your signal—this includes other wireless devices, thick walls, or even appliances operating on similar frequencies. Try repositioning your router or switching Wi-Fi channels to minimize interference.
- Check VPN or Proxy Settings: If you use a VPN or proxy service, try disabling it temporarily to see if this improves connection stability. These services can sometimes conflict with normal network operations.
- Attempt a Soft Reset: Without fully resetting any configurations back to factory settings, simply unplug your router for ten seconds before plugging it back in. This action can often clear minor glitches without altering any personalized settings.
By following these steps carefully prior to considering a hard reset of your networking equipment, you might find a simple solution without needing extensive reconfigurations post-reset.
Also Read: Starlink Cable Routing Kit: Easy Install Guide!
Various Methods for Resetting Your Router
Resetting your router can resolve numerous network issues, improve performance, or clear custom settings before selling or repurposing the device. Understanding the different types of reset methods allows you to choose the most appropriate approach for your situation. Here are the primary techniques:
- Soft Reset:
- Achieved simply by powering off and then powering on the router.
- Suitable for addressing minor connectivity problems without altering configurations.
- Factory (Hard) Reset:
- Involves pressing a designated reset button on the router, usually with a pin or paperclip, for about 10 seconds.
- Erases all customized settings including Wi-Fi network names (SSIDs), passwords, and security protocols, reverting them to their original factory states.
- Power Cycling:
- Entails switching off the router and unplugging it from its power source.
- After waiting for a brief period (around 10-15 seconds), reconnect and power back on to refresh its internal state without losing your settings.
- Wi-Fi Settings Reset:
- Specific method varies by device but usually found within the router’s web interface or mobile app under wireless settings.
- Resets only wireless-related configurations such as SSID and password while leaving other adjustments intact.
- Remote Reset via App/Web Interface:
- Requires access to the router’s management application or web-based dashboard which has an option to restart remotely.
– Particularly useful if you’re not physically near your router but need to troubleshoot connectivity issues.
- Requires access to the router’s management application or web-based dashboard which has an option to restart remotely.
By choosing one of these methods based on your needs—whether you’re resolving minor glitches with a soft reset/power cycle or returning a device back to its default state with a hard reset—you can manage your home network more effectively.
Also Read: Can You Set Up Your Starlink Router Outdoors? Ultimate Guide
Frequently Asked Questions
What is the purpose of resetting my Starlink router?
Resetting your Starlink router can help resolve connectivity issues or restore it to its default settings.
How do I reset my Starlink router?
To reset your Starlink router, simply locate the reset button on the device and hold it down for a few seconds until the lights flash.
Will resetting my Starlink router erase all my settings?
Yes, resetting your Starlink router will erase any customized settings or configurations you have made.
How often should I reset my Starlink router?
It is recommended to reset your Starlink router only when necessary, such as when experiencing network issues or setting up a new configuration.
Conclusion
Resetting your Starlink router can significantly enhance your internet experience by resolving connectivity issues and improving performance. The process is straightforward, user-friendly, and requires no technical expertise. Following the simple steps provided can help ensure that your device returns to its optimal settings, potentially removing any glitches or errors that have accumulated over time.
A reset might also be necessary after firmware updates or when changing network configurations. Remember, resetting the router will erase all custom settings, so it’s wise to keep a record of any changes you’ve made for easy reconfiguration. Regular maintenance, including occasional resets of your Starlink router, is key to enjoying consistent and reliable internet service.