Have you been hearing about people using a J-Mount with Starlink and wondering what all the fuss is about? Well, let me tell you, setting up your very own speedy internet connection starts with a solid foundation – and that’s where the magic of a J-Mount comes into play. Stick with me as I guide you through turning your Starlink dreams into reality.
J-Mounts are like the trusty sidekicks for your Starlink dish; they’re sturdy arms that make sure your key to fast internet stands strong against wind, rain, or anything nature throws at it.
A good J-mount not only holds your dish tight but also allows fine-tuning its position to ensure you get the best signal possible. So yes, no more slow downloads or endless buffering – just quick and reliable access to all things online!
What is a J-Mount for Starlink?
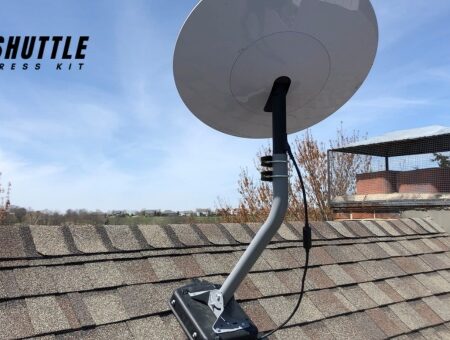
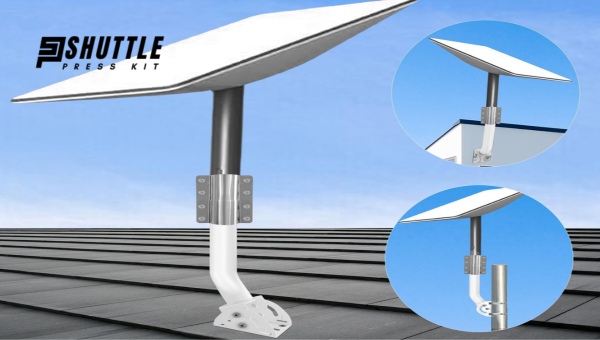
A J-Mount is a type of mounting bracket commonly used to affix satellite dishes or antenna systems. It’s called a “J Mount” because the shape of this device looks like the letter “J.” The curved top part provides an ideal platform to hold your dish steady while the other end attaches securely to your roof, wall, or pole.
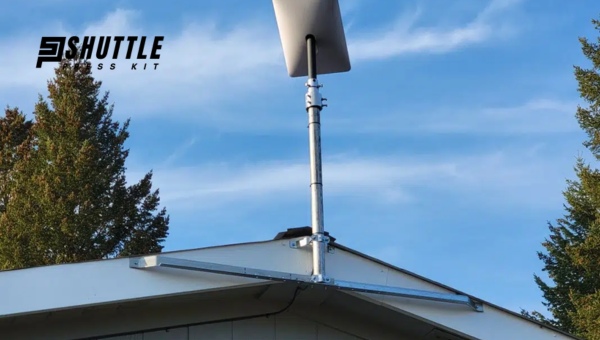
This mount plays an integral role in orienting the satellite dish correctly and providing stability against wind and weather conditions. It helps align your dish perfectly with the sky – ensuring that you have clear signal transmission without any hitches!
Need for J-Mount in Starlink Setup
Using a J-mount with Starlink setup isn’t just optional – it’s necessary! With all technology, especially ones exposed to elements like rain or gusty winds, we need consistency and stability.
The main reason behind using a J-mount lies in its sturdiness, which is fashionably designed for optimal strength. This allows it to firmly support your dish’s weight while resisting different weather patterns, such as high winds.
Besides that, this particular mount aids in achieving perfect alignment towards the sky, which directly influences how well you receive signals from satellites orbiting Earth! Remember, when setting up your Starlink system, alignment is key; any minor change may cause disruptions in reception.
So when considering installing a dish yourself on a star gazing journey with Starlink’s fast internet, don’t forget the importance of incorporating using quality ‘J-Mounts.’ Not only do they facilitate easier installation, but they also significantly add necessary durability, making sure your venture into cyberspace remains smooth sailing!
Also Read: How To Adjust Starlink Snow Melt Settings? A Quick Guide
Sourcing the Best J-Mounts for Your Starlink
Finding the right J-mount for your Starlink may seem like a daunting task, but I’m here to guide you.
After thoroughly exploring and using several products myself, I’ve narrowed down three top choices in different categories. Each of these excels in its area and can support your Starlink dish effectively.
1. Proxicast Pro-Grade J-Max
Let’s talk about our top pick – the Proxicast Pro-Grade J-Max. This heavy-duty antenna mounting kit stands out with features that are all about strength and flexibility.
| Features | Details |
|---|---|
| Material | 304 stainless steel |
| Functionality | Adjustable pivot/slide for ideal signal reception |
| Compatibility | Universal design that works with any type/brand of antenna |
| Unique Features | Locking pin that enhances stability |
Comprised of robust 304 stainless steel material, this mount guarantees durability without rusting on your house. One of its best features is the unique locking pin that fortifies strength and makes it ideal for heavy antennas at 0, +45, or -45 degrees.
This product’s universal design makes it compatible with any antenna type or brand, giving you an added advantage. Even though the pricing might be a concern for some users because it leans toward the higher end, I can vouchsafe that its quality justifies every penny spent on it!
2. Winegard DS2000A Universal 22-inch Mount
Close on heels to our top pick is the Winegard DS2000A Universal 22-inch Mount. We are falling behind only slightly due to lesser flexibility compared to our first choice, but still offers some compelling benefits!
| Features | Details |
|---|---|
| Material | Steel |
| Functionality | Mounted on side of building, roof or pole |
| Compatibility | Works with satellite TV and internet antennas, over-the-air TV antennas and others |
| Unique Features | E-coated for maximum weather protection |
This economical mount is easy to install, and its robust steel material ensures durability. Its round 1.66″ OD shape can be mounted on the side of a building, a roof, or even a pole, but it lacks the flexibility offered by our top pick, like adjustable angles.
However, it’s uniquely e-coated for maximum weather protection, which gives an added advantage to users living in harsh climates.
3. Ubiquiti Universal Antenna Mount (UB-AM)
Looking for a budget-friendly option? Allow me to introduce you to the Ubiquiti Universal Antenna Mount (UB-AM)! It may lack some of the fancy features of our top picks but don’t let that put you off.
| Features | Details |
|---|---|
| Material | Radio antenna |
| Functionality | Simple design with basic functions |
| Compatibility | Original brand product, Manufacturer – UB-AM |
| Unique Features | Light-weight |
This no-frills model does what it says on the tin! Reliable support for your Starlink dish and basic yet functional design make it worth considering if you’re not looking to break the bank!
In conclusion, deciding on which J-mount complements your Starlink dish best depends significantly on personal circumstances such as your budget and environmental factors around where you live.
Remember that investing in quality mounts now can save money in the long run, mitigating damages caused by bad weather conditions or frequent replacements due to low-quality mounts.
Also Read: How to Rent Starlink? Quick Guide for Seamless Connectivity
Step-by-Step Guide on Installing Your Chosen J-Mount
Having the right equipment at hand can make your installation hassle-free. Here’s what you need:

- The chosen J-Mount (Proxicast Pro-Grade J-Max/Winegard DS2000A/Ubiquiti Universal Antenna Mount)
- Starlink dish
- Positioning adapter (Specific like Proxicast or universal options)
- U-Bolts/drilling accessories for securing
- Personal Protective Equipment(PPE)- Helmet, harnesses for heights
- Appropriate screwdrivers/wrench
Remember, choosing quality tools ensures durability and eases up the process!
The Actual Process Explained Stage by Stage
Undoubtedly, being prepared is only the first step. Performing the actual installation requires precision and a clear understanding of the process. Let’s walk through it:
- Stage 1: Assemble Your J-Mount: Begin by assembling your chosen J-mount
- Stage 2: Fix the J-Mount: Once assembled, fix the mount onto your chosen location. Depending on the type, this process may involve drilling or using U-Bolts. In each case, ensure that your mount is secure and uses the Starlink provided alignment guide to enable correct dish alignment.
- Stage 3: Attach Adapter to Dish: The next step includes attaching a suitable adapter to your Starlink dish. Make sure it’s securely fastened before moving onto the next step.
- Stage 4: Mount Your Dish: Now you are ready to attach your prepared Starlink dish onto your J-Mount. Again, check for proper alignment according to the instructions provided by Starlink. Russian always leads to mistakes!
- Stage 5: Secure Your Setup: With everything in place and aligned correctly, it’s time to secure your setup entirely using bolts or clamps wherever necessary.
Also Read: Best Aftermarket Wifi Routers For Starlink: Top Picks!
FAQs
What is the best way to mount Starlink?
Using a J-Mount with Starlink is the best way. It provides a sturdy base that can withstand various climates and offers flexibility in how you install your dish.
Does the Starlink mast need to be vertical?
Yes, ensuring the Starlink mast is vertical is crucial. This aligns your dish for optimal reception of satellite signals, ensuring a reliable internet connection.
What size mount do I need for Starlink?
The suitable mount size mainly depends on the specification of your dish, but typically, J-mounts in sizes ranging from 1-2 inches are used for Starlink.
Can you use the standard Starlink mount on a roof?
Absolutely! The standard Stalink mounts can be secured onto roofs. However, it’s essential to follow proper installation guidelines to avoid damaging your roof structure.
Also Read: Starlink Travel Case Review: Must-Have Accessory?
Conclusion
In my journey of using a J-Mount with Starlink, I learned that the right equipment and setup can significantly impact my internet speed and signal strength. The J-Mount, though seemingly insignificant, is an integral part of this ecosystem.
While there are several options out there, like the Proxicast Pro-Grade J-Max, Winegard DS2000A Universal 22-inch Mount, or Ubiquiti Universal Antenna Mount(UB-AM), choosing the right one depends on your budget and specific needs.
And don’t forget about securing your dish securely! From U-Bolts to drilling with spring tabs—every detail counts when you’re aiming for a hassle-free and efficient internet experience. So now that you’re armed with this knowledge, it’s time to find your perfect mount!