Have you ever considered “How to Transfer Internet Service: Moving Internet Service Guide” when planning a change of home? If not, then this is the most essential guide you’d want to read. This ultimate internet service transfer guide will provide you with all the relevant details required when moving homes. From identifying your current internet service provider (ISP) to the potential issues that may arise and their feasible solutions – we’ve covered it all!
To successfully transfer your internet service when moving, it involves several steps. First, identify who your current ISP is and check whether they provide services in your new location. Then contact them about the move with information such as old and new addresses well in hand. Next, schedule a suitable date for transferring or installing depending upon their availability in your new home zone.
Steps to Moving with Your Existing Internet
Moving can be a busy time, especially when you want to keep your internet service going smoothly. There are steps you can follow to make sure you don’t lose connection during your move.

First, you need to contact your internet service provider (ISP) and tell them about your move. Check if they offer service at your new address. Remember to bring along your router and modem for easy setup in the new place. If needed, look into other ISPs available where you’re moving. Finally, arrange an installation appointment.
Also Read: Starlink DNS: Understanding, Setup, and Key Advantages
Contact Your ISP and Let Them Know You’re Moving
When planning a move, your first step should be to inform your ISP that you’re changing homes. This means calling them up or using their online chat if they have one, and telling them when and where you’ll be moving to. This early notice helps ensure there won’t be delays in switching over or setting up your service in the new house.
By telling your ISP early on, they can also help guide you regarding what needs to happen next with their services during the move. This may include closing out old accounts or transferring services without losing any special settings or preferences that have been established based on past usage.
| Provider | Phone Number |
|---|---|
| Xfinity | +1-800-934-6489 |
| CenturyLink | +1-866-642-0444 |
| AT&T | +1-800-288-2020 |
| Verizon Fios Home Internet | +1-800-837-4966 |
| Cox | +1-800-234-3993 |
| Spectrum | +1-877-463-0677 |
| Viasat | +1-844-702-3199 |
| HughesNet | +1-866-347-3292 |
| Suddenlink | +1-877-794-2724 |
| Windstream | +1-800-347-1991 |
| RCN | +1-800-746-4726 |
| Optimum | +1-866-218-3259 |
| Mediacom | +1-855-633-4226 |
Ask if Your ISP is Available in Your New Location
It’s not always guaranteed that your current ISP will provide services at the new place you’re moving into. When contacting them about the move, ask specifically if they cover the area of your new home. This information will help prevent future surprises once moved in.
If it turns out they do offer service there – great! If not, knowing ahead leaves more time for seeking alternatives without rush processing times typically needed for setting up a new internet provider.
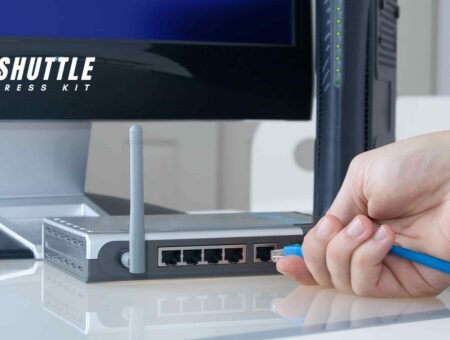
Take Your Router and Modem With You
To save money during the move, take along any routers or modems that belong to you personally rather than renting from ISPs because usually purchasing these devices is cheaper than leasing over long periods of time from providers.
Plus having familiar equipment may make setup easier and faster upon arrival like reconnecting instead of figuring out settings brand-new units might require some adjustments first before functioning well with required configurations after every reboot so remember to properly pack and protect critical components using bubble wrap sturdy boxes!
Even if the equipment doesn’t come with ongoing rental agreements still useful to double-check agreement-related charges that might incur leaving behind unnecessary expenses in pocketbook already stressed budgets associated with typical moves!
Look Into Other ISPs If You Need To
Sometimes changing locations means needing change providers result the unavailability previous company due to switched geographical limitations premier concern is future connectivity priorities choosing various factors including cost speed reliability customer support options however essential to start exploring possibilities soon confirming the prior’s lack of coverage focus quickly narrowing down top contenders based specific needs wants ensuring seamless transition minimizing downtime getting settled newly established living space!
Compare internet companies
| Company | Internet type options | Price range | Download speeds | Learn more |
|---|---|---|---|---|
| T-Mobile 5G Home Internet | T-Mobile | 5G Cellular | $40–$60/mo.* | 25–245 Mbps |
| Xfinity | Xfinity | Fiber, cable | $19.99–$83.95/mo.** | 50–1,200 Mbps |
| AT&T | AT&T | Fiber, DSL, fixed wireless | $55.00–$80.00/mo.*** | 25–940 Mbps |
| Spectrum | Spectrum | Cable | $49.99–$89.99/mo.† | 200–1,000 Mbps |
| Cox | Cox | Cable | $29.99–$109.99/mo.‡ | 25–1,000 Mbps |
Set Up an Installation Appointment
Before finishing packing boxes another crucial step scheduling an installation appointment whereby technicians visit to check the connectivity and assess necessary installations often choice timing dictates availability. For both parties synchronizing calendars is ideal to avoid clashes in schedules but the flexibility offered usually accommodates varying availabilities so try to plan advance three-four weeks preferred slot thereby avoiding undue stress and last-minute scrambles.
Find mutually agreeable timeframe benefits to smooth the operations day itself prepared and ready to accommodate the team and ensure everything runs smoothly reducing risk delays and complications arise equipped with knowledge beforehand expectations manage efficiently deliver solutions promptly effective everything plugged turned tested regards crosschecking performance
How to Update Your Service Location with Starlink
Changing your service address for Starlink ensures that your satellite internet connection is optimized for your current location.
Whether you’re moving house or simply relocating your office, updating this information is crucial for maintaining the best possible internet speeds and connectivity. Follow these straightforward steps to update your service address within the Starlink system:
- Sign in to Your Account: Start by accessing the Starlink website and logging into your account using your credentials.
- Access Your Subscription Details: Locate the section labeled “Your Starlinks” on the dashboard, then select the specific service you wish to update by clicking on “Manage.”
- Initiate Address Change: Find the option for “Service Address” within your account settings. Click on the pencil icon or an equivalent symbol meant for editing next to this field.
- Enter New Address: Type in your new service address accurately. Ensure all details are correct, including any apartment or suite numbers, to avoid issues with service provisioning.
- Confirm Changes: After verifying that all information entered is accurate, save the changes to update your service address.
By following these steps, you can easily update your location details in Starlink’s system without hassle, ensuring a smooth transition of services to your new address.
Also Read: Starlink Volcano Mount Guide: Easy DIY Installation Tips
Transferring Your Internet Router to a New Home
Moving into a new home often involves setting up your internet connection to ensure you stay connected. If you plan on taking your current internet router with you, there are several steps to follow for a smooth transition.
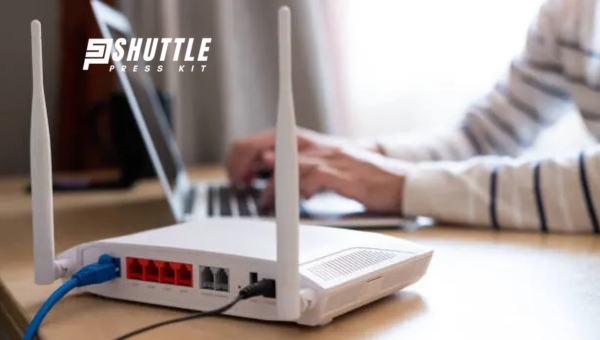
This ensures that your network setup in the new house will be as efficient and hassle-free as possible. Here’s how:
- Contact Your ISP: Before the move, get in touch with your Internet Service Provider (ISP) to confirm that their service is available at your new address and to schedule any necessary service activation.
- Assess Your Equipment: Make sure that your existing router (and modem, if separate) is compatible with the new location’s internet setup and meets any specific requirements of your ISP.
- Set Up Internet Service at New Location: Arrange for your ISP to activate the internet service at your new home by the time you move in or shortly after.
- Disconnect and Pack Safely: When it’s time to move, power down your router (and modem) correctly, then disconnect all cables. Pack everything securely, preferably in their original boxes if available, to avoid damage during transportation.
- Reconnect Equipment at New Home: Once at the new house, connect your modem (if using one separate from the router) to the broadband socket or cable outlet. Then connect your router to the modem if they are not combined devices.
- Power On Devices: Turn on both devices starting with the modem followed by the router. Wait for them to boot up fully—this might take a few minutes as they establish a connection.
- Test Your Connection: Use a laptop or mobile device to search for and connect to your Wi-Fi network using existing network names and passwords—if all is well, you should have access just like before.
Following these steps helps ensure that relocating doesn’t mean losing touch with what matters most online whether it’s work-related tasks or simply staying connected with friends and family.
Also Read: Starlink Ethernet Adapter: Effortless Setup, Honest Review!
FAQs
How long does it take to transfer an internet service?
It can typically take about 1-2 weeks to transfer an internet service, but timeframes may vary depending on your provider and the preparation done.
Can I carry my Wi-Fi router when moving?
Yes, you can usually carry your Wi-Fi router when moving, but be sure to check with your ISP as some may require you to return the old equipment or get a new one.
Is it cheaper to switch than transfer internet services?
Whether it’s cheaper to switch rather than transfer largely depends on the terms of your contract with the current ISP and the potential deals that new providers are offering.
Do I need to physically take my modem/router to my new home?
This depends on your ISP. Some providers might require you do so while others will provide new equipment at your new home; it’s best to ask them directly.
Will there be any downtime during the internet service transferring process?
Yes, typically there can be a brief period of downtime while transitioning between locations. Proper planning and scheduling with your provider can help minimize this downtime.
Also Read: Amazon’s Project Kuiper vs Starlink: Showdown Unpacked
Conclusion
Knowing how to transfer internet service can make your moving process less stressful. We’ve outlined key stages of this process; identifying your provider, contacting them about the move, confirming service availability at your new home, arranging the transfer and comparing transferring vs switching. Potential issues have also been discussed along with their effective solutions.
Lastly, we highlighted the importance of early planning and setting moving dates with your provider for a smooth transition. Remember these points during your next move for a hassle-free internet service relocation.