
Internet connectivity while on the go can be a game-changer for anyone who loves to travel in their recreational vehicle. Knowing ‘How To Set Up Internet in Your RV’ is not only convenient but also essential for staying connected with the outside world. This article will provide you with all the information you need to set up a stable and reliable internet connection inside your mobile abode. We’ll cover benefits, equipment needed, service provider selection, and offer a step-by-step guide for easy installation.
So how do you set up the internet in your RV? The process involves identifying your needs for speed and coverage, choosing an appropriate service provider based on these preferences, investing in necessary equipment such as Wi-Fi extenders or hotspots, and following through with installation according to instructions provided by your chosen service provider or device manufacturer. Also important is understanding how to maintain digital hygiene when utilizing public Wi-Fi or mobile hotspots during travels.
Choosing the Ideal Internet Solution for Your RV
Ensuring you have reliable internet while on the road in your RV is crucial for both leisure and work-related activities. With options ranging from mobile data through cellular networks, utilizing public Wi-Fi, to investing in satellite internet, deciding which route best suits your travel habits and connectivity needs is key. Below are essential steps to help you navigate through the options and select the most appropriate internet solution for your RV lifestyle:

- Assess Your Internet Usage Needs: Begin by understanding how you plan to use the internet while traveling. Consider factors such as streaming video, working remotely, browsing social media, or simply staying connected with friends and family.
- Consider Mobility and Coverage: Think about where you’ll be traveling. If your journeys take you through remote or rural areas, satellite internet might be preferable for its broad coverage. Conversely, if you stay within urban areas or campsites equipped with Wi-Fi facilities, relying on mobile data or public Wi-Fi could be more cost-effective.
- Evaluate Cost vs. Performance: Analyze each option’s cost against the quality of service provided. Mobile data plans may offer better speeds than public Wi-Fi but at a higher monthly expense; meanwhile, satellite internet can provide consistent coverage but typically comes at a premium price and may have latency issues.
- Check Data Limitations: Be aware of any data caps associated with the service plan. Mobile data plans often come with a limit after which speeds can significantly drop or additional charges may apply – similar constraints can apply to satellite services.
- Research Equipment Requirements: Each option may require specific equipment such as a mobile hotspot device for cellular data plans or a satellite dish for satellite internet connections. Assess whether your RV setup can accommodate these requirements both in terms of space and power supply.
By following these steps before making a decision will ensure that you choose an RV Internet solution that best aligns with your travel style without compromising connectivity regardless of where your adventures take you.
Also Read:Is Starlink Available In Your Area? Find Out Now!
Mobile Internet Solutions for RVs
When living the RV lifestyle, staying connected is crucial whether it’s for navigation, remote work, or staying in touch with loved ones. Traditional home internet solutions won’t fit the bill due to the nomadic nature of RV living. Instead, mobile data plans are ideal as they provide flexibility and cover a wide geographic area. Here’s a breakdown of some top mobile internet plans suitable for RV users:
- Verizon Prepaid 100GB Plan: At $80 per month, this option offers 100GB of high-speed data suitable for heavy browsing and streaming needs, making it an excellent choice due to Verizon’s extensive coverage.
- AT&T Prepaid 100GB Data Plan: Priced at $90 per month, AT&T delivers another robust option with 100GB of high-speed data. It stands out for providing a good balance between cost and coverage.
- T-Mobile Go5G Plus: For $90 monthly, this plan offers unlimited data with prioritization up to 50GB of high-speed use. It’s perfect for those who spend most time near urban areas where T-Mobile’s network is strongest.
- Mint Mobile Unlimited: This plan costs $30 per month (when you pay for 12 months upfront) and includes 10GB of high-speed data before throttling. Mint Mobile uses T-Mobile’s network, offering an affordable option without compromising on coverage quality in supported areas.
- Visible+ Plan by Visible (Using Verizon’s Network): Offering unlimited data at capped speeds (5Mbps), this $45/month plan is best suited for those looking for an affordable unlimited solution that benefits from Verizon’s impressive network reach but can work with lower speed thresholds.
These options cater to various needs—from heavy data usage to budget-conscious travelers—ensuring there’s a suitable mobile internet solution no matter your travel style or coverage requirement while exploring in an RV.
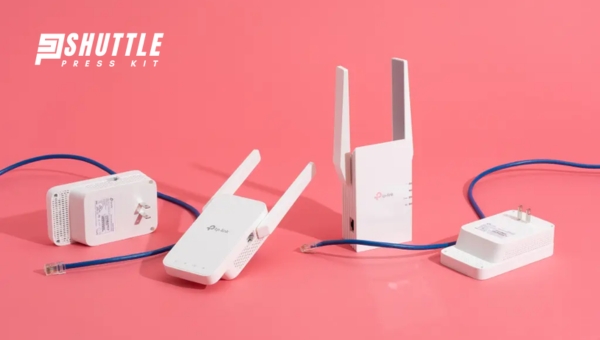
Enhancing Wi-Fi Signals with Boosters and Extenders
Wi-Fi boosters and extenders play a crucial role in improving the range and strength of wireless internet connections. They are particularly useful in areas where the Wi-Fi signal may be weak or unstable. These devices work by amplifying the existing signal from your router, enabling it to cover larger areas and reach devices that are farther away.
- Opt for a Compatible Device: Ensure that the booster or extender is compatible with your current Wi-Fi router’s standards and frequencies (e.g., 2.4 GHz, 5 GHz).
- Location is Key: Place your Wi-Fi booster or extender halfway between your Wi-Fi router and the area where you need improved coverage. Avoid physical obstacles like thick walls or metal objects that could interfere with signal propagation.
- Power Source: Ensure there’s an available power outlet near the chosen location for the device. Some models plug directly into an outlet, while others require a power adapter.
- Connection Setup: Follow the manufacturer’s instructions to connect your booster/extender to your existing Wi-Fi network. This often involves pressing a WPS button on both devices or manually configuring settings through a web interface.
- Optimize Placement After Initial Setup: Use a Wi-Fi signal strength app on your smartphone or tablet to fine-tune the placement of your booster/extender for optimal performance. The goal is to minimize dead zones without creating too much overlap in coverage areas.
Making these adjustments can effectively extend your wireless network’s reach, ensuring better connectivity throughout all areas of your home or office, especially when leveraging public Wi-Fi as outlined earlier using boosters to enhance both performance and range.
Satellite Internet Solutions for RV Travelers
For RV enthusiasts who love to hit the road without leaving connectivity behind, satellite internet presents a promising solution. It’s designed to provide internet service even in the most remote locations, making it ideal for travelers who frequent areas beyond the reach of traditional cellular networks. Starlink Roam, one of the leading options for RVs, offers two distinct setups catering to stationary and on-the-move usage.
- Stationary Setup Option:
- Requires setting up a standard dish every time you park.
- Offers widespread availability wherever you decide to stop and set up camp.
- Comes with a monthly fee starting at $150, plus an initial hardware cost of $599.
- On-the-Move Setup Option:
- Utilizes a more sophisticated Flat High-Performance dish that must be permanently mounted on your vehicle.
- Allows continuous internet use even while driving.
- Significantly higher upfront hardware cost due to advanced technology required.
Both solutions give users access to high-speed internet across the country and in select global markets. The decision between the two will largely depend on your budget, travel patterns (stationary versus constant movement), and your need for uninterrupted online access during drives. Opting for Starlink’s satellite solutions can fundamentally change your travel experience by ensuring reliable connectivity virtually anywhere your adventures take you.
Strategies to Enhance Your Signal Strength
In today’s connected world, having a strong and reliable signal—whether it’s for Wi-Fi, cellular data, or satellite connections—is crucial for maintaining communication, streaming services, and general internet activities. Weak signals can result in slow speeds, dropped connections, and frustration. However, there are effective strategies to boost your signal strength across various types of networks:
- For Campground or National Park Wi-Fi:
- Use a Wi-Fi signal booster: A booster can amplify a weak signal from public Wi-Fi networks.
- Position yourself closer to the Wi-Fi router: The closer you are to the source of the Wi-Fi signal, the stronger your connection will be.
- For Mobile Data Usage:
- Check your data plan: Ensure you haven’t exceeded your monthly data allowance as this can lead to throttled (slowed down) speeds.
- Consider a plan upgrade: If you frequently hit your data cap, upgrading your plan or purchasing additional increments of data may help avoid speed reductions.
- For Satellite Connections:
- Align your dish accurately: Using tools like those provided in the Starlink app can guide you in precisely lining up your dish for optimal reception and faster speeds.
By addressing these factors appropriately according to the type of connection you’re using (Wi-Fi at campgrounds or parks, mobile data on devices like smartphones and tablets), or satellite systems like Starlink for broadband internet access), you’re more likely to enjoy improved signal strength and overall better performance from your network.
Also Read:Starlink Satellites – Spotting Them in the Night Sky!
Solving Common RV Internet Connectivity Problems
Maintaining a stable internet connection while traveling in an RV can be challenging due to various factors like location, equipment quality, and signal interference. A reliable connection is crucial for both remote work and entertainment purposes. Below are effective steps for troubleshooting common internet issues encountered in an RV setting.
- Check Your Data Plan: Ensure your mobile data plan hasn’t been exhausted or limited due to overuse. Some plans have data caps that, once reached, significantly reduce internet speed or stop it altogether.
- Restart Your Devices: Sometimes, the simplest solution is the most effective. Restarting your modem, router, or mobile device can resolve temporary connectivity issues by refreshing your internet connection.
- Inspect Antenna Placement: If you’re using a cellular booster or Wi-Fi extender with an external antenna, verify that it’s correctly positioned. The antenna should have a clear line of sight to the nearest cell tower or Wi-Fi source without obstructions.
- Secure Connections: Ensure all physical connections between your modem/router and any external antennas or boosters are secure and undamaged. Loose cables can lead to inconsistent performance.
- Network Switching: In areas with multiple available networks (e.g., campground Wi-Fi vs. cellular data), manually switch networks if one becomes unreliable. Sometimes devices do not automatically connect to the strongest signal.
- Update Firmware and Software: Keep your devices’ firmware and any associated apps up-to-date. Manufacturers frequently release updates that improve performance and fix known issues affecting connectivity.
Implementing these steps can help maintain a stable internet connection while enjoying the mobility of RV life—whether you’re parked in a remote area or moving between destinations.
Also Read: RV Satellite Dishes: Top Picks for RVs and Tailgating Fun!
FAQs
What kind of Wi-Fi extender do I need for my RV?
You need a robust, long-range Wi-Fi extender, ideally designed for RVs, to ensure good signal strength even in remote places.
How much does internet cost for an RV?
The cost of internet for an RV widely varies based on your ISP plan and the amount of data you require; it can range from $10 to $200 per month.
Can I use mobile data as my main internet source in the ‘RV’?
Yes, you can use mobile data as your primary internet source by tethering or using a mobile hotspot device although it may be less reliable in remote areas.
How can I boost my internet signal in different locations while touring in a ‘RV’?
You can boost your signal using tools like a Wi-Fi extender or booster, which helps to amplify the existing network’s reach and strength.
Is setting up the Internet in my RV easy?
Setting up Internet in your RV involves several steps such as selecting an ISP, installing necessary equipments and ensuring proper connectivity but with a guide such as “How To Set Up Internet in Your RV”, it becomes easy to follow through.
Also Read: OneWeb Satellite Internet Review: Is It Worth Your Money?
Conclusion
Setting up the Internet in your RV is a crucial step towards ensuring continuous communication and seamless online activities while traveling. This offers you the ability to keep abreast with the world, stay entertained, and solve emergencies without much hassle. With a slew of options available, from traditional cellular data plans to satellite internet connections, it can be tailored according to your needs. However, it becomes equally essential to maintain digital hygiene for secure connectivity. The road may take you anywhere but equipped with an appropriately set internet connection in your RV will ensure that you are always one tap away from the rest of the world!