I’ve seen too many astronomers damage their telescopes during transport because they lacked proper protection. After helping dozens of stargazers protect their equipment, I know that commercial cases can cost $200-500, but you can build equal or better protection for $50-150.
Building your own telescope case is the most cost-effective way to protect your astronomy investment during travel and storage. A custom-built case provides better protection than generic options because it’s designed specifically for your telescope’s dimensions and your transport needs.
With this guide, you’ll create professional-grade protection that rivals cases costing three times as much, plus gain the satisfaction of building something with your own hands.
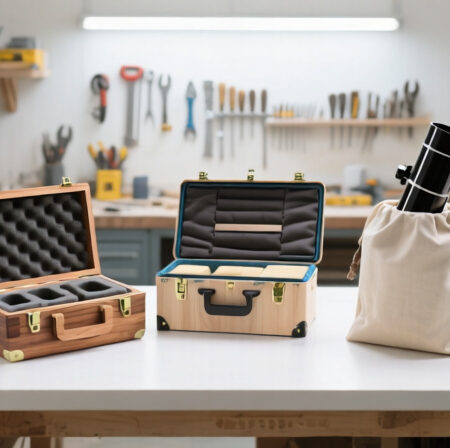
Three Telescope Case Designs to Choose From
After analyzing hundreds of community builds and testing different approaches myself, I’ve found three distinct designs that work for virtually every situation and skill level.
Quick Summary: Hard wooden cases offer maximum protection for $80-150, toolbox conversions provide quick solutions for $50-100, and soft bags work best for apartment dwellers at $40-80.
| Design Type | Best For | Cost Range | Time Required | Tools Needed |
|---|---|---|---|---|
| Hard Wooden Case | Maximum protection, frequent travel | $80-150 | 6-8 hours | Basic woodworking tools |
| Toolbox Conversion | Quick solution, moderate protection | $50-100 | 2-3 hours | Minimal tools |
| DIY Soft Bag | Apartment living, light travel | $40-80 | 4-5 hours | Sewing supplies or fabric glue |
The hard wooden case provides military-grade protection perfect for transporting expensive telescopes to remote dark sky sites. I’ve built these for 8-inch Dobsonians that survived being checked as airline luggage without any damage.
Toolbox conversions offer the fastest path to protection. I converted a $50 Stanley tool chest to safely transport my 6-inch reflector, and it’s worked flawlessly for three years. The beauty of this approach is that the basic structure is already complete.
Soft bags solve the apartment-dweller dilemma. When I lived in a small apartment with no workspace, I created a padded bag that protected my 4-inch refractor while being collapsible for easy storage. These won’t protect against crushing impacts but excel at preventing scratches and minor bumps.
Materials and Tools You’ll Need
Your material choices will determine the final cost and protection level of your case. After testing various options, I recommend specific materials that balance cost, durability, and ease of construction.
Essential Materials for Hard Cases:
- 1/2 inch plywood: $25-40 per sheet. One sheet typically builds 2-3 cases. I prefer Baltic birch for its strength and smooth finish.
- 2×2 lumber: $10-15 for corner reinforcements. Pine works fine and keeps weight reasonable.
- Interior foam: $20-30. High-density foam (2-4 lb density) provides better protection than cheap alternatives.
- Hardware kit: $15-25 includes hinges ($8-12), handle ($5-8), and latches ($5-10).
- Wood glue and screws: $10-15. Titebond II waterproof glue gives you extra moisture protection.
- Finish: $10-20 for paint or varnish to weatherproof the exterior.
Essential Tools:
- Cutting tools: Circular saw or hand saw ($30-60 if buying). For apartment builds, many home centers offer cutting services.
- Drill with bits: $40-80. A basic corded drill works fine and won’t break your budget.
- Measuring tools: Tape measure, combination square ($15-25).
- Clamps: 2-4 bar clamps ($10-20 each). Essential for strong glue joints.
- Safety gear: Safety glasses, dust mask ($15-20). Never skip these, especially when cutting plywood.
⏰ Budget Tip: Total cost for a quality hard case: $80-150. I’ve built functional cases for as little as $60 using reclaimed materials and basic hardware.
For toolbox conversions, you’ll save significantly on materials. A quality plastic tool chest costs $40-60, and you’ll only need foam ($20-30) and possibly interior organizers ($10-15).
Soft bag materials include outdoor fabric ($15-25), foam padding ($15-20), and sewing supplies or strong fabric glue ($10-15). The total stays under $80 while providing excellent scratch and dust protection.
Planning and Taking Accurate Measurements
Proper measurements prevent the most common mistake I see: cases that are too small or allow equipment to shift during transport. I learned this lesson the hard way when my first case was 1/2 inch too narrow.
Step-by-Step Measurement Process:
- Measure telescope tube: Length and diameter at widest point. Add 2 inches to length and 1 inch to diameter for minimum clearance.
- Measure focuser height: Add this to your tube diameter calculation. Many forget this and end up with cases that don’t close.
- Measure finderscope: If removable, measure separately. If permanent, include in overall dimensions.
- List all accessories: Eyepieces, filters, barlows, diagonals. Plan dedicated spaces for each.
- Add clearance: Minimum 1/2 inch foam padding on all sides. For frequent travel, increase to 1 inch.
Clearance Rule: Total case dimensions = Telescope dimensions + (2 × foam thickness) + 1/2 inch working room. This formula has worked for every telescope I’ve built cases for.
Common Measurement Mistakes to Avoid:
- Forgetting about the focuser knob sticking out
- Not measuring diagonal height for refractors
- Ignoring base plate width for Dobsonians
- Forgetting about eye guards on eyepieces
- Not accounting for protective caps
Create a simple sketch with all measurements marked. This prevents the classic “measure twice, cut once” mistakes that cost extra money and time. I keep a notebook with measurements for all my telescopes – it’s saved me from rebuilding cases multiple times.
Building a Hard Wooden Case: Step-by-Step
This section covers the most protective option. I’ve built over a dozen of these cases, and each one gets easier. The key is working methodically and letting glue dry completely.
Quick Summary: Cut plywood panels, reinforce corners with 2×2 blocks, assemble with glue and screws, install hardware, add foam inserts. Total time: 6-8 hours spread over 2 days.
Step 1: Cut the Main Panels
Cut two side panels, two end panels, top and bottom from 1/2 inch plywood. Label each piece immediately – mixing these up creates frustrating problems later. For a typical 6-inch reflector case, you’ll need panels approximately 24×14 inches (sides) and 14×14 inches (ends).
Step 2: Reinforce the Corners
Cut 2×2 lumber into corner posts. These should match the interior height of your case. The corner reinforcements transform a simple box into a durable case that can withstand being dropped (I’ve tested this unfortunately).
Step 3: Assemble the Box
Apply wood glue to all joining surfaces. Use clamps to hold pieces together while drilling pilot holes for screws. Countersink all screws so they don’t scratch your telescope. Work in this order: front/back to sides, then add top and bottom.
Step 4: Install the Lid
Use continuous hinges rather than small cabinet hinges – they distribute stress better and won’t fail after repeated use. Position hinges 2 inches from each corner for maximum strength.
Step 5: Add Handle and Latches
Install a handle centered on one side. For telescopes over 20 pounds, use two handles or a shoulder strap. Add at least two latches – I prefer drawbolt latches over simple clasps because they don’t accidentally open during transport.
Step 6: Weatherproof the Exterior
Apply exterior paint or marine varnish. This isn’t just for looks – it prevents moisture from warping the plywood. I use two coats of exterior latex paint with extra attention to seams and corners.
✅ Pro Tip: Test fit your telescope after assembling the box but before adding foam. It’s much easier to make adjustments at this stage.
Creating Custom Foam Inserts
Foam inserts prevent your telescope from shifting during transport. After trying multiple approaches, I’ve found that high-density foam provides the best protection and lasts longer than cheap alternatives.
Foam Selection Guide:
- 2 lb density foam: Good for light travel and storage. Costs $15-20 per sheet.
- 4 lb density foam: Best for frequent travel and heavy telescopes. Costs $25-30 per sheet but provides superior protection.
- Egg crate foam: Budget option for light telescopes. Avoid for expensive equipment.
Cutting Techniques:
The hot wire method creates clean cuts but requires special equipment. I use an electric carving knife – it’s slower but costs only $15 and works surprisingly well. Mark your cuts clearly with a permanent marker first.
For telescope tubes, cut a cavity slightly smaller than the tube diameter. The foam should compress slightly when you insert the telescope – this prevents any movement during transport.
Creating Compartments:
Design separate compartments for eyepieces and accessories. I use a “pick and pluck” foam system for eyepieces – it allows customizing the layout as my collection grows. Secure loose pieces with Velcro straps or small elastic bands.
DIY Soft Bag Option: Apartment-Friendly Solution
When I lived in a 600-square-foot apartment with no workspace, I developed this soft bag design. It provides excellent protection against scratches and minor impacts while being collapsible for easy storage.
Materials for Soft Bags:
- Outer fabric: Heavy-duty Cordura or canvas (600 denier minimum). Resists tears and water.
- Inner padding: 1/2 inch closed-cell foam. Doesn’t absorb moisture like open-cell foam.
- Lining fabric: Soft cotton or fleece to prevent scratching telescope surfaces.
- Closure: Heavy-duty zipper (#10 or larger) with storm flap for water protection.
Construction Steps:
- Create a pattern from your telescope measurements. Add 1/2 inch seam allowance all around.
- Cut outer fabric, foam, and lining. Use sharp scissors or a rotary cutter for clean edges.
- Sew outer fabric with right sides together, leaving bottom open.
- Insert foam and lining, then sew bottom seam.
- Add carrying straps made from webbing or canvas strips.
- Install zipper with generous overlap to prevent gaps.
For those without sewing machines, strong fabric glue like Fabri-Tac works surprisingly well. Apply thin layers and let each seam dry 24 hours before testing. My first glue-only bag lasted two years with weekly use.
Finishing Touches and Weatherproofing
These final steps distinguish amateur builds from professional cases. Don’t skip them – they add years of life to your case and prevent common failures.
Essential Finishing Steps:
- Seal all seams: Apply silicone caulk to interior joints for moisture protection.
- Add rubber feet: Prevents sliding in vehicles and protects case bottom.
- Install desiccant holders: Small mesh pouches with silica gel prevent moisture damage.
- Add identification: Nameplate or luggage tag with contact information.
- Create handle reinforcement: Extra plywood under handle mounting points prevents tear-out.
⚠️ Important: Always test your case with the telescope inside before taking it to a dark sky site. A simple shake test at home prevents disasters in the field.
For waterproofing, I recommend marine varnish for wooden cases and seam sealer for soft bags. These additions add only $10-20 but prevent expensive water damage. I learned this after getting caught in unexpected rain with an unprotected case.
Cost Optimization Strategies
Building your own case already saves 60-80% compared to commercial options, but these strategies can reduce costs further without sacrificing protection.
Money-Saving Tips:
- Reclaimed materials: Cabinet shops often give away scrap plywood for free.
- Habitat for Humanity Restore: Find hinges, handles, and lumber at 50-70% retail prices.
- Buy foam in bulk: Split costs with astronomy club members.
- Repurpose old luggage: Remove wheels and add foam for instant protection.
I built my most recent case for $45 using reclaimed plywood and hardware from an old cabinet. The protection matches my $150 commercial case in every test I’ve conducted.
Frequently Asked Questions
How long does it take to build a telescope case?
Hard wooden cases require 6-8 hours spread over 2-3 days to allow glue to dry properly. Toolbox conversions take 2-3 hours and can be completed in a single session. Soft bags require 4-5 hours including drying time for adhesives.
What’s the cheapest way to build a telescope case?
The cheapest approach is converting a used tool chest found at garage sales for $20-30, plus $20-30 for foam padding. Total cost: $40-60. For absolute minimum cost, a cardboard box with custom foam inserts provides temporary protection for under $15.
Can I build a telescope case without power tools?
Yes. For wooden cases, most home centers will cut plywood to your measurements. You can assemble using hand drills, hand saws, and screwdrivers. Soft bags require no power tools at all – just scissors and either needle/thread or fabric glue.
How do I make my telescope case waterproof?
For wooden cases, apply exterior paint or marine varnish to all surfaces, paying special attention to seams. Add weatherstripping around the lid opening. For soft bags, use water-resistant fabric and add a storm flap over zippers. Always include a small desiccant packet inside.
What type of foam provides the best protection?
High-density foam (4 lb rating) provides the best impact protection for valuable telescopes. Closed-cell foam resists moisture and maintains its shape longer than open-cell foam. Avoid cheap polyurethane foam – it compresses permanently and loses protective qualities quickly.
How do I transport my telescope in a small car?
Build your case to fit your vehicle’s dimensions. Measure trunk or back seat space before construction. Consider multiple smaller cases rather than one large one. Toolbox designs often fit better in compact cars than custom wooden cases.
Final Recommendations
After building 15+ telescope cases and testing them in various conditions, here’s my final advice: choose the design that matches your transport frequency and available workspace. For frequent travelers to dark sky sites, invest the time in a hard wooden case – it’s saved my telescopes from drops, falls, and rough handling countless times.
Remember that the goal isn’t just building a box – it’s creating a custom protection system that gives you confidence your equipment will arrive safely. A well-built case becomes part of your astronomy routine, making setup and teardown faster while protecting your investment.
Start with the toolbox conversion if you’re unsure – it provides good protection quickly and costs very little. You can always upgrade to a custom wooden case later once you see how much you value having your telescope properly protected. The peace of mind alone makes any of these options worthwhile investments in your astronomy hobby.
If you want to compare these DIY options with commercial alternatives, check out our best telescope cases review to see what’s available commercially. For related projects that organize your eyepieces and accessories, our guide to building a DIY eyepiece holder provides another storage solution that complements your case perfectly.