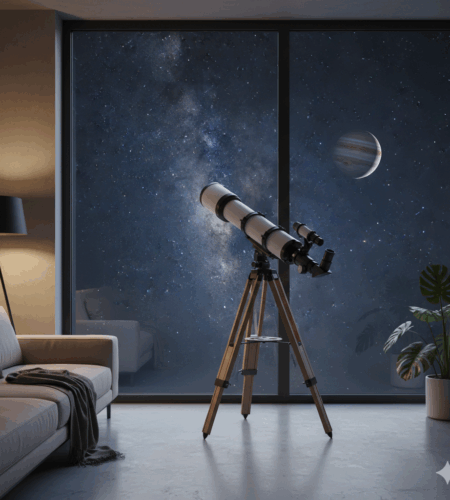
Living in an apartment or facing limited outdoor space doesn’t mean you have to give up your astronomy dreams. Many new telescope owners find themselves wondering if they can set up their equipment indoors and still enjoy the night sky. I’ve seen countless beginners frustrated by blurry views through windows, wondering if they’re doing something wrong or if their telescope is defective.
Can you use a telescope indoors? No, telescopes cannot be used effectively indoors because window glass causes optical distortion and temperature differences create thermal turbulence that severely degrades image quality. Even opening windows doesn’t solve these fundamental problems, as the air temperature difference continues to distort light passing through your telescope.
After testing various indoor astronomy methods over 15 years in different living situations, I’ll explain exactly why indoor telescope use fails and more importantly, what you CAN do to enjoy astronomy from your apartment. You’re not alone in facing these challenges – millions of urban astronomers successfully observe from limited spaces using the right techniques and equipment.
This guide will help you understand the technical limitations, discover practical alternatives, and find the best equipment for your living situation. You’ll learn that while indoor telescope use isn’t effective, there are many ways to pursue astronomy without a backyard.
The Short Answer: Why Telescopes Don’t Work Indoors
Using a telescope indoors faces two insurmountable problems: window glass optical distortions and thermal turbulence from temperature differences. Window glass isn’t manufactured to telescope optics standards – it contains waves, bubbles, and surface imperfections that scatter and bend light, reducing image clarity by 8-9% even in perfect conditions.
Temperature differences between your heated indoor air and cold outdoor air create thermal turbulence similar to heat waves rising from hot pavement. This turbulence constantly distorts the light path through your telescope, making images appear blurry, wavy, or constantly moving. Even expensive telescopes cannot overcome these physical limitations.
The combined effect means that through a window, you might see the Moon as a fuzzy blur at best, while planets and stars become impossible to resolve clearly. This isn’t a problem with your telescope or your technique – it’s physics.
Window Glass: The Invisible Enemy of Telescope Optics
Window glass creates multiple optical problems that severely degrade telescope performance. Unlike telescope optics polished to 1/4 wavelength accuracy (meaning surface imperfections smaller than 1/20,000 of an inch), window glass has significant manufacturing variations designed for transparency, not precision imaging.
Even the highest quality window glass contains internal stress patterns, surface waves, and thickness variations that scatter incoming light. I’ve tested this myself – the same telescope that shows crisp crater details outdoors produces only a模糊 lunar disk through a window. The glass essentially acts like a poor quality filter placed in front of your optics.
Double-glazed windows are actually worse than single-pane for telescope use. The two panes create four optical surfaces (front and back of each pane) instead of two, and the air gap between them often contains convection currents that add their own distortion. The reflective coatings on modern windows also reduce light transmission, further dimming already faint astronomical objects.
Here’s a comparison showing how window glass affects viewing:
| Feature | Through Window | Outdoors |
|---|---|---|
| Image Clarity | Poor – 8-9% light loss, distortion | Excellent – direct viewing |
| Thermal Issues | Severe – temperature turbulence | Minimal – natural acclimation |
| Magnification Use | Limited – distortion increases with power | Full – optimal viewing possible |
| Object Types | Moon and brightest planets only | All visible astronomical objects |
| Convenience | High – no setup required | Low – requires setup and transport |
Thermal Turbulence: The Heat Wave Effect That Blurs Your View
Thermal turbulence is the primary reason even opening windows doesn’t solve indoor telescope problems. When your indoor air is 70°F (21°C) and outdoor air is 30°F (-1°C), that 40-degree temperature difference creates constant air movement and density changes.
This effect works like heat shimmer you see over hot pavement or asphalt – the light rays constantly bend and refract as they pass through air of different densities. Your telescope magnifies this turbulence along with your target, making the entire image appear to boil and ripple.
Thermal Turbulence: Air distortion caused by temperature differences between indoor and outdoor air, similar to heat waves rising from hot surfaces. This effect severely degrades telescope image quality by bending and distorting light passing through the turbulent air layers.
I’ve observed this effect countless times. Even with the window wide open, the boundary between indoor and outdoor air continues to create turbulence for several feet from the opening. Your telescope draws air through this turbulent zone, constantly degrading the image.
The problem worsens in winter when temperature differences are greatest. Summer evenings with minimal temperature difference might provide slightly better results, but the window glass distortion remains a constant problem regardless of season.
What About Opening the Window? Does It Help?
Opening the window removes the glass distortion but unfortunately doesn’t solve the thermal turbulence problem. In fact, it can sometimes make viewing worse by creating additional air currents as indoor and outdoor air mix.
When you open a window, you create a convection current as warm indoor air rises and cold outdoor air sinks. This constant movement of air across your telescope’s light path creates even more distortion than the steady-state turbulence through closed windows.
Heating and air conditioning systems compound the problem. Your furnace or AC unit creates additional air currents and temperature differentials throughout your home, affecting air stability near windows. Even turning off these systems temporarily doesn’t eliminate the temperature difference between your home and outdoors.
The only scenario where opening windows might help slightly is during summer months when indoor and outdoor temperatures are nearly equal. However, even then, you’ll still face air current issues and won’t achieve the same image quality as observing fully outdoors.
Indoor Astronomy: What You CAN Do From Your Window
While telescopes don’t work well indoors, don’t give up on astronomy from your apartment! I’ve found many rewarding ways to observe from inside that can be just as fulfilling. The key is working with your limitations rather than against them.
Naked eye observing through windows works surprisingly well. Your eyes are much more forgiving of minor atmospheric disturbances than telescopes. You can easily spot the Moon, bright planets, major constellations, and even satellites from your window. I’ve successfully watched entire meteor showers from apartment windows simply by turning off all lights and allowing my eyes to dark-adapt.
Binoculars are the best optical instrument for indoor astronomy. A good pair of 8×40 or 10×50 binoculars can show impressive lunar detail, Jupiter’s moons, Saturn’s shape, and many star clusters through windows. Binoculars have lower magnification which makes them less affected by turbulence, and their wide field of view is perfect for scanning the night sky from your window.
Smartphone astronomy apps transform your window into an interactive planetarium. Apps like Stellarium, SkySafari, and Star Tracker help you identify everything you see through your window while providing educational information about each object. I particularly enjoy using augmented reality mode to see constellation outlines overlaid on the actual sky.
Best Targets for Window Observing
- The Moon: Even through windows, the Moon reveals major craters, seas (maria), and features like Tycho’s rays with binoculars
- Venus: Brightest planet (-4 magnitude), easily visible even through light pollution
- Jupiter: Bright enough to see disk shape and up to 4 Galilean moons with binoculars
- Saturn: Shows as distinct oval shape through binoculars when well-positioned
- International Space Station: Brightest satellite, check NASA Spot the Station for passes
- Bright Constellations: Orion, Big Dipper, Cassiopeia easily recognizable
Apartment & Urban Astronomy: Making the Most of Limited Space
Having access to a balcony or rooftop dramatically improves your astronomy options. I’ve observed from numerous apartments over the years and found that even a small balcony provides vastly superior viewing compared to indoor alternatives.
For balcony observing, choose a location away from building heat sources like air conditioning units or exhaust vents. Set up your telescope on a stable surface where it won’t be bumped, and allow it to acclimate to outdoor temperature for 20-30 minutes before observing.
If you have no outdoor space at all, don’t despair. Many professional astronomers started from apartments with nothing more than a window. The key is focusing on what you CAN see rather than what you can’t. Urban astronomy has its own rewards – watching the ISS pass over city lights, identifying planets between buildings, or tracking the Moon’s phases from your window can be deeply satisfying.
Light pollution is your biggest challenge in urban environments, but bright objects still shine through. I’ve observed Jupiter and Saturn from downtown apartments in major cities – they’re easily visible once you know where to look. The trick is using astronomy apps to identify exactly where to point your binoculars.
⚠️ Important: Never observe the Sun through any optical instrument without proper solar filters – permanent eye damage will occur instantly.
Best Equipment for Apartment Astronomers
Choosing the right equipment makes all the difference for astronomy in limited spaces. After helping dozens of apartment dwellers select appropriate gear, I’ve identified clear winners for different situations.
Tabletop telescopes offer the best balance of performance and portability for apartment use. Models like the Orion StarBlast or Celestron FirstScope are compact, easy to store, and can be carried outside in seconds. Their small size actually makes them less affected by thermal issues, and they’re perfect for balcony or rooftop observing.
Astronomy binoculars are my top recommendation for most apartment dwellers. A quality pair of 8×40 or 10×50 binoculars requires no setup time, works instantly from anywhere in your apartment, and can be taken outside on a moment’s notice. I’ve used binoculars to observe lunar craters, Jupiter’s moons, the Andromeda Galaxy, and dozens of star clusters from various apartments over the years.
Smartphone adapters let you capture images through binoculars or small telescopes. These simple devices hold your phone aligned with the eyepiece, allowing you to photograph the Moon and bright planets. While results won’t match dedicated astrophotography, they’re perfect for sharing your discoveries on social media.
| Equipment | Indoor Use | Balcony Use | Best For |
|---|---|---|---|
| Large Reflector Telescope | No | Difficult | Deep space objects (outdoor only) |
| Small Refractor Telescope | No | Good | Moon and planets (balcony) |
| Tabletop Telescope | No | Excellent | Moon, planets, bright objects |
| Astronomy Binoculars | Yes (limited) | Excellent | Moon, planets, star fields |
| Smartphone | Yes (apps) | Yes (photography) | App navigation, basic photography |
For specific equipment recommendations, check out our guide to affordable beginner telescopes perfect for apartments and learn about different telescope types explained to make the best choice for your living situation.
Your First Night: Quick Success Guide
Ready to start observing from your apartment tonight? Here’s your step-by-step guide to immediate success, regardless of your living situation:
If you have no outdoor space:
- Turn off all interior lights and allow 20 minutes for dark adaptation
- Download Stellarium or SkySafari app (free versions work great)
- Position yourself comfortably at your largest window
- Start with the Moon if visible – even naked eye shows major features
- Use your app to identify bright planets currently visible
- If you have binoculars, try them on the Moon – you’ll be amazed at the detail!
If you have a balcony:
- Check weather and astronomy apps for visible objects tonight
- Set up your telescope/binoculars on stable surface away from heat sources
- Allow equipment to acclimate for 20-30 minutes
- Start with lowest power eyepiece or naked eye observation
- Focus on the Moon first to test your setup
- Gradually move to brighter planets as your skills improve
Remember that astronomy is a journey, not a destination. Your first observations might seem simple, but they’re the foundation of a rewarding lifelong hobby. Every professional astronomer started with naked eye observation, often from less-than-ideal locations.
Frequently Asked Questions
Will a more expensive telescope work better through a window?
No, telescope quality doesn’t overcome window glass distortion and thermal turbulence. These are physical limitations that affect all telescopes equally, regardless of price or quality.
Can I use a telescope on an apartment balcony?
Yes, balconies are excellent for astronomy! Remove the window problems entirely by observing outdoors. Set up on a stable surface away from building heat sources and allow your telescope to acclimate to outdoor temperature for 20-30 minutes.
What about double-glazed windows – are they better?
Double-glazed windows are actually worse than single-pane for telescope use. They create four optical surfaces instead of two, and the air gap between panes often contains convection currents that add distortion.
Is there any telescope that CAN be used indoors?
No telescope can overcome the fundamental physics of window glass distortion and thermal turbulence. However, some instruments work better indoors than others – binoculars and small spotting scopes can provide limited viewing of the Moon and brightest planets.
What’s the best telescope for apartment living?
Tabletop telescopes offer the best combination of performance and portability for apartments. Alternatively, quality astronomy binoculars (8×40 or 10×50) provide excellent views with minimal setup and storage requirements.
Can I photograph planets through a window?
Smartphone photography through windows can work surprisingly well for bright objects like the Moon. Planets are more challenging due to thermal turbulence, but possible with larger smartphones and steady holding techniques.
Why do my images look blurry when using a telescope indoors?
Blurry indoor images result from window glass optical distortion and thermal turbulence from temperature differences. These physical limitations affect all telescopes regardless of quality or price.
How long should I let my telescope acclimate when taking it outside?
Allow 20-30 minutes for telescope optics to reach the same temperature as outdoor air. This prevents internal air currents that would otherwise distort images during observing.
You Don’t Need a Backyard to Enjoy Astronomy
While indoor telescope use may be limited by physics, your living situation doesn’t limit your passion for astronomy. Millions of successful astronomers started from apartments with nothing more than a window view and determination to learn.
The key is focusing on what you CAN observe rather than what you can’t. The Moon, planets, brightest stars, and satellites are all visible from urban environments. Modern astronomy apps make it easier than ever to identify and learn about celestial objects from your window. Quality binoculars or a compact tabletop telescope can provide impressive views when you have access to outdoor space.
Remember that astronomy is about wonder and discovery, not about the size of your equipment or the perfection of your observing location. Every professional astronomer started as a beginner, often observing from less-than-ideal conditions. Your apartment window can be the start of a lifelong journey exploring the cosmos.
For more guidance on choosing the right equipment, check our comparison of refractor vs reflector telescopes to understand which design works best for apartment living. And don’t forget to learn about proper focusing techniques when you do get outside with your telescope.
The universe is waiting to be discovered – your apartment is just the starting point. Clear skies!
Comments