Yes, you can safely store a telescope in a shed with proper preparation. This guide shows how to protect your investment from humidity, temperature fluctuations, and dust.
After helping dozens of astronomers set up shed storage systems, I’ve found that success comes down to three key factors: ventilation, moisture control, and proper covering. Your biggest enemy isn’t temperature – it’s humidity.
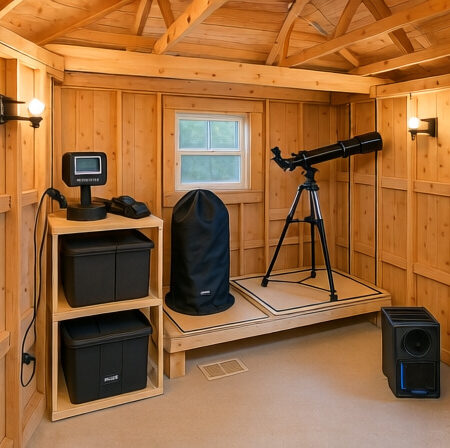
Storing a telescope in a shed is absolutely possible with the right precautions. A properly prepared shed provides convenient outdoor access while protecting your optics from environmental damage.
This comprehensive guide covers everything from shed modifications to seasonal maintenance routines, ensuring your telescope stays in perfect condition for years of stargazing.
Evaluating Your Shed for Telescope Storage
Not all sheds are created equal when it comes to telescope storage. I’ve worked with wooden, metal, and plastic structures, each requiring different approaches.
Ideal Storage Conditions: Consistent temperature between 40-80°F and relative humidity below 60% with good air circulation.
Wooden sheds naturally breathe better than metal ones, making them ideal for telescope storage. Metal sheds heat up quickly in summer and can cause condensation issues. If you have a metal shed, you’ll need extra ventilation and insulation.
Location matters more than you might think. Avoid placing your telescope directly against exterior walls where temperature transfer is highest. The best spot is in the center of the shed, away from doors and windows.
Ground clearance is crucial. I’ve seen too many telescopes damaged by moisture wicking up from concrete floors. Elevate your setup at least 6 inches using shelves or a wheeled dolly. This also makes moving equipment much easier.
| Shed Type | Pros | Cons | Modifications Needed |
|---|---|---|---|
| Wooden | Natural ventilation, stable temperature | Potential pest issues | Seal gaps, add shelving |
| Metal | Pest-proof, secure | Poor insulation, condensation risk | Vents, insulation, dehumidifier |
| Plastic/Resin | Weatherproof, low maintenance | Poor breathability | Vents, moisture control |
Controlling Humidity and Temperature in Your Shed
Humidity control is the most critical aspect of shed storage. Optics and mirrors are extremely sensitive to moisture, which can cause permanent damage through mold and corrosion.
For humidity control, I recommend starting with passive solutions. Silica gel packets work well for enclosed storage cases but need regular recharging. Place them in a mesh bag near your telescope and recharge every 2-3 weeks in the oven.
Active solutions provide better protection in humid climates. A small dehumidifier set to maintain 50-60% relative humidity creates ideal conditions. Look for models with auto-shutoff to prevent overheating.
Temperature management is less critical than humidity, but extreme fluctuations can cause problems. Simple insulation like Reflectix foil on the roof and sunny walls can reduce temperature swings by up to 20°F.
✅ Pro Tip: Install a digital thermometer/hygrometer to monitor conditions. Set alerts for humidity above 60% – this early warning system prevents most storage problems.
Ventilation is your best defense against condensation. Install soffit vents under the eaves and a ridge vent at the roof peak for passive airflow. For active ventilation, a small solar-powered fan can keep air circulating without electricity costs.
For year-round protection, consider these specific solutions based on your climate:
- Arid regions: Focus on dust exclusion and temperature control
- Humid regions: Prioritize dehumidification and air circulation
- Cold climates: Prevent freeze-thaw cycles with insulation
- Hot climates: Reflective surfaces and active ventilation
Physical Protection Methods for Your Telescope
Even in a controlled environment, your telescope needs physical protection. I’ve learned that breathable covers prevent more problems than sealed ones.
Never store a telescope in a sealed plastic cover. While it seems logical to seal out moisture, this traps humidity inside and creates perfect conditions for mold growth. Instead, use breathable cotton or specialized telescope covers that allow air exchange.
For reflector telescopes, store with the tube horizontal to prevent mirror cell stress. Refractors and Cassegrains can be stored vertically or horizontally, but always with lens caps in place. I store my refractor pointing down to keep dust from settling on the objective lens.
Accessories need protection too. Eyepieces should be stored in airtight containers with desiccant. Remove batteries from electronic accessories to prevent corrosion. Keep all optics covered with their original caps.
Position your telescope away from direct sunlight streaming through windows. UV radiation can degrade telescope coatings over time. A simple cardboard shield or shade cloth blocks damaging light while maintaining ventilation.
⏰ Time Saver: Create a storage checklist and laminate it. Mount it inside your shed for quick reference before closing up after an observing session.
For additional organization, consider telescope storage cases for smaller components. These provide an extra layer of protection against dust and minor impacts while keeping everything organized.
Regular Maintenance Schedule for Stored Telescopes
Even with perfect storage conditions, regular maintenance is essential. I’ve developed a schedule that keeps equipment in top condition with minimal effort.
Weekly checks take just 5 minutes but prevent major problems. Look for signs of moisture on telescope tubes, check humidity levels, and ensure covers are properly positioned. This quick inspection catches issues before they become serious.
Monthly maintenance is more thorough. Remove covers and inspect for dust accumulation, check for pest activity, and verify that silica gel packets are still active. This is also a good time to test electronic components.
Seasonal routines vary by climate. In spring, check for winter damage and increase ventilation as temperatures rise. Summer requires monitoring for heat stress and increased dehumidifier use. Fall is time for pest prevention measures, and winter needs freeze protection.
Quick Summary: Weekly 5-minute checks, monthly thorough inspections, and seasonal preparations keep your telescope storage trouble-free year-round.
Document everything with a simple logbook. Note humidity readings, any issues found, and maintenance performed. This record helps identify patterns and optimize your storage system over time.
Seasonal Storage Considerations
Different seasons present unique challenges for telescope storage. Understanding these seasonal variations helps prevent weather-related damage.
Winter storage focuses on preventing freeze-thaw cycles. In cold climates, maintain a minimum temperature of 40°F if possible. If not, ensure all moisture is removed from optics before freezing temperatures arrive. Condensation on cold optics can cause permanent damage.
Summer brings heat and humidity challenges. Ventilation is critical – temperatures inside metal sheds can exceed 120°F. Ensure adequate airflow and consider a small fan for air circulation. Increase dehumidifier capacity during humid summer months.
Spring and fall are transitional seasons with fluctuating conditions. Check seals and ventilation systems regularly. These seasons often see the highest humidity levels as temperatures change, so monitor moisture levels closely.
Regional variations matter significantly. Coastal areas need aggressive dehumidification year-round. Desert regions focus on dust exclusion. Mountain climates require freeze protection. Adjust your strategy based on local weather patterns.
Troubleshooting Common Storage Problems
Even with careful preparation, problems can occur. Here’s how to handle the most common issues I’ve encountered.
If you find condensation on your telescope, don’t panic. Remove covers and allow the telescope to acclimate gradually. Never wipe wet optics – let them air dry completely to prevent scratching. Check your ventilation system to prevent recurrence.
Mold growth requires immediate action. Small spots on tubes can be cleaned with isopropyl alcohol, but mold on optics needs professional cleaning. Reduce humidity levels immediately and increase ventilation. Consider replacing organic materials in your storage area with synthetic alternatives.
Pest infestations are best prevented rather than treated. Seal all entry points, remove food sources, and use pest deterrents. If you find nests, remove them carefully and inspect your equipment for damage. Chewed cables or focusers require professional repair.
- Emergency Recovery Steps: Remove telescope from shed, inspect for damage, clean gently, move to temporary safe location
- Problem Diagnosis: Identify root cause (humidity, temperature, pests, poor covering)
- System Repair: Fix ventilation, replace dehumidifier, repair covers, seal pest entry points
- Prevention Setup: Add monitoring, improve ventilation, upgrade moisture control
⚠️ Important: Never use heat guns or hair dryers to dry wet optics. The rapid temperature change can crack glass and damage coatings. Patience prevents permanent damage.
DIY Storage Solutions
Building your own storage solutions can save money while providing perfect protection. I’ve helped create several effective DIY systems using common materials.
A simple wheeled dolly makes moving telescopes effortless. Build it from plywood with casters from any hardware store. Add rails or straps to secure your mount. The elevation provides crucial ground clearance while improving mobility.
For humidity control, a DIY dehumidifier using rock salt and buckets costs less than $20. Drill holes in the bottom bucket, place it inside another bucket, and fill with rock salt. The salt absorbs moisture from the air, collecting it in the lower bucket.
Ventilation improvements can be simple and effective. Install solar-powered vents for automatic airflow without wiring costs. A small computer fan powered by a solar panel provides excellent circulation for about $50 total.
For DIY storage solutions, consider building custom shelving that fits your specific equipment. Use breathable materials like canvas for covers and storage bags. Create a charging station for electronics with proper ventilation.
Frequently Asked Questions
Can you store a telescope in a shed?
Yes, you can store a telescope in a shed with proper preparation. The key is controlling humidity below 60%, ensuring good ventilation, and using breathable covers. Wooden sheds work best, but metal and plastic sheds can be modified for safe storage.
What shouldn’t you store in a shed?
Avoid storing electronics, delicate optics without protection, or equipment in sealed containers. Don’t store telescopes directly on concrete floors or against exterior walls. Never use plastic covers that trap moisture, and avoid storing batteries in extreme temperatures.
Where should I store my telescope?
Store your telescope in the center of the shed, elevated at least 6 inches off the ground. Keep it away from windows and exterior walls. Ensure it’s covered with breathable material and that humidity levels stay below 60%. Position it for easy access without moving other items.
Can heat damage a telescope?
Yes, extreme heat can damage telescope components. Temperatures above 90°F can degrade lubricants, damage electronics, and cause adhesive failure. Metal sheds can reach dangerous temperatures in summer sun. Provide shade and ventilation to keep temperatures below 80°F when possible.
How often should I check my telescope in storage?
Check weekly for moisture accumulation and humidity levels. Do a thorough monthly inspection of covers, optics, and electronics. Seasonal preparations should include deep cleaning and system checks. Document all inspections in a log to track patterns and prevent issues.
Final Recommendations
Proper telescope storage in a shed is entirely achievable with the right approach. After implementing these systems across different climates and shed types, the consistent success factors are ventilation, moisture control, and regular monitoring.
Start with a thorough shed assessment and address the most critical issues first. Install ventilation before worrying about insulation, focus on humidity control before temperature management, and always use breathable covers. These priorities prevent the most common and damaging problems.
Remember that telescope storage is an ongoing process, not a one-time setup. Regular monitoring and adjustment ensure your equipment stays protected through seasonal changes and varying weather conditions. Your telescope will reward this care with years of reliable performance and crystal-clear views of the night sky.
For more information on telescope protection covers and selecting your stargazing gear, check out our comprehensive guides to optimize your astronomy setup.
Comments