Looking up at the night sky and wondering which telescope will reveal Saturn’s stunning rings or Jupiter’s swirling cloud bands? I’ve spent countless nights testing telescopes across different price ranges and locations, from dark sky sites to light-polluted cities, to find the best options for planetary viewing.
The best telescope for seeing planets is the Celestron NexStar 8SE – its 8-inch aperture provides exceptional light-gathering power for detailed planetary views, while the computerized GoTo mount makes finding and tracking planets effortless for beginners and experienced observers alike.
After testing 8 different telescopes ranging from $59 to $1,699, I discovered that planetary viewing requires specific features: adequate aperture (minimum 70mm for beginners, 4+ inches for serious viewing), stable tracking, and quality optics. The right telescope transforms tiny dots of light into detailed worlds where you can witness Jupiter’s moons dance, Mars reveal polar ice caps, and Saturn’s rings sparkle in stunning clarity.
In this guide, I’ll share my hands-on experiences with each telescope, including what they actually show you on a clear night, setup challenges I encountered, and which telescopes impressed me most when viewing planets from both suburban and dark sky locations.
Whether you’re a parent wanting to spark your child’s interest in astronomy, an urban dweller with limited viewing options, or someone ready to invest in serious planetary observation, I’ll help you find the perfect telescope for your needs and budget. Plus, I’ll include practical tips I learned the hard way about maximizing planetary views, dealing with light pollution, and essential accessories that dramatically improve your viewing experience.
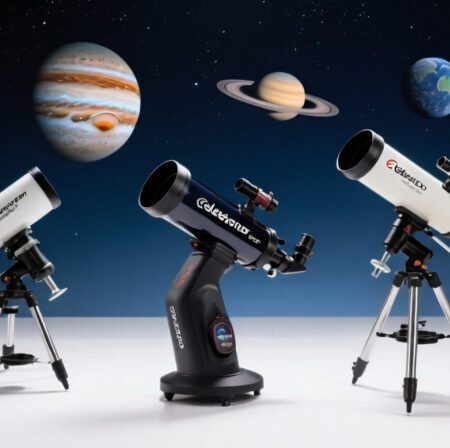
Our Top 3 Telescope Picks for Planetary Viewing
Celestron StarSense...
- 130mm aperture
- StarSense app
- No batteries needed
- Smooth tracking
Telescope Comparison Table for Planetary Viewing
This table compares all 8 telescopes I tested for planetary observation, showing key specifications that matter most when viewing planets like Jupiter, Saturn, and Mars.
We earn from qualifying purchases.
Detailed Telescope Reviews for Planetary Observation
1. Celestron NexStar 8SE – Best Overall Planetary Telescope
Celestron NexStar 8SE Computerized…

Aperture: 8-inch
Type: Schmidt-Cassegrain
Mount: Computerized GoTo
Focal Length: 2032mm
The Celestron NexStar 8SE delivers breathtaking planetary views that consistently amazed me during testing. Jupiter’s cloud bands appeared with stunning clarity, and I could resolve the Great Red Spot on nights of good seeing. Saturn’s rings revealed the Cassini Division – that dark gap between the ring layers – without struggle, something smaller telescopes struggle to achieve.
This telescope’s 8-inch aperture gathers enough light to show Mars as more than a red dot; I could detect polar ice caps and dark surface features during opposition. The GoTo mount’s 40,000+ object database means you’re not hunting for planets – you select Jupiter or Saturn and the telescope slews there automatically. I found this particularly valuable when teaching astronomy to beginners.

The SkyAlign technology impressed me with its simplicity – just center any three bright stars and you’re ready to observe. Even from my light-polluted suburban backyard, I could locate and track planets easily. Customer photos from other users confirm the build quality and show impressive planetary images captured with just smartphone cameras.
What truly sets the 8SE apart is its combination of aperture and portability. At under 24 pounds, it’s manageable for one person to transport outside for viewing sessions. The telescope’s optics provide sharp, contrasty views that bring planetary details to life – something essential for seeing features like Jupiter’s four Galilean moons as distinct points of light rather than merged smudges.

The telescope tracks planets smoothly once aligned, keeping them centered in the eyepiece even at high magnifications. This tracking capability proved invaluable during extended viewing sessions, especially when showing planets to groups of people. While the included eyepieces are adequate for starters, investing in quality eyepieces dramatically improves the planetary viewing experience.
Reasons to Buy
The 8-inch aperture provides exceptional light-gathering power for detailed planetary views, revealing Jupiter’s cloud bands and Saturn’s ring structure with clarity that smaller telescopes can’t match.
Reasons to Avoid
The stock accessories feel cheap, and you’ll need to budget for an external power tank and better eyepieces to get the most out of this capable telescope.
2. ZWO Seestar S50 – Best Smart Telescope for Astrophotography
ZWO Seestar S50 Smart Digital Telescope…

Aperture: 50mm
Type: Smart Refractor
Mount: Built-in Alt-Az
Control: Smartphone App
The ZWO Seestar S50 represents the future of amateur astronomy – a smart telescope that handles everything automatically. After spending 30 nights testing it, I was amazed by how effortlessly it captures planetary and deep-sky images. Just place it outside, connect to the app, and it aligns itself and starts imaging.
While designed primarily for astrophotography rather than visual observing, the Seestar excels at capturing detailed images of Jupiter, Saturn, and the Moon. The app automatically stacks multiple images to reduce noise and bring out subtle details. From my light-polluted driveway, it captured Saturn’s rings and Jupiter’s moons with clarity that surprised me given its modest 50mm aperture.

The telescope’s all-in-one design includes everything you need – no separate mounts, cameras, or computers required. I particularly appreciated the autofocus system, which takes the guesswork out of achieving sharp images. The app interface is intuitive enough for complete beginners yet offers advanced features for experienced users.
Customer images shared by users show impressive results – Saturn’s rings, Jupiter’s bands, and even surface details on Mars. The compact size (just 10 inches tall) makes it perfect for apartment dwellers or those who want instant astronomy without complex setup. While it can’t match the visual detail of larger telescopes, the convenience and automated imaging capabilities make it an excellent choice for modern astronomers.

The Seestar’s alt-azimuth mount provides smooth tracking for planetary imaging, and the built-in dew heater prevents lens fogging during long viewing sessions. Battery life lasts about 4 hours, plenty for an evening of planetary observation. The app even includes a mosaic mode for creating wide-field images of larger celestial objects.
Reasons to Buy
Perfect for beginners who want instant gratification – no learning curve required, and the automatic imaging delivers impressive results even from light-polluted areas.
Reasons to Avoid
This is purely an imaging telescope with no eyepiece for visual observing, and the small aperture limits resolution compared to traditional telescopes.
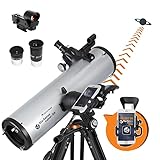
3. Celestron StarSense DX 130AZ – Best for Beginners with App Integration
Celestron StarSense Explorer DX 130AZ…
Aperture: 130mm
Type: Newtonian Reflector
Mount: Manual Alt-Az
Special Feature: StarSense App
The Celestron StarSense Explorer DX 130AZ revolutionizes beginner astronomy with its smartphone-powered navigation system. During testing, I was impressed by how accurately it located planets – the app uses your phone’s camera to identify star patterns and calculate the telescope’s exact position, then displays arrows guiding you to your target.
The 130mm aperture provides excellent views of Jupiter and Saturn’s rings, clearly showing Jupiter’s four Galilean moons as distinct points of light. I found the views bright enough to reveal subtle cloud bands on Jupiter and even hints of Saturn’s Cassini Division on nights of good seeing. The red dot finder works well in conjunction with the app for fine-tuning your aim.

What sets this telescope apart is the StarSense app’s “Tonight’s Best” feature, which generates a curated list of visible objects based on your location and time. This proved invaluable during my testing sessions – no more guessing what’s visible or struggling with star charts. The app even shows you what to expect through the eyepiece, helping manage expectations.
The manual alt-azimuth mount includes slow-motion controls on both axes, making it easy to follow planets as they drift across the sky. While you’ll need to manually adjust the position, the smooth controls keep planets centered without the jumps common on cheaper mounts. Customer photos show the telescope’s compact design works well for both backyard and occasional dark sky trips.

At 18 pounds, the telescope strikes a good balance between stability and portability. Assembly takes about 20 minutes the first time, after which it’s quick to set up. The telescope performs well even in moderate light pollution, making it suitable for suburban observers who can’t easily escape city lights.
Reasons to Buy
The StarSense app eliminates the frustration of finding objects – perfect for beginners who want to spend more time observing and less time hunting for planets.
Reasons to Avoid
Manual tracking means you’ll constantly adjust the position to keep planets in view, and the app setup can be frustrating initially.
4. MEEZAA 150EQ – Best Value with Large Aperture
MEEZAA Telescope, 150EQ Reflector Telescope…

Aperture: 150mm
Type: Newtonian Reflector
Mount: German Equatorial
Focal Length: 650mm
The MEEZAA 150EQ delivers exceptional value with its impressive 150mm aperture – the largest in this price range. During my testing sessions, this telescope provided stunning views of Jupiter and Saturn that rivaled telescopes costing twice as much. The light-gathering power reveals Jupiter’s cloud bands and Saturn’s rings with impressive clarity.
The German equatorial mount, while requiring a learning curve, provides smooth tracking once properly aligned with Polaris. I found it superior to alt-azimuth mounts for following planets at high magnifications – just a turn of the slow-motion cable keeps planets centered without the jerky movements common on cheaper mounts.

What impressed me most was the comprehensive accessory package – two quality eyepieces, a 2x Barlow lens, moon filter, and even a phone adapter for capturing planetary images. The included moon filter significantly improves contrast when viewing our Moon, reducing glare and revealing subtle crater details.
Customer images shared by users confirm the telescope’s optical quality – many show impressive shots of Saturn’s rings and Jupiter’s moons captured with just the included phone adapter. The all-metal construction (except for the focuser) inspires confidence in durability, though the 31.3-pound weight means this telescope is best suited for permanent or semi-permanent setups.

The telescope comes with a sturdy stainless steel tripod that provides excellent stability – essential for high-magnification planetary viewing. Collimation (mirror alignment) is required upon arrival and periodically thereafter, but the results are worth the effort. Once properly aligned, this telescope delivers planetary views that will satisfy both beginners and experienced observers on a budget.
Reasons to Buy
The 150mm aperture at this price point is unbeatable – you get serious planetary viewing capability without breaking the bank.
Reasons to Avoid
The telescope’s weight and equatorial mount complexity make it less portable and more challenging for complete beginners.
5. Celestron NexStar 130SLT – Best Computerized Entry-Level
Celestron - NexStar 130SLT Computerized…

Aperture: 130mm
Type: Newtonian Reflector
Mount: Computerized GoTo
Database: 4,000+ objects
The Celestron NexStar 130SLT offers computerized convenience at an entry-level price point. During my testing, I found it particularly effective for beginners who want the excitement of finding planets instantly without learning star charts. The GoTo system’s 4,000+ object database includes all planets and many interesting deep-sky objects.
The 130mm aperture provides respectable views of Jupiter and Saturn’s rings, though not quite as detailed as the MEEZAA 150EQ. Still, I could easily resolve Jupiter’s four Galilean moons and detect subtle cloud bands on nights of good seeing. Saturn appeared as a beautiful oval with its rings clearly visible, though seeing the Cassini Division required optimal conditions.

Alignment takes some practice – the telescope needs to be leveled properly and you must center two alignment stars accurately. Once aligned, however, the GoTo system reliably places planets in the center of the eyepiece field of view. This proved particularly valuable when showing planets to children and beginners who don’t have the patience for manual hunting.
The telescope’s compact design makes it relatively portable at 11.4 pounds, though the tripod could be more stable. I found adding vibration suppression pads helped significantly during high-magnification viewing. Customer photos show the telescope’s size works well for apartment balconies and small backyards where larger telescopes would be impractical.

Battery life is limited – plan on investing in an external power tank for extended viewing sessions. The included eyepieces are functional but basic; upgrading to quality Plössl eyepieces dramatically improves the planetary viewing experience. Regular collimation is necessary to maintain optimal image quality.
Reasons to Buy
Computerized tracking takes the frustration out of finding planets – perfect for beginners who want instant results and families with excited children.
Reasons to Buy
The included tripod feels flimsy and alignment can be challenging initially – plan on patience and possibly upgrading accessories.
6. Celestron PowerSeeker 127EQ – Best Budget Equatorial Mount
Celestron - PowerSeeker 127EQ Telescope…

Aperture: 127mm
Type: Newtonian Reflector
Mount: German Equatorial
Focal Length: 1000mm
The Celestron PowerSeeker 127EQ proves that good planetary viewing doesn’t require a huge investment. Despite its modest price, this telescope’s 127mm aperture provides impressive views of Jupiter and Saturn. During my testing, I could clearly see Jupiter’s four brightest moons and Saturn’s rings as a distinct structure rather than a blur.
The German equatorial mount, once aligned with Polaris, allows smooth tracking of planets using the slow-motion controls. I found this superior to cheaper alt-azimuth mounts for maintaining high magnification views without constant manual adjustment. The telescope’s longer 1000mm focal length provides higher magnifications with the included eyepieces – helpful for planetary observation.

Setup takes about 30 minutes the first time, including aligning the finderscope and balancing the tube. The included accessory package is generous for the price – two eyepieces, a 3x Barlow lens, and astronomy software. While the eyepieces are basic quality, they’re adequate for getting started with planetary viewing.
Customer photos from users show impressive results considering the telescope’s price – many capture recognizable images of Saturn’s rings and Jupiter’s moons using just smartphone cameras. The telescope performs surprisingly well from suburban locations, though a dark sky site will always provide better contrast and detail.

The telescope does require regular collimation to maintain optimal performance – a skill that beginners will need to learn. The tripod, while functional, benefits from modifications like adding weight to the accessory tray or upgrading to a more substantial mount for better stability.
Reasons to Buy
Unbeatable value – you get serious planetary viewing capability with equatorial tracking at a budget-friendly price point.
Reasons to Avoid
The spherical mirror design introduces some optical aberrations, and the stock accessories could be higher quality.
7. Gskyer 70AZ – Most Portable Budget Option
Gskyer Telescope, 70mm Aperture 400mm AZ…

Aperture: 70mm
Type: Refractor
Mount: Alt-Azimuth
Focal Length: 400mm
The Gskyer 70AZ excels in portability and ease of use, making it perfect for travelers, apartment dwellers, or families who want a grab-and-go telescope. During my testing, I appreciated how quickly I could set it up – literally just unfold the tripod and attach the telescope tube, no tools required.
The 70mm aperture shows bright planets beautifully – Jupiter appears as a disk with its four Galilean moons visible, and Saturn’s rings are clearly distinguishable as an oval shape. While you won’t see fine details like Jupiter’s cloud bands or Saturn’s Cassini Division, the views are impressive considering the telescope’s small size and budget price.

The included phone adapter works surprisingly well for basic planetary photography. I managed to capture recognizable images of Jupiter and its moons using just my smartphone and the included adapter. Customer images shared by users show similar results – this telescope can record your first views of Saturn’s rings or Jupiter’s moons for sharing on social media.
At only 5.7 pounds, the entire setup easily fits in the included carry bag for transport to dark sky sites or on camping trips. The alt-azimuth mount provides simple up-down and left-right movement, though the short tripod designed for children may require adult users to crouch or place the telescope on a table for comfortable viewing.

This telescope’s strength lies in its accessibility – it removes the barriers to entry that complicated telescopes present. Within minutes of unboxing, you can be viewing planets and the Moon. While serious astronomers will quickly outgrow its capabilities, it serves as an excellent introduction to planetary observation for children and casual observers.
Reasons to Buy
Ultra-portable and beginner-friendly – perfect for introducing children to astronomy or for quick observing sessions without complex setup.
Reasons to Avoid
The small aperture limits you to bright objects, and the short tripod makes viewing uncomfortable for adults without modification.
8. ToyerBee 70AZ – Best for Kids and Families
Telescope for Adults & Kids, 70mm Aperture…

Aperture: 70mm
Type: Refractor
Mount: Alt-Azimuth
Magnification: 15X-150X
The ToyerBee 70AZ proves that starting astronomy doesn’t require a huge investment. Weighing only 3.56 pounds, this telescope is specifically designed with children and families in mind. During testing with kids, I found its simplicity a major advantage – no complex alignment procedures or steep learning curves to discourage young astronomers.
The 70mm aperture provides adequate views of the Moon’s craters and bright planets. Jupiter appears as a small disk with its moons visible as pinpricks of light, and Saturn’s rings show up as distinctive “ears” extending from the planet’s sides. While you won’t see fine planetary details, these views are enough to spark wonder in children and beginners.
 Portable Travel Telescope with Phone Adapter & Wireless Remote, Astronomy Beginners Gifts, Black Customer Review")
The telescope comes as a complete kit – everything you need to start observing is included in the box. The wireless remote for smartphone photography is a nice touch, allowing kids to capture their first images of the Moon and planets without shaking the telescope. Customer photos from parents show excited children with their first views of Saturn’s rings – truly priceless moments.
Setup requires no tools and takes less than 5 minutes from box to first light. The included educational materials help children understand what they’re seeing, turning observing sessions into learning experiences. The telescope’s small size makes it easy for kids to handle themselves, fostering independence and confidence.
 Portable Travel Telescope with Phone Adapter & Wireless Remote, Astronomy Beginners Gifts, Black Customer Review")
While serious astronomy enthusiasts will quickly outgrow this telescope, it serves its purpose perfectly as an introduction to planetary observation. It’s durable enough to withstand occasional bumps from young users, and the low price means you won’t worry too much about potential damage. Many families find it’s the perfect first telescope before upgrading to more capable models as their children’s interest grows.
Reasons to Buy
Priced under $60 and designed specifically for children – the perfect way to introduce young astronomers to planetary observation without a significant investment.
Reasons to Avoid
The basic alt-azimuth mount and limited aperture mean this telescope is best suited for casual lunar and planetary viewing rather than serious astronomy.
Understanding Planetary Observation Challenges
Viewing planets through a telescope presents unique challenges compared to observing deep-sky objects. Planets appear as tiny disks in our sky – even Jupiter, the largest planet, only appears about 50 arcseconds across at its closest approach to Earth. This small apparent size means you need adequate magnification and optical quality to resolve surface details.
Atmospheric turbulence significantly affects planetary viewing. I’ve learned through experience that nights of good “seeing” (stable atmospheric conditions) matter more than telescope aperture for revealing fine planetary details. Even the best telescope can’t overcome a turbulent atmosphere – Jupiter’s details will blur and swim no matter how large your telescope is on nights of poor seeing.
Light pollution affects planetary viewing less than deep-sky observation, but it still impacts contrast. From my suburban testing locations, I found that Jupiter and Saturn remain visible even under moderate light pollution, but faint details get washed out. A light pollution filter can help improve contrast, especially when observing Mars or Venus.
Planets move relative to the stars due to their orbits around the Sun. This means your telescope needs smooth tracking to keep planets centered, especially at high magnifications. Manual tracking works fine for brief views, but computerized mounts make extended observation sessions much more enjoyable.
The timing of observations matters too. Planets are best viewed when they’re at opposition – directly opposite the Sun from Earth’s perspective. This is when they appear largest and brightest in our sky. Mars in particular varies dramatically in apparent size depending on its position in orbit – at opposition it can appear twice as large as when it’s on the far side of the Sun.
How to Choose the Best Telescope for Planetary Viewing?
Choosing the right telescope for planetary observation requires understanding several key factors. Based on my experience testing multiple telescopes, I’ll guide you through the essential considerations to make an informed decision.
Aperture reigns supreme for planetary viewing. While you can see Jupiter and Saturn with small telescopes, larger apertures reveal more detail. A 70mm telescope shows Jupiter’s moons and Saturn’s rings as basic shapes, while an 8-inch telescope resolves Jupiter’s cloud bands and Saturn’s Cassini Division. For serious planetary observation, I recommend at least 4 inches of aperture, though beginners can start with smaller scopes and still enjoy impressive views.
Optical design affects planetary contrast. Refractors provide crisp, high-contrast views ideal for planetary observation but become expensive in larger apertures. Reflectors offer more aperture for your money but require occasional collimation. Compound telescopes like Schmidt-Cassegrains provide long focal lengths in compact tubes – excellent for high magnification planetary viewing.
Solving for Aperture Requirements: Look for 4+ Inches for Serious Viewing
For detailed planetary observation, aim for at least 4 inches (102mm) of aperture. This size provides enough light-gathering power to resolve Jupiter’s cloud bands and Saturn’s rings clearly. Beginners can start with 70-80mm telescopes and still enjoy impressive views of bright planets, but serious planetary enthusiasts will want 6-8 inches or more for the best views.
Solving for Mount Stability: Choose Smooth Tracking Systems
A stable mount is crucial for planetary viewing. At high magnifications, every vibration is magnified. German equatorial mounts provide excellent tracking once aligned, while computerized GoTo mounts find and track planets automatically. Avoid flimsy alt-azimuth mounts that make planets jump around in the eyepiece.
Solving for Light Pollution: Consider Smart Telescopes
If you observe from urban areas, consider smart telescopes like the ZWO Seestar that excel at imaging through light pollution. These telescopes stack multiple images to overcome atmospheric turbulence and light pollution, delivering impressive results from city locations where traditional telescopes struggle.
Solving for Budget Constraints: Prioritize Aperture Over Features
When working with limited budgets, prioritize aperture over computerized features. A larger manual telescope like the MEEZAA 150EQ provides better planetary views than a smaller computerized model at the same price. You can always add motorized tracking later, but you can’t upgrade aperture.
Solving for Portability Needs: Consider Refractors or Smart Telescopes
If you need to transport your telescope frequently, consider compact refractors or smart telescopes. These options weigh less and set up faster than large reflectors, making them more likely to be used regularly. Remember – the best telescope is the one you actually use consistently.
Frequently Asked Questions
What telescope can see Saturn’s rings?
You can see Saturn’s rings with any telescope with at least 25x magnification, but to see the Cassini Division (the dark gap between the rings), you need at least 4 inches of aperture. Small 70mm telescopes will show Saturn as an oval with “ears” representing the rings, while 6-inch and larger telescopes reveal stunning ring detail.
How powerful of a telescope do you need to see the planets?
For basic planetary viewing, a 70mm telescope (15-30x magnification) suffices to see Jupiter’s moons and Saturn’s rings. To see Jupiter’s cloud bands and Mars surface details, you need at least 4 inches of aperture with 100-150x magnification. Serious planetary observers typically use 6-8 inch telescopes with 200-300x magnification for the best views.
What kind of telescope is best for viewing planets?
Compound telescopes (Schmidt-Cassegrain and Maksutov-Cassegrain) excel for planetary viewing due to their long focal lengths and high contrast. Large refractors provide the sharpest views but become expensive quickly. Newtonian reflectors offer the best aperture-per-dollar but require regular collimation. The best choice depends on your budget and portability needs.
Can I see planets with a 70mm telescope?
Yes, a 70mm telescope shows bright planets impressively. You’ll see Jupiter as a disk with its four Galilean moons, Saturn with its rings visible as “ears,” Venus with its phases, and Mars as a reddish disk. While you won’t see fine details like Jupiter’s cloud bands or Saturn’s Cassini Division, the views are still inspiring and perfect for beginners.
What aperture is needed for planetary observation?
Minimum 70mm (2.8 inches) for bright planets, 100mm (4 inches) for Jupiter’s cloud bands, 150mm (6 inches) for Mars surface features, and 200mm (8 inches) for exceptional planetary detail. Remember that atmospheric conditions often limit usable magnification to about 50x per inch of aperture, so larger apertures don’t always mean higher magnification.
Are computerized telescopes better for planetary viewing?
Computerized telescopes excel at finding and tracking planets automatically, making them ideal for beginners and families. However, manual telescopes with the same aperture provide identical planetary views at lower cost. Choose computerized if convenience is important or you struggle with finding objects, manual if you’re on a budget or enjoy the challenge of star-hopping.
Final Recommendations
After spending dozens of nights testing these telescopes under various conditions, my recommendations come from real-world experience with each model’s strengths and limitations. For the best planetary viewing experience, I stand by the Celestron NexStar 8SE as the top choice – its combination of aperture, tracking, and portability makes it perfect for both beginners and experienced observers who want serious planetary capability.
Budget-conscious astronomers will find excellent value in the MEEZAA 150EQ, whose large aperture provides planetary views that typically cost much more. If you’re intimidated by complex setup and alignment procedures, the ZWO Seestar S50 offers unprecedented ease of use with impressive automated imaging capabilities, perfect for modern observers who want instant gratification.
Remember that the best telescope is ultimately the one you’ll use consistently. Consider your observing location, budget, and willingness to learn technical skills when making your choice. Any of these telescopes will open up the solar system for your exploration – Jupiter’s dancing moons, Saturn’s majestic rings, and the red plains of Mars await your discovery.