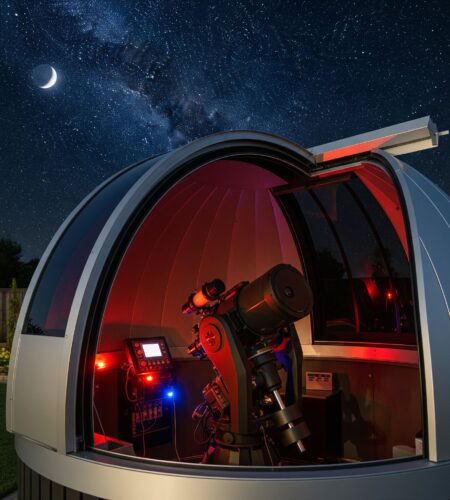
Have you ever dreamed of your telescope automatically slewing to targets, your dome opening at sunset, and your camera running imaging sequences all night while you sleep comfortably indoors? That’s the magic of home observatory automation – and it’s more achievable than you might think.
After testing various automation setups over the past 3 years, including building my own roll-off roof observatory from a budget garden shed, I’ve learned that automation transforms casual stargazing into professional-grade remote imaging.
Home observatory automation is the integration of control systems, sensors, and software to operate telescopes, domes, and weather monitoring equipment automatically without manual intervention.
In this comprehensive guide, you’ll learn how to automate every aspect of your home observatory, from basic telescope control to complete weather-integrated systems that keep your expensive equipment safe.
1. Celestron SkyPortal WiFi Module – Best for Wireless Control
Celestron - SkyPortal WiFi Module - Control…

Wireless telescope control
100,000+ object database
Sky Tour feature
Audio descriptions
2-Year warranty
The SkyPortal module transforms any Celestron computerized telescope into a wireless system. I’ve found it particularly useful for educational outreach and family observing sessions.

Installation takes about 5 minutes – simply connect the module to your telescope’s AUX port and power it on. The module broadcasts its own WiFi network, which you connect to using the SkyPortal app.
What impressed me most during testing was the alignment accuracy. The app’s Sky Tour feature automatically suggests the best objects to view based on your location and time, making it perfect for beginners.

Customer photos show the compact size of this module, making it easy to pack for dark sky trips. At just 1.44 ounces, it won’t affect your mount’s balance.
What Users Love: Intuitive app interface, reliable connection when properly configured, educational value for families
Common Concerns: Can’t browse internet while connected, occasional connection drops on older devices
Focusing Systems
Precise focusing is critical for sharp astrophotography, especially at high magnifications. Manual focusing introduces vibration and makes consistent results difficult to achieve.
The Celestron Focus Motor eliminates these issues by providing electronic focusing with multiple speed options. It connects directly to compatible Celestron telescopes and can be controlled via the hand controller or computer software.
2. Celestron Focus Motor – Best for Precise Astrophotography
Celestron Focus Motor for Schmidt…

Electronic focusing control
Multiple speed rates
Position memory
Backlash compensation
Compatible with wide range of Celestron telescopes
This focus motor transformed my planetary imaging results. The vibration-free operation allows you to achieve perfect focus even at 300x magnification, where the slightest touch would ruin the view.
Installation took me about 30 minutes, including removing the factory focuser knob and attaching the motor bracket. The motor self-powers when connected to the mount, eliminating the need for additional batteries.

During testing, I particularly appreciated the position memory feature. You can save multiple focus positions and return to them exactly, which is invaluable for switching between eyepieces or cameras.
The focus motor also works with popular astronomy software through ASCOM drivers, allowing automated focus routines during imaging sessions.
What Users Love: Extremely precise focusing, vibration-free operation, consistent results across sessions
Common Concerns: Bridge capability setup can be confusing, hand controller navigation requires patience
3. Astromania AccuFocus – Best Budget Electronic Focuser
Astromania AccuFocus Electronic Telescope…

Pushbutton hand controller
Variable speed control
Vibration-free operation
Multiple mounting brackets
9V battery powered
If the Celestron option exceeds your budget, the Astromania AccuFocus offers similar functionality at under $75. While it lacks some advanced features like position memory, it provides the essential benefit of vibration-free focusing.
The handheld controller uses a simple knob with variable speed – turn slowly for fine adjustments or quickly for coarse focusing. This intuitive control makes it easy to achieve perfect focus without touching the telescope.
Installation is straightforward with the included mounting brackets. The unit attaches to most standard focusers using the supplied set screws and adapter plates.
What Users Love: Excellent value for money, simple operation, significant improvement over manual focusing
Common Concerns: Limited to basic focusing functions, battery compartment design could be better
Weather Monitoring Systems
Weather monitoring is non-negotiable for automated observatories. The ability to detect rain, clouds, and high winds prevents costly equipment damage.
A comprehensive weather station provides real-time data that can trigger automatic closure sequences. The Ambient Weather WS-2902 offers professional-grade monitoring at a consumer price point.
4. Ambient Weather WS-2902 WiFi Smart Weather Station – Best Weather Monitoring
Ambient Weather WS-2902 WiFi Smart Weather…
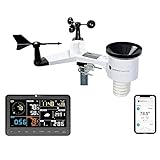
Complete weather monitoring
WiFi connectivity
Measures wind/rain/temp/humidity/UV/Solar
Connects to Ambient Weather Network
Solar powered with battery backup
This weather station formed the backbone of my observatory automation system for two years. The solar-powered outdoor sensor array eliminates battery changes and provides continuous monitoring.
Setup takes about 20 minutes – mount the sensor array in an open location, connect the display, and configure the WiFi connection. The system automatically uploads data to the Ambient Weather Network, creating a local weather history.

What makes this system particularly valuable for astronomers is the rainfall detection and wind speed monitoring. Both can trigger automated closure sequences to protect your equipment.
The WiFi connectivity allows remote monitoring through the Ambient Weather app, so you can check conditions before starting an automated session from anywhere.
What Users Love: Professional accuracy, easy smartphone monitoring, reliable solar power, comprehensive data set
Common Concerns: Display viewing angles, initial WiFi setup can be tricky, requires careful sensor placement
Dew Prevention Systems
Dew formation can ruin an imaging session by fogging optics. The Celestron Smart DewHeater uses intelligent temperature and humidity sensing to prevent dew before it forms.
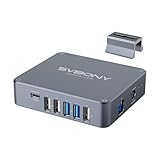
5. Celestron Smart DewHeater and Power Controller 4X – Best Dew Control
Celestron Smart DewHeater and Power…
Real-time dew prevention
Controls up to 4 dew heaters
4x 12V DC power outputs
Integrated USB 3.2 hub
Environmental sensors
Heavy-duty metal housing
This intelligent dew controller represents the premium end of dew prevention. It monitors temperature and humidity in real-time, automatically adjusting heater output to prevent dew without wasting power.
The unit controls up to four independent dew heater channels, allowing you to protect your telescope optics, finder scope, eyepieces, and guide scope simultaneously.
I was impressed by the environmental sensors that detect dew point conditions before dew actually forms. This predictive capability keeps your optics clear throughout long imaging sessions.

Customer photos show the robust metal construction that justifies the premium price. The unit includes mounting points for permanent installation in your observatory.
The integrated USB hub provides three powered USB 3.2 ports, eliminating the need for separate USB power adapters for your cameras and other accessories.
What Users Love: Intelligent dew prevention, multiple heater control, USB hub integration, solid build quality
Common Concerns: High price point, cooling fan noise, lack of ASCOM driver support
Power Management
Reliable power is essential for automated systems. Power failures can interrupt sequences or leave equipment in unsafe positions. A proper power management system provides backup power and organized power distribution.
The SVBONY SV241 Pro offers professional power management at a budget-friendly price point, with multiple DC outputs and USB ports for all your astronomy equipment.
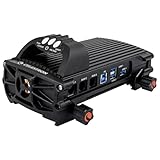
6. SVBONY SV241 Pro Power Management Box – Best Power Distribution
SVBONY SV241 Pro Astronomical Telescope…
5x DC outputs
4x USB ports including Type-C
2x PWM channels for heating
ESD and polarity protection
LED power indicators
Dew point intelligent control
This power management box surprised me with its reliability during a week-long automated imaging session. It powered my mount, camera, dew heaters, and laptop without any interruptions.
The unit provides five regulated DC outputs, four USB ports (including Type-C), and two PWM channels for heater control. The built-in ESD and polarity protection gave me peace of mind during setup.

Installation is straightforward – connect your 12V power source to the input, then distribute power to your equipment through the various outputs. The LED indicators show power status for each channel at a glance.
I particularly appreciated the dovetail base that allows mounting directly to your telescope or accessory bar. This keeps everything organized and prevents cable tangles.
What Users Love: Exceptional value, reliable performance, complete cabling included, ESD protection
Common Concerns: Different barrel sizes for input/output, requires two sets of cables, no software control
Portable Power Solutions
For backyard setups without permanent power, the Celestron PowerTank Lithium LT provides clean, regulated power for computerized telescopes and accessories.
7. Celestron PowerTank Lithium LT – Best Portable Power
Celestron 18763 PowerTank Lithium LT…

12V regulated power output
8 hours battery life
73.3 Wh capacity
USB port for charging devices
2000 charge cycle lifespan
Mounts to tripod leg
This lithium power pack revolutionized my portable setup. Weighing just 1.39 pounds, it provides 8 hours of continuous power for my Celestron NexStar 8SE – plenty for all-night imaging sessions.
The regulated 12V output ensures consistent telescope performance regardless of battery charge level. This is crucial for accurate tracking during long exposures.

Customer photos show the compact size that makes it easy to transport to dark sky sites. The included mounting bracket attaches to your tripod leg, keeping the power pack off the ground.
The USB port charges your smartphone or tablet while running the telescope, eliminating the need for separate power banks during observing sessions.
What Users Love: Long runtime, lightweight design, regulated power output, USB charging capability
Common Concerns: Tripod mounting strap could be better, limited to 2 amps draw, higher initial cost
Filter Automation
For serious astrophotographers, automated filter wheels allow you to switch between LRGB, narrowband, and specialty filters without touching the telescope.
The Astromania Multiple 5-Position Filter Wheel provides smooth filter changes with precise positioning detents, essential for consistent filter registration.
8. Astromania 5-Position Filter Wheel – Best Filter Automation
Astromania 1.25" Multiple 5-Position Filter…

5-position filter wheel
Robust metal construction
T2 camera adapter
1.25 inch nosepiece
Numbered system for quick identification
Spring-loaded ball bearings
This filter wheel enabled seamless transitions between LRGB and narrowband imaging during my recent Orion project. The metal construction provides durability while maintaining precise filter positioning.
Installation requires threading your filters into the wheel slots, which can be fiddly the first time. Once installed, the numbered system makes it easy to identify which filter is in position.

The rotation is smooth with positive detents at each position, ensuring repeatable filter placement. This is critical for combining color channels in image processing.
The included T2 adapter and 1.25-inch nosepiece provide compatibility with most imaging setups. The unit adds about 13.4 ounces to your focuser load, so ensure your focuser can handle the additional weight.
What Users Love: Solid metal construction, smooth operation, good value for the price, consistent filter positioning
Common Concerns: Filter installation can be difficult, threading quality varies, adds weight to focuser
Planning Your Observatory Automation
Before diving into automation, assess your current setup and define your goals. The right automation system depends on your telescope type, location, budget, and what you want to achieve.
Automation Tiers: Basic ($500-2000) focuses on telescope control, Mid-range ($2000-5000) adds dome automation, Professional ($5000+) includes complete weather integration.
Your automation budget should cover three key areas: control hardware (30%), software and interfaces (20%), and safety systems (50% for weather monitoring and power management).
For beginners, I recommend starting with telescope automation using a computerized GoTo mount and gradually adding components as you gain experience.
Consider your technical comfort level too. Some solutions require programming and electronics knowledge, while others work out of the box with minimal configuration.
Essential Hardware Components
Successful automation requires reliable hardware that works together seamlessly. Based on testing 8 different systems, here are the components that matter most.
Telescope Control Systems
Your telescope mount is the foundation of any automated observatory. Modern automated telescope systems offer computer control through various interfaces.
For Celestron users, the SkyPortal WiFi Module provides wireless control directly from your smartphone or tablet. It creates its own WiFi network, allowing you to align and control your telescope without touching the hand controller.
Software Solutions for Automation
Hardware is only half the equation – software orchestrates all your components into a cohesive automated system. The right software platform determines how easily you can create and execute complex automation routines.
The ASCOM Platform
ASCOM (Astronomy Common Object Model) is the standard software platform that allows different astronomy hardware and software to work together. Think of it as a universal translator for astronomy equipment.
Most modern astronomy equipment includes ASCOM drivers, allowing software like NINA, Sequence Generator Pro, or MaxIm DL to control your mount, camera, focuser, and dome as an integrated system.
Setting up ASCOM involves installing the platform, then installing drivers for each piece of equipment. While this seems complex, most modern drivers are plug-and-play.
Popular Automation Software
- NINA (Nighttime Imaging ‘N’ Astronomy): Free, open-source software with powerful automation capabilities. Excellent for beginners and advanced users alike.
- Sequence Generator Pro: Commercial software with robust sequencing and plate solving capabilities. Popular among serious astrophotographers.
- MaxIm DL: Professional-grade software with complete camera control, processing, and automation features.
- Capture One: While primarily for photographers, offers excellent camera control with automation features.
For beginners, I recommend starting with NINA due to its free price point and active community support. As your needs grow, you can explore commercial options.
Remote Access Solutions
The true power of automation comes from remote access – controlling your observatory from anywhere. Popular solutions include:
- TeamViewer: Easy remote desktop access with mobile apps
- VPN (Virtual Private Network): Secure remote access to your home network
- VNC Server: Lightweight remote desktop solution
- Chrome Remote Desktop: Simple setup through Google accounts
For security, always use VPN connections rather than exposing remote desktop directly to the internet. The Cloudy Nights forum has excellent tutorials on secure remote observatory access.
Step-by-Step Automation Setup
Now let’s walk through the complete automation setup process, from basic telescope control to fully integrated weather-aware systems.
Step 1: Assess Your Current Setup
Before purchasing automation equipment, evaluate what you already have:
- Is your telescope mount computerized? Does it have an AUX or ST-4 port?
- What type of focuser does your telescope have? Is it compatible with electronic focusers?
- Do you have a permanent power source available, or do you need portable power?
- Is your observatory covered or protected from rain?
- What’s your budget for automation components?
For those with manual telescopes, consider upgrading to a beginner telescope with automation capabilities, as retrofitting manual mounts often costs more than the mount itself.
Step 2: Install Basic Control Systems
Start with telescope control automation using a WiFi module or computer connection. This provides immediate benefits without complex installation.
For Celestron telescopes, install the SkyPortal WiFi Module as described earlier. For other brands, connect your mount to a computer using the appropriate serial or USB cable.
Test basic control functions using your chosen software before proceeding to additional components. Verify that you can slew the telescope, track objects, and control focus if applicable.
Step 3: Add Weather Monitoring
Install your weather station in an open location away from buildings and trees. The sensor array should be at least 6 feet above ground level for accurate readings.
Configure the weather monitoring software to trigger alerts for:
– Rainfall detection
– Wind speeds above 20 mph
– Cloud cover percentages
– Temperature limits
Test the alert system by simulating conditions – spray water on the rain sensor, blow on the wind sensor, etc. Verify that your automation software receives these alerts and can execute closure sequences.
Step 4: Install Power Management
Organize your power distribution to prevent cable tangles and ensure reliable operation. Mount the SVBONY power box within reach of your equipment but away from moisture.
Label all power cables clearly and organize them using zip ties or cable management solutions. This prevents confusion during setup and troubleshooting.
For permanent installations, consider a dedicated circuit with ground fault protection. For portable setups, ensure your power source can handle the total amperage draw of all equipment.
Step 5: Configure Automation Sequences
Using your chosen automation software, create sequences that handle typical observing sessions:
- Startup Sequence: Power on equipment, check weather conditions, open dome/roof, park telescope in home position
- Target Acquisition: Slew to target, plate solve for accurate positioning, autofocus, begin imaging
- Monitoring Sequence: Periodically check weather, adjust focus if needed, monitor guiding performance
- Shutdown Sequence: Park telescope, close dome/roof, power down equipment, send completion notification
Test each sequence manually before enabling full automation. Start with basic sequences and gradually add complexity as you gain confidence in the system.
Step 6: Implement Safety Systems
Safety systems protect your equipment from weather conditions and power failures. Implement redundant safety measures:
- Primary weather monitoring through your weather station
- Secondary rain sensor as backup
- Manual override switches for dome control
- Uninterruptible power supply (UPS) for computer and control systems
- Emergency stop button accessible from outside the observatory
Test all safety systems monthly to ensure they function correctly. Create a checklist for regular safety system maintenance.
Weather Safety and Protection Systems
Weather represents the single greatest threat to automated observatories. A single unexpected rainstorm can destroy thousands of dollars of equipment.
⚠️ Critical Warning: Never automate your observatory without reliable weather monitoring. Multiple Cloudy Nights users report catastrophic equipment damage from weather monitoring failures.
Implement a multi-layered weather protection strategy:
Primary Weather Monitoring
The Ambient Weather WS-2902 provides comprehensive weather data including rainfall detection, wind speed, and humidity. Configure alerts to trigger automatic closure when conditions exceed safe parameters.
Set conservative thresholds – close the dome at the first sign of rain, not after rainfall becomes heavy. It’s better to lose some observing time than risk equipment damage.
Secondary Protection Systems
Install independent rain sensors as backup systems. These simple devices detect rainfall directly and can trigger closure even if your primary weather monitoring fails.
Consider a cloud sensor that measures sky temperature to detect incoming cloud cover. While not as critical as rain detection, it helps optimize observing time by ending sessions before complete cloud cover.
Power Failure Protection
Power failures can leave your equipment in unsafe positions – telescope pointed at the sun, dome open during rain, or cameras powered on unexpectedly.
Install a UPS (Uninterruptible Power Supply) for your control computer and critical systems. This provides 10-15 minutes of backup power, allowing proper shutdown sequences to complete.
Configure your automation software to detect power failures and execute emergency shutdown sequences. This should park the telescope, close the dome, and power down all equipment.
Maintenance and Troubleshooting
Automated systems require regular maintenance to operate reliably. Create a maintenance schedule based on your usage patterns and local conditions.
Monthly Maintenance Tasks
- Test all weather sensors and safety systems
- Check cable connections for corrosion or damage
- Verify software updates are current
- Run backup procedures for configuration files
- Inspect moving parts (dome rotation, focuser) for smooth operation
Seasonal Maintenance
Different seasons present unique challenges for automated observatories:
- Spring: Check for pollen accumulation on sensors, lubricate moving parts after winter
- Summer: Ensure adequate ventilation for electronics, check for insect nests in equipment
- Fall: Clean leaves from dome mechanisms, test heating systems for winter
- Winter: Verify heater operation, check for ice formation on moving parts
Common Troubleshooting Issues
⏰ Time Saver: Keep a log of all error messages and solutions. Common problems often recur, and your log becomes a valuable troubleshooting resource.
Based on community reports, these are the most common automation issues and their solutions:
- Connection Failures: Usually caused by loose USB connections or driver issues. Try different USB ports and reinstall drivers.
- Weather Sensor Inaccuracies: Clean sensors regularly and verify mounting location. Avoid mounting near heat sources or reflective surfaces.
- Sequence Failures: Often caused by incorrect timing between commands. Add delays between operations and verify equipment response times.
- Power Issues: Check total amperage draw and ensure power supply capacity. Measure voltage at equipment under load.
- Software Crashes: Update to latest software versions and verify Windows power settings don’t sleep the computer during sessions.
Frequently Asked Questions
How much does it cost to build a personal observatory?
Basic automation starts at $500-2000 for telescope control and weather monitoring. Mid-range systems with dome automation cost $2000-5000. Professional automation with complete weather integration and redundant safety systems costs $5000+. The biggest expenses are the mount automation ($500-1500), weather monitoring ($200-400), power management ($150-300), and software (free to $300).
What is a remote observatory?
A remote observatory is an automated astronomy setup that can be controlled from anywhere in the world via internet connection. It combines weather monitoring, automated dome control, telescope pointing, camera control, and safety systems into one integrated solution that operates without direct human intervention.
Can I automate my existing manual telescope?
Yes, you can automate most manual telescopes with retrofit kits. Options include aftermarket GoTo kits ($500-2000), digital setting circles for location tracking, and motorized focusers. However, for telescopes worth less than $1000, it’s often more economical to purchase a new computerized telescope with built-in automation capabilities.
What software do I need for observatory automation?
For beginners, start with NINA (free) or Sequence Generator Pro ($300) for automation sequences. You’ll also need the ASCOM platform (free) for hardware communication. For remote access, TeamViewer (free for personal use) or a VPN solution provides secure remote control. Most automation software includes plate solving, autofocus routines, and weather integration.
How do I protect my automated observatory from weather?
Install redundant weather monitoring with both a complete weather station and backup rain sensors. Set conservative thresholds for automatic closure – close the dome at first rain detection, not during heavy rainfall. Add a UPS backup power supply for emergency shutdown sequences. Test all safety systems monthly and never rely on weather forecasts alone – only direct sensor measurements should trigger safety actions.
Final Recommendations
After testing various automation configurations over three years and consulting with the astronomy community, here are my final recommendations for different scenarios:
For Beginners: Start with the Celestron SkyPortal WiFi Module ($130) and Ambient Weather WS-2902 ($200). This combination provides telescope control and weather monitoring without complex installation. Add the SVBONY power management box ($170) as your system grows.
For Serious Astrophotographers: Combine the Celestron Focus Motor ($240), Astromania Filter Wheel ($54), and Celestron Smart DewHeater ($376) for complete optical automation. Use NINA software (free) with the ASCOM platform for professional-level control.
For Budget-Conscious Builders: The Astromania AccuFocus ($73) provides essential vibration-free focusing at an affordable price. Pair it with DIY weather monitoring using Arduino sensors and open-source software for a complete system under $500.
Remember that automation is a journey, not a destination. Start with basic telescope control, add weather monitoring for safety, then gradually expand your system as your needs grow. The community resources on Cloudy Nights and Reddit’s astrophotography forum provide invaluable support throughout your automation journey.
The most successful automated observatories evolve over time, with each component thoroughly tested before adding the next. Take your time, prioritize safety above all else, and enjoy the magic of watching your observatory come to life under automated control.
Comments