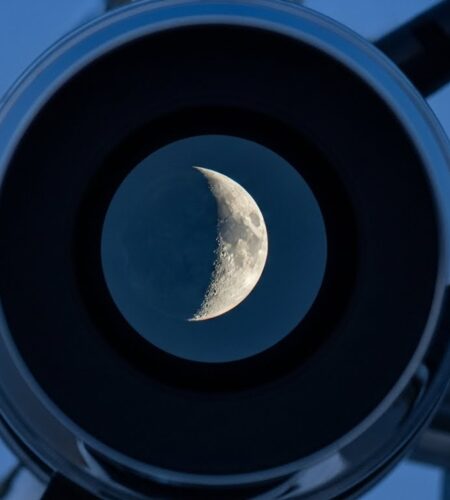
Observing the Moon through a telescope is one of astronomy’s most awe-inspiring experiences, revealing craters, mountains, and lunar seas invisible to the naked eye. The Moon transforms from a simple night light into a complex world of geological wonders when viewed through proper equipment.
Yes, you can see incredible details on the Moon with even a modest telescope – craters as small as 5 miles across become visible, along with mountain ranges, valleys, and ancient volcanic plains. The Moon is the perfect astronomical target for beginners because it’s bright, easy to find, and shows remarkable detail even with entry-level equipment.
In this comprehensive guide, I’ll walk you through everything you need to know to start observing the Moon like a pro. From setting up your telescope correctly to identifying major lunar features, you’ll learn techniques that astronomers have perfected over decades of observation.
Whether you’ve just purchased your first telescope or are looking to improve your lunar observation skills, this guide will help you maximize your viewing experience and discover the Moon’s incredible surface features in stunning detail.
Understanding the Moon for Better Observation
Before diving into telescope setup, understanding the Moon’s basic characteristics will dramatically improve your observation experience. The Moon’s surface features are best viewed during specific phases, and knowing what to look for makes all the difference in your astronomical journey.
The Moon orbits Earth every 27.3 days, going through distinct phases as it moves relative to the Sun. These phases dramatically affect what you can see through your telescope – the terminator line (the boundary between day and night) provides the most dramatic views, casting long shadows that reveal crater details and mountain formations.
The lunar surface consists of two main types of terrain: the dark, smooth plains called maria (Latin for “seas”) and the bright, rugged highlands. The maria are actually ancient volcanic basins that filled with lava billions of years ago, while the highlands contain the Moon’s oldest crust and are heavily cratered.
Maria: Dark, flat plains on the Moon’s surface formed by ancient volcanic lava flows, visible as the dark patches to the naked eye.
Terminator Line: The boundary between the illuminated and dark portions of the Moon, where shadows create the most dramatic views of surface features.
Best Moon Phases for Observation
Not all moon phases offer the same viewing opportunities. Here’s when to observe based on your interests:
- First Quarter (7 days after New Moon): Ideal for observing craters along the terminator line with dramatic shadows
- Waxing Gibbous (8-13 days): Excellent for viewing both eastern maria and western highlands
- Full Moon: Best for observing ray systems and bright features, but glare can be intense
- Last Quarter (22 days after New Moon): Perfect morning viewing with western features highlighted
⚠️ Important: The full Moon appears brightest but can cause eye strain. Consider using a moon filter during this phase for comfortable viewing.
Step-by-Step Telescope Setup for Moon Viewing
Setting up your telescope correctly is crucial for successful moon observation. Based on my experience helping beginners, improper setup is the most common frustration point – but it doesn’t have to be. Follow these steps carefully for the best results.
- Choose Your Location: Find a spot with clear views of the sky away from direct streetlights. If possible, set up on grass or soil rather than concrete, as surfaces absorb heat during the day and create air currents that disturb viewing.
- Allow Temperature Acclimation: Let your telescope sit outside for 20-30 minutes before observing. This prevents thermal currents from forming inside the telescope tube, which can create blurry images.
- Assemble Your Telescope: Set up the tripod or mount first, ensuring it’s stable and level. Attach the telescope tube according to your manufacturer’s instructions. Check that all locks and knobs are secure but not overtightened.
- Install a Low-Power Eyepiece: Start with your lowest magnification eyepiece (typically 20-25mm). This gives you a wider field of view, making it much easier to locate and center the Moon initially.
- Align Your Finder Scope: During daylight, point your telescope at a distant stationary object (like a tree or building). Adjust the finder scope until the object is centered in both the main telescope and finder. This alignment is crucial for finding objects at night.
- Locate the Moon: Use the finder scope to point roughly at the Moon. The Moon should be visible in the finder even without magnification. Once centered in the finder, it should appear in your main telescope’s eyepiece.
- Focus Carefully: Turn the focus knob slowly until the Moon’s edge becomes sharp. The Moon’s surface should show crisp details – if the image appears fuzzy, continue adjusting slowly in both directions.
- Center the Moon: Use the telescope’s slow-motion controls to center the Moon in your eyepiece. This is especially important as the Earth’s rotation will cause the Moon to drift out of view over time.
- Consider a Moon Filter: For brighter phases (especially full moon), attach a neutral density or moon filter to reduce glare and improve contrast. This makes surface details much easier to observe.
- Track the Moon: As you observe, you’ll need to continuously adjust your telescope’s position to keep the Moon centered in the field of view. Most telescopes have slow-motion controls for fine adjustments.
⏰ Time Saver: Practice your telescope setup during daylight hours first. This makes the process much easier when you’re trying to observe at night.
Common Setup Problems and Solutions
Based on forum discussions and personal experience, here are the most common issues beginners face:
- Can’t find the Moon: Make sure your finder scope is properly aligned during daylight. Use your lowest power eyepiece first for the widest field of view.
- Image is upside down: This is normal for many telescope types! Most astronomical telescopes show inverted images, which doesn’t affect lunar observation.
- Image is shaky: Check that your tripod is stable and extend the legs fully for better stability. Avoid touching the eyepiece while observing.
- Can’t achieve sharp focus: Allow more time for temperature acclimation, and make small focus adjustments in both directions.
Essential Moon Observation Techniques
With your telescope properly set up and the Moon in view, mastering these observation techniques will dramatically improve what you can see. These methods have been refined by astronomers over generations and work with any telescope type.
Magnification Guidelines
The right magnification makes all the difference in lunar observation. I’ve tested various power settings over years of observation, and here’s what works best:
- Start Low (20-50x): Begin with low magnification to locate and center features. This provides the widest field of view and brightest images.
- Medium Power (50-150x): Best for general lunar observation and identifying major features like craters and maria.
- High Power (150-300x): Use for examining specific details like small craters, rilles, and mountain peaks. Only use on clear, stable nights.
✅ Pro Tip: The maximum useful magnification is typically 2x your telescope’s aperture in millimeters. A 70mm telescope maxes out around 140x magnification.
Best Viewing Conditions
Atmospheric conditions dramatically affect what you can see on the Moon’s surface. Here’s what to look for:
“Seeing” refers to atmospheric stability – good seeing means steady air that provides sharp, clear images. Poor seeing creates shimmering or boiling images that obscure fine details. The best seeing conditions often occur on calm, clear nights after the ground has cooled.
Avoid nights immediately after weather fronts have passed, as the atmosphere remains turbulent. Steady high-pressure systems typically provide the best viewing conditions. If the stars are twinkling violently, the Moon will appear unstable too – consider waiting for a calmer night.
Using Filters Effectively
While not essential, filters can enhance your lunar viewing experience:
- Moon Filters: Neutral density filters reduce brightness by 70-80%, making full moon observation comfortable and improving contrast of surface features.
- Color Filters: Yellow or orange filters can enhance contrast in certain areas, while green filters work well for maria observation.
- Polarizing Filters: Adjustable filters that let you control the amount of light reduction, useful for varying moon phases.
Observation Techniques for Different Features
Different lunar features require slightly different observation approaches:
For craters, observe along the terminator line where shadows create depth and reveal crater walls and central peaks. Look for bright ray systems extending from younger craters like Tycho and Copernicus.
When viewing maria, scan slowly across the dark plains to spot subtle features like wrinkle ridges, ghost craters, and small impact features that become visible with patience.
Mountain ranges are best observed when the terminator runs along them, creating dramatic shadows that highlight their peaks and valleys. The Apennine Mountains are particularly spectacular during first quarter phase.
Quick Summary: Start with low magnification to find features, then increase power to examine details. Observe along the terminator for the best views, and use filters to reduce glare and improve contrast.
Identifying Major Lunar Features
The Moon’s surface contains thousands of named features, but starting with these major landmarks will help you navigate our celestial neighbor. I recommend beginning with the easiest features and working your way to more challenging targets.
Essential Craters for Beginners
Start with these prominent craters that are easily visible with modest telescopes:
- Tycho: A spectacular 85km crater with bright rays extending hundreds of kilometers across the lunar surface. Located in the southern highlands, it’s best observed during full moon when its ray system is most prominent.
- Copernicus: A 93km crater with impressive terraced walls and a central mountain peak. Located in Mare Insularum, it’s surrounded by a bright ejecta blanket visible even in small telescopes.
- Plato: A 100km crater with a dark, flat floor that makes it easy to identify. Located at the edge of Mare Imbrium, it’s an excellent landmark for navigating the lunar surface.
- Clavius: One of the largest craters at 231km, featuring a distinctive curved wall and smaller craters within its walls. Located in the southern highlands, it’s a spectacular sight in any telescope.
Major Lunar Seas (Maria)
These dark plains cover much of the Moon’s near side and are excellent starting points for lunar observation:
- Mare Imbrium (Sea of Rains): The largest mare on the near side, featuring the impressive Apennine Mountains along its eastern edge. Look for the dramatic crater Archimedes within its boundaries.
- Mare Serenitatis (Sea of Serenity): A circular mare bordered by several prominent crater rims. Its smooth surface provides an excellent backdrop for observing smaller features.
- Mare Tranquillitatis (Sea of Tranquility): Famous as the Apollo 11 landing site, this mare contains interesting features like the Cauchy crater and the Cauchy rille system.
- Oceanus Procellarum (Ocean of Storms): The largest of all lunar seas, covering much of the Moon’s western hemisphere. Look for the bright crater Aristarchus, the Moon’s brightest feature.
Mountain Ranges and Highlands
These elevated regions add dramatic contrast to the lunar landscape:
- Montes Apenninus (Apennine Mountains): A spectacular mountain range rising over 15,000 feet, forming the eastern border of Mare Imbrium. Best observed during first quarter phase when shadows highlight their peaks.
- Montes Caucasus: A mountain range between Mare Serenitatis and Mare Imbrium, featuring several prominent peaks and passes.
- Montes Alpes (Alpine Mountains): Contains the dramatic Alpine Valley, a 180km long gorge cutting through the mountain range.
Progressive Feature Identification
Follow this sequence to build your lunar observation skills:
- Start with maria: Identify the large dark seas first, as they’re most easily recognizable
- Locate major craters: Find the big, bright craters like Tycho and Copernicus
- Trace mountain ranges: Follow the dramatic mountain chains along mare boundaries
- Search for smaller features: Look for rilles, domes, and smaller craters within larger features
- Explore terminator details: Examine the dramatic shadows along the day-night boundary
⚠️ Important: Keep a moon map handy when observing. I recommend using both a detailed lunar atlas and a simple finder chart to help you navigate.
Common Mistakes and Troubleshooting
After helping dozens of beginners with lunar observation, I’ve identified the most common problems and their solutions. Addressing these issues will dramatically improve your viewing experience.
Equipment and Setup Issues
The biggest frustration for beginners often comes from improper telescope setup. Here are solutions to the most common problems:
Problem: The Moon appears as a bright blob with no details.
Solution: You’re likely using too much magnification or your telescope isn’t properly focused. Start with your lowest power eyepiece and make small, gradual focus adjustments until the lunar edge becomes sharp.
Problem: The image shakes constantly, making observation impossible.
Solution: This usually indicates an unstable mount or vibrations. Ensure your tripod is fully extended with legs spread wide. Avoid observing from elevated surfaces like decks, which tend to vibrate with movement.
Problem: The Moon drifts out of view quickly.
Solution: This is normal due to Earth’s rotation. Use your telescope’s slow-motion controls to track the Moon continuously. For more advanced tracking, consider an equatorial mount with a motor drive.
Observation Challenges
These common observation issues can frustrate even experienced astronomers:
Problem: Details seem hazy or indistinct despite clear skies.
Solution: This is likely caused by poor atmospheric seeing. Wait for nights with steady air, usually when stars appear steady rather than twinkling violently. Also ensure your telescope has fully acclimated to outdoor temperatures.
Problem: The full Moon appears too bright and causes eye strain.
Solution: Use a moon filter or polarizing filter to reduce brightness. You can also observe during moon phases other than full – the quarter phases often provide the most detailed views due to long shadows along the terminator.
Problem: You can’t find specific lunar features shown in maps.
Solution: Start with the most prominent features like large maria and bright craters. Use the terminator line as a reference point – features are much easier to identify when shadows highlight their structure. Consider using lunar observation apps that show current moon phase and feature positions.
Environmental and Weather Factors
Weather and location can significantly impact your lunar viewing experience:
Problem: Views are poor despite clear skies.
Solution: Atmospheric transparency might be low due to humidity, pollution, or high-altitude clouds. Check weather forecasts for clear, dry conditions with low humidity. Avoid observing immediately after weather fronts pass through.
Problem: Nearby lights wash out the Moon’s details.
Solution: Light pollution affects lunar viewing less than deep-sky objects, but can still impact contrast. Try to position yourself to block direct lights, and consider using a moon filter to improve contrast.
⏰ Time Saver: Keep an observation log to track which conditions and equipment settings work best. Note the moon phase, weather conditions, and which features you successfully observed.
Safety Considerations
While moon observation is generally safe, keep these considerations in mind:
- Eye Comfort: The Moon itself is safe to observe, but brightness can cause eye strain, especially during full moon. Use filters for comfortable extended viewing sessions.
- Equipment Safety: Never look at the Sun through any telescope or optical device without proper solar filters. Cover your telescope when not in use to protect optics.
- Personal Safety: Observe in safe locations, and consider observing with a friend or family member. Use red light flashlights to preserve night vision.
✅ Pro Tip: Joining local astronomy clubs or online communities can dramatically accelerate your learning. Experienced observers are often happy to share tips and provide guidance with equipment issues.
Taking Your Moon Observation Further
Once you’ve mastered basic lunar observation, these advanced techniques and activities will help you deepen your astronomical experience and contribute to scientific understanding.
Basic Lunar Photography
Capturing images of the Moon is easier than you might think with modern equipment. For smartphone photography, hold your phone camera to the telescope eyepiece and experiment with focus and exposure settings. For better results, consider a smartphone adapter that holds your phone securely aligned with the eyepiece.
For more serious lunar photography, DSLR or mirrorless cameras can be attached to telescopes using T-rings and adapters. Start with short exposure times and adjust settings based on the moon phase. Full moon requires shorter exposures than crescent phases due to brightness differences.
Observing Special Lunar Phenomena
The Moon offers several special events worth watching for:
- Lunar Eclipses: When Earth passes between the Sun and Moon, creating dramatic color changes and revealing faint features normally invisible.
- Libration Effects: The Moon’s apparent wobbling motion occasionally reveals parts of the far side around the edges, offering glimpses of normally hidden features.
- Occultations: When the Moon passes in front of stars or planets, creating dramatic disappearances and reappearances worth timing and recording.
Equipment Upgrades and Optimization
As your skills advance, consider these equipment improvements:
- Quality Eyepieces: Upgrade from stock eyepieces to better quality options for improved contrast and clarity.
- Motorized Tracking: An equatorial mount with motor drive automatically follows the Moon, keeping it centered for extended observation and photography sessions.
- Filters: Expand your filter collection with specialized options for enhancing specific lunar features.
Community and Citizen Science
Engaging with the astronomy community enhances your experience while contributing to scientific knowledge:
Consider joining organizations like the Association of Lunar and Planetary Observers (ALPO), which coordinates amateur observations and maintains databases of lunar feature changes. Many online forums and social media groups welcome beginner contributions and provide expert guidance.
Citizen science projects often seek lunar observations, particularly for monitoring transient lunar phenomena (TLPs) – temporary changes in lunar appearance that may indicate volcanic activity or impact events. Documenting these events helps scientists better understand lunar geology.
Quick Summary: Advanced lunar observation includes photography, special phenomena tracking, equipment upgrades, and community participation. These activities deepen your connection to astronomy while contributing valuable observations to the scientific community.
Frequently Asked Questions
Can you see the Moon with a telescope?
Yes, you can see incredible details on the Moon with any telescope. Even small telescopes reveal craters, mountains, and lunar seas. The Moon is an excellent target for beginners because it’s bright, easy to find, and shows remarkable detail at any magnification level.
How to use a telescope to view the Moon?
Start with a low-power eyepiece to find and center the Moon. Allow your telescope to cool for 20-30 minutes outside. Use the finder scope to locate the Moon, then switch to higher magnification to observe details. Focus carefully and use slow-motion controls to track the Moon as it moves across the sky.
Can you look at the Moon through a telescope without a filter?
Yes, observing the Moon without a filter is completely safe and often done. However, during full moon phases, the brightness can cause eye strain and reduce contrast. A moon filter improves comfort and enhances visibility of surface features, especially during bright phases.
Is it okay to look at the Moon with a telescope?
Yes, observing the Moon is completely safe for your eyes. Unlike the Sun, the Moon’s reflected light is not harmful. However, the full moon can be bright enough to cause temporary eye strain during extended viewing, so filters are recommended for comfort.
How strong of a telescope do you need to see the Moon?
Any telescope, even small 60mm models, can show impressive lunar details. Larger apertures reveal smaller features, but the Moon looks spectacular in instruments of all sizes. Binoculars also provide excellent moon views, showing major craters and maria clearly.
Can you see the US flag on the Moon with a telescope?
No, Earth-based telescopes cannot see the Apollo landing sites or flags. The largest features visible from Earth are about 1 mile across, while the flag is much smaller. However, you can observe the general areas where astronauts landed using detailed lunar maps.
What magnification is best for viewing the Moon?
Start with low magnification (20-50x) to locate features, then increase to medium power (50-150x) for general observation. High magnification (150x+) works well for small details but requires steady atmospheric conditions. The maximum useful magnification is typically 2x your telescope’s aperture in millimeters.
Final Recommendations
Observing the Moon through a telescope offers a lifetime of discovery and wonder. After years of lunar observation, I’m still amazed by new details I notice during each session. The Moon rewards patient observation with increasingly subtle features and insights into our solar system’s history.
For beginners just starting their lunar journey, remember that even modest equipment provides spectacular views of our celestial neighbor. Focus on learning the major features first, then gradually work toward more challenging targets. The key is consistent observation under varying conditions – each moon phase and atmospheric condition reveals different aspects of lunar geography.
I recommend keeping an observation log to track your progress and discoveries. Note which features you identify, the equipment and magnification used, and the observing conditions. This record not only helps you improve but also creates a personal record of your astronomical journey.
The Moon serves as a gateway to astronomy, offering accessible observation opportunities that build fundamental skills for exploring the wider universe. Whether you observe alone or share the experience with others, lunar viewing connects you to generations of skywatchers who have looked up in wonder at our nearest celestial companion.
Clear skies and happy observing! The Moon awaits your discovery, revealing new secrets with each viewing session through your telescope.
Comments